Summary of Contents for Gleamous GL5
- Page 1 Instruction Manual Instant Hot Water Heater For proper operation and maintenance please Read the instruction manual before installation. Instant Hot Water Heater www.gleamoushotwater.com.au...
-
Page 2: Main Features
Thank you for choosing the GL5 series complete home instant hot water unit. Your safety is very important to us! This manual provides many important safety points. Please read it carefully and follow the instructions. Injury can occur if safety instructions aren't followed ume Consumer Responsibility ’... -
Page 3: Part Identifications
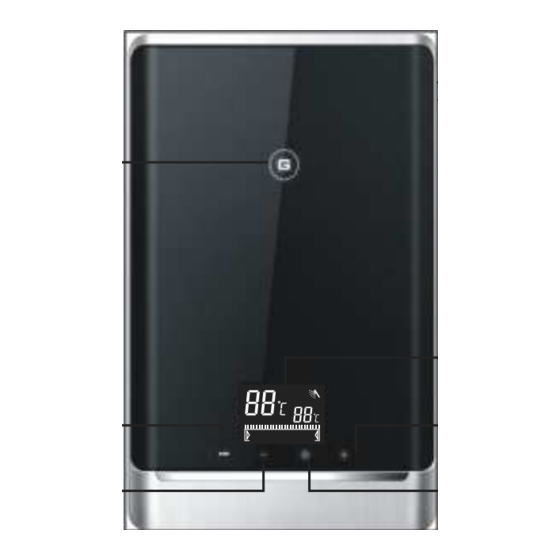
Part Identifications OUTLINE DRAWING OF GL5 POWER CORD POWER INDICATOR DISPLAY SCREEN MODE TEMP. REGULATING CHANGE KEY KEY+ TEMP. ON/OFF REGULATING KEY- HOT WATER OUTLET PIPE COLD WATER INLET PIPE Installation Manual Opening the Packing Materials Attention: Do not remove any of the permanent instructions and labels. - Page 4 Note: 1.For the best installation, make sure there is at least 1.8 meters distance between the hook of water heater and the floor. (Refer to installation drawing for more details, Please see page 2) 2.Power switch must be away from the water outlet, or make sure there is at least 1.2 meters distance between them.
-
Page 5: Electrical Requirements
Electrical Requirements The Hot Water Unit must be installed by a qualified electrician /plumber. E lectrical connections : A. Separate switch is required to be installed. B. The use of a plug and socket is NOT recommended. Choose the RCCB(Air-break switch) or junction box according to the table of technical parameters. - Page 6 Heater Wall Mounting Fig.1 Fig.2 Heater Wall Mounting for GL5, Three Phase The General line of input L L L Double Air-breaker Switch Black or Brown copper core cable ---- LIVE(L) Green/Yellow copper core cable ---- EARTH(E) Hot water outlet...
-
Page 7: Electrical Connection
1.The unit should be wall-mounted . 2.Determine the right position of installation for the unit; According to Figure 1 and Figure 2. 3.Fix the hook on the wall and position unit accordingly. 4.Connect the unit to main water pipe. 5.Install a Non-Return Isolating valve only if needed by local standards. 6.When installing DO NOT USE TEFLON TAPE on plastic outlet fittings. -
Page 8: Methods Of Operation
Methods of Operation GL5 Series A. Outlet water temp. & Malfunction code display B. Water flow status C. Setting temp. & Water Flow E. Regulating key + F. ON/OFF G. Regulating key – H. Sliding status display I. Mode change key Before operating the water heater, perform the following: 1.Make sure the water heater has been properly installed. - Page 9 RCCB). If the unit is to be left unused for an extended period of time in a cold region, drain the water inside it to avoid continuous cold water. Water Temperature Regulation The GL5 series highest outlet water temperature can up to 50C。 When you are showering, the temperature should not be set higher than 45℃.
-
Page 10: Troubleshooting
Maintenance instruction lean the heater with a damp cloth. It is ok to clean the cover with mild detergent, but DO NOT use turpentine, alcohol, petrol or any other corrosive solutions. Trouble Shooting Trouble Cause Solution water pipe is not Water leakage from... - Page 11 Malfunction code “E1” Current leakage Contact the service centre for repair Water Flow switch is open or Malfunction code “E2” short circuit Contact the service centre for repair The temp. sensor of outlet has Malfunction code “E3” short circuit or open circuit temperature outlet Malfunction code “E4”...
- Page 12 www.gleamoushotwater.com.au...


Need help?
Do you have a question about the GL5 and is the answer not in the manual?
Questions and answers