Table of Contents
Advertisement
Available languages
Available languages
Quick Links
Advertisement
Chapters
Table of Contents

Subscribe to Our Youtube Channel
Related Manuals for Sonnenkonig GENUA & VERONA


Summary of Contents for Sonnenkonig GENUA & VERONA
- Page 1 CATANIA DECKENVENTILATOR Bedienungsanleitung Artikel-Nr. CATANIA: 10534078...
-
Page 2: Table Of Contents
INDEX 1 Sicherheitshinweise ................... 3 2 Reinigung ......................4 3 Erforderliche Teile und Einbau ................5 4 Vorbereitung ..................... 6 5 Betrieb des Ventilators ..................8 6 Anweisungen zur Fernbedienung ..............11 7 Garantie / Entsorgung / Technische Änderungen ..........11... -
Page 3: Sicherheitshinweise
1 Sicherheitshinweise Bitte lesen Sie vor erster Inbetriebnahme die Gebrauchsanweisung genau durch und beachten Sie die Sicherheitshinweise um Schäden durch falsche oder unsachgemäße Bedienung sowie unzulässige Umgebungsbedingungen zu vermeiden. Bewahren Sie diese zum späteren Nach- schlagen gut auf. Kontrollieren Sie das Gerät nach dem Entfernen der Verpackung auf Beschädigungen. Setzen Sie das Gerät bei Verdacht auf eine Beschädigung nicht in Betrieb und wenden Sie sich an einen Fachmann. -
Page 4: Reinigung
• Dieser Deckenventilator darf nicht draussen verwendet werden. • Verwenden Sie diesen Lüfter nicht im Badezimmer und in einem feuchten Bereich. • Der Ventilator darf nicht ohne Basis verwendet werden. • Verlegen Sie das Kabel nicht unter einer Abdeckung oder Ähnlichem. Überlagern Sie das Ka- bel nicht mit kleinen Abdeckungen. -
Page 5: Erforderliche Teile Und Einbau
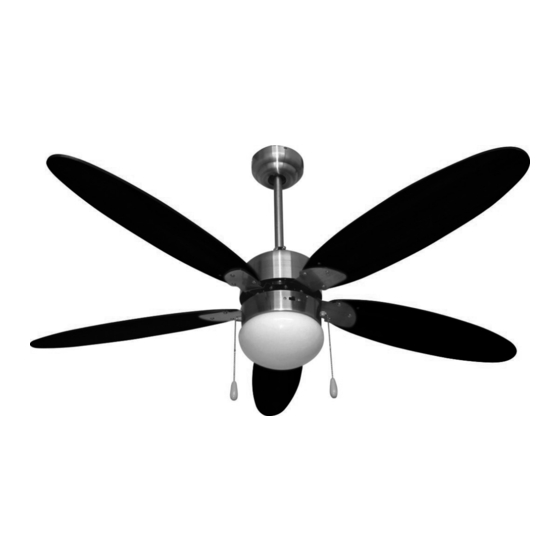
3 Erforderliche Teile und Einbau Klingen, Klingenarm Aufhängestange Motorgehäuse Halterung Abdeckhaube Schutzbrille Teile in Verpackung Gebrauchsanweisung Trittleiter... -
Page 6: Vorbereitung
4 Vorbereitung Wichtig: Bei Verwendung einer vorhandenen Anschlusssteckdose stellen Sie bitte sicher, dass die Steckdose fest in der Gebäude-Struktur verankert ist und sie das volle Gewicht des Ventila- tors tragen kann. Bei Nichtbeachtung kann es zu schweren Verletzungen oder zum Tod führen. Stellen Sie sicher, dass kein Strom mehr auf den Leitungen ist. - Page 7 Entfernen Sie jede zweite Schraube und Sicherungsscheibe von der Ober- seite des Motorgehäuses. (Diese Schrauben und Unterlagscheiben kön- nen bereits in der Verpackung sein). Ziehen Sie das Kabel der elektronischen Steuereinheit durch die Abdeckhau- be, Aufhängestange und Abdeckhaube des Motors bis Sie die Kabel am Mo- tor befestigen können.
-
Page 8: Betrieb Des Ventilators
Führen Sie die Stange und die Kabel durch das Loch in der Abdeckhaube. Entfernen Sie Stift und Clip aus dem Pendelrohr. Führen Sie die Stange in das Gehäuse und installieren Sie es mit Bolzen und Clips. Befestigen Sie es mit Schrauben und Muttern. Befestigen Sie den Ball in die Öffnung der hängenden Konsole. - Page 9 Korrekte Prüfung des Ventilators Nach der Installation des Ventilators schalten Sie den Ventilator ein. Steuern Sie die Messer rotation und die Solidität: wenn die Lüfterschwankungen nur mässig sind, schalten Sie den Ventilator aus und gehen wie folgt vor: 1. Lösen Sie die Schrauben. 2.
- Page 10 EINRICHTEN DER FERNSTEUERUNG Um den Empfänger einzuschalten, halten Sie die Taste „STOP“ 3 Sekunden lang gedrückt. Das Licht blinkt (falls installiert) 2 mal. Sie werden synchronisiert, wenn sie ein längeres Signal hören. ANSCHLUSSPLAN DES EMPFÄNGERS INSTALLATIONSSCHEMA DES EMPFÄNGERS Empfänger Die beiden Kabel „to fan neutrale“ und „to fan live“ müssen gegebenenfalls bis zur Basis verlängert werden.
-
Page 11: Anweisungen Zur Fernbedienung
6 Anweisungen zur Fernbedienung LIGHT ON/OFF: Drücken Sie die Taste, um das Licht am Gerät ein- oder auszuschalten. LOW: Drücken Sie diese Taste, um die niedrige Geschwindigkeit zu wählen. MED: Drücken Sie diese Taste, um die mittlere Geschwindigkeit zu wählen. HI: Drücken Sie diese Taste, um die hohe Geschwindigkeit zu wählen. - Page 12 ENTSORGUNGSHINWEISE FÜR DEN ELEKTRISCHEN TEIL DES PRODUKTS Gemäß Artikel 26 des Gesetzeserlass vom 14. März 2014 zur Umsetzung der Richtlinie 2012/19/EG und des Erlasses vom 4. März 2014 zur Umsetzung der Richtlinie 2011/65/ EG zur Verringerung der Verwendung gefährlicher Stoffe in Elektro- und Elektronik- geräten und zur Abfallentsorgung.
- Page 13 Firma Armin Schmid Olensbachstrasse 9–15 CH-9631 Ulisbach Tel. Int. +41 71 987 60 60 Tel. Nat. 0848870850 info@sonnenkoenig.ch www.sonnenkoenig.ch Firma Armin Schmid Peter-Henlein-Strasse 5 D-89331 Burgau Tel: 0180 500 64 35 info@sonnenkoenig.ch www.sonnenkoenig.ch Festnetz 14 Cent/Minute Mobilnetz bis 42 Cent/Minute...
- Page 14 GENUA & VERONA VENTILATEUR DE PLAFOND Mode d‘emploi Article-nr. CATANIA: 10534078...
- Page 15 SOMMAIRE 1 Consignes de sécurité ..................16 2 Entretien ......................17 3 Pièces nécessaires et montage ................ 18 4 Préparation ......................19 5 Fonctionnement du ventilateur ................ 21 6 Mode d‘emploi de la télécommande ..............24 7 Garantie / Mise au rebut / Modifications techniques ........24...
-
Page 16: Consignes De Sécurité
1 Consignes de sécurité Avant la première mise en service, veuillez lire scrupuleusement le mode d‘emploi dans son Intégralité et tenir compte des consignes de sécurité afin d‘éviter les dommages liés à une commande mauvaise ou non conforme ainsi qu‘à des conditions d‘environnement non auto- risées. -
Page 17: Entretien
• Ce ventilateur ne doit pas être utilisé à l’extérieur. • N’utilisez pas ce ventilateur dans une salle de bains ou une zone humide. • Le ventilateur ne doit pas être utilisé sans sa base. • Ne couvrez jamais le câble. Ne superposez jamais de petits éléments sur le câble. Placez le câble à... -
Page 18: Pièces Nécessaires Et Montage
3 Pièces nécessaires et montage Pales, Bras des pales Tige de suspension Boîtier du moteur Fixation Capot Lunettes de protection Éléments emballés Mode d‘emploi Escabeau... -
Page 19: Préparation
4 Préparation Attention: si vous utilisez une prise électrique existante, assurez-vous que celle-ci est ferme- ment fixée à la structure du bâtiment et qu’elle sera capable de supporter la totalité du poids du ventilateur. De graves blessures pourraient être causées par le non-respect de cette consigne. Assurez-vous que l’électricité... - Page 20 Retirez une vis + rondelle sur deux sur le dessus du boîtier moteur. (Ces vis et rondelles peuvent déjà se trouver dans l’emballage). Tirez le câble de l‘unité de commande électronique à travers le couvercle du moteur, la tige de suspension et le couvercle jusqu‘à ce que vous puissiez fixer les câbles au moteur.
-
Page 21: Fonctionnement Du Ventilateur
Retirez la broche et le clip du tube de suspension. Passez la tige dans le boîtier et installez-la à l’aide de boulons et de clips. Fixez-la à l’aide de vis et d’écrous. Fixez la boule dans l’ouverture de la console suspendue. Insérez-la dans le support. - Page 22 Vérification du bon fonctionnement du ventilateur Une fois le ventilateur installé, enclenchez-le. Testez la rotation des pales et la solidité : si les oscil- lations du ventilateur ne sont que limitées, procédez comme suit : 1. Dévissez les vis. 2. Vérifiez que l’espacement entre les quatre connecteur plats est identique. 3.
- Page 23 APPRENDRE À UTILISER LA TÉLÉCOMMANDE Pour allumer le récepteur, appuyez sur la touche „STOP“ et maintenez-la enfoncée pendant 3 secondes. Le voyant clignotera (s‘il est installé) 2 fois. Ils seront synchronisés lorsqu‘ils en- tendront un signal prolongé. SCHÉMA DE CÂBLAGE SCHÉMA D‘INSTALLATION DU RÉCEPTEUR DU RÉCEPTEUR...
-
Page 24: Mode D'emploi De La Télécommande
6 Mode d’emploi de la télécommande LIGHT ON/OFF: Appuyez sur la touche pour allumer ou éteindre la lumière de l‘appareil. LOW: Appuyez sur cette touche pour sélectionner la vitesse lente. MED: Appuyez sur cette touche pour sélectionner la vitesse moyenne. HI: Appuyez sur cette touche pour sélectionner la vitesse élevée. - Page 25 INSTRUCTIONS D’ÉLIMINATION DES COMPOSANTS ÉLECTRIQUES DU PRODUIT Conformément à l’article 26 du décret-loi du 14 mars 2014 portant application de la directive 2012/19/CE et à la loi du 4 mars 2014 portant application de la directive 2011/65/CE concernant la réduction de l’utilisation de substances dangereuses dans les équipements électriques et élec- troniques et la gestion des déchets.
- Page 26 Maison Armin Schmid Olensbachstrasse 9–15 CH-9631 Ulisbach Tel. Int. +41 71 987 60 60 Tel. Nat. 0848870850 info@sonnenkoenig.ch www.sonnenkoenig.ch Maison Armin Schmid Peter-Henlein-Strasse 5 D-89331 Burgau Tel: 0180 500 64 35 info@sonnenkoenig.ch www.sonnenkoenig.ch Festnetz 14 Cent/Minute Mobilnetz bis 42 Cent/Minute...
- Page 27 GENUA & VERONA VENTILATORE DA SOFFITTO Manuale dell‘utente Nr. articolo CATANIA: 10534078...
- Page 28 INDICE 1 Avvertente per la sicurezza ................29 2 Istruzioni per la pulizia del ventilatore ............. 30 3 Montaggio ...................... 31 4 Preparazione ....................32 5 Funzionamento del ventilatore ................ 34 6 Funzionamento del telecomando ..............37 7 Garanzia / Smaltimento / Modifiche tecniche ........... 37...
-
Page 29: Avvertente Per La Sicurezza
1 Avvertenze per la sicurezza Prima di mettere in funzione per la prima volta il deumidificatore, si raccomanda di leggere con cura le istruzioni d’uso e di rispettare le avvertenze di sicurezza al fine di evitare un utilizzo improprio o sbagliato come pure condizioni ambientali non idonee. -
Page 30: Istruzioni Per La Pulizia Del Ventilatore
• NON collegare l’apparecchio all’impianto prima che sia completamente montato e regolato. • NON utilizzare l’apparecchio se il filo dell’alimentazione è rovinato. Esso deve essere riparato unicamente da un riparatore autorizzato, in quanto sono necessari strumenti e/o elementi conoscitivi specifici. •... -
Page 31: Montaggio
3 Montaggio Pale, agganci delle pale Tubo per cavi Corpo motore Alloggiamento per interruttori Calotta Occhiali di sicurezza Sachetti con vitarie e varie Istruzioni Scala... -
Page 32: Preparazione
4 Preparazione Importante: quando si utilizza una scatola di collegamento elettrico al soffitto già esistente, assicurarsi che questo sia agganciato in sicurezza al soffitto e che possa sopportare il peso del ventilatore. Non effettuare questo controllo può provocare gravi infortuni o la morte. Staccare la corrente elettrica prima di in-iziare il montaggio del ventila- tore. - Page 33 A: Montaggio parallelo al soffitto senza tubo di prolunga. Suggerimento: consigliato per soffitti di altezza inferiore ai 2.43 m. Importante: rimuovere la coppiglia ed il chiodino dal tubo, e due viti di aggancio del tubo dalla parte alta del corpo motore Rimuovere ogni altra vite e rondella dalla parte superiore del corpo mo- tore.
-
Page 34: Funzionamento Del Ventilatore
B: Montaggio inclinato rispetto al soffitto o con tubo di prolunga Suggerimento: consigliato per soffitti alti più di 2.43 m. Per soffitti inclinati potrebbe essere necessario un tubo di lunghezza maggiore (non fornito). Inserire il tubo di prolunga attraverso la calotta. Far passare i cavi elettrici dal corpo motore attraverso il tubo di prolunga. - Page 35 Istruzioni di montaggio Attenzione: Per il collegamento elettrico alla rete,qualora non abbiate sufficienti conoscenze sugli impianti elettrici, fate installare il vostro ventilatore da un elettri-cista specializzato. • Montare la borchia superiore a quella inferiore sull‘asta di sostegno. • Inserire il cavo di alimentazione attraverso il foro centrale dell’ asta di sostegno. •...
- Page 36 APPRENDRE À UTILISER LA TÉLÉCOMMANDE Pour allumer le récepteur, appuyez sur la touche „STOP“ et maintenez-la enfoncée pendant 3 secondes. Le voyant clignotera (s‘il est installé) 2 fois. Ils seront synchronisés lorsqu‘ils en- tendront un signal prolongé. SCHÉMA DE CÂBLAGE SCHÉMA D‘INSTALLATION DU RÉCEPTEUR DU RÉCEPTEUR...
-
Page 37: Funzionamento Del Telecomando
6 Funzionamento del telecomando LIGHT ON/OFF: Premere il pulsante per accendere o spegnere la luce sull‘unità. LOW: Premere questo pulsante per selezionare la bassa velocità. MED: Premere questo pulsante per selezionare la velocità media. HI: Premere questo pulsante per selezionare l‘alta velocità. STOP: Premere questo pulsante per spegnere l‘unità. - Page 38 INFORMATIVA SMALTIMENTO RELATIVA ALLA PARTE ELETTRICA DEL PRODOTTO Ai sensi del D.L. 14 marzo 2014 art. 26, di attuazione della direttiva 2012/19/EU e del D.L. 27 del 4 marzo 2014, di attuazione della direttiva 2011/65/EU relativa alla riduzione dell‘uso di sostanze pericolose nelle apparecchiature elettriche ed elettroniche, nonché allo smaltimento dei rifiuti.
- Page 39 Ditta Armin Schmid Olensbachstrasse 9–15 CH-9631 Ulisbach Tel. Int. +41 71 987 60 60 Tel. Nat. 0848870850 info@sonnenkoenig.ch www.sonnenkoenig.ch Ditta Armin Schmid Peter-Henlein-Strasse 5 D-89331 Burgau Tel: 0180 500 64 35 info@sonnenkoenig.ch www.sonnenkoenig.ch Telefono fisso 14 Cent/Minute Telefono mobile bis 42 Cent/Minute...
- Page 40 GENUA & VERONA CEILING FAN User manual Article-Nr. CATANIA: 10534078...
- Page 41 INDEX 1 Safety instructions ................... 39 2 Cleaning ......................40 3 Requested tools and montage ................. 41 4 Preparation ..................... 42 5 Operating your fan ..................44 6 Instructions of the remote control ..............46 7 Warranty / Disposal / Technical change ............47...
-
Page 42: Safety Instructions
1 Safety instructions Please read before first commissioning the safety instructions carefully and observe the safety in- structions to prevent damage due to misuse, improper operation, and improper environmental condi- tions to be avoided. Keep these for later reference. Check the device after removing the packaging for damage . Do not put the unit in case of suspected corruption in operation and consult a specialist. -
Page 43: Cleaning
• Periodically check the electric cable of this fan. lf the electric cable is damaged, it must be replaced by the manufacturer, its after sales service or by a similar qualified person in order to avoid a danger. • Do not use this fan outside. •... -
Page 44: Requested Tools And Montage
3 Requested tools and montage Blades, blades arms Downrod Motor housing Mounting support Canopy Safety glasses Hardware packs Instruction manual Stepladder... -
Page 45: Preparation
4 Preparation Important: When using an existing outlet box, make sure the box is securely attached to the building struc-ture and can support the full weight of the fun. Failure to do this can result in serious injury or death. Turn off circuit breakers and wall swich to the fan supply line leads. - Page 46 Remove every other screw and lock wash-er from top of motor housing. (These screws and washers may already be in the hardware pack). Pull the cable of the electronic control unit through the motor cover, suspen- sion rod and cover until you can attach the cables to the motor. Screw the suspension rod to the bracket on the motor and then pull the motor cover over it.
-
Page 47: Operating Your Fan
Insert downrod through canopy. Thread wires from motor housingth- rough downrod. Remove pin and clip from downrod. Slip downrod into housing yoke, align hole and reinstall pin and clip. Tighten downrod set screws and then tighten nuts. Install ball end into hanging bracket opening. Align slot in ball with tab in bracket. - Page 48 Checking up on the device After the fan installation switch on the current and switch on the fan. Control the blade rotation and the solidity: if the fan swings excessively switch off the fan, disable the current and perform the following controls: •...
- Page 49 LEARNING HOW TO USE THE REMOTE CONTROL For turning on the receiver, press and hold the “STOP” button for 3 seconds. Light will (if instal- led) blinks 2 times. They will be synchronized when hear a prolonged signal. WIRING DIAGRAM OF RECEIVER INSTALLATION DIAGRAM OF RECEIVER Receiver...
-
Page 50: Instructions Of The Remote Control
6 Instructions of the remote control LIGHT ON/OFF: Press the button to switch the light on the unit on or off. LOW: Press this button to select the low speed. MED: Press this button to select the average speed. HI: Press this button to select the high speed. STOP: Press this button to turn off the unit. - Page 51 DISPOSAL INSTRUCTIONS FOR THE ELECTRICAL PART OF THE PRODUCT In accordance with Article 26 of the Decree-Law of 14 March 2014 implementing Directive 2012/19/EC, and the Law of 4 March 2014 implementing Directive 2011/65/EC on the re- duction of the use of hazardous substances in electrical and electronic equipment and on waste management.
- Page 52 Company Armin Schmid Olensbachstrasse 9–15 CH-9631 Ulisbach Tel. Int. +41 71 987 60 60 Tel. Nat. 0848870850 info@sonnenkoenig.ch www.sonnenkoenig.ch Company Armin Schmid Peter-Henlein-Strasse 5 D-89331 Burgau Tel: 0180 500 64 35 info@sonnenkoenig.ch www.sonnenkoenig.ch Landline 14 Cent/Minute Mobile network to 42 Cent/Minute...
Need help?
Do you have a question about the GENUA & VERONA and is the answer not in the manual?
Questions and answers