EUFY RoboVac T2108 Owner's Manual
Hide thumbs
Also See for RoboVac T2108:
- Quick start manual ,
- Owner's manual (87 pages) ,
- Owner's manual (14 pages)

Subscribe to Our Youtube Channel
Related Manuals for EUFY RoboVac T2108


Summary of Contents for EUFY RoboVac T2108
- Page 1 Cleaning For FAQs and more information, please visit: www.eufylife.com Owner’s Manual RoboVac T2108/T2109/T2110 51005001324 V01...
-
Page 2: Table Of Contents
Table of Contents Important Safety Instructions About Your RoboVac What's in the Box RoboVac Anatomy LED Indication Using Your RoboVac Important Tips Before Use Preparation Charge Your RoboVac Start / Stop Cleaning Select a Cleaning Mode Set Time and Scheduled Cleaning Cleaning and Maintenance Clean the Dust Collector and Filters Clean the Rolling Brush... -
Page 3: Important Safety Instructions
Important Safety Instructions • This device is not a toy. Do not sit or stand on this device. Small children and pets should be supervised when this device is operating. To reduce the risk of injury or damage, read these safety • Store and operate this device in room temperature instructions carefully and keep them at hand when setting up, environments only. -
Page 4: About Your Robovac
Notice About Your RoboVac This symbol on the device or its packaging indicates: Do What's in the Box not dispose of electrical appliances as unsorted municipal waste; use separate collection facilities. Contact your local authority for information regarding the collection systems available. -
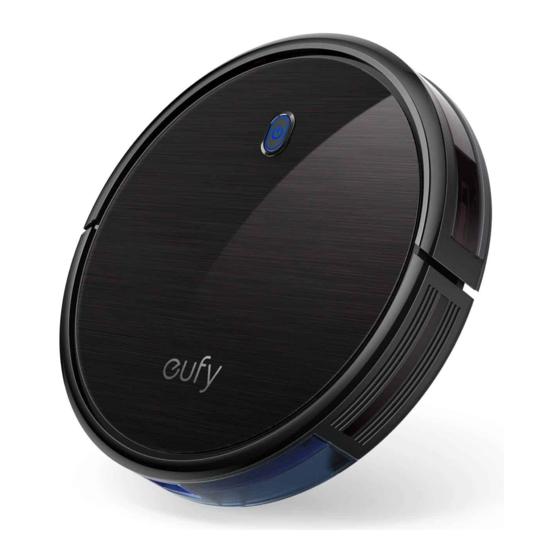
Page 5: Robovac Anatomy
RoboVac Anatomy Dust Collector Top & Side Pre-filter Auto cleaning Start/Stop button Bumper High-performance filter Foam filter Infrared sensor Suction Inlet Dust collector Dust collector release button Dust collector Bottom Drop sensors Charging contact pins Swivel wheel Side brushes Battery compartment Suction inlet Wheels Brush guard... -
Page 6: Led Indication
Remote Control LED Indication You can see the status of RoboVac from the LED indicator. Start Auto cleaning Start Auto cleaning (Status Light) Status Stop cleaning Breathing orange Charging Start Spot cleaning Solid blue Standby / Cleaning / Fully charged Start Edge cleaning Solid orange Low power and returning to Charging Base... -
Page 7: Using Your Robovac
Using Your RoboVac Preparation Install the side brushes before use. Important Tips Before Use Turn on the main power switch on the bottom of RoboVac. Remove power cords and small objects from the floor that may entangle RoboVac. Fold tasseled edges of area rugs underneath to prevent tangling RoboVac. Avoid cleaning very dark-colored high-pile rugs or rugs thicker than 1.02 in/26 mm as they may cause RoboVac to malfunction. -
Page 8: Charge Your Robovac
Method 2: Press on the remote control to return RoboVac to the Charging Base. Remove objects within 3 ft/1 m of the left and right side and within 6 ft/2 m of the front of the charging base. Turn off the main power switch if RoboVac will not be used for a long period of time. -
Page 9: Select A Cleaning Mode
Select a Cleaning Mode 2. Spot cleaning RoboVac intensively cleans a specific area in a spiral, useful if there is a concentrated area of dust or debris. In Spot mode, RoboVac will stop cleaning after 2 minutes. 1. Auto cleaning RoboVac optimizes its cleaning path by selecting different cleaning modes automatically Press on the remote control to start cleaning in Spot mode. -
Page 10: Set Time And Scheduled Cleaning
Set Time and Scheduled Cleaning 4. Single Room cleaning RoboVac intensively cleans one single room and stops after 30 minutes. Select this mode only when one specific room needs to be cleaned. Make sure to confine RoboVac to the Set Time room by closing the door. -
Page 11: Cleaning And Maintenance
Clean the Dust Collector and Filters Press to set the “hour” and “minute”. Note: Make sure AM/PM is set correctly. Press the dust collector release button to pull the dust collector out. Press to save the setting. RoboVac will BEEP ONCE to indicate the schedule has been set. -
Page 12: Clean The Rolling Brush
Clean the Side Brushes Push the dust collector back into the main unit. Foreign substances, such as hair, can easily get tangled in the side brushes, and dirt may adhere to them. Be sure to clean them regularly. Remove the side brushes. Carefully unwind and pull off any hair or string that is wrapped between the main unit and the side brushes. -
Page 13: Clean The Sensors And Charging Pins
• Check if the filters are wet due to water or other liquid on the floor. Air-dry the filters completely before use. • Check if the indicator on the Charging Base lights up. If not, contact the eufy service center to repair or replace the Charging Base. RoboVac cannot be • Dust off the charging contact pins with a dry cloth. -
Page 14: Specifications
Specifications Problems Solutions • Clean the rolling brush. The rolling brush • Check if the rolling brush and brush guard have been installed does not rotate. Input 19 V 0.6 A properly. Battery Voltage DC 14.4 V RoboVac’s Power Consumption 25 W • Clean the sensors carefully with a dry cloth. - Page 15 Consignes de Sécurité • Le câble de l'alimentation ne peut être remplacé. S'il est endommagé, l'unité d'alimentation ne pourra plus être utilisée. Pour réduire le risque de blessures ou de dommages, lisez attentivement ces consignes de sécurité et gardez-les en • Cet appareil est réservé à une utilisation en intérieur. main lors de la mise en place, de l'utilisation et de l'entretien • Cet appareil n’est pas un jouet.
- Page 16 • Ne pas utiliser sur un sol inachevé, non scellé, ciré ou accidenté au risque d'endommager le sol ou l'appareil. Utiliser uniquement sur des surfaces dures ou sur des tapis à poils courts. • Cet appareil a été conçu pour être utilisé sur les sols sans les abîmer.
Need help?
Do you have a question about the RoboVac T2108 and is the answer not in the manual?
Questions and answers