Table of Contents
Advertisement
Quick Links
Advertisement
Table of Contents

Related Manuals for EUFY RoboVac T2253


Summary of Contents for EUFY RoboVac T2253
- Page 1 RoboVac Owner’s Manual T2253 51005002511...
-
Page 2: Table Of Contents
Table of Contents 02 Important Safety Instructions 16 About Your RoboVac What's in the Box RoboVac Anatomy 20 Using Your RoboVac Important Tips Before Use Preparation Charge Your RoboVac Use Your RoboVac with the EufyHome App Start / Pause Cleaning Select a Cleaning Mode Select a Suction Power Level Use Mopping System Use the Boundary Strip Use Your RoboVac with Amazon Alexa /... -
Page 3: Important Safety Instructions
Important Safety Instructions • The battery must be removed before this device is disposed of. To remove the battery, first unscrew the screws on the bottom, then remove the back To reduce the risk of injury or damage, keep these cover. - Page 4 • Be aware that this device moves around on its in the instructions for use and care. own. Take care when walking in the area where this • Follow all charging instructions and do not charge device is operating to avoid stepping on it. the battery pack or appliance outside of the •...
- Page 5 (4) Consult the dealer or an experienced and Electronic Equipment Regulations 2012. The full radio / TV technician for help. text of the GB declaration of conformity is available at the following internet address: https://www.eufy.com. ISED Compliance Statement This device contains license-exempt transmitter(s)/ Trademark Notice receiver(s) that comply with Innovation, Science and •...
- Page 6 Consignes de sécurité importantes • Pour recharger la batterie, n'utilisez que l'adaptateur détachable (États-Unis/Canada : GSCU0600S019V12E ; R-U :GSCB0600S019V12E ; Pour réduire le risque de blessure ou de dommage, AUS : GSCS0600S019V12E ; UE : gardez ces consignes de sécurité à portée de main GSCV0600S019V12E) fourni avec cet appareil.
- Page 7 que les vêtements et les feuilles de papier. Relevez • Utilisez uniquement les accessoires recommandés les persiennes ou les rideaux proches du sol. ou décrits dans ce manuel. Enlevez du passage les cordons d'alimentation ainsi • Ne manipulez pas l'appareil ou la fiche avec les que les objets pointus et fragiles.
- Page 8 Avis Classe B, en application de la partie 15 du règlement de la FCC. Ces restrictions sont désignées afin de fournir Ce symbole sur le produit ou son emballage une protection raisonnable contre des interférences indique : nuisibles dans une installation résidentielle. Ne jetez pas les appareils électriques de la Cet appareil génère, utilise et peut émettre des même manière que les déchets municipaux...
- Page 9 Déclaration d'Industrie Canada • Apple et le logo Apple sont des marques déposées d'Apple Inc., enregistrées aux États-Unis et dans Le présent appareil est conforme aux CNR d'Industrie d'autres pays. App Store est une marque de service Canada applicables aux appareils radio exempts d'Apple Inc., enregistrée aux États-Unis et dans de licence.
-
Page 10: About Your Robovac
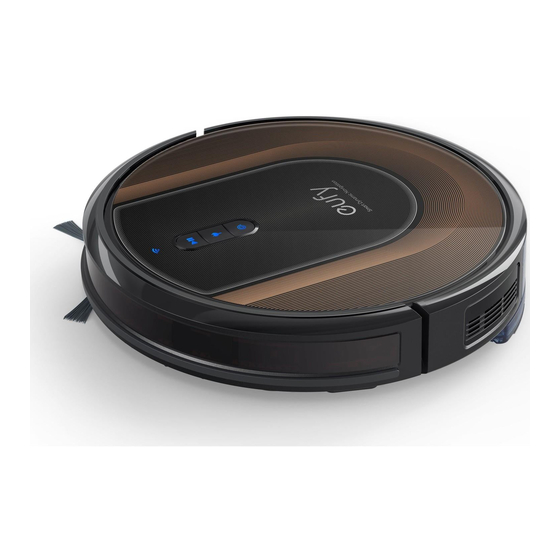
About Your RoboVac RoboVac Anatomy A. Top & Side What's in the Box Bumper Wi-Fi status light Auto cleaning control button Recharge button Spot cleaning button RoboVac Charging Base Power Adapter Additional Side Brushes (x2) Additional Filter Cleaning Tool Infrared sensor Main power switch (On/Off) Dust collector Dust collector release button Cable Ties (x5) Boundary Strip... - Page 11 C. Dust Collector F. Water Tank Mopping Cloth Filter Slot Fliter element Fliter element Movable pulley Cloth attachment area D. Suction Inlet Snap joints Snap joints Dust collector Water inlet Water inlet cover Buttons & Indicators Suction inlet Suction inlet Start/Pause Cleaning • Solid blue: standby, cleaning, pause cleaning, returning to charging base or fully charged E. Charging Base •...
-
Page 12: Using Your Robovac
It is strongly recommended to place boundary strips in front of fireplaces • When you use the Find My Robot function via the EufyHome app, all and certain areas (i.e. air vents) that may cause damage to RoboVac if three LED indicators are solid blue and a voice prompt is heard. entered. -
Page 13: Charge Your Robovac
Charging Base to a new place and check whether RoboVac can return to it with the charging pins on the base. normally; if not, contact eufy customer service for help. Connect the round connector of the adapter into the power socket on the... -
Page 14: Use Your Robovac With The Eufyhome App
Method 2: Press to return RoboVac to the Charging Base. Download the EufyHome app from the App Store (iOS devices) or Google Play (Android devices). Open the app and create a user account. Tap the “+” icon to add RoboVac to your EufyHome account. Follow the instructions in the app to set up the Wi-Fi connection. -
Page 15: Start / Pause Cleaning
Start / Pause Cleaning • Make sure the main power switch at the side of RoboVac is turned on before use. • You can also start or pause cleaning via the EufyHome app. Press on RoboVac to start cleaning in Auto Mode. Press on RoboVac to start cleaning in Auto Mode. -
Page 16: Select A Suction Power Level
Use Mopping System Spot cleaning RoboVac intensively cleans a specific area in a spiral pattern, useful if there is a • The mopping mode is not recommended when no one is at home. concentrated area of dust or debris. In Spot mode, RoboVac will stop cleaning after 2 minutes. - Page 17 Open the water inlet cover to fill the water tank, then close the cover. Select a cleaning mode to start cleaning. • RoboVac automatically sweeps and mops in the selected mode. When RoboVac finishes working and returns to the Charging Base, press the release button to remove the dust collector and the water tank.
-
Page 18: Use The Boundary Strip
Use the Boundary Strip Use Your RoboVac with Amazon Alexa / the Google Assistant With the Boundary Strip, you can keep RoboVac away from any area or item you do not want RoboVac to clean. RoboVac will recognize the Boundary Strip Amazon Alexa or the Google Assistant is a smart voice control device that and will not cross into the blocked-off area. -
Page 19: Clean The Dust Collector And Filter
Remove the filter. RoboVac Part Cleaning Frequency Replacement Frequency Brush Guard Once every month Every 3-6 months (or when the silicone rubber strip on the brush guard becomes visibly worn) Sensors Once every month Charging Pins Once every month Swivel Wheel Once every month Tap the filter to remove dust. -
Page 20: Clean The Mopping Cloth And Water Tank
Clean the Mopping Cloth and Water Tank Air-dry the dust collector and filter completely before next use. You may change to use the other filter if the original one is not completely dry. A dirty mopping cloth will affect the mopping performance. Clean the washable mopping cloth and water tank before use. After each use, remove the mopping cloth from the water tank. -
Page 21: Clean The Rolling Brush
Clean the Rolling Brush Clean the Side Brush Foreign substances, such as hair, can easily get tangled in the side brush, and Pull the release tabs to unlock the brush guard as shown. dirt may adhere to it. Be sure to clean it regularly. Lift the rolling brush to remove. Remove the side brush. -
Page 22: Clean The Sensors And Charging Pins
• Be careful not to touch the path tracking sensor with your hands to make it dirty. • Do not clean the path tracking sensor with sharp-pointed objects, as it may damage the sensor. Clean the Swivel Wheel Hair or dust particles can easily get entangled in the swivel wheel. Be sure to clean the swivel wheel periodically and as needed. -
Page 23: Troubleshooting
RoboVac is docked onto the Charging Base. • Check if RoboVac is trapped or stuck on an obstacle. If not, contact the eufy service center to repair or • Check if the battery level is too low. replace the Charging Base. -
Page 24: Voice Alert
40 minutes of cleaning will hear a specific voice prompt. Follow the voice prompt to solve the problem. • If your cleaning time is much less than the time mentioned above, contact eufy customer service for Voice Prompt Cause and Solution help. -
Page 25: Specifications
Voice Prompt Cause and Solution Voice Prompt Cause and Solution Error 7: Wheel - Remove and clean the roller brush, roller brush Wheels may be suspended in air. Move the device suspended. Please move connection, roller brush cover and suction inlet Error S5: Rolling Brush to a flat surface and a new position close to the the device to a new Error. -
Page 26: Customer Service
Customer Service For FAQs and more information, please visit www.eufylife.com. support@eufylife.com support.mea@anker.com (For Middle East and Africa Only) service@myeufy.com.au (For AU Only) ru.support@anker.io (For RU Only) www.eufylife.com (US) +1 (800) 988 7973 Mon-Fri 9:00 - 17:00 (PT) (UK) +44 (0) 1604 936200 Mon-Sun 6:00 - 14:00 (DE) +49 (0) 69 9579 7960 Mo-Fr 6:00 - 11:00 (Middle East &...
Need help?
Do you have a question about the RoboVac T2253 and is the answer not in the manual?
Questions and answers