dymax BlueWave MX Series User Manual
1-channel controller
Hide thumbs
Also See for BlueWave MX Series:
- User manual (46 pages) ,
- Quick start instructions (2 pages) ,
- Unpacking and setup instructions (2 pages)
Table of Contents
Advertisement
Quick Links
Advertisement
Table of Contents

Subscribe to Our Youtube Channel
Related Manuals for dymax BlueWave MX Series


Summary of Contents for dymax BlueWave MX Series
- Page 1 BlueWave MX-Series ® 1-Channel Controller User Guide...
- Page 2 Please note that most dispensing and curing system applications are unique. Dymax does not warrant the fitness of the product for the intended application. Any warranty applicable to the product, its application, and use is strictly limited to that contained in the Dymax standard Conditions of Sale.
-
Page 3: Table Of Contents
Contents Introduction ............... 4 Where to Get Help ............5 Safety ................. 5 Product Overview ............. 6 Description of BlueWave MX-Series 1CH Controller ... 6 Controller Front Panel ............7 Controller Back Panel ............8 Unpacking ..............9 Parts Included ..............9 System Setup ............ - Page 4 System Information ........... 24 Troubleshooting & Maintenance ......25 Measuring/Checking Intensity ........25 Product Cleaning .............. 25 Alarms ................25 Accessories ............... 27 Spare Parts ..............27 Specifications ............28 Validation ..............29 Set Exposure Time, Determine Intensity ....... 29 Set Intensity, Determine Exposure Time .......
-
Page 5: Introduction
This user guide is meant for experienced process engineers, technicians, and manufacturing personnel. If you are new to high-intensity LED light sources and do not understand the instructions, contact Dymax Application Engineering for answers to your questions before using the equipment. -
Page 6: Product Overview
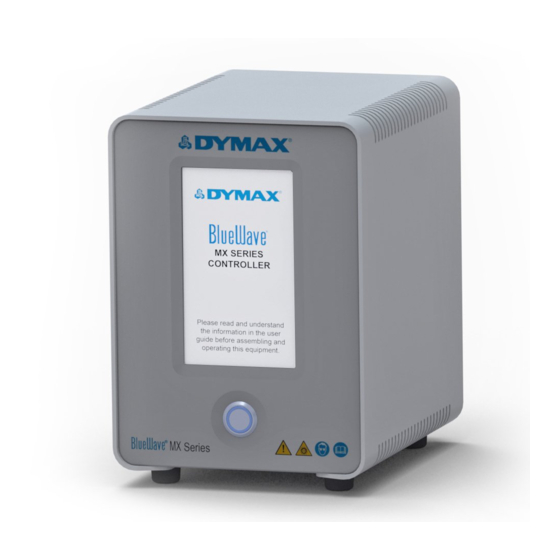
Product Overview Description of BlueWave MX-Series 1CH Controller BlueWave MX-Series Controller when combined with MX Series emitters feature all the benefits of LED-curing technology in smaller, more versatile units. These systems are uniquely designed to offer higher, more consistent curing intensity than traditional spot or flood curing systems. -
Page 7: Controller Front Panel
Controller Front Panel The front panel features the power button and a touchscreen display through which the unit can be operated. Power Button — Press the power button to power up the controller. Press the button a second time to turn the unit off. Figure 1. -
Page 8: Controller Back Panel
Controller Back Panel Power Cord Receptacle — Connection point for the power cord. Foot Pedal Jack — Connection point for the foot pedal. PLC Connector Terminals — Connection points for an interface with a user-supplied PLC (for remote operation). Emitter Connector — Connection point for the system’s emitter. Figure 2. -
Page 9: Unpacking
Upon arrival, inspect all boxes for damage and notify the shipper of box damage immediately. Open each box and check for equipment damage. If parts are damaged, notify the shipper and submit a claim for the damaged parts. Contact Dymax so that new parts can be shipped to you immediately. - Page 10 WARNING! Under no circumstance should the interconnect cable from the BlueWave MX-Series 1CH controller to the LED emitter be connected or disconnected while power to the unit is on. This procedure is usually called “hot- swapping” and should not be performed as it could cause damage to the controller or the LED emitter.
-
Page 11: Modes Of Operation
Modes of Operation The system has three basic modes of operation: manual, timer, and PLC. Manual Mode In manual mode, the LED is energized when the foot pedal is pressed, passing curing energy through the delivery optics, and de-energized when the foot pedal is released. The LED may also be energized by momentarily pressing the run/stop button located in the center of the touchscreen user interface. -
Page 12: Plc (Programmable Logic Controller) Operation
PLC (Programmable Logic Controller) Operation Figure 3. When in PLC mode, an external PLC can control the PLC Mode Screen unit. The PLC provides input signals to the BlueWave MX-Series 1CH system to control the on/off signals and intensity of the LED. The PLC monitors the status of the system by reading output signals provided by the unit. - Page 13 Table 1. PLC Inputs Signal Level Signal Name / Description PLC INPUTS PLC ENABLE 24 VDC Active: Unit enters PLC mode and displays the PLC input status screen. The touch screen input is ignored. Inactive: All dedicated PLC inputs are ignored, and the PLC outputs will remain active.
- Page 14 MANUAL input interface GUI. Ensure you are in Manual Mode prior to switching to PLC mode. ANALOG(EXT) mode you can control the intensity via the analog intensity input J6 (1VDC = 10% intensity, 7VDC = 70%, etc) and have your PLC output manage the exposure time by asserting the LED ON command.
-
Page 15: Examples Of Plc Wiring
Examples of PLC Wiring Figure 5. PLC Interface Using Dry Contact Switches or Relays Figure 6. PLC Analog Control Input Figure 7. PLC Discrete Status Outputs U S E R G U I D E B L U E W A V E M X - S E R I E S 1 C H C O N T R O L L E R... - Page 16 Figure 8. PLC Interface Using n-Channel Mosfets or Relays Note: The PLC status outputs have a maximum sink current of 5 mA each. It is recommended to use a solid-state relay with a control current <5 mA. Recommended Relays: Weidmuller 8820710000, Phoenix Contact 2980636 U S E R G U I D E B L U E W A V E M X - S E R I E S 1 C H C O N T R O L L E R...
-
Page 17: Operation
Operation To operate the system, first verify that all Connectors are correctly plugged into the rear panel of the unit (See System Connections, pg. 9 for more details). When all Connectors are properly plugged in, press the Power Button on the front panel of the unit. -
Page 18: Control Screen
Control Screen The control screen is used to set up and run curing cycles. This screen allows users to switch back and forth between administrator and production modes as well as between timer and manual operating modes. It is also where the cycle’s time and power settings are set. - Page 19 Irradiating Time — The Irradiating time is displayed in this field. When in timed mode, time is entered by touching the display field which in turn brings up a numerical keypad for entry. The entry range is 0.1 – 999 seconds. From 0.1 – 30 seconds the adjustment is made in 0.1 second increments and from 30 –...
-
Page 20: Irradiation
Irradiation To run a curing cycle in manual mode: 1. Input the power value by pressing the respective field. The time field will be disabled. 2. Press the Run Button or Foot Pedal to start the irradiation. The timer field will begin counting. -
Page 21: Saving Programs
Saving Programs Figure 10. The current power and time settings (program) may Program Screen be saved to internal memory by highlighting “New Name” and pressing “SAVE”, which will bring up a QWERTY keyboard for program name entry. The user may also save the current settings by selecting an existing program name and pressing “SAVE”... -
Page 22: Language Settings
Language Settings Figure 13. Language Screen BlueWave MX-Series 1CH systems are currently available in English. The Back Button will return the user to the previous screen. Volume Settings Figure 14. Volume Screen The volume of the Alarm Annunciator can be adjusted using the Slider Control on the Volume Screen. -
Page 23: Brightness Settings
Brightness Settings Figure 15. Brightness Screen The brightness of the LCD screen can be adjusted using the Slider Control on the Brightness Screen. Moving the Slider upwards towards “MAX” increases the brightness, while moving the Slider downward towards “MIN” decreases it. When finished, press “DONE”... -
Page 24: System Information
Administrator Boot Mode Setting the boot mode to “Administrator” will cause the Controller to enter the Admin Mode immediately following power-up. The administrator password may be accessed by pressing the Settings Button followed by the User Button. The password is entered and confirmed in the password screen via the on-screen QWERTY keyboard. -
Page 25: Troubleshooting & Maintenance
Troubleshooting & Maintenance Measuring/Checking Intensity ACCU-CAL 50-LED radiometers are designed to measure intensity levels up to ™ 40,000 mW/cm , so they can easily handle BlueWave MX-Series 1CH systems. It is also capable of exposure to temperatures up to 100°C. As with any energy source, extended exposures will cause a thermal rise of the sensor assembly, so exposure times at higher intensities (>20 W/cm ) should be limited to less than 10 seconds. - Page 26 Alarm Codes Alarms are generated and displayed on the Alarm screen. The alarms include: • • Lightguide Not Installed 100, LED Over Temperature • • Emitter Error 103, LED Over Current • • Controller-Interconnect Cable 104, Emitter Fan Speed Low Problem Possible Cause Corrective Action...
-
Page 27: Accessories
Personal Protection Equipment Protective Goggles — Green 35286 Protective Goggles — Gray (standard model included with unit) 35285 Face Shield 35186 Radiometer Dymax ACCU-CAL™ 50-LED Radiometer 40505 Stands Emitter Mounting Stand 42390 Three-Sided Acrylic Shield 41395 Emitter Holder Assembly Bracket (MX-150 Only) -
Page 28: Specifications
Specifications Property Specification Power Supply Input 100-240V≈ 2.5A, 50-60Hz LED Timer 0.1 to 999 seconds, max (timer accuracy 0.1%) LED Activation Foot pedal, LCD touchscreen, or PLC Cooling Air cooled Controller Dimensions 3.74" x 6.26" x 5.77" [9.5 cm x 15.9 cm x 7.9 cm] (W x D x H) Weight Controller: 2.6 lbs. -
Page 29: Validation
As with any manufacturing process, it is advisable to incorporate a safety factor. Contact the Dymax Application Engineering Team for additional process support. Control Process validation confirms a minimum acceptable intensity. Users can then choose to operate at full intensity (using the excess intensity as an additional safety factor) or adjust the output to a specific intensity level. -
Page 30: Declaration Of Conformity
Declaration of Conformity U S E R G U I D E B L U E W A V E M X - S E R I E S 1 C H C O N T R O L L E R... -
Page 31: Warranty
Warranty From date of purchase, Dymax Corporation offers a one-year warranty against defects in material and workmanship on all system components with proof of purchase and purchase date. Unauthorized repair, modification, or improper use of equipment may void your warranty benefits. The use of aftermarket replacement parts not supplied or approved by Dymax Corporation, will void any effective warranties and may result in damage to the equipment. - Page 32 Corporation, U.S.A. The data contained in this bulletin is of a general nature and is based on laboratory test conditions. Dymax Europe GmbH does not warrant the data contained in this bulletin. Any warranty applicable to products, its application and use is strictly limited to that contained in Dymax Europe GmbH’s General Terms and Conditions of Sale published on our website.
Need help?
Do you have a question about the BlueWave MX Series and is the answer not in the manual?
Questions and answers