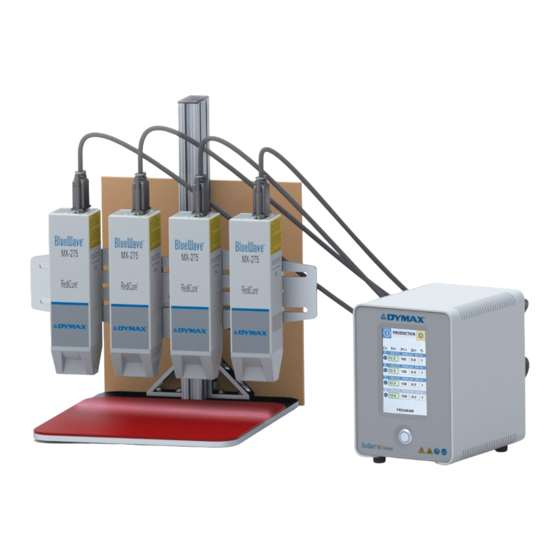
dymax BlueWave MX Series Quick Start Instructions
Mounting stand kit
Hide thumbs
Also See for BlueWave MX Series:
- User manual (46 pages) ,
- Unpacking and setup instructions (2 pages) ,
- User manual (32 pages)
Advertisement
Table of Contents
BlueWave
1. Remove the stand and carriage from the packaging.
2. Remove the cap and 2 fasteners from the stand upright (Figure 1). These are push-in fasteners, not screws,
and can easily be removed by pushing upward on the plate.
3. Using a 2-mm hex key, attach the bearing pad to the emitter body with the M3 flathead screws (Qty. 2). Make
certain the bearing pad surface engraved with "TOP" is parallel to the emitter top. Repeat for as many
emitters as will be used in the array. (Figure 2)
Figure 1. Remove Cap and Fasteners
4. Attach the bearing pad to the carriage by aligning the pad's guides with the slots in the bracket, then securing
it with the thumbscrew (Figure 3).
5. Slide the carriage onto the stand's upright, being sure to align bearing pads and t-nut into slot (Figure 4).
Thumbscrew
Figure 3. Attach the Bearing Pad to the Carriage
6. Slide to the desired height, tighten the knob, slide back panel into position, replace the cap and fasteners.
7. The emitters can be positioned linearly along the bracket as shown in Figure 5, built outward using the
supplied L-brackets as shown in Figure 6, or a combination thereof, depending on user need and application.
MX-Series Mounting Stand Kit (43070)
®
Unpacking and Setup Instructions
Fasteners (2X)
Cap
Stand's Upright
Bearing Pad
M3 Flathead
Screws (2X)
Knob
Figure 4. Slide Carriage into Stand
Quick Start Instructions
Top
Figure 2. Attach Bearing Pad to Emitter
Advertisement
Table of Contents

Subscribe to Our Youtube Channel
Related Manuals for dymax BlueWave MX Series


Summary of Contents for dymax BlueWave MX Series
- Page 1 Quick Start Instructions BlueWave MX-Series Mounting Stand Kit (43070) ® Unpacking and Setup Instructions 1. Remove the stand and carriage from the packaging. 2. Remove the cap and 2 fasteners from the stand upright (Figure 1). These are push-in fasteners, not screws, and can easily be removed by pushing upward on the plate.
- Page 2 Please note that most dispensing and curing system applications are unique. Dymax does not warrant the fitness of the product for the intended application.
Need help?
Do you have a question about the BlueWave MX Series and is the answer not in the manual?
Questions and answers