Table of Contents
Advertisement
Quick Links
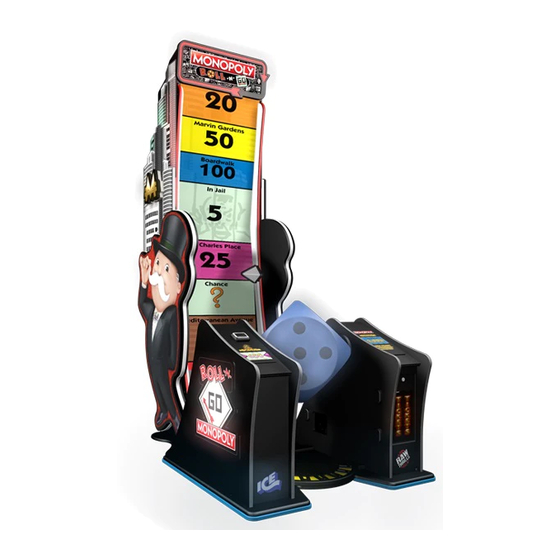
Installing the Marquee on top of two games.
Step 2:
Unlock the back covers from both mounts.
Facing the bck of the game, the cabinet to
the right will have the mount that contains all
the electronics. The cabinet to the left will
have the mount with no electronics.
Step 1:
Position the two games leaving
1/2" between them at the front.
1/2"
Advertisement
Table of Contents

Related Manuals for Ice MONOPOLY ROLL-N-GO


Summary of Contents for Ice MONOPOLY ROLL-N-GO
- Page 1 Installing the Marquee on top of two games. Step 1: Position the two games leaving 1/2” between them at the front. 1/2” Step 2: Unlock the back covers from both mounts. Facing the bck of the game, the cabinet to the right will have the mount that contains all the electronics.
- Page 2 Step 3: Secure the cabinet mounts to the top of the cabinets. Use four AA6220 bolts and AA6070 washers. Make sure the mount with the electronics are on top of the cabinet on the left looking at the front of the game (right if from the back!).
- Page 3 Attach the two harnesses together shown. Step 5: Secure it to the mount using two AA6212 bolts and two AA6281 washers. Step 6: Slide the left upper assembly over and onto the mount as shown. Then secure using two AA6281 bolts and two AA6212 washers.
- Page 4 Step 7: At each side of the center display are the mounting inserts. They are shown within the circles. They insert into slots in each of the top signs. One of those slots are shown. Insert the center display into the two slots. Step 8: Secure the display using two AA6281 bolts and AA6212 washers.
- Page 5 Step 9: Slide the sign onto the poles. Step 10: Game 1: Computer connects to the DVI connection on the marquee, not the network line. The other end of that cable should be Display port which connects to the computer in game 1. A network switch is used to connect all the computers together.
- Page 6 Step 11: Before attaching the wire channel cover, make sure all connections have been made. See below for more details on wiring. Once confirmed, carefully wire tie all wires and neatly tuck them inside this channel. Secure the wire channel using two bolts and washers. Software settings: The game that you have the display port plugged into, go into game options and set under “system settings”, machine ID =1, Mega Marquee ON.
Need help?
Do you have a question about the MONOPOLY ROLL-N-GO and is the answer not in the manual?
Questions and answers