
Related Manuals for Ice TIPPIN' BLOKS


Summary of Contents for Ice TIPPIN' BLOKS
- Page 1 OWNERS AND SERVICE MANUAL INNOVATIVE CONCEPTS IN ENTERTAINMENT INC. 10123 MAIN STREET, CLARENCE, NY 14031 SERVICE: 1-716-759-0360 FAX: 1-716-759-0884 E-MAIL: service@icegame.com WEBSITE: www.icegame.com...
-
Page 3: Table Of Contents
TABLE OF CONTENTS Safety and Warnings Setup Game Play Game Setup Volume Controls Programming See Insert Service Marquee Bulb replacement Lower Illumination replacement Upper Illumination replacement Power Supply Replacement Horizontal Control Replacement Tilt Control Replacement Computer and I/O replacement Upper monitor assembly replacement Assembly Diagrams Main cabinet components 15 &... -
Page 4: Safety And Warnings
SAFETY AND WARNINGS BEFORE YOU BEGIN WARNING: WHEN INSTALLING THIS GAME, A GROUNDED A.C. RECEPTACLE MUST BE USED. FAILURE TO DO SO COULD RESULT IN INJURY TO YOURSELF OR OTHERS. FAILURE TO USE A GROUNDED RE- CEPTACLE COULD ALSO CAUSE IMPROPER GAME OPERATION, OR DAMAGE TO THE ELECTRONICS. DO NOT DEFEAT OR REMOVE THE GROUNDING PRONG ON THE POWER CORD FOR THE SAME REA- SON AS GIVEN ABOVE. -
Page 5: Setup
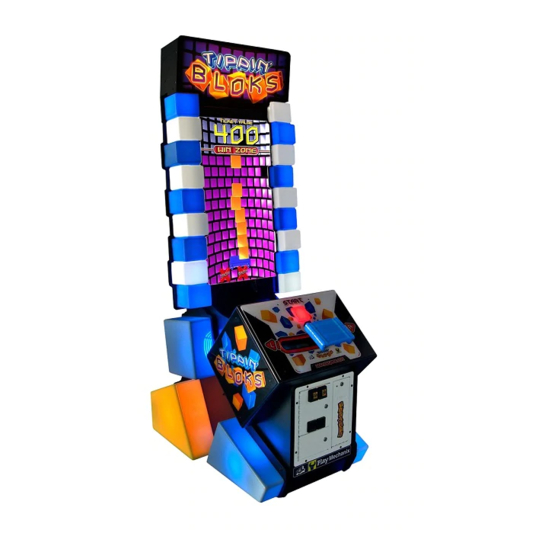
SETUP - INTRODUCTION Game Play: “Welcome to the Bloks Party!” To win the game, stack nine blocks to get the big bo- nus. Drop three bloks and the game is over….. In this game the player attempts to stack nine bloks. As the bloks stack up the player reaches new win zones until the fi- nal zone is reached. - Page 6 SETUP - ASSEMBLY METERS LOCATION The meters are located through the coin door. Both coin and ticket meters can be found there. CHANGING THE VOLUME LEVELS DURING PLAY There are UP and DOWN buttons located in the coin door. Pressing of these buttons will either increase the volume level or decrease the level volume.
-
Page 7: Service
(BW2017) as shown below. Replace the bulbs with ICE part number 8312. Be sure to reinstall the bulb clip (BW2017) when replacing the bulb or the bulb will not stay installed in light socket! Replace the front graphic panel and reinstall... -
Page 8: Lower Illumination Replacement
Remove the five 1/4-20 bolts that hold the sides of the lower cabinet assembly on. Once removed you will find two blue CFL 24w bulbs (ICE Part E00272) and one yellow CFL 24w bulb (ICE Part E00273). The diagram below only shows the left side, repeat the same on the right side to access... -
Page 9: Upper Illumination Replacement
SERVICE UPPER ILLUMINATION REPLACEMENT LED strips provide the lighting in each of the front BLOKSs and are very reliable. Before replacing strips, test for 12 volts DC to eliminate wiring or logical board failures. To access these strips you will need to remove the seven screws that hold the plastic bloks assembly to the front of the cabinet. -
Page 10: Power Supply Replacement
Remove the four 1/4-20 bolts shown below to remove the upper back panel. You will need to disconnect the AC harness that is connected to the cooling fans. The ICE part number for the 24VDC supply is MON42/47PS. -
Page 11: Horizontal Control Replacement
SERVICE HORIZONTAL CONTROL REPLACEMENT The game’s controller has two axis, horizontal and tilt. If the game has no movement horizontally when the controller is pushed to either side, you will need to check the horizontal pot located at the back of the game. If the game has no tilt control when you move the controller handle left and right, you will need to check the tilt pot located at the front of the controller handle. -
Page 12: Tilt Control Replacement
SERVICE TILT CONTROL REPLACEMENT The game’s controller has two axis, horizontal and tilt. If the game has no movement horizontally when the controller is pushed to either side, you will need to check the horizontal pot located at the back of the game. See previous page for details. If the game has no tilt control when you move the controller handle left and right, you will need to check the tilt pot located at the back of the controller handle. -
Page 13: Computer And I/O Replacement
SERVICE COMPUTER AND I/O CONTROL REPLACEMENT The computer is located on the back door itself. Two chains provides support to the back door when opened. Do not remove these chains for any reason. The computer is held on to the back door by two straps. -
Page 14: Upper Monitor Assembly Replacement
SERVICE UPPER MONITOR ASSEMBLY REMOVAL The upper cabinet and marquee can be removed if desired. It is recommended to have assistance when removing the upper cabinet. A special 5/16 Latch wrench tool is included with your game. Re- move the four bolts holding the upper assembly stable. Remove all wire connectors that attaches the upper cabinet to the lower cabinet. -
Page 17: Spare Parts
Door Harness BX2052MX Start button harness BX2061MX AC extension harness BX7000 Side control panel decal BX2062MX AC block Lights BX7001 Ice/Playmechanix Logo BX2068MX Start button Lamp AC BX7004 Ticket door decal BX2070LX Ground rear door harness BX7012 Control panel decal BX2071LX... -
Page 18: Warranty
I.C.E. Inc, at the customer’s expense, within 30 days. After 30 days a 15% re-stocking fee will apply to all returns. ICE distributors are independent, privately owned and operated. In their judgment, they may sell parts and/or accessories other than those manufactured by I.C.E. Inc. We cannot be responsible for the quality, suitability or safety of any non-I.C.E.
Need help?
Do you have a question about the TIPPIN' BLOKS and is the answer not in the manual?
Questions and answers