
Related Manuals for Ice Hoopla


Summary of Contents for Ice Hoopla
- Page 1 Service Manual Innovative Concepts in Entertainment 10123 Main Street Clarence, New York 14031 (716) 759-0360 www.icegame.com...
-
Page 2: Warranty
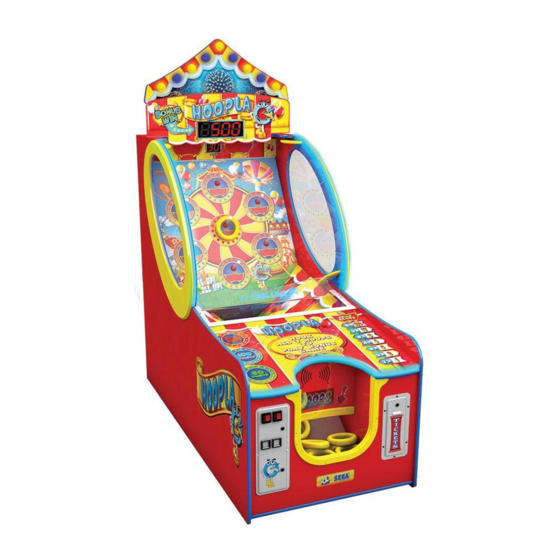
Table of Contents What’s included Safety and Warnings Game Assembly 5 - 6 Game Programming 7 - 18 Conveyor replacement Safety Sensor replacement Assembly Drawings 21– 23 Spare Suggestion Warranty Revision E - 1/8/2018... - Page 3 Your game should include two bags of Rings, one bag of bolts with washers, and the upper marquee assembly. If any of these items are missing, please contact ICE Service Department. 20 Ring Toss Rings Marquee Hardware...
-
Page 4: Ac Power Information
SAFETY AND WARNINGS BEFORE YOU BEGIN WARNING: WHEN INSTALLING THIS GAME, A GROUNDED A.C. RECEPTACLE MUST BE USED. FAIL- URE TO DO SO COULD RESULT IN INJURY TO YOURSELF OR OTHERS. FAILURE TO USE A GROUNDED RECEPTACLE COULD ALSO CAUSE IMPROPER GAME OPERATION, OR DAMAGE TO THE ELECTRONICS. -
Page 5: Cabinet Setup
Cabinet Setup Step 1: Attach the upper marquee onto the cabinet Use four AA6281 1/4-20 bolts and four AA6057 washers. Push the two wire harnesses through the wire access hole. AA6281 Bolts x’s 4 AA6212 Washers x’s 4 Step 2: Remove the upper back door and connect the two wire harnesses. - Page 6 Step 3: Remove on both sides the playfield stop cleats. Do not discard! The game is shipped with the motor power unplugged. After removing the cleats, plug the motor harness together.
- Page 7 Unless ordered differently, your game is already set from the factory for $1.00 game. Additional .50 and $2.00 inserts are included if you wish to change. Contact ICE support if additional inserts values are required. HA7007 $.25 HA7008 $.50 HA7005 $1.00 HA7009 $1.50 HA7011 $2.00 Step 1: (Only do if changing to a different cost of play): Remove the control panel top.
- Page 8 THE FOLLOWING STEPS ARE ONLY REQUIRED IF YOUR GAME IS NOT ALREADY CONFIGURED FOR .50! Step 1: Unlock and open the upper coin door. Press the “TEST” button. This will cause the upper display on the game to change to “TEST”. NOTE: The small display inside the coin door will display the test and program menus.
- Page 9 THE FOLLOWING STEPS ARE ONLY REQUIRED IF YOUR GAME IS NOT ALREADY CONFIGURED FOR .50! Step 5: Unlock and open the upper coin door. Press the “TEST” button. This will cause the upper display on the game to change to “TEST”. NOTE: The small display inside the coin door will display the test and program menus.
- Page 10 THE FOLLOWING STEPS ARE ONLY REQUIRED IF YOUR GAME IS NOT ALREADY CONFIGURED FOR .50! Step 5: Unlock and open the upper coin door. Press the “TEST” button. This will cause the upper display on the game to change to “TEST”. NOTE: The small display inside the coin door will display the test and program menus.
- Page 11 THE FOLLOWING STEPS ARE ONLY REQUIRED IF YOU NEED TO ADJUST YOUR BONUS. Step 1: If not already unlock and open the upper coin door. Press the “TEST” button. This will cause the upper display on the game to change to “TEST”. NOTE: The small display inside the coin door will display the test and program menus.
- Page 12 THE FOLLOWING INFORMATION IS IMPORTANT FOR BOTH USERS WHO ACCEPT CASH OR USE SWIPES. You need to define how many pulses the game needs to see on the coin input line for the game to issue one credit. If using a card swipe system you should set this value always to 1. If you are accepting cash to credit the game you must tell the game what each coin line is worth in money.
- Page 13 The Free Game Option An exciting feature allows the operator to award a free game in place of paying tickets. To enable this feature you must set the option “Free game mode” to “on”. When it is enabled the ticket mechanism will no longer pay tickets.
-
Page 14: Game Difficulty
Other Game Settings Although there are more settings that can be customized, it is recommended only to change those options with advice from ICE service department. They have been already configured for optimal revenues. Game Difficulty This option allows you to control the amount of times the game will turn the rings red which is the highest value color. - Page 15 Other Game Settings (CONT) Although there are more settings that can be customized, it is recommended only to change those options with advice from ICE service department. They have been already configured for optimal revenues. Set Game Time (Bonus) This option allows you to adjust how long a player has to achieve the bonus.
-
Page 16: Set Date/Time
Attract Audio Sounds You can disable the attract audio while the game awaits to be played. Step 1: If not already unlock and open the upper coin door. Press the “TEST” button. This will cause the up- per display on the game to change to “TEST”. NOTE: The small display inside the coin door will display the test and program menus. - Page 17 Book Keeping - Audits Book keeping contains logged data regarding game performance. Step 1: If not already unlock and open the upper coin door. Press the “TEST” button. This will cause the upper display on the game to change to “TEST”. NOTE: The small display inside the coin door will display the test and program menus.
- Page 18 Bookkeeping Screen 8 AWARD 5 – The number of games in award zone 5. AWARD 6 – The number of games in award zone 6. Bookkeeping Screen 9 AWARD 1 – The number of games in each award zone (AWARD #1 = Highest) MERCY - The number of Mercy games played.
- Page 19 How to Remove the conveyor assembly Step 2:Then remove the twelve bolts and screws shown here. Step 1:Remove the control panel cover Lift up on the control panel assembly by removing the nine 5/32” Allen screws and unplug the LED Connectors. shown.
- Page 20 Accessing the Safety Sensors. Step 2:Then remove the twelve bolts and screws shown here. Step 1:Remove the control panel cover Lift up on the control panel assembly by removing the nine 5/32” Allen screws and unplug the LED Connectors. shown. The Safety sensor is mounted The Safety sensor is mounted on the bracket which is...
- Page 21 HA3000X Plunger Assembly E01449 HA2036X...
- Page 24 The Hoops can be refreshed with dish soap and water. Although your Hoopla will come with 20 hoops (12 in the game at all times, and 8 spares) it may be a good idea to keep 8 spares on the shelf at all times.
-
Page 25: Warranty Policy
I.C.E. Inc, at the customer’s expense, within 30 days. After 30 days a 15% re-stocking fee will ap- ply to all returns. ICE distributors are independent, privately owned and operated. In their judgment, they may sell parts and/or accessories other than those manufactured by I.C.E. Inc. We cannot be responsible for the quality, suitability or safety of any non-I.C.E.
Need help?
Do you have a question about the Hoopla and is the answer not in the manual?
Questions and answers