Table of Contents
Advertisement
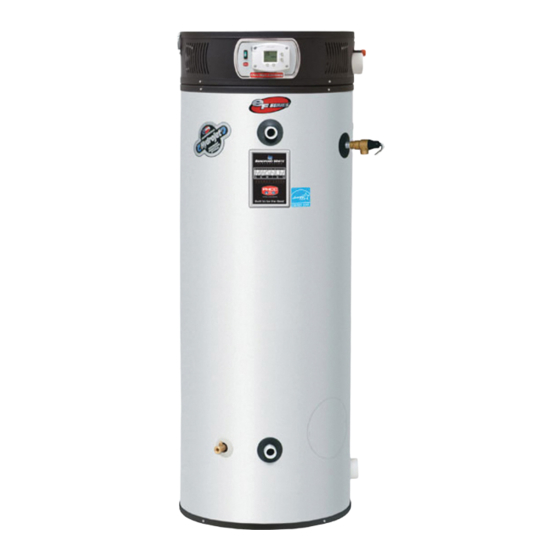
Ultra High Efficiency Water Heaters
Manual 238-45817-00F
SERVICE
MANUAL
Troubleshooting Guide
and Instructions for Service
(To be performed ONLY by
qualified service providers)
Models Covered
by This Manual:
For The Bradford White
eF Series
®
Models:
EFR160T120*(EN,SX)
EF60T125(E)*(N,X)(A)(2)
EF60T150(E)*(N,X)(A)(2)
EF60T199(E)*(N,X)(A)(2)
EF100T150(E)*(N,X)(A)(2)
EF100T199(E)*(N,X)(A)(2)
EF100T250(E)*(N,X)(A)(2)
EF100T300(E)*(N,X)(A)(2)
EF100T399(E)*(N,X)(A)(2)
(*) Denotes Warranty Years
Save this manual for future reference
Ultra High Effeciency
Advertisement
Table of Contents

Related Manuals for Bradford White EF100T150(E)*(N


Summary of Contents for Bradford White EF100T150(E)*(N
- Page 1 (To be performed ONLY by qualified service providers) Models Covered by This Manual: For The Bradford White eF Series Ultra High Effeciency ® Models: EFR160T120*(EN,SX) EF60T125(E)*(N,X)(A)(2) EF60T150(E)*(N,X)(A)(2) EF60T199(E)*(N,X)(A)(2) EF100T150(E)*(N,X)(A)(2) EF100T199(E)*(N,X)(A)(2) EF100T250(E)*(N,X)(A)(2) EF100T300(E)*(N,X)(A)(2) EF100T399(E)*(N,X)(A)(2) (*) Denotes Warranty Years Save this manual for future reference...
- Page 2 The Bradford White Introduction How to use this manual Tool required for service Features Specifications Sequence of Operation Troubleshooting Thermostat Circuit, Testing & Replacement Combustion System Testing and Replacement Burner Tube Inspection & Replacement Gas Valve Replacement Blower Testing and Replacement Exhaust Pressure Switch Testing and Replacement Hot Surface Igniter Testing and Replacement Flame Sensor Testing and Replacement...
- Page 3 Heater. The Bradford White eF Series Nox premix power burner located at the top of the water heater to direct a turbulent flame down into a submerged combustion chamber. This turbulence causes a thorough mixing of gas and air for optimum combustion. The combustion gases then travel through a three pass flue system keeping the gases moving at a high velocity.
- Page 4 It is intended for this manual to be used by qualified service personal for the primary purpose of troubleshooting analysis and repair of the Bradford White eF Series Efficiency Water Heater. Understanding the sequence of operation section of this manual will contribute greatly to troubleshooting this product.
- Page 5 Water heater display will show diagnostic codes in the event the water heater needs servicing. Aids in diagnosing and servicing the water heater. Water heater display can show previous error code history to further aid in servicing the water heater.
- Page 6 Recovery GPH at Degree Rise Input Model No Rate 40°F 100°F BTU/h 100°F Rise EFR-1-60T-120 120,000 EF60T125 125,000 363.6 145.5 EF60T150 150,000 422.7 169.1 EF60T199 199,999 557.6 EF100T150 150,000 450.5 180.2 EF100T199 199,999 238.8 EF100T250 250,000 734.8 293.9 EF100T300 300,000 836.4 334.5 EF100T399...
- Page 7 Power supply Dedicated 120 VAC, 60 Hz, 15A, GFI Minimum 1" NPT for EF100T399, all others ¾" NPT Gas Supply (schedule 40 black iron pipe recommended) Approved Gas Type Natural or Propane. Unit must match gas type supplied. Gas Pressure ( 14.0"...
- Page 8 Serial Numbers including and AFTER GB13006174 and ALL EFR models Power supply Dedicated 120 VAC, 60 Hz, 15A Minimum ¾" NPT Gas Supply (schedule 40 black iron pipe recommended) Approved Gas Type Natural or Propane. Unit must match gas type supplied. Gas Pressure ( 14.0"...
- Page 9 WARNING! The EF100T250 and EF100T300 models are not approved for 2 inch diameter vent pipe. Venting with 2 inch pipe on these models may result in damage to the water heater or cause an unsafe condition. DO NOT use 2 inch Vent or Air Intake Pipe on EF100T250/300 models.
- Page 10 For models prior to CF serial numbers Thermostat calls for heat. -Prior to energizing blower, ignition module checks safety circuits for normal switch positions: a) Vent temp switch normally closed. b) Intake pressure switch normally closed. c) Exhaust pressure switch normally open. If the vent temp switch is open, the control waits indefinitely for temp switch to close (green light stays on).
- Page 11 For models prior to CF serial numbers Lockout Conditions If normally closed pressure switch contacts open during burner operation, gas valve closes, burner shuts off. Blower restarts after 30 seconds and runs 5 minutes to wait for pressure switch to close. If not, locks out. The system will go into lock out mode for the following reasons: - Pressure switches stuck open or closed.
- Page 12 For models starting with CF serial numbers and later. Thermostat calls for heat. Prior to energizing blower, ignition module checks to make sure the vent temperature switch is in the normally closed position. If the vent temperature switch is open, the control waits indefinitely for the temperature switch to close. Blower energizes, pressure switch contacts are normally closed.
- Page 13 For models starting with CF serial numbers and later. Lockout Conditions Lockout conditions: The system will go into lock out mode for the following reasons: Blocked vent pressure switch contacts open: Check for obstruction in exhaust pipe and vent terminal. Check for blocked condensate trap or drain line.
- Page 14 Serial Numbers including and AFTER GB13006174 and ALL EFR models Thermostat calls for heat. Combustion blower starts. Blower pre-purge period of 30 seconds. Trial for Ignition. (5 seconds, 3 trials). Flame establishing period (3 seconds), gas valve opens, sparks from spark rod to burner surface to ignite the gas.
-
Page 15: Lockout Conditions
ERROR CODE 65 If the top of the tank should exceed 200°F, then the high limit control will shut off the burner and the water heater will go into a “Hard Lockout”. Error code 65 will be shown in the water heater display. The control can only be reset in the “Service Mode”, which is detailed in the “Troubleshooting”... - Page 16 Is front panel power Position front panel switch light on, power switch to indicating power? “ON” position. Is there 120VAC across switch? (see photo at right) Is there 120VAC across terminal block? (see photo at right) Determine power source problem and Refer to ignition module Is ignition module illustration, is there 120VAC...
- Page 17 Determine failure mode by observing flashing LED status on ignition module. LED status and probable cause shown below. * Denotes conditions that may require the water heater to be isolated from the vent system to determine root cause. LED STATUS...
- Page 18 Water Heater Fault: Water heater does not operate Display Error Code: Water heater display does not operate - blank display Check main power supply to water heater - fuse, circuit breaker, plug receptacle, line cord or wiring to water heater.
- Page 19 From previous page Does combustion blower operate? P7(5) on the “inducer” output (make sure the control display Replace blower. Can sparking be seen/heard at the spark rod to the burner? Does Main Burner Light? Does burner continue until thermostat set point is reached? See setting display in Service Mode and displaying temperature sensors.
- Page 20 The display has a “service mode” for changing the maximum setpoint and accessing information in aiding servicing of the water heater. This procedure is for service and installation personnel only. To enter the Service Mode, follow the steps illustrated below: Step 1: Press “Select”...
- Page 21 2. Tank Sensor Temperature Displayed Water Temperature Average. 3. Flame Current of Burner Flame Sensor (Displays only in the Heating Cycle) Accessing Service Mode on Control Display For models with Honeywell Integrated Control Max Setpoint value in Water Heater Display °F Setpoint idle Operational Status &...
- Page 22 4. Setpoint (Display/Change) 5. °F/°C (Display/Change) 6. Differential (Display only - shows the differential of the thermostat) Accessing Service Mode on Control Display For models with Honeywell Integrated Control setpoint °F idle Status Operational SELECT setpoint °F °F/C° idle Operational Status SELECT Differential...
- Page 23 7. Software Version (Display only) Error Code History (Displays if there are present error codes or up to 10 previous error codes). Water Heater Display will show a “--“ if there are no error codes. To change the Maximum Setpoint Limit (Max Setpoint) for the temperature setpoint: Step 1: In service mode press the “Select”...
- Page 24 Step 2: Press “Set” button to enter setting mode. “Max Setpoint” will flash to indicate setting mode. Step 3: Press the “UP” or “DOWN” buttons to change the maximum setpoint value. This will limit the maximum setpoint the user can select. Note: The maximum setpoint is approximately 180°F. Step 4: Press “Set”...
- Page 25 Step 5: 30 Seconds after the last button press, the Water Heater Display will go back to “User Mode”. It will read “Max Setpoint” without showing a temperature value if the temperature setpoint is at the maximum setting. The Water Heater Display can be set back to the “User Mode”...
- Page 26 (µA). To Display and Change Temperature Setpoint: Step 1: In “Service Mode” press the “Select” button until “Setpoint” is shown in the water heater display Accessing Service Mode on Control Display For models with Honeywell Integrated Control...
- Page 27 Step 2: Press the “Set” button to enter the setting mode. “Setpoint” will flash in the water heater display. Step 3: To raise the temperature setpoint, press the “Temperature Up” button until the desired temperature is shown on the water heater display.
- Page 28 To Display and Change Temperature Format (°F/°C): To Change Temperature Format in Display from °F to °C or °C to °F: Step 1: While in “Service Mode”, press “Select” button until “°F/°C” is shown in the upper right portion of the water heater display.
- Page 29 Step 3a: Press “Temperature Up” button to change temperature format to °C Step 3b: Press “Temperature Down” button to change temperature format to °F Step 4: Press “Set” button to confirm °F or °C format. °F/°C will stop flashing Accessing Service Mode on Control Display For models with Honeywell Integrated Control °C °F/C°...
- Page 30 Error Codes and Error History Display: If there is an operating problem with the water heater, an error code number will appear on the water heater display with “Service Needed” to the right of the “Status” indicator. The error code label is located under the Water Heater Display and the following section in this Service Manual explains the error codes with corrective actions to repair the water heater.
- Page 31 Step 3: Press the “Select” button to view the error code for “code 10”. If there is a number displayed, note what the number is. The label next to the water heater display will identify the code number. If no number is displayed with only a “--“ in the water heater display, then there has not been an error code for error code index 10.
- Page 32 Continue on to index #1, the oldest error code index. The water heater display will store up to 10 error codes with the oldest code starting in code index #1 with the most recent code in code index #10.
- Page 33 ELECTRONICS FAILURE HIGH WATER TEMPERATURE (OVER 200°F) IF ANY OF THE ABOVE CODES APPEAR ON THE CONTROL DISPLAY, CONTACT YOUR PLUMBER OR QUALIFIED SERVICE AGENT FOR SERVICE OF THE WATER HEATER. Error Code Definitions For models with Honeywell Integrated Control...
- Page 34 If an error code is displayed (except for #4, low flame sense current), the water heater will be in a “lockout condition” with the water heater display showing the error code number and “Service Needed” in the status section of the display window.
- Page 35 Replace sensor if needed. Turn power ON to water heater. Run water heater through heating cycle and verify proper operation. Sensor temperature can be viewed when burner shuts off (see section on viewing the display in “Service Mode”).
- Page 36 Reconnect and switch on power to the water heater. Enter service mode on the water heater display (see illustration) Press button under “Lockout Reset” and hold for 3 seconds. Set thermostat to the desired setting.
- Page 37 For models with Hot Surface Ignition IMPORTANT NOTE: This procedure assumes a cool tank 120 volt potential exposure. Use Rotate temperature dial to highest setting. caution making voltage checks to avoid personal injury. Refer to ignition module illustration, Is there 24VAC between P3(7) and P3(8)? Thermostat not calling...
- Page 38 Be Careful When Making Voltage Measurements or Jumping Terminals Not to Damage or Deform Connectors or Connector Pins. Draw Water From The T&P Valve. Compare Temperature With Example: If temperature of sensor is 84°F, then the resistance through the sensor would be 8449 (see shaded area). NOTE: Sensor resistance increases as the temperature falls.
- Page 39 For models with Hot Surface Ignition Thermostat circuit. (continued from page 37) Check AC source to determine why there is no power. Replace ignition module. (see “Ignition Module Replacement”) Refer to ignition module Refer to ignition module illustration, Is there 120VAC illustration, Is there 120VAC between P1(1) and P1(3)? between P7(3) and P7(1)?
-
Page 40: Wiring Diagram
Thermostat Board Replacement Procedure Step 1. Position main power switch to “OFF” Step 2. Disconnect (unplug) water heater from 120 volt power source. Step 3. Un-latch and remove top surround cover from top of heater. Step 4. Locate thermostat board on control panel. - Page 41 Reconnect wires to potentiometer. Note: Wire leads are interchangeable with either wire. Step 10. Restore 120 volt power supply to water heater and confirm proper operation following the lighting instructions on the lighting instruction label or the lighting instruction located in the installation and operating instruction manual.
- Page 42 Fold insulation back into place. Be sure there are no wires in contact with burner. Step 10. Restore 120 volt power supply and water supply to water heater, check and repair any leaks found. Confirm proper operation following the lighting instructions on the lighting instruction label or the lighting instruction located in the installation and operating instruction manual.
- Page 43 Observe burner operation through the sight glass located on the combustion insert mounting flange. Normal burner operation should ignite smoothly, without evidence of coughing or huffing upon ignition. The burner flame should be a blue flame near the burner surface in a uniform flame pattern. Occasional yellow or white streaks are normal. For models with Hot Surface Ignition System Note: On higher input models using metal fiber mesh burner (serial number “CK”...
- Page 44 Observe burner operation through the sight glass located on the combustion insert mounting flange. Normal burner operation should ignite smoothly, without evidence of coughing or huffing upon ignition. The burner flame should be a blue flame near the burner surface in a uniform flame pattern. Occasional yellow or white streaks are normal. For models with Hot Surface Ignition System Continued from previous page...
- Page 45 Observe burner operation through the sight glass located on the combustion insert mounting flange. Normal burner operation should ignite smoothly, without evidence of coughing or huffing upon ignition. The burner flame should be a blue flame near the burner surface in a uniform flame pattern. Occasional yellow or white streaks are normal. Serial Numbers including and AFTER GB13006174 and ALL EFR models Note: On higher input models using metal fiber mesh burner a red glow from the burner surface is normal.
- Page 46 Observe burner operation through the sight glass located on the combustion insert mounting flange. Normal burner operation should ignite smoothly, without evidence of coughing or huffing upon ignition. The burner flame should be a blue flame near the burner surface in a uniform flame pattern. Occasional yellow or white streaks are normal. Serial Numbers including and AFTER GB13006174 and ALL EFR models Continued from previous page...
- Page 47 Position main power switch to “OFF”. Step 2. Disconnect (unplug) water heater from 120 volt power source. Step 3. Turn off gas supply to water heater. Step 4. Un-latch and remove surround cover from top of heater. Step 5. From the gas valve, disconnect the gas connection, PVC venting, Silicone tubing and wire harness.
- Page 48 Step 5. Restore 120 volt power supply to water heater and confirm proper operation following the lighting instructions on the lighting instruction label or the lighting instruction located in the installation and operating instruction manual.
- Page 49 Position main power switch to “OFF”. Step 2. Disconnect (unplug) water heater from 120 volt power source. Step 3. Turn off gas supply to water heater. Step 4. Un-latch & remove surround cover from top of heater. Step 5. From the gas valve, disconnect the gas connection, PVC venting, wire harness and silicone tubing.
- Page 50 Step 7. Restore 120 volt power supply to water heater and confirm proper operation following the lighting instructions on the lighting instruction label or the lighting instruction located in the installation and operating instruction manual.
- Page 51 Step 10. Restore 120 volt power supply to water heater and confirm proper operation following the lighting instructions on the lighting instruction label or the lighting instruction located in the installation and operating instruction manual.
- Page 52 Is there 120VAC Does blower across the white and energize? black wires at the (For Direct Spark terminal block ? Ignition models, (see photo at right) ensure control display shows “Heating”, raise temperature setpoint if necessary) Determine power source problem correct Is there 120VAC across the white and...
- Page 53 Reconnect wire harness to blower assembly, restore 120 volt power supply & Gas supply to water heater and confirm proper operation following the lighting instructions on the lighting instruction label or the lighting instructions located in the installation and operating instruction manual.
- Page 54 Sequence of operation: With the thermostat calling for heat, prior to energizing blower, the ignition module checks the exhaust pressure switch for normal switch position of normally open. If the exhaust pressure switch contacts are closed (not in normal position), the ignition module waits 45 seconds for the pressure switch contacts to open.
- Page 55 Exhaust Pressure Switch Testing and Replacement Check Collector Pressure Check exhaust collector pressure at the exhaust collector pressure tap location (see illustration below). Is there positive pressure equal to or greater than pressure switch settings below? EXHAUST PRESSURE SWITCH SETTINGS EF(60,100)T199 +2.58"...
- Page 56 Example of switch showing positive side identifier Step 9. Restore 120 volt power supply to water heater and confirm proper operation following the lighting instructions on the lighting instruction label or the lighting instructions located in the installation and operating instruction manual.
- Page 57 Sequence of operation: The blocked vent pressure switch monitors the pressure in the exhaust tube. The switch contacts are normally closed and will not open unless there is a blockage in the exhaust venting or terminal (snow, ice, debris). If the blocked vent pressure switch contacts open after the thermostat initiates the blower, the blower will remain on for to 5 minutes waiting for the contacts to close.
- Page 58 Check Exhaust Tube Pressure With monometer, take a reading at the exhaust tube pressure tap location. Is value negative (-) or slightly postitive (see illustration below). With ohmmeter check pressure switch for continuity. Contacts should be closed. Pressure switch O.K. Blocked Vent Pressure Switch Testing and Replacement for serial number “CF”...
- Page 59 Exhaust pipe tubing connects to single tap located on switch Step 9. Restore 120 volt power supply to water heater and confirm proper operation following the lighting instructions on the lighting instruction label or the lighting instructions located in the installation and operating instruction manual.
- Page 60 Hot surface Igniter Testing Procedure Is igniter resistance less than 150 Ohms (cold)? (see “check igniter resistance” below) Replace hot surface igniter (see “Hot Surface Igniter Replacement Procedure”) Volt meter set to OHM setting CHECK IGNITER RESISTANCE Refer to ignition module illustration below, is there 120VAC across terminals P6(1) and P6(2)? (Check during igniter warm up period,...
- Page 61 Fold insulation back into place. Be sure no wires are in contact with burner flange. Step 11. Restore 120 volt power supply to water heater and confirm proper operation following the lighting instructions on the lighting instruction label or the lighting instructions located in the installation and operating instruction manual.
- Page 62 With flame sensor Disconnected from ignition module, check continuity to ground. Is there continuity to ground? Remove flame sensor from water heater. Check continuity from tip of flame sensor to end of wire lead. Is there continuity? Is flame sensor free...
- Page 63 Fold insulation back into place. Be sure no wires are in contact with burner flange. Step 11. Restore 120 volt power supply to water heater and confirm proper operation following the lighting instructions on the lighting instruction label or the lighting instructions located in the installation and operating instruction manual.
- Page 64 Spark gap must be set to 3/16" to 1/4". Failure to set and verify proper spark gap may result in a delayed ignition resulting in damage to the water heater. Use caution while performing these steps to prevent stressing or cracking...
- Page 65 Fold insulation back into place. Be sure no wires are in contact with burner flange. Step 11. Restore 120 volt power supply to water heater and confirm proper operation following the lighting instructions on the lighting instruction label or the lighting instructions located in the installation and operating instruction manual.
- Page 66 Step 9. Restore 120 volt power supply to water heater and confirm proper operation following the lighting instructions on the lighting instruction label or the lighting instruction located in the installation and operating instruction manual.
- Page 67 Step 10. Replace surround cover on top of water heater. (Honeywell Integrated Control w/ Direct Spark Ignition) 120 volt potential exposure. Isolate the appliance and reconfirm power is disconnected using a multi-meter.
- Page 68 Note the blue wire must connect to the 24 volt “HOT” terminal. (see photo at right) Step 10. Restore 120 volt power supply to water heater and confirm proper operation following the lighting instructions on the lighting instruction label or the lighting instruction located in the installation and operating instruction manual.
- Page 69 Used on EF water heaters prior to “CF” serial number. Notice: The intake pressure switch is not used on serial number “CF” and later. Is there continuity through the normally Does Blower Energize? closed intake pressure switch? (see photo at right) See “Vent Safety Switch Testing and Replacement”...
- Page 70 Step 2. Disconnect (Unplug) water heater from 120 Volt power source. Step 3. Un-latch & remove surround cover from top of water heater. Step 4. Locate intake pressure switch on control panel inside surround area (see photos below). Step 5.
- Page 71 Sequence of operation: For Hot Surface Ignition models, with the thermostat calling for heat, prior to energizing blower, the ignition module checks the vent safety switch for normal switch position of normally closed. If the vent safety switch contacts are open, (not in normal position), the ignition module waits indefinitely for contact to close, The vent safety switch must be manually reset to close the switch contacts.
- Page 72 Step 8. Restore 120 volt power supply to water heater and confirm proper operation following the lighting instructions on the lighting instruction label or the lighting instruction located in the installation and operating instruction manual.
- Page 73 Step 5. Remove the three control panel mounting screws (¼” nut driver) and remove control panel from the water heater (see photos below). Control Panel Mounting Screw Step 6.
-
Page 74: Anode Inspection And Replacement
Take necessary precaution to prevent personal injury. Step 1. Turn off water supply and drain water heater. Step 2. Disassemble water heater per “Disassembly Procedure for Access to Andoes & Flue Baffles”. Step 3. Locate and remove anode rods from heater (1-1/16 hex socket). Step 4. - Page 75 Reinstall collector insulation and control panel, reconnect control panel wire harnesses. Step 7. Restore 120 volts to water heater and verify proper heater operation following the instructions on the lighting instruction label or the lighting instruction located in the installation and operating instruction manual.
- Page 76 The control has a LED indicator light to show the status of operation. When the tank is filled with water and the power supply is on to the water heater, the light should have a steady green glow to indicate that protection current is flowing and operating normally.
- Page 77 Collector Cover Installation Procedure Step 1. Remove old silicone from top surface of collector flange and collector cover. Step 2. Apply ¼" bead of Ultra Copper Silicone around entire collector flange surface. Allow caulk to “cure” for 10 minutes. Step 3. Carefully reinstall collector cover, tighten screws evenly.
- Page 78 2 inch diameter vent pipe. Venting with 2 inch pipe on these models may result in damage to the water heater or cause an unsafe condition. DO NOT use 2 inch Vent or Air Intake Pipe on EF100T250/300 models.
-
Page 79: Model Number
Vent size 3" or 4" Intake 90's (qty) Exhaust 90's (qty) Gas Line: Size & material Distance from meter to water heater Electrical: Line Voltage Igniter Resistance: LED Flashing Y or N Which One(s) Error Codes on Control Display (Direct Spark Ignition System Only): __________________________________ Condensate Line: Size &... - Page 80 Models prior to “CF” serial number Combustion Surround Assy. Burner Assy Screw 10-16 x 3/4 Vent Termination Elbow Thermostat Sensor Probe Baffle 4" Flue Anode Baffle 2" Flue Wire Harness Service Panel Plastisert Nipple 1-½" NPT Plug Nipple T&P Relief Valve Exhaust Pipe (PVC) w/Hose Barb Condensate Trap Elbow Silicone Hose...
- Page 81 Latch Assy Screw 8-32 x ½ RHCR Ignition Control Assy Jacket Head Main Power Switch Potentiometer Combustion Surround Surround Base Customer must specify complete model number and serial number when ordering service parts. Models prior to “CF” serial number Combustion Surround Assy. Blower Gas Valve Assy Burner Assy Blower EBM...
- Page 82 Electronic Control Module Screw 8-32 x 1/2 Intake Pressure Switch Control Mounting Panel Thermostat PC Board Transformer 120VAC x 24VAC x 40VA Terminal Terminal Strip Power Cord 10C Control Wire Harness 11C Thermostat Wire Harness 12C Igniter Extension Wire 13C Blower Wire Harness 14C Power Switch Wire Harness 15C Flame Sensor Wire Harness 16C Rectifier Harness...
- Page 83 For models with “CF” serial or later. Combustion Surround Assy. Burner Assy (specify model) Screw 10-16 x 3/4 Vent Termination Elbow Thermostat Sensor Probe Baffle 4" Flue (specify model) Anode Rod Assy Powered Anode (for EF100T399) Baffle 2" Flue Wire Harness Service Panel Plastisert Nipple 1-½"...
- Page 84 Latch Assy Screw 8-32 x ½ RHCR Ignition Control Assy Jacket Head Main Power Switch Potentiometer Combustion Surround Surround Base Customer must specify complete model number and serial number when ordering service parts. For models with “CF” serial or later. Combustion Surround Assy.
- Page 85 For models with “CF” serial or later. Electronic Control Module Screw 8-32 x 1/2 Control Mounting Panel Thermostat PC Board Transformer 120VAC x 24VAC x 40VA Terminal Terminal Strip Power Cord Control Wire Harness Thermostat Wire Harness Rectifier Harness (specify model) Blower Wire Harness (specify model) Power Switch Wire Harness Flame Sensor Wire Harness...
- Page 86 For models with Direct Spark Ignition Combustion Surround Assembly Burner Assembly (specify model) Screw 10-16 x 3/4 Vent Termination Elbow Thermostat Sensor Probe Baffle 4" Flue (specify model) Anode Rod Assembly Baffle 2" flue Wire Harness Service Panel Plastisert Nipple 1-½" NPT Plug Nipple T&P Relief Valve...
- Page 87 Latch Assy Screw 8-32 x ½ RHCR Ignition Control Assy Jacket Head Main power switch Honeywell Control Display Combustion Surround Surround Base Customer must specify complete model number and serial number when ordering service parts. For models with Direct Spark Ignition Combustion Surround Assembly (specify model) Blower Gas Valve Assy.
- Page 88 Control Panel Control Board Transformer 120VAC x 24VAC x 40VA Terminal Terminal Strip Power Cord Controller Wire Harness Transformer Primary Wire Harness Transformer Secondary Wire Harness Blower Wire Harness Power Switch Wire Harness Sensor Wire Harness 13C High Voltage Spark Cable For models with Direct Spark Ignition Customer must specify complete model number and serial number...
- Page 89 Alternating Current BTU/H British Thermal Units Carbon Monoxide Carbon Dioxide Direct Current Direct Spark Ignition Energy Cut Off Ground fault interrupt Gallons per Minute Hot Surface Igniter Hertz Light Emitting Diode Oxides of Nitrogen National Pipe Thread Pounds per Square Inch Revolutions per Minute Volt Amps Volts Alternating Current...
- Page 90 NOTES...
- Page 91 NOTES...
- Page 92 Email parts@bradfordwhite.com techserv@bradfordwhite.com www.bradfordwhite.com...
Need help?
Do you have a question about the EF100T150(E)*(N and is the answer not in the manual?
Questions and answers