
Subscribe to Our Youtube Channel
Related Manuals for Ubiquiti UniFi Stadium XG


Summary of Contents for Ubiquiti UniFi Stadium XG
- Page 1 Quad-Radio 802.11ac Wave 2 Access Point with Dedicated Security and Beamforming Antenna Model: UAP-StadiumXG...
-
Page 2: Package Contents
(Qty. 4) (50V, 1.2A) Guide TERMS OF USE: Ubiquiti radio devices must be professionally installed. Shielded Ethernet cable and earth grounding must be used as conditions of product warranty. TOUGHCable ™ designed for outdoor installations. It is the professional installer’s responsibility to follow local country regulations, including operation within legal frequency channels, output power, and Dynamic Frequency Selection (DFS) requirements. -
Page 3: Installation Requirements
AC ground of the PoE. We recommend that you protect your networks from harmful outdoor environments and destructive ESD events with industrial‑grade, shielded Ethernet cable from Ubiquiti Networks. For more details, visit: www.ubnt.com/toughcable System Requirements • Linux, Mac OS X, or Microsoft Windows 7/8/10 •... -
Page 4: Network Topology Requirements
Network Topology Requirements • A DHCP‑enabled network (for the AP to obtain an IP address as well as for the wireless clients after deployment) • A UniFi Cloud Key or management station running the UniFi Controller v5.7 (or newer) software, located either on‑site and connected to the same Layer 2 network, or off‑site in the cloud or NOC UniFi Hybrid... -
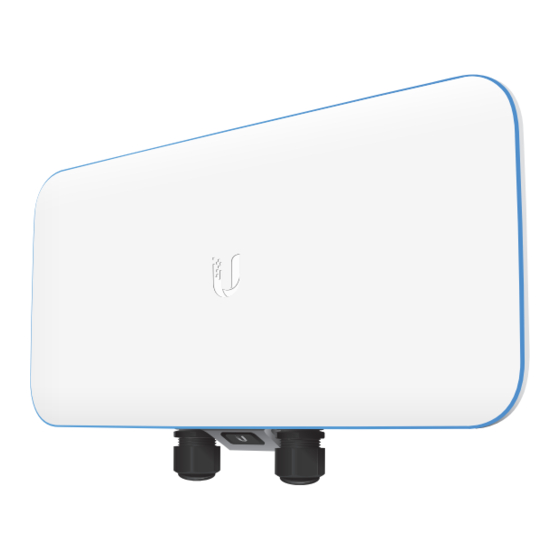
Page 5: Hardware Overview
Hardware Overview Top View Lanyard Loop Mounting Bolt Elevation Lock Bolt Adjustment Bracket Pole Clamp... - Page 6 The RGB LED is set to the factory defaults below; however, the color and lighting pattern are software‑controllable. LED Color Status Factory default, waiting to be integrated. White Initializing. Flashing White Device is busy; do not touch or unplug it. Alternating This usually indicates that a process such White/Blue...
- Page 7 Ports 10 GbE 1 GbE Reset Port Port Button 10 GbE The 10 GbE port is a 1/10 Gbps Ethernet port used to connect to the LAN and DHCP server. It can also be used to connect the power. Note: The UAP‑StadiumXG can be powered using an 802.3bt PoE switch or the included Gigabit PoE adapter.
-
Page 8: Vesa Mounting
VESA Mounting If you choose to use your own mount, remove the four M4 x 10 screws from the back of the UAP‑StadiumXG and detach the pre‑installed mount. The 8‑hole mounting pattern on the back of the UAP‑StadiumXG follows the VESA MIS‑D standard and can be used with mounts that comply with this standard. -
Page 9: Hardware Installation
Hardware Installation The UAP‑StadiumXG can be mounted on a pole or wall. Proceed to the appropriate instructions for your installation. Pole Mount 1. Attach the Pole Clamp to the Adjustment Bracket. a. Hold the Adjustment Bracket with its clamps facing you. b. - Page 10 2. Mount the Adjustment Bracket on the pole and secure it. a. Place the Adjustment Bracket against the pole. b. Slide the three slots of the Pole Clamp over the corresponding Carriage Bolts. c. Tighten the Flange Nuts of the bolts to 25 N m to secure ·...
- Page 11 3. Loosen and remove the Elevation Lock Bolts on the UAP‑StadiumXG. (The lanyards will retain the bolts.) 4. Lift the UAP‑StadiumXG and align the Mounting Bolts with the slots on the Adjustment Bracket. Seat the Mounting Bolts in the slots.
- Page 12 5. Insert the Elevation Lock Bolts into the adjustment slots. Remove the lanyards and then tighten the bolts by hand. 6. Pivot the UAP‑StadiumXG until it reaches the desired elevation angle (+10 to ‑50°). Then tighten all bolts. 7. Proceed to Connecting Ethernet.
-
Page 13: Wall Mount
Wall Mount To mount the UAP‑StadiumXG on a wall, securely attach the Adjustment Bracket to the wall using the four Lag Screws. Note: The Adjustment Bracket must attach directly to a stud or other structurally stable surface. 1. Locate the stud. 2. - Page 14 6. Loosen and remove the Elevation Lock Bolts on the UAP‑StadiumXG. (The retaining lanyards will constrain the bolts.) 7. Lift the UAP‑StadiumXG and align the Mounting Bolts with the slots on the Adjustment Bracket. Seat the Mounting Bolts in the slots.
- Page 15 8. Insert the Elevation Lock Bolts into the adjustment slots. Remove the lanyards and then tighten the bolts by hand. 9. Pivot the UAP‑StadiumXG until it reaches the desired elevation angle (+10 to ‑50°). Then tighten all bolts. 10. Proceed to Connecting Ethernet.
-
Page 16: Connecting Ethernet
Connecting Ethernet Note: If you are using TOUGHCable, we recommend attaching the TOUGHCable Connector(s) after you insert the cable(s) into the grommet. 1. Rotate the grommet cover counterclockwise to remove it. 2. Remove the plug from the grommet. 3. Rotate the grommet sleeve counterclockwise to remove it.
Need help?
Do you have a question about the UniFi Stadium XG and is the answer not in the manual?
Questions and answers