Download Print this page
Toyota 1RZ Supplement Manual

Toyota 1RZ Supplement Manual

For toyota hilux

Advertisement

Back To Engine Index
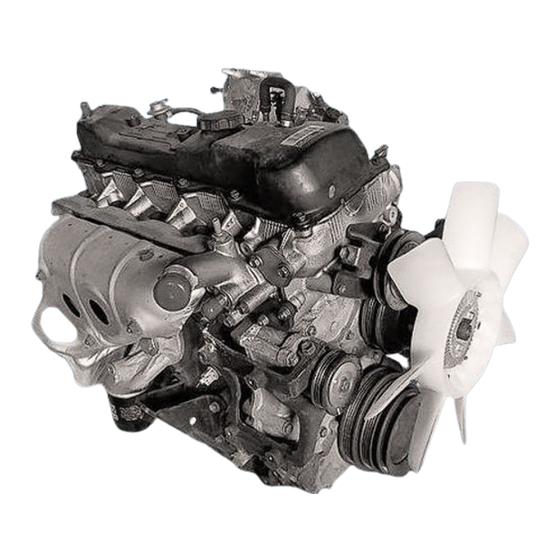
RM584E
This
SUPPLEMENT
1RZ,1RZ - E, 2RZ -- FE,
Applicable models:
For the service specifications and repair procedures of the above model other than those listed in this supple-
ment, refer to the following manuals.
S
1R Z ,
2R Z , 2R Z - - E
S
2R Z , 2R Z - - E E ngine R epair Manual S upplement
S
3R Z - - F, 3R Z - - F E E ngine R epair Manual
S
1RZ- -E Engine Repair Manual
S
1RZ, 2RZ- -E Repair Manual For Emission Control
S
3RZ- -F Repair Manual For Emission Control
All information in this manual is based on the latest product information at the time of publication. However,
specifications and procedures are subject to change without notice.
TOYOTA MOTOR CORPORATION
1997
A ll r ight s r es er v ed. T his CD m ay not be r epr o-
duced or copied, in whole or in part, without the
written permission of Toyota Motor Corporation.
First Printing: Aug. 18. 1997 01--970818--00
This manual does not include all the necessary items about repair and service. This manual is made
for the purpose of the use for the persons who have special techniques and certifications. In the
cases that non--specialized or uncertified technicians perform repair or service only using this manu-
al or without proper equipment or tool, that may cause severe injury to you or other people around
and also cause damage to your customer's vehicle.
In order to prevent dangerous operation and damages to your customer's vehicle, be sure to follow
the instruction shown below.
Must read this manual thoroughly. It is especially important to have good understanding all the
S
contents written in the PRECAUTION of "IN" section.
The service method written in this manual is very effective to perform repair and service. When
S
performing the operations following the procedures using this manual, be sure to use tools spe-
cified and recommended. If using non--specified or recommended tools and service method,
be sure to confirm safety of the technicians and any possibility of causing personal injury or
damage to the customer's vehicle before starting the operation.
If part replacement is necessary, must replace the part with the same part number or equivalent
S
part. Do not replace it with inferior quality.
It is important to note that this manual contains various "Cautions" and "Notices" that must be
S
carefully observed in order to reduce the risk of personal injury during service or repair, or the
possibility that improper service or repair may damage the vehicle or render it unsafe. It is also
important to understand that these "Cautions" and "Notices" are not exhaustive, because it is
important to warn of all the possible hazardous consequences that might result from failure to
follow these instructions.
TOY OTA MOTOR C ORP ORATION
has been prepared to provide information covering general service repairs for the
3RZ -- F and 3RZ -- FE ENGINES
RZN142, 144, 147, 148, 149, 154, 168, 169, 173, 174, 193 series
Manual Name
E ngine R epair Manual
FOREWORD
N/A FOR THE HILUX
N/A FOR THE HILUX
N/A FOR THE HILUX
CAUTION
VIEW THE MAIN INDEX
3RZ-F,3RZ-FE
Pages From Supplement
TO MODEL INDEX
equipped on the
TOYOTA HILUX.
ERM055E
ERM103E
Pub.No.
RM167E
RM558E
RM521E
RM467E

Advertisement

loading

Summary of Contents for Toyota 1RZ

  • Page 1 3R Z - - F, 3R Z - - F E E ngine R epair Manual RM467E 1RZ- -E Engine Repair Manual ERM055E 1RZ, 2RZ- -E Repair Manual For Emission Control N/A FOR THE HILUX ERM103E 3RZ- -F Repair Manual For Emission Control N/A FOR THE HILUX All information in this manual is based on the latest product information at the time of publication.
  • Page 2 BACK TO MAIN FOREWORD & Engine Index 3RZ-F,3RZ-FE Pages From Supplement TO MODEL INDEX HILUX MAIN INDEX: SUPPLEMENT: ENGINE 3RZ-F & 3RZ-FE August 1997 INTRODUCTION PREPARAT IO N SERVICE SPECIF ICAT IO NS DIAGNOSTICS ENGINE MECHANICAL EMISSION CONTROL EL ECT R O N IC F U EL INJECT IO N COOLING LUBRICATION IG NITIO N...
  • Page 3 BACK TO MAIN INDEX 3RZ-F,3RZ-FE Pages From Supplement TO MODEL INDEX I NTRO DUCTI O N HO W TO US E T HI S M A NUA L ... . . I N -- 1 GENERAL INFORMATION .
  • Page 4 CLICK HERE TO VIEW CHAPTER INDEX 3RZ-F,3RZ-FE Pages From Supplement TO MODEL INDEX IN- -1 INTRODUCTION HOW TO USE THIS MANUAL HOW TO USE THIS MANUAL IN02X- -01 GE NE RAL I NFORMATI ON I NDE X An INDEX is provided on the first page of each section to guide you to the item to be repaired. To assist you in finding your way through the manual, the Section Title and major heading are given at the top of every page.
  • Page 5 CLICK HERE TO VIEW CHAPTER INDEX 3RZ-F,3RZ-FE Pages From Supplement TO MODEL INDEX IN- -2 INTRODUCTION HOW TO USE THIS MANUAL The procedures are presented in a step--by--step format: The illustration shows what to do and where to do it. The task heading tells what to do.
  • Page 6 CLICK HERE TO VIEW CHAPTER INDEX 3RZ-F,3RZ-FE Pages From Supplement TO MODEL INDEX IN- -3 INTRODUCTION IDENTIFICATION INFORMATION IDENTIFICATION INFORMAT ION IN02Y- -01 E NGI NE S E RI AL NUM BE R The engine serial number is stamped on the engine block as shown.
  • Page 7 CLICK HERE TO VIEW CHAPTER INDEX 3RZ-F,3RZ-FE Pages From Supplement TO MODEL INDEX IN- -4 INTRODUCTION REPAIR INSTRUCTIONS REPAIR INSTRUCTIONS IN02Z- -01 GE NE RAL I NF O RM AT I O N BAS I C RE PAI R HI NT Use fender, seat and floor covers to keep the vehicle clean and prevent damage.
  • Page 8 CLICK HERE TO VIEW CHAPTER INDEX Pages From Supplement 3RZ-F,3RZ-FE TO MODEL INDEX IN- -5 INTRODUCTION REPAIR INSTRUCTIONS Carefully observe all specifications for bolt tightening torques. Always use a torque wrench. Use of special service tools (SST) and special service ma- terials (SSM) may be required, depending on the nature of the repair.
  • Page 9 CLICK HERE TO VIEW CHAPTER INDEX Pages From Supplement 3RZ-F,3RZ-FE TO MODEL INDEX IN- -6 INTRODUCTION REPAIR INSTRUCTIONS Observe the following precautions to avoid damage to the following parts: Do not open the cover or case of the ECU unless absolutely necessary.
  • Page 10 CLICK HERE TO VIEW CHAPTER INDEX 3RZ-F,3RZ-FE Pages From Supplement TO MODEL INDEX IN- -7 INTRODUCTION FOR ALL OF VEHICLES FOR ALL OF VEHICLES IN030- -01 PRECAUTION FOR VEHICLES EQUIPPED WITH A CATALYTIC CONVERTER CAUTION: If large amounts of unburned gasoline flow into the converter, it may overheat and create a fire haz- ard.
  • Page 11 ECU controlled systems: System Page Engine 1RZ- -E: DI - - 1 2RZ- -FE:, 3RZ- -FE: The troubleshooting procedure and how to make use of it are described on the following pages.
  • Page 12: Table Of Contents

    1. CUSTOMER PROBLEM ANALYSIS IN-10 2. SYMPTOM CONFIRMATION AND DIAGNOSTIC TROUBLE CODE CHECK IN-11/12 3. SYMPTOM SIMULATION IN-13/14 4. 1RZ-E: DIAGNOSTIC TROUBLE CODE CHART IN-15 5. 2RZ-FE, 3RZ-FE: DIAGNOSTIC TROUBLE CODE CHART IN-16 6. PROBLEM SYMPTOMS TABLE IN-17 7. 1RZ-FE: CIRCUIT INSPECTION IN-18 8.
  • Page 13: How To Proceed With Troubleshooting

    CLICK HERE TO VIEW CHAPTER INDEX 3RZ-F,3RZ-FE Pages From Supplement TO MODEL INDEX IN- -9 INTRODUCTION HOW TO TROUBLESHOOT ECU CONTROLLED SYSTEMS IN032- -01 HOW TO P ROCE E D WI T H T ROUBL E S HOOT I NG Carry out troubleshooting in accordance with the procedure on the following page.
  • Page 14 CLICK HERE TO VIEW CHAPTER INDEX 3RZ-F,3RZ-FE Pages From Supplement TO MODEL INDEX IN- -10 INTRODUCTION HOW TO TROUBLESHOOT ECU CONTROLLED SYSTEMS CUS TO ME R P RO BLE M ANALY S I S In troubleshooting, the problem symptoms must be confirmed accurately and all preconceptions must be cleared away in order to give an accurate judgment.
  • Page 15 CLICK HERE TO VIEW CHAPTER INDEX 3RZ-F,3RZ-FE Pages From Supplement TO MODEL INDEX IN- -11 INTRODUCTION HOW TO TROUBLESHOOT ECU CONTROLLED SYSTEMS S Y MP TO M CO NFI RMATI O N AND DI AG NO S T I C TRO UBLE CO DE CHE CK The diagnostic system in the HILUX fulfills various functions.
  • Page 16 CLICK HERE TO VIEW CHAPTER INDEX 3RZ-F,3RZ-FE Pages From Supplement TO MODEL INDEX IN- -12 INTRODUCTION HOW TO TROUBLESHOOT ECU CONTROLLED SYSTEMS Taking into account the above points, a flow chart showing how to proceed with troubleshooting using the diagnostic trouble code check is shown below. This flow chart shows how to utilize the diagnostic trouble code check effectively, then by carefully checking the results, indicates how to proceed either to diagnostic trouble code troubleshooting or to troubleshooting of problem symptoms.
  • Page 17: Symptom Simulation

    CLICK HERE TO VIEW CHAPTER INDEX 3RZ-F,3RZ-FE Pages From Supplement TO MODEL INDEX IN- -13 INTRODUCTION HOW TO TROUBLESHOOT ECU CONTROLLED SYSTEMS SYMPTOM SIMULATION The most difficult case in troubleshooting is when there are no problem symptoms occurring. In such cases, a thorough customer problem analysis must be carried out, then simulate the same or similar conditions and environment in which the problem occurred in the customer’s vehicle.
  • Page 18 CLICK HERE TO VIEW CHAPTER INDEX Pages From Supplement 3RZ-F,3RZ-FE TO MODEL INDEX IN- -14 INTRODUCTION HOW TO TROUBLESHOOT ECU CONTROLLED SYSTEMS HE AT M E T HO D: W h en t h e p ro b l em seems t o o ccu r w h en t h e su sp ect area i s h eat ed . Heat the component that is the likely cause of the malfunction with a hair dryer or similar object.
  • Page 19: Rz-E: Diagnostic Trouble Code Chart

    INTRODUCTION HOW TO TROUBLESHOOT ECU CONTROLLED SYSTEMS 1RZ - - E: DI AG NO S T I C TRO UBLE CO DE CHART The inspection procedure is shown in the table below. This table permits efficient and accurate troubleshoot- ing using the diagnostic trouble codes displayed in the diagnostic trouble code check. Proceed with trouble- shooting in accordance with the inspection procedure given in the diagnostic chart corresponding to the diagnostic trouble codes displayed.
  • Page 20: Rz-Fe, 3Rz-Fe: Diagnostic Trouble Code Chart

    CLICK HERE TO VIEW CHAPTER INDEX 3RZ-F,3RZ-FE Pages From Supplement TO MODEL INDEX IN- -16 INTRODUCTION HOW TO TROUBLESHOOT ECU CONTROLLED SYSTEMS 2RZ - - FE:, 3RZ - - FE: DI AG NO S T I C TRO UBLE CO DE CHART The inspection procedure is shown in the table below.
  • Page 21: Problem Symptoms Table

    CLICK HERE TO VIEW CHAPTER INDEX 3RZ-F,3RZ-FE Pages From Supplement TO MODEL INDEX IN- -17 INTRODUCTION HOW TO TROUBLESHOOT ECU CONTROLLED SYSTEMS PROBLEM SYMPTOMS TABLE The suspect circuits or parts for each problem symptom are shown in the table below. Use this table to trou- bleshooting the problem when a ”Normal”...
  • Page 22: Rz-Fe: Circuit Inspection

    TO MODEL INDEX IN- -18 INTRODUCTION HOW TO TROUBLESHOOT ECU CONTROLLED SYSTEMS 1RZ - - FE: CI RCUI T I NSPECTION How to read and use each page is shown below. D Diagnostic Trouble Code No. and Detection Item D Circuit Description The major role and operation, etc.
  • Page 23 CLICK HERE TO VIEW CHAPTER INDEX 3RZ-F,3RZ-FE Pages From Supplement TO MODEL INDEX IN- -19 INTRODUCTION HOW TO TROUBLESHOOT ECU CONTROLLED SYSTEMS 2RZ - - FE:, 3RZ - - FE: CI RCUI T I NSPECTION How to read and use each page is shown below. D Diagnostic Trouble Code No.
  • Page 24 CLICK HERE TO VIEW CHAPTER INDEX 3RZ-F,3RZ-FE Pages From Supplement TO MODEL INDEX IN - - 20 INTRODUCTIO N HOW TO TROUBLESHOOT ECU CONTROLLED SYSTEMS D Inspection Procedure Indicates the position of the ignition switch during the check . Use the inspection procedure to determine LOCK Ignition Switch ON Ignition Switch LOCK (OFF)
  • Page 25 CLICK HERE TO VIEW CHAPTER INDEX 3RZ-F,3RZ-FE Pages From Supplement TO MODEL INDEX IN- -21 INTRODUCTION HOW TO TROUBLESHOOT ECU CONTROLLED SYSTEMS IN033- -01 HOW TO US E THE DI AGNOS TI C CHART AND I NS P E CT I ON PROCEDURE CO NNE CTO R CO NNE CTI O N AND TE RMI NAL INSPECTION...
  • Page 26 CLICK HERE TO VIEW CHAPTER INDEX 3RZ-F,3RZ-FE Pages From Supplement TO MODEL INDEX IN- -22 INTRODUCTION HOW TO TROUBLESHOOT ECU CONTROLLED SYSTEMS CO NTI NUI TY CHE CK (O P E N CI RCUI T CHE CK) Sensor Side ECU Side Disconnect the connectors at both ECU and sensor sides.
  • Page 27 CLICK HERE TO VIEW CHAPTER INDEX 3RZ-F,3RZ-FE Pages From Supplement TO MODEL INDEX IN- -23 INTRODUCTION HOW TO TROUBLESHOOT ECU CONTROLLED SYSTEMS CO NNE CTO R HANDLI NG When inserting tester probes into a connector, insert them from the rear of the connector. When necessary, use mini test leads. For water resistant connectors which cannot be accessed from behind, take good care not to deform the connector terminals.
  • Page 28 CLICK HERE TO VIEW CHAPTER INDEX 3RZ-F,3RZ-FE Pages From Supplement TO MODEL INDEX IN- -24 INTRODUCTION HOW TO TROUBLESHOOT ECU CONTROLLED SYSTEMS Check the voltage. Fig. 4 In a circuit in which voltage is applied (to the ECU connec- tor terminal), an open circuit can be checked for by con- ducting a voltage check.
  • Page 29 CLICK HERE TO VIEW CHAPTER INDEX 3RZ-F,3RZ-FE Pages From Supplement TO MODEL INDEX IN- -25 INTRODUCTION HOW TO TROUBLESHOOT ECU CONTROLLED SYSTEMS Disconnect connector ”B” and measure the resis- Fig. 7 tance between terminal 1 of connector ”A” and body ground, and terminal 1 of connector ”B2”...
  • Page 30 CLICK HERE TO VIEW CHAPTER INDEX 3RZ-F,3RZ-FE Pages From Supplement TO MODEL INDEX IN- -26 INTRODUCTION TERMS TERMS IN034- -01 ABBRE V I AT I O NS US E D I N T HI S M ANUAL Abbreviations Meaning Air Conditioner Automatic Transmission BTDC Before Top Dead Center...
  • Page 31 BACK TO MAIN INDEX 3RZ-F,3RZ-FE Pages From Supplement TO MODEL INDEX PREPARATI O N E NG I NE M E CHA NI CA L ....P P -- 1 E M I S S I O N CO NT RO L .
  • Page 32 CLICK HERE TO VIEW CHAPTER INDEX 3RZ-F,3RZ-FE Pages From Supplement TO MODEL INDEX PP- -1 PREPARATION ENGINE MECHANICAL ENGINE MECHANICAL PP0L2- -01 SST (Special Service Tools) 09032- -00100 Oil Pan Seal Cutter 09201- -10000 Valve Guide Bushing Remover & Replacer Set (09201- -01060) Valve Guide Bushing Remover &...
  • Page 33 CLICK HERE TO VIEW CHAPTER INDEX 3RZ-F,3RZ-FE Pages From Supplement TO MODEL INDEX PP- -2 PREPARATION ENGINE MECHANICAL (09248- -05410) Valve Lifter Press (09248- -05420) Valve Lifter Stopper 09325- -20010 Transmission Oil Plug Companion Flange Holding Tool Crankshaft pulley 09330- -00021 09550- -10012 Replacer Set ”B”...
  • Page 34 CLICK HERE TO VIEW CHAPTER INDEX 3RZ-F,3RZ-FE Pages From Supplement TO MODEL INDEX PP- -3 PREPARATION ENGINE MECHANICAL (09952- -04010) Slide Arm (09953- -04010) Center Bolt 100 (09954- -04010) Arm 25 Claw No.6 (09955- -04060) 09950- -50010 Puller C Set (09951- -05010) Hanger 150 (09952- -05010)
  • Page 35 CLICK HERE TO VIEW CHAPTER INDEX 3RZ-F,3RZ-FE Pages From Supplement TO MODEL INDEX PP- -4 PREPARATION ENGINE MECHANICAL 09950- -70010 Handle Set (09951- -07150) Handle 150 CONTINUED...
  • Page 36 Pages From Supplement TO MODEL INDEX PP- -5 PREPARATION ENGINE MECHANICAL PP0L3- -01 RECOMMENDED TOOLS 09082- -00040 TOYOTA Electrical Tester. 09200- -00010 Engine Adjust Kit . 09258- -00030 Hose Plug Set . Plug for the vacuum hose, fuel hose etc. CONTINUED...
  • Page 37 CLICK HERE TO VIEW CHAPTER INDEX 3RZ-F,3RZ-FE Pages From Supplement TO MODEL INDEX PP- -6 PREPARATION ENGINE MECHANICAL PP0L4- -01 EQUIPMENT Caliper gauge CO/HC meter Compression gauge Connecting rod aligner Cylinder gauge Dial indicator Dye penetrant Engine tune- -up tester Heater Magnetic finger Micrometer...
  • Page 38 CLICK HERE TO VIEW CHAPTER INDEX 3RZ-F,3RZ-FE Pages From Supplement TO MODEL INDEX PP- -7 PREPARATION ENGINE MECHANICAL PP0L5- -01 SSM (Service Special Materials) 08826- -00080 Seal Packing Black or equivalent Over space between cylinder head (FIPG) and timing chain cover Semi- -circular plug Oil pan, Rear oil seal retaine 08833- -00070...
  • Page 39 CLICK HERE TO VIEW CHAPTER INDEX 3RZ-F,3RZ-FE Pages From Supplement TO MODEL INDEX PP- -8 PREPARATION EMISSION CONTROL EMISSION CONTROL PP0L6- -01 RECOMMENDED TOOLS 09082- -00040 TOYOTA Electrical Tester.
  • Page 40 CLICK HERE TO VIEW CHAPTER INDEX 3RZ-F,3RZ-FE Pages From Supplement TO MODEL INDEX PP- -9 PREPARATION EMISSION CONTROL PP0L7- -01 EQUIPMENT OBD II scan tool Engine speed Torque wrench Vacuum gauge...
  • Page 41 CLICK HERE TO VIEW CHAPTER INDEX 3RZ-F,3RZ-FE Pages From Supplement TO MODEL INDEX PP- -10 PREPARATION ELECTRONIC FUEL INJECTION ELECTRONIC FUEL INJECTION PP0L8- -01 SST (Special Service Tools) 09243- -00020 Idle Adjusting Screw Wrench 09268- -41046 Injection Measuring Tool Set (09268- -41091) NO.7 Union (90405- -09015)
  • Page 42 Pages From Supplement TO MODEL INDEX PP- -11 PREPARATION ELECTRONIC FUEL INJECTION PP0L9- -01 RECOMMENDED TOOLS 09082- -00040 TOYOTA Electrical Tester. 09200- -00010 Engine Adjust Kit . 09258- -00030 Hose Plug Set . Plug for vacuum hose, fuel hose etc.
  • Page 43 CLICK HERE TO VIEW CHAPTER INDEX 3RZ-F,3RZ-FE Pages From Supplement TO MODEL INDEX PP- -12 PREPARATION ELECTRONIC FUEL INJECTION PP0LA- -01 EQUIPMENT Carburetor cleaner Throttle body Graduated cylinder Injector Heater Ohmmeter Soft brush Throttle body Sound scope Injector Thermometer Tachometer Torque wrench...
  • Page 44 CLICK HERE TO VIEW CHAPTER INDEX 3RZ-F,3RZ-FE Pages From Supplement TO MODEL INDEX PP- -13 PREPARATION COOLING COOLING PP0LB- -01 EQUIPMENT Heater Thermostat Radiator cap tester Thermometer Thermostat Torque wrench...
  • Page 45 PREPARATION COOLING PP0LC- -01 COOLANT Item Capacity Classification 1RZ- -E: 7.8 liters (8.2 US qts, 6.9 lmp. qts) Ethylene- -glycol base 1RZ: w/ Heater 7.8 liters (8.2 US qts, 6.9 lmp. qts) w/o Heater 7.3 liters (7.7 US qts, 6.4 lmp. qts)
  • Page 46 CLICK HERE TO VIEW CHAPTER INDEX 3RZ-F,3RZ-FE Pages From Supplement TO MODEL INDEX PP- -15 PREPARATION LUBRICATION LUBRICATION PP0LD- -01 SST (Special Service Tools) 09223- -50010 Crankshaft Front oil Seal Replacer 09228- -07501 Oil Filter Wrench 09816- -30010 Oil Pressure Switch Socket...
  • Page 47 CLICK HERE TO VIEW CHAPTER INDEX 3RZ-F,3RZ-FE Pages From Supplement TO MODEL INDEX PP- -16 PREPARATION LUBRICATION PP0LE- -01 RECOMMENDED TOOLS 09200- -00010 Engine Adjust Kit .
  • Page 48 CLICK HERE TO VIEW CHAPTER INDEX 3RZ-F,3RZ-FE Pages From Supplement TO MODEL INDEX PP- -17 PREPARATION LUBRICATION PP0LF- -01 EQUIPMENT Oil pressure gauge Precision straight edge Oil pump Torque wrench...
  • Page 49 CLICK HERE TO VIEW CHAPTER INDEX 3RZ-F,3RZ-FE Pages From Supplement TO MODEL INDEX PP- -18 PREPARATION LUBRICATION PP0LG- -01 LUBRICANT Item Capacity Classification Engine oil API grade SH, Energy- -Conserving II or SJ Ener- gy- -Conserving or ILSAC multigrade engine oil. Dry fill 5.1 liters (5.4 US qts, 4.5 lmp.
  • Page 50 CLICK HERE TO VIEW CHAPTER INDEX 3RZ-F,3RZ-FE Pages From Supplement TO MODEL INDEX PP- -19 PREPARATION LUBRICATION PP0LH- -01 SSM (Service Special Materials) 08833- -00080 Adhesive 1344 Oil pressure switch THREE BOND 1344 LOCTITE 242 or equivalent...
  • Page 51 CLICK HERE TO VIEW CHAPTER INDEX 3RZ-F,3RZ-FE Pages From Supplement TO MODEL INDEX PP- -20 PREPARATION IGNITION IGNITION PP0LI- -01 RECOMMENDED TOOLS 09082- -00040 TOYOTA Electrical Tester. 09200- -00010 Engine Adjust Kit .
  • Page 52 CLICK HERE TO VIEW CHAPTER INDEX 3RZ-F,3RZ-FE Pages From Supplement TO MODEL INDEX PP- -21 PREPARATION IGNITION PP0LJ- -01 EQUIPMENT Spark plug cleaner Torque wrench Ohmmeter...
  • Page 53 CLICK HERE TO VIEW CHAPTER INDEX 3RZ-F,3RZ-FE Pages From Supplement TO MODEL INDEX PP- -22 PREPARATION STARTING STARTING PP0LK- -01 SST (Special Service Tools) 09286- -46011 Injection Pump Spline Shaft Armature bearing Puller 09810- -38140 Starter Magnet Switch Nut Wrench Terminal nut 09820- -00030 Alternator Rear Bearing Replacer...
  • Page 54 CLICK HERE TO VIEW CHAPTER INDEX 3RZ-F,3RZ-FE Pages From Supplement TO MODEL INDEX PP- -23 PREPARATION STARTING PP0LL- -01 RECOMMENDED TOOLS 09082- -00040 TOYOTA Electrical Tester.
  • Page 55 CLICK HERE TO VIEW CHAPTER INDEX 3RZ-F,3RZ-FE Pages From Supplement TO MODEL INDEX PP- -24 PREPARATION STARTING PP0LM- -01 EQUIPMENT Dial indicator Commutator Magnetic finger Steel ball Pull scale Brush spring Sandpaper Commutator Torque wrench V- -block Commutator Vernier calipers Commutator, Brush Press Magnetic switch terminal kit...
  • Page 56 CLICK HERE TO VIEW CHAPTER INDEX 3RZ-F,3RZ-FE Pages From Supplement TO MODEL INDEX PP- -25 PREPARATION CHARGING CHARGING PP0LN- -01 SST (Special Service Tools) 09285- -76010 Injection Pump Camshaft Bearing Rotor rear bearing cover Cone Replacer 09286- -46011 Injection Pump Spline Shaft Rectifier end frame Puller 09820- -00021...
  • Page 57 CLICK HERE TO VIEW CHAPTER INDEX 3RZ-F,3RZ-FE Pages From Supplement TO MODEL INDEX PP- -26 PREPARATION CHARGING PP0LO- -01 RECOMMENDED TOOLS 09082- -00040 TOYOTA Electrical Tester.
  • Page 58 CLICK HERE TO VIEW CHAPTER INDEX 3RZ-F,3RZ-FE Pages From Supplement TO MODEL INDEX PP- -27 PREPARATION CHARGING PP0LP- -01 EQUIPMENT Ammeter(A) Battery specific gravity gauge Belt tension gauge Torque wrench Vernier calipers Rotor (Slip ring), Brush...
  • Page 59 BACK TO MAIN INDEX 3RZ-F,3RZ-FE Pages From Supplement TO MODEL INDEX SERVI CE SPECI F I CAT I O NS STANDARD BO LT ......SS -- 1 E NG I NE M E CHA NI CA L .
  • Page 60 CLICK HERE TO VIEW CHAPTER INDEX 3RZ-F,3RZ-FE Pages From Supplement TO MODEL INDEX SS- -1 SERVICE SPECIFICATIONS STANDARD BOLT STANDARD BOLT SS00F- -03 HOW TO DETERMINE BOLT STRE NGTH Mark Class Mark Class Hexagon Hexagon head flange bolt bolt Bolt Protruding w/ washer head No.
  • Page 61 CLICK HERE TO VIEW CHAPTER INDEX 3RZ-F,3RZ-FE Pages From Supplement TO MODEL INDEX SS- -2 SERVICE SPECIFICATIONS STANDARD BOLT SS00G- -03 S P E CI F I E D TO RQUE F O R S TANDARD BOLT S Specified torque Diameter Pitch Hexagon head bolt...
  • Page 62 0.25 - - 0.35 mm (0.010 - - 0.014 in.) Ignition 1RZ:, 3RZ- -F: 5˚ BTDC@ Max. 850 rpm timing 1RZ- -E:, 2RE- -FE:, 3RE- -FE: 5˚ BTDC@ idle w/ Terminals TE1 and E1 of check Connector connected Idle speed...
  • Page 63 SERVICE SPECIFICATIONS ENGINE MECHANICAL Valve Valve overall length STD Intake 101.70 - - 102.30 mm(4.0039 - - 4.0278 in.) (1RZ:, 1RZ- -E:) Exhaust 102.05 - - 102.45 mm (4.0177 - - 4.0335 in.) Minimum intake 101.50 mm (3.9961 in.) Exhaust 101.75 mm (4.0059 in.)
  • Page 64 SS- -5 SERVICE SPECIFICATIONS ENGINE MECHANICAL Camshaft Thrust clearance 0.080 - - 0.155 mm (0.0031 - - 0.0061 in.) (1RZ:, 1RZ- -E:) Maximum 0.25 mm (0.0098 in.) Journal oil clearance 0.0025 - - 0.066 mm (0.0010 - - 0.0026 in.) Maximum 0.10 mm (0.0039 in.)
  • Page 65 Vibration dumper Cylinder block Cylinder head surface warpage Maximum 0.05 mm (0.0020 in.) (1RZ:, 1RZ- -E:) Cylinder bore diameter 85.990 - - 86.003 mm (3.3854 - - 3.3859 in.) Maximum 86.203 mm (3.3938 in.) O/S 0.50 86.703 mm (3.4135 in.) Main bearing cap bolt outside diameter 10.760 - - 10.970 mm (0.4236 - - 0.4319 in.)
  • Page 66 Piston pin installing temperature 80 - - 90˚C (176 - - 194˚F ) Connecting rod Thrust clearance 0.160 - - 0.312 mm (0.0063 - - 0.0123 in.) (1RZ:, 1RZ- -E:) Maximum 0.35 mm (0.0138 in.) Connecting rod bearing center wall thickness (Reference) STD Mark 4 1.482 - - 1.485 mm (0.0583 - - 0.0585 in.)
  • Page 67 Minimum 7.60 mm (0.2992 in.) Crankshaft Thrust clearance 0.020 - - 0.220 mm(0.0008 - - 0.0087 in.) (1RZ:, 1RZ- -E:) Maximum 0.30 mm (0.0118 in.) Thrust washer thickness 2.440 - - 2.490 mm (0.0961 - - 0.0980 in.) Main journal oil clearance STD No.3...
  • Page 68 CLICK HERE TO VIEW CHAPTER INDEX 3RZ-F,3RZ-FE Pages From Supplement TO MODEL INDEX SS- -9 SERVICE SPECIFICATIONS ENGINE MECHANICAL Crankshaft Thrust clearance 0.020 - - 0.0220 mm (0.0008 - - 0.0087 in.) (2RZ- -FE:) Maximum 0.30 mm (0.0118 in.) Thrust washer thickness 2.440 - - 2.490 mm (0.0961 - - 0.0980 in.) Main journal oil clearance STD No.3...
  • Page 69 TO MODEL INDEX SS- -10 SERVICE SPECIFICATIONS ENGINE MECHANICAL SS0B2- -01 TO RQUE S P E CI F I CAT I ON 1RZ:, 1 RZ -- E: Part tightened N∙m kgf∙cm ft∙lbf Distributor x Cylinder head Camshaft bearing cap x Cylinder head...
  • Page 70 CLICK HERE TO VIEW CHAPTER INDEX Pages From Supplement 3RZ-F,3RZ-FE TO MODEL INDEX SS- -11 SERVICE SPECIFICATIONS ENGINE MECHANICAL 2RZ -- FE: Part tightened N∙m kgf∙cm ft∙lbf Spark plug x Cylinder head Cylinder head x Cylinder block 1 st Turn 90˚ Turn 90˚...
  • Page 71 CLICK HERE TO VIEW CHAPTER INDEX Pages From Supplement 3RZ-F,3RZ-FE TO MODEL INDEX SS- -12 SERVICE SPECIFICATIONS ENGINE MECHANICAL 3RZ -- F:, 3RZ -- FE: Part tighttened N∙m kgf∙cm ft∙lbf Spark plug x Cylinder head Cylinder head x Vacuum pipe 74 in.∙lbf Cylinder head x Cylinder block 1 st...
  • Page 72 CLICK HERE TO VIEW CHAPTER INDEX Pages From Supplement 3RZ-F,3RZ-FE TO MODEL INDEX SS- -13 SERVICE SPECIFICATIONS ENGINE MECHANICAL Main bearing cap x Cylinder block 1 st 2 nd Turn 90˚ Turn 90˚ Turn 90˚ No.1 balance shaft, No.2 balance chaft x Timing gear (3RZ- -FE:) Balance shaft thrust plate x Cylinder block (3RZ- -FE:) Rear oil seal retainer x Cylinder block 13.5...
  • Page 73 CLICK HERE TO VIEW CHAPTER INDEX Pages From Supplement 3RZ-F,3RZ-FE TO MODEL INDEX SS- -14 SERVICE SPECIFICATIONS EMISSION CONTROL EMISSION CONTROL SS0B3- -01 TO RQUE S P E CI F I CAT I ON Part tightened N∙m kgf∙cm ft∙lbf EGR pipe x Intake chamber assembly 2RZ- -FE: EGR pipe x Cylinder head 2RZ- -FE:...
  • Page 74 (2.7 - - 3.1 kgf/cm , 38 - - 44 psi) Fuel pump Resistance at 20˚C (68˚F) 0.2 - - 3.0 Ω Injector (1RZ- -E:) Resistance at 20˚C (68˚F) 13.4 - - 14.2 Ω Injection volume 44 - - 54 cm (3.3 - - 3.4 cu in.) per 15 seconds...
  • Page 75 VCC- -E2 4.5 - - 5.5 V Resistance 4 - - 6 kΩ Fuel cut RPM Fuel return rpm 1,200 rpm (1RZ- -E:) Fuel cut RPM Fuel return rpm 1,400 rpm (2RZ- -FE:) Fuel cut RPM Fuel return rpm 1,200 rpm...
  • Page 76 Fuel line (Flare nut type) w/ SST Fuel pump bracket assembly x Fuel tank 40 in.∙lbf Fuel pressure regulator x Delivery pipe 1RZ- -E: 78 in.∙lbf 2RZ- -FE:, 3RZ- -FE: 69 in.∙lbf Delivery pipe x Cylinder head Pulsation damper x Delivery pipe...
  • Page 77 CLICK HERE TO VIEW CHAPTER INDEX Pages From Supplement 3RZ-F,3RZ-FE TO MODEL INDEX SS- -18 SERVICE SPECIFICATIONS COOLING COOL I N G SS0B6- -01 SERVICE DATA Thermostat Valve opening temperature 80 - - 84˚C (176 - - 183˚F) Valve lift at 95˚C (203˚F) 8 mm (0.31 in.) or more Radiator cap Relief valve opening pressure...
  • Page 78 CLICK HERE TO VIEW CHAPTER INDEX 3RZ-F,3RZ-FE Pages From Supplement TO MODEL INDEX SS- -19 SERVICE SPECIFICATIONS COOLING SS0B7- -01 TO RQUE S P E CI F I CAT I ON Part tightened N∙m kgf∙cm ft∙lbf Cylinder block x Drain plug 24.5 Water pump pulley x Water pump...
  • Page 79 CLICK HERE TO VIEW CHAPTER INDEX 3RZ-F,3RZ-FE Pages From Supplement TO MODEL INDEX SS- -20 SERVICE SPECIFICATIONS LUBRICATION LUBRICATION SS0B8- -01 SERVICE DATA Oil pressure Normal operating temperature ar idle speed 29 kPa (0.3 kgf/cm , 4.3 psi) or more at 3,000 rpm 245 - - 490 kPa (2.5 - - 5.0 kgf/cm , 36 - - 71 psi)
  • Page 80 CLICK HERE TO VIEW CHAPTER INDEX 3RZ-F,3RZ-FE Pages From Supplement TO MODEL INDEX SS- -21 SERVICE SPECIFICATIONS LUBRICATION SS0B9- -01 TO RQUE S P E CI F I CAT I ON Part tightened N∙m kgf∙cm ft∙lbf Oil pan x Drain plug...
  • Page 81 Resistance Maximum 25 kΩ per cold Spark Plug Recommended spark plug IRZ ND W16EX- -U BP5EY 1RZ- -E ND W16EXR- -U BPR5EY 2RZ- -FE, 3RZ- -F, 3RZ- -FE ND K16R- -U BKR5EYA Correct electrode gap for new spark plug 0.8 mm (0.031 in.)
  • Page 82 CLICK HERE TO VIEW CHAPTER INDEX 3RZ-F,3RZ-FE Pages From Supplement TO MODEL INDEX SS- -23 SERVICE SPECIFICATIONS IGNITION SS0BB- -01 TO RQUE S P E CI F I CAT I ON Part tightened N∙m kgf∙cm ft∙lbf Spark plug x Cylinder head Ignition coil x Cylinder head 2RZ- -FE:, 3RZ- -FE: Camshaft position sensor x Cylinder head...
  • Page 83 CLICK HERE TO VIEW CHAPTER INDEX 3RZ-F,3RZ-FE Pages From Supplement TO MODEL INDEX SS- -24 SERVICE SPECIFICATIONS STARTING STARTING SS0BC- -01 SERVICE DATA Starter Rated voltage and output 1.0 kW, 1.2 kW, 1.4 kW, (1.0 kW, 1.2 kW, No- -load characteristics Current 90 A or less at 11.5 V 1.4 kW type)
  • Page 84 CLICK HERE TO VIEW CHAPTER INDEX 3RZ-F,3RZ-FE Pages From Supplement TO MODEL INDEX SS- -25 SERVICE SPECIFICATIONS STARTING SS0BD- -01 TO RQUE S P E CI F I CAT I ON Part tightened N∙m kgf∙cm ft∙lbf Field frame x Armature 52 in.∙lbf End frame x Starter housing 1.2 kW, 1.4 kW...
  • Page 85 CLICK HERE TO VIEW CHAPTER INDEX Pages From Supplement 3RZ-F,3RZ-FE TO MODEL INDEX SS- -26 SERVICE SPECIFICATIONS CHARGING CHARGING SS0BE- -01 SERVICE DATA Battery Specific gravity at 20˚C (68˚F) 1.25 - - 1.29 Drive belt Deflection New belt 5 - - 7 mm (0.20 - - 0.28 in.) Used belt 7 - - 8 mm (0.28 - - 0.31 in.) Tension...
  • Page 86 CLICK HERE TO VIEW CHAPTER INDEX 3RZ-F,3RZ-FE Pages From Supplement TO MODEL INDEX SS- -27 SERVICE SPECIFICATIONS CHARGING SS0BF- -01 TO RQUE S P E CI F I CAT I ON Part tightened N∙m kgf∙cm ft∙lbf Pulley x Rotor 1125 Retainer x Drive end frame 23 in.∙lbf Drive end frame x Rectifier end frame...
  • Page 87 Pages From Supplement DI AG NO STI CS TO MODEL INDEX ENGINE (1RZ--E) ......DI--1 HOW TO PROCEED WITH TROUBLESHOOTING .
  • Page 88 3RZ-F,3RZ-FE Pages From Supplement TO MODEL INDEX DI- -1 DIAGNOSTICS ENGINE (1RZ - - E) ENGINE (1RZ- -E) DI1HG- -01 HOW TO PROCEED WITH TROUBLESHOOTING Troubleshoot in accordance with the procedure on the following page. Titles inside are titles of pages in...
  • Page 89 CLICK HERE TO VIEW CHAPTER INDEX 3RZ-F,3RZ-FE Pages From Supplement TO MODEL INDEX DI- -2 DIAGNOSTICS ENGINE (1RZ- -E) DI1HH- -01 CUS TO M E R P ROBL E M ANALY S I S CHE CK Inspector’s ENGINE CONTROL SYSTEM Check Sheet Name Model and Model Customer’s Name...
  • Page 90 CLICK HERE TO VIEW CHAPTER INDEX 3RZ-F,3RZ-FE Pages From Supplement TO MODEL INDEX DI- -3 DIAGNOSTICS ENGINE (1RZ- -E) DI1HI- -01 PRE- -CHECK DIAGNOSIS SYSTEM Description The Engine ECU contains a built--in self--diagnosis sys- tem by which troubles with the engine signal network are detected and a check engine warning light in the com- bination meter lights up.
  • Page 91 Pages From Supplement TO MODEL INDEX DI- -4 DIAGNOSTICS ENGINE (1RZ- -E) DIAGNOSIS INSPECTION (Normal Mode) Check Engine warning Light Check The check engine warning light will light up when the ignition switch is turned ON and the engine is not running.
  • Page 92 CLICK HERE TO VIEW CHAPTER INDEX 3RZ-F,3RZ-FE Pages From Supplement TO MODEL INDEX DI- -5 DIAGNOSTICS ENGINE (1RZ- -E) As an example, the blinking patterns for codes; nor- 1.5 sec. 0.5 sec. mal, 12 and 31 are as shown on the illustration. 4.5 sec.
  • Page 93 CLICK HERE TO VIEW CHAPTER INDEX 3RZ-F,3RZ-FE Pages From Supplement TO MODEL INDEX DI- -6 DIAGNOSTICS ENGINE (1RZ- -E) HINT: Flashing To confirm that the test mode is operating, check that the check engine warning light flashes when the ignition switch turned ON.
  • Page 94 Pages From Supplement TO MODEL INDEX DI- -7 DIAGNOSTICS ENGINE (1RZ- -E) HINT: Cancellation can also be done by removing the negative (--) terminal cable from the battery, but in this case, other memory systems (clock, etc.) will also be cancelled out.
  • Page 95 Pages From Supplement 3RZ-F,3RZ-FE TO MODEL INDEX DI- -8 DIAGNOSTICS ENGINE (1RZ- -E) FAI L - - S AFE CHART If any of the following codes is recorded, the ECU enters fail--safe mode. Trouble Code No. Fail- -Safe Operation Fail- -Safe Deactivation Conditions...
  • Page 96 3RZ-F,3RZ-FE Pages From Supplement TO MODEL INDEX DI- -9 DIAGNOSTICS ENGINE (1RZ- -E) CHECK FOR INTERMITTENT PROBLEMS As previously described , abnormality detection ability in the Circuit test mode is increased compared to that in the normal mode, NE signal circuit...
  • Page 97 TO MODEL INDEX DI- -10 DIAGNOSTICS ENGINE (1RZ- -E) BASIC INSPECTION When the normal code is displayed in the diagnostic trouble code check, troubleshooting should be per- formed in the order for all possible circuits to be considered as the causes of the problems.
  • Page 98 CLICK HERE TO VIEW CHAPTER INDEX 3RZ-F,3RZ-FE Pages From Supplement TO MODEL INDEX DI- -11 DIAGNOSTICS ENGINE (1RZ- -E) Check air filter. PREPARATION: Remove air filter. CHECK: Visually check that the air filter is not excessively dirty or oily. HINT: If necessary, clean the air filter with compressed air.
  • Page 99 CLICK HERE TO VIEW CHAPTER INDEX 3RZ-F,3RZ-FE Pages From Supplement TO MODEL INDEX DI- -12 DIAGNOSTICS ENGINE (1RZ- -E) Check ignition timing. PREPARATION: Shift transmission into ”N” position or neutral. Warm up engine to normal operating temperature. Keep the engine speed at idle.
  • Page 100 Pages From Supplement TO MODEL INDEX DI- -13 DIAGNOSTICS ENGINE (1RZ- -E) Check for spark. CHECK: Disconnect the high--tension cord from the distributor and hold the end about 12.5 mm (1/2”) from the ground. See if spark occurs while the engine is being cranked.
  • Page 101 Pages From Supplement 3RZ-F,3RZ-FE TO MODEL INDEX DI- -14 DIAGNOSTICS ENGINE (1RZ- -E) Re fe re nc e Va l ue of E ngi ne E CU Da ta Hand--Held Tester HINT: Engine ECU data can be monitored by hand--held tester.
  • Page 102 3RZ-F,3RZ-FE Pages From Supplement TO MODEL INDEX DI- -15 DIAGNOSTICS ENGINE (1RZ- -E) DI1HJ- -01 DIAGNOSTIC TROUBLE CODE CHART HINT: Parameters listed in the chart may not be exactly the same as your reading due to the type of instrument or other factors.
  • Page 103 CLICK HERE TO VIEW CHAPTER INDEX 3RZ-F,3RZ-FE Pages From Supplement TO MODEL INDEX DI- -16 DIAGNOSTICS ENGINE (1RZ- -E) DI1HK- -01 PARTS LOCATION Combination Meter (Speed Meter) Ignition Switch Circuit Opening Relay Variable Resistor Intake Air Temp. Sensor Engine ECU...
  • Page 104 3RZ-F,3RZ-FE Pages From Supplement TO MODEL INDEX DI- -17 DIAGNOSTICS ENGINE (1RZ- -E) DI1HL- -01 T E RM I NAL S O F E CU ECU Terminals 13 12 11 10 9 26 25 24 23 22 21 20 19 18 17 16 15 14...
  • Page 105 Pages From Supplement TO MODEL INDEX DI- -18 DIAGNOSTICS ENGINE (1RZ- -E) DI1HM- -01 PROBLEM SYMPTOMS TABLE When the malfunction code is not confirmed in the diagnostic trouble code check and the problem still can not be confirmed in the basic inspection, proceed to this matrix chart and troubleshoot according to the num- bered order given below.
  • Page 106 CLICK HERE TO VIEW CHAPTER INDEX 3RZ-F,3RZ-FE Pages From Supplement TO MODEL INDEX DI- -19 DIAGNOSTICS ENGINE (1RZ- -E) Symptom Suspect Area See page 1. Vacuum sensor circuit DI - - 35 2. Injector circuit DI - - 57 3. Fuel system circuit...
  • Page 107 CLICK HERE TO VIEW CHAPTER INDEX 3RZ-F,3RZ-FE Pages From Supplement TO MODEL INDEX PAGE 1 OF 2 DIAGNOSTICS – ENGINE (1RZ – E) DTC 12: NE SIGNAL CIRCUIT DI-20 CIRCUIT DESCRIPTION DI-20 WIRING DIAGRAM DI-20 INSPECTION PROCEDURE DI-21/22 DTC 13: NE SIGNAL CIRCUIT...
  • Page 108 CLICK HERE TO VIEW CHAPTER INDEX 3RZ-F,3RZ-FE Pages From Supplement TO MODEL INDEX DIAGNOSTICS – ENGINE (1RZ – E) PAGE 2 OF 2 CIRCUIT DESCRIPTION DI-49 WIRING DIAGRAM DI-49 INSPECTION PROCEDURE DI-50/53 BACK UP POWER SOURCE CIRCUIT DI-54 CIRCUIT DESCRIPTION...
  • Page 109 3RZ-F,3RZ-FE Pages From Supplement TO MODEL INDEX DI- -20 DIAGNOSTICS ENGINE (1RZ- -E) DI1HN- -01 NE Signal Circuit CIRCUIT DESCRIPTION The IIA in the Engine Control System contains signal plate and a pickup coil for NE signal. The NE signal plate has 4 teeth on its outer circumference. The NE signal sensor generates 4 signals for every engine revolution.
  • Page 110 Pages From Supplement 3RZ-F,3RZ-FE TO MODEL INDEX DI- -21 DIAGNOSTICS ENGINE (1RZ- -E) INSPECTION PROCEDURE Ch eck resistan ce o f p icku p co il in d istrib u t o r (NE) . PREPARATION: Disconnect distributor connector. CHE CK: NE⊖...
  • Page 111 CLICK HERE TO VIEW CHAPTER INDEX 3RZ-F,3RZ-FE Pages From Supplement TO MODEL INDEX DI- -22 DIAGNOSTICS ENGINE (1RZ- -E) Check air gap. PREPARATION: Remove distributor cap, rotor and dust cover. Air Gap CHECK: Using a feeler gauge, measure the air gap between the signal rotor and pickup coil projection.
  • Page 112 CLICK HERE TO VIEW CHAPTER INDEX 3RZ-F,3RZ-FE Pages From Supplement TO MODEL INDEX DI- -23 DIAGNOSTICS ENGINE (1RZ- -E) DI1HO- -01 NE Signal Circuit CIRCUIT DESCRIPTION Refer to NE signal circuit on page DI -- 20. DTC No. Detection Item...
  • Page 113 3RZ-F,3RZ-FE Pages From Supplement TO MODEL INDEX DI- -24 DIAGNOSTICS ENGINE (1RZ- -E) DI1HP- -01 I gniti on Signal Circuit CIRCUIT DESCRIPTION The ECU determines the ignition timing, turns ON Tr1 at a predetermined angle (˚CA) before the desired ignition timing and outputs an ignition signal (IGT) ”1” to the igniter.
  • Page 114 3RZ-F,3RZ-FE Pages From Supplement TO MODEL INDEX DI- -25 DIAGNOSTICS ENGINE (1RZ- -E) INSPECTION PROCEDURE Check spark plug and spark (See Pub. No. RM467E). Go to step 4. Check for open and short in harness and connector in IGF signal circuit between engine ECU and IIA (See page IN- -21).
  • Page 115 Pages From Supplement TO MODEL INDEX DI- -26 DIAGNOSTICS ENGINE (1RZ- -E) Check for open and short in harness and connector in IGT signal circuit between engine ECU and IIA (See page IN- -21). Repair or replace harness or connector.
  • Page 116 CLICK HERE TO VIEW CHAPTER INDEX 3RZ-F,3RZ-FE Pages From Supplement TO MODEL INDEX DI- -27 DIAGNOSTICS ENGINE (1RZ- -E) Disconnect IIA connector and check voltage between terminal IGT of engine ECU connector and body ground. PREPARATION: START Disconnect igniter connector.
  • Page 117 CLICK HERE TO VIEW CHAPTER INDEX 3RZ-F,3RZ-FE Pages From Supplement TO MODEL INDEX DI- -28 DIAGNOSTICS ENGINE (1RZ- -E) Check ignition coil (See Pub. No. RM467E). Replace ignition coil. Replace igniter.
  • Page 118 Pages From Supplement 3RZ-F,3RZ-FE TO MODEL INDEX DI- -29 DIAGNOSTICS ENGINE (1RZ- -E) DI1HQ- -01 Water Tem p . S ensor Ci r cui t CIRCUIT DESCRIPTION The water temperature sensor senses the coolant temperature. A thermistor built into the sensor changes the resistance value according to the coolant temperature.
  • Page 119 3RZ-F,3RZ-FE TO MODEL INDEX DI- -30 DIAGNOSTICS ENGINE (1RZ- -E) INSPECTION PROCEDURE HINT: If diagnostic trouble code ”22” (water temperature sensor circuit), ”24” (intake air temperature sensor circuit), ”31” (vacuum sensor circuit) and ”41” (throttle position sensor circuit) are output simultaneously, E2 (sensor ground) may be open.
  • Page 120 3RZ-F,3RZ-FE TO MODEL INDEX DI- -31 DIAGNOSTICS ENGINE (1RZ- -E) Check for open and short in harness and connector between engine ECU and water t emp . sen so r ( See p ag e IN - - 21). Repair or replace harness or connector.
  • Page 121 Pages From Supplement 3RZ-F,3RZ-FE TO MODEL INDEX DI- -32 DIAGNOSTICS ENGINE (1RZ- -E) DI1HR- -01 DT C I ntake Ai r Tem p. Sensor Ci rcuit CIRCUIT DESCRIPTION The intake air temp. sensor is built into the air cleaner cap and senses the intake air temperature.
  • Page 122 3RZ-F,3RZ-FE TO MODEL INDEX DI- -33 DIAGNOSTICS ENGINE (1RZ- -E) INSPECTION PROCEDURE HINT: If diagnostic trouble code ”22” (water temperature sensor circuit), ”24” (intake air temperature sensor circuit), ”31” (vacuum sensor circuit) and ”41”(throttle position sensor circuit) are output simultaneously, E2 (sensor ground) may be open.
  • Page 123 Pages From Supplement TO MODEL INDEX DI- -34 DIAGNOSTICS ENGINE (1RZ- -E) Check for open and short in harness and connector between engine ECU and intake air temp. sensor (See page IN- - 21). Repair or replace harness or connector.
  • Page 124 3RZ-F,3RZ-FE Pages From Supplement TO MODEL INDEX DI- -35 DIAGNOSTICS ENGINE (1RZ- -E) DI1HS- -01 Vacuum Sensor Circuit CIRCUIT DESCRIPTION By a built--in sensor unit, the vacuum sensor detects the intake manifold pressure as a voltage. The ECU then determines the basic injection duration and basic ignition advance angle based (3.96)
  • Page 125 CLICK HERE TO VIEW CHAPTER INDEX 3RZ-F,3RZ-FE Pages From Supplement TO MODEL INDEX DI- -36 DIAGNOSTICS ENGINE (1RZ- -E) INSPECTION PROCEDURE Check voltage between terminals VC and E2 of engine ECU connector. PREPARATION: Remove the glove compartment.(See page FI -- 61) Turn ignition switch ON.
  • Page 126 CLICK HERE TO VIEW CHAPTER INDEX 3RZ-F,3RZ-FE Pages From Supplement TO MODEL INDEX DI- -37 DIAGNOSTICS ENGINE (1RZ- -E) DI1HT- -01 Throttle Position Sensor Circuit CIRCUIT DESCRIPTION The throttle position sensor is mounted in the throttle body and Throttle Position detects the throttle valve opening angle.
  • Page 127 Pages From Supplement TO MODEL INDEX DI- -38 DIAGNOSTICS ENGINE (1RZ- -E) INSPECTION PROCEDURE HINT: If diagnostic trouble codes ”22” (water temperature sensor circuit), ”24” (intake air temperature sensor circuit) ”31” (vacuum sensor circuit) and ”41” (throttle position sensor circuit) are output simultaneously, E2 (sensor ground) may be open.
  • Page 128 CLICK HERE TO VIEW CHAPTER INDEX 3RZ-F,3RZ-FE Pages From Supplement TO MODEL INDEX DI- -39 DIAGNOSTICS ENGINE (1RZ- -E) Check throttle position sensor. PREPARATION: Disconnect throttle position sensor connector. CHECK: Measure resistance between terminals 3, 4 and 1 of throttle position sensor connector when the throttle valve is opened gradually from the closed condition.
  • Page 129 Pages From Supplement 3RZ-F,3RZ-FE TO MODEL INDEX DI- -40 DIAGNOSTICS ENGINE (1RZ- -E) DI1HU- -01 Vehicle Speed Sensor Signal Circuit CIRCUIT DESCRIPTION This sensor is mounted in the combination meter. It contains a magnet which is rotated by the speedometer cable.
  • Page 130 CLICK HERE TO VIEW CHAPTER INDEX 3RZ-F,3RZ-FE Pages From Supplement TO MODEL INDEX DI- -41 DIAGNOSTICS ENGINE (1RZ- -E) INSPECTION PROCEDURE Check operation of speedometer. CHECK: Drive the vehicle and check if the operation of the speedometer in the combination meter is normal. HINT: The vehicle speed sensor is operating normally if the speedometer display is normal.
  • Page 131 Pages From Supplement TO MODEL INDEX DI- -42 DIAGNOSTICS ENGINE (1RZ- -E) DI1HV- -01 Starter Signal Circuit CIRCUIT DESCRIPTION When the engine is cranked, the intake air flow is slow, so fuel vaporization is poor. A rich mixture is therefore necessary in order to achieve good startability.
  • Page 132 Pages From Supplement TO MODEL INDEX DI- -43 DIAGNOSTICS ENGINE (1RZ- -E) INSPECTION PROCEDURE HINT: This diagnostic chart is based on the premise that the engine is cranked normally. If the engine is not cranked, proceed to the problem symptoms table on page DI -- 18.
  • Page 133 3RZ-F,3RZ-FE Pages From Supplement TO MODEL INDEX DI- -44 DIAGNOSTICS ENGINE (1RZ- -E) DI1HW- -01 Switch Condition Signal Circuit CIRCUIT DESCRIPTION Air Conditioning Switch Signal The ECU uses the output from the air conditioning switch to determine whether or not the air conditioning is operating so that it can increase the idling speed of the engine if necessary.
  • Page 134 CLICK HERE TO VIEW CHAPTER INDEX 3RZ-F,3RZ-FE Pages From Supplement TO MODEL INDEX DI- -45 DIAGNOSTICS ENGINE (1RZ- -E) INSPECTION PROCEDURE Check output condition of diagnostic trouble code 51. PREPARATION: Setting the test mode. Turn ignition switch OFF. Using SST, connector terminals TE2 and E1 of check con- nector.
  • Page 135 CLICK HERE TO VIEW CHAPTER INDEX 3RZ-F,3RZ-FE Pages From Supplement TO MODEL INDEX DI- -46 DIAGNOSTICS ENGINE (1RZ- -E) Check resistance of throttle position sensor. PREPARATION: Disconnect throttle position sensor connector. CHECK: (--) Measure resistance between terminals IDL and E2 of throttle position sensor connector.
  • Page 136 3RZ-F,3RZ-FE Pages From Supplement TO MODEL INDEX DI- -47 DIAGNOSTICS ENGINE (1RZ- -E) Check for open and short in harness and connector between engine ECU and A/C amplifier (See page IN- - 21). Repair or replace harness or connector. Check and replace engine ECU.
  • Page 137 CLICK HERE TO VIEW CHAPTER INDEX Pages From Supplement 3RZ-F,3RZ-FE TO MODEL INDEX DI- -48 DIAGNOSTICS ENGINE (1RZ- -E) DI1HX- -01 S tarter S i gnal Ci rcui t * CIRCUIT DESCRIPTION Refer to DTC43 (Starter Signal Circuit) on page DI -- 42.
  • Page 138 3RZ-F,3RZ-FE Pages From Supplement TO MODEL INDEX DI- -49 DIAGNOSTICS ENGINE (1RZ- -E) DI1HY- -01 ECU Power Source Circuit CIRCUIT DESCRIPTION When the ignition switch is turned ON, battery positive voltage is applied to the coil, closing the contacts of the EFI main relay and supplying power to the terminal +B of the ECU.
  • Page 139 CLICK HERE TO VIEW CHAPTER INDEX 3RZ-F,3RZ-FE Pages From Supplement TO MODEL INDEX DI- -50 DIAGNOSTICS ENGINE (1RZ- -E) INSPECTION PROCEDURE Check voltage between terminals +B and E1 of engine ECU connector. PREPARATION: Remove the glove compartment.(See page FI -- 61) Turn ignition switch ON.
  • Page 140 CLICK HERE TO VIEW CHAPTER INDEX 3RZ-F,3RZ-FE Pages From Supplement TO MODEL INDEX DI- -51 DIAGNOSTICS ENGINE (1RZ- -E) Check EFI main relay. PREPARATION: Remove EFI main relay from engine room J/B. CHECK: Check continuity between terminals EFI main relay shown be- low.
  • Page 141 CLICK HERE TO VIEW CHAPTER INDEX 3RZ-F,3RZ-FE Pages From Supplement TO MODEL INDEX DI- -52 DIAGNOSTICS ENGINE (1RZ- -E) Check ignition switch. PREPARATION: Remove lower finish panel. Disconnect the ignition switch connector. CHECK: Check continuity between terminals shown below. Switch Position Terminal No.
  • Page 142 CLICK HERE TO VIEW CHAPTER INDEX 3RZ-F,3RZ-FE Pages From Supplement TO MODEL INDEX DI- -53 DIAGNOSTICS ENGINE (1RZ- -E) Check EFI fuse. PREPARATION: Remove EFI fuse from engine room J/B. CHECK: Check continuity of EFI fuse. Continuity Check for short in all the harness and compo-...
  • Page 143 Pages From Supplement TO MODEL INDEX DI- -54 DIAGNOSTICS ENGINE (1RZ- -E) DI1HZ- -01 Back Up Power Source Circuit CIRCUIT DESCRIPTION Battery positive voltage is supplied to terminal BATT of the ECU even when the ignition switch is OFF for use by the diagnostic trouble code memory, air--fuel ratio adaptive control value memory, etc.
  • Page 144 CLICK HERE TO VIEW CHAPTER INDEX 3RZ-F,3RZ-FE Pages From Supplement TO MODEL INDEX DI- -55 DIAGNOSTICS ENGINE (1RZ- -E) INSPECTION PROCEDURE Check EFI fuse. PREPARATION: Remove EFI fuse from engine room J/B. CHECK: Check continuity of EFI fuse. Continuity Check for short in all the harness and compo-...
  • Page 145 Pages From Supplement TO MODEL INDEX DI- -56 DIAGNOSTICS ENGINE (1RZ- -E) Are the diagnostic trouble codes still in the memory when the ignition switch is turned OFF? Check and replace engine ECU. Proceed to next circuit inspection shown on problem symptoms table (See page DI- -18).
  • Page 146 3RZ-F,3RZ-FE Pages From Supplement TO MODEL INDEX DI- -57 DIAGNOSTICS ENGINE (1RZ- -E) DI1I0- -01 Injector Circuit CIRCUIT DESCRIPTION The injectors are situated in the intake manifold. They inject fuel into the cylinders based on the signals from the engine ECU.
  • Page 147 CLICK HERE TO VIEW CHAPTER INDEX Pages From Supplement 3RZ-F,3RZ-FE TO MODEL INDEX DI- -58 DIAGNOSTICS ENGINE (1RZ- -E) INSPECTION PROCEDURE Check voltage between terminals #10, #20 of engine ECU and body ground. PREPARATION: Remove the glove compartment.(See page FI -- 61) Turn ignition switch ON.
  • Page 148 CLICK HERE TO VIEW CHAPTER INDEX Pages From Supplement 3RZ-F,3RZ-FE TO MODEL INDEX DI- -59 DIAGNOSTICS ENGINE (1RZ- -E) Ch eck in jecto rs. PREPARATION: Disconnect injector connectors. CHE CK: Measure resistance of injectors. Resistance: At 20˚C (68˚F): 13.4 - - 14.2 Ω...
  • Page 149 3RZ-F,3RZ-FE Pages From Supplement TO MODEL INDEX DI- -60 DIAGNOSTICS ENGINE (1RZ- -E) DI1I1- -01 Fuel System Circuit CIRCUIT DESCRIPTION In the diagram below, when the engine is cranked, current flows from terminal ST of the ignition switch to the starter relay coil and also current flows to terminal STA of ECU (STA signal).
  • Page 150 CLICK HERE TO VIEW CHAPTER INDEX 3RZ-F,3RZ-FE Pages From Supplement TO MODEL INDEX DI- -61 DIAGNOSTICS ENGINE (1RZ- -E) WIRING DIAGRAM Passenger Side R/B Engine ECU R--L R--L R--L G--Y W--B R--L G--W Circuit Opening junction Relay Connector G--W Fuel...
  • Page 151 CLICK HERE TO VIEW CHAPTER INDEX 3RZ-F,3RZ-FE Pages From Supplement TO MODEL INDEX DI- -62 DIAGNOSTICS ENGINE (1RZ- -E) INSPECTION PROCEDURE Check voltage terminal FC. PREPARATION: Remove the glove compartment.(See page FI -- 61) Turn ignition switch ON. CHECK: Measure voltage between terminal FC of engine ECU connec- tor and body ground.
  • Page 152 CLICK HERE TO VIEW CHAPTER INDEX 3RZ-F,3RZ-FE Pages From Supplement TO MODEL INDEX DI- -63 DIAGNOSTICS ENGINE (1RZ- -E) Check circuit opening relay. PREPARATION: Remove the driver’s cowl side trim. Remove circuit opening relay. CHECK: Check continuity between terminals of circuit opening relay shown below.
  • Page 153 3RZ-F,3RZ-FE Pages From Supplement TO MODEL INDEX DI- -64 DIAGNOSTICS ENGINE (1RZ- -E) DI1I2- -01 TE1, TE2 Terminal Circuit CIRCUIT DESCRIPTION Terminals TE1 and TE2 are located in the check connector. The check connector is located in the engine compartment. When these terminals are connected with the E1 terminal, diagnostic trouble codes in normal mode or test mode can be read from the check engine warn- ing light in the combination meter.
  • Page 154 3RZ-F,3RZ-FE Pages From Supplement TO MODEL INDEX DI- -65 DIAGNOSTICS ENGINE (1RZ- -E) INSPECTION PROCEDURE HINT: If terminals TE1 and TE2 are connected with terminal E1, diagnostic trouble code is not output or test mode is not activated. Even though terminal TE1 is not connected with terminal E1, the check engine warning light blinks.
  • Page 155 Pages From Supplement TO MODEL INDEX DI- -66 DIAGNOSTICS ENGINE (1RZ- -E) Check for open and short in harness and connector between terminal TE1, TE2 of engine ECU and check connector (See page IN- -21). Repair or replace harness or connector.
  • Page 156 3RZ-F,3RZ-FE Pages From Supplement TO MODEL INDEX DI- -67 DIAGNOSTICS ENGINE (1RZ- -E) DI1I3- -01 Variable Resistor Circuit. CIRCUIT DESCRIPTION This resistor is used to change the air--fuel ratio of the air--fuel mixture. The idle mixture is adjusted using this resistor.
  • Page 157 3RZ-F,3RZ-FE Pages From Supplement TO MODEL INDEX DI- -68 DIAGNOSTICS ENGINE (1RZ- -E) INSPECTION PROCEDURE NOTICE: Always use a CO meter when adjusting the idle mixture. If a CO meter is not available, DO NOT ATTEMPT TO ADJUST IDLE MIXTURE.
  • Page 158 CLICK HERE TO VIEW CHAPTER INDEX 3RZ-F,3RZ-FE Pages From Supplement TO MODEL INDEX DI- -69 DIAGNOSTICS ENGINE (1RZ- -E) Adjust CO concentration. PREPARATION: Same condition as step 1 of this chart. CHE CK: Using SST, adjust the mixture by turning the idle mixture adjusting screw in the variable resistor.
  • Page 159 CLICK HERE TO VIEW CHAPTER INDEX 3RZ-F,3RZ-FE Pages From Supplement TO MODEL INDEX DI- -70 DIAGNOSTICS ENGINE (1RZ- -E) Check resistance of variable resistor. Check Resistance Between 1 and 2: Ohmmeter PREPARATION: 1 (VC) 2 (E2) Disconnect the variable resistor connector.
  • Page 160 CLICK HERE TO VIEW CHAPTER INDEX 3RZ-F,3RZ-FE Pages From Supplement TO MODEL INDEX DI- -71 DIAGNOSTICS ENGINE (1RZ- -E) Check voltage between terminals VAF and E2 of engine ECU connector. PREPARATION: Reconnect the variable resistor connector. Remove the glove compartment.(See page FI -- 61) Turn the ignition switch ON.
  • Page 161 CLICK HERE TO VIEW CHAPTER INDEX 3RZ-F,3RZ-FE Pages From Supplement TO MODEL INDEX DI- -72 DIAGNOSTICS ENGINE (2RZ- -FE, 3RZ- -FE) ENGINE (2RZ- -FE, 3RZ- -FE) DI1I4- -01 HOW TO PROCEED WITH TROUBLESHOOTING When using hand--held tester, troubleshooting in accordance with the procedure on the following page. Titles inside are titles of pages in Vehicle Brought to Workshop...
  • Page 162 CLICK HERE TO VIEW CHAPTER INDEX 3RZ-F,3RZ-FE Pages From Supplement TO MODEL INDEX DI- -73 DIAGNOSTICS ENGINE (2RZ- -FE, 3RZ- -FE) When not using hand--held tester, troubleshooting in accordance with the procedure on the following pages. Titles inside are titles of pages in Vehicle Brought to Workshop this manual with the page number indicated in the bottom portion.
  • Page 163 CLICK HERE TO VIEW CHAPTER INDEX Pages From Supplement 3RZ-F,3RZ-FE TO MODEL INDEX DI- -74 DIAGNOSTICS ENGINE (2RZ- -FE, 3RZ- -FE) DI1I5- -01 CUS TO M E R P ROBL E M ANALY S I S CHE CK Inspector’s ENGINE CONTROL SYSTEM Check Sheet Name Model and Model Customer’s Name...
  • Page 164 CLICK HERE TO VIEW CHAPTER INDEX 3RZ-F,3RZ-FE Pages From Supplement TO MODEL INDEX DI- -75 DIAGNOSTICS ENGINE (2RZ- -FE, 3RZ- -FE) DI1I6- -01 PRE- -CHECK DIAGNOSIS SYSTEM Description When troubleshooting Multiplex OBD (M--OBD) ve- hicles, the only difference from the usual trouble- shooting procedure is that you connect the hand-- held tester to the vehicle, and read off various data output from the vehicle’s ECU.
  • Page 165 CLICK HERE TO VIEW CHAPTER INDEX 3RZ-F,3RZ-FE Pages From Supplement TO MODEL INDEX DI- -76 DIAGNOSTICS ENGINE (2RZ- -FE, 3RZ- -FE) * 2 trip detection logic When a logic malfunction is fist detected, the mal- function is temporaily stored in the ECU memory. If the same malfunction is detected again during the second drive test, this second detection cases the check engine warning (CHK ENG) to light up.
  • Page 166 CLICK HERE TO VIEW CHAPTER INDEX 3RZ-F,3RZ-FE Pages From Supplement TO MODEL INDEX DI- -77 DIAGNOSTICS ENGINE (2RZ- -FE, 3RZ- -FE) If communication is still not possible is when the tool is connected to another vehicle, the problem is probably in the tool itself, so consult the Service deparment listed in the tool,s instruction manual.
  • Page 167 CLICK HERE TO VIEW CHAPTER INDEX 3RZ-F,3RZ-FE Pages From Supplement TO MODEL INDEX DI- -78 DIAGNOSTICS ENGINE (2RZ- -FE, 3RZ- -FE) Read the DTC from the check engine warning light (CHK ENG). 0.25 sec. ON ON OFF OFF OFF 0.25 sec. FI0294 As an example, the blinking patterns for codes, nor- 0.5 sec.
  • Page 168 CLICK HERE TO VIEW CHAPTER INDEX 3RZ-F,3RZ-FE Pages From Supplement TO MODEL INDEX DI- -79 DIAGNOSTICS ENGINE (2RZ- -FE, 3RZ- -FE) Switch the hand--held tester normal mode to check (test) mode. (Check that the check engine warning light (CHK ENG) flashes.) Flashing Start the engine.
  • Page 169 CLICK HERE TO VIEW CHAPTER INDEX Pages From Supplement 3RZ-F,3RZ-FE TO MODEL INDEX DI- -80 DIAGNOSTICS ENGINE (2RZ- -FE, 3RZ- -FE) FAI L - - S AFE CHART If any of the following codes is recorded, the ECU enters fail--safe mode. DTC No.
  • Page 170 CLICK HERE TO VIEW CHAPTER INDEX 3RZ-F,3RZ-FE Pages From Supplement TO MODEL INDEX DI- -81 DIAGNOSTICS ENGINE (2RZ- -FE, 3RZ- -FE) Is engine cranked ? Proceed to page ST- -5, ST- -15 and continue to troubleshoot. Does engine start ? Go to step 7 Check air filter.
  • Page 171 CLICK HERE TO VIEW CHAPTER INDEX 3RZ-F,3RZ-FE Pages From Supplement TO MODEL INDEX DI- -82 DIAGNOSTICS ENGINE (2RZ- -FE, 3RZ- -FE) Check engine idle speed. PREPARATION: TACH Warm up engine to normal operating temperature. Switch off all accessories. Switch off air conditioning. Shift transmission into the ”N”...
  • Page 172 CLICK HERE TO VIEW CHAPTER INDEX 3RZ-F,3RZ-FE Pages From Supplement TO MODEL INDEX DI- -83 DIAGNOSTICS ENGINE (2RZ- -FE, 3RZ- -FE) Check ignition timing. PREPARATION: Warm up engine to normal operating temperature. Switch off all accessories. Switch off air conditioning Shift transmission into the ”N”...
  • Page 173 CLICK HERE TO VIEW CHAPTER INDEX 3RZ-F,3RZ-FE Pages From Supplement TO MODEL INDEX DI- -84 DIAGNOSTICS ENGINE (2RZ- -FE, 3RZ- -FE) Check fuel pressure. PREPARATION: Be sure that enough fuel is in the tank. Turn the ignition switch ON. Connect the hand--held tester to the DLC3. Use ACTIVE TEST mode to operate the fuel pump.
  • Page 174 CLICK HERE TO VIEW CHAPTER INDEX Pages From Supplement 3RZ-F,3RZ-FE TO MODEL INDEX DI- -85 DIAGNOSTICS ENGINE (2RZ- -FE, 3RZ- -FE) ENGINE OPERATING CONDITION NOTICE: The values given below for ”Normal Condition” are representative values, so a vehicle may still be normal even if its value from those listed here.
  • Page 175 CLICK HERE TO VIEW CHAPTER INDEX 3RZ-F,3RZ-FE Pages From Supplement TO MODEL INDEX DI- -86 DIAGNOSTICS ENGINE (2RZ- -FE, 3RZ- -FE) Hand- -held tester display Measurement Item Normal Condition* INJECTOR Fuel injection time for cylinder No.1 Idling: 2.5 ∼ 4.3 ms Intake Air Control Valve Duty Ratio ISC DUTY RATIO Idling: 24.8 ∼...
  • Page 176 CLICK HERE TO VIEW CHAPTER INDEX 3RZ-F,3RZ-FE Pages From Supplement TO MODEL INDEX DI- -87 DIAGNOSTICS ENGINE (2RZ- -FE, 3RZ- -FE) DI1I7- -01 DIAGNOSTIC TROUBLE CODE CHART SAE CONTROLLED HINT: Parameters listed in the chart may not be exactly the same as your reading due to the type of instrument or other factors.
  • Page 177 CLICK HERE TO VIEW CHAPTER INDEX 3RZ-F,3RZ-FE Pages From Supplement TO MODEL INDEX DI- -88 DIAGNOSTICS ENGINE (2RZ- -FE, 3RZ- -FE) DTC No. CHK ENG Detection Item Trouble Area Memory ( S ee P age) S Open or short in camshaft position sensor circuit P0340/12 Camshaft Position Sensor S Camshaft position sensor...
  • Page 178 CLICK HERE TO VIEW CHAPTER INDEX 3RZ-F,3RZ-FE Pages From Supplement TO MODEL INDEX DI- -89 DIAGNOSTICS ENGINE (2RZ- -FE, 3RZ- -FE) DI1I8- -01 PARTS LOCATION Ignition Switch Heated Oxygen Sensor (Bank1 Sensor1) (2RZ--FE) DLC3 Throttle Position Sensor Water Temp. Sensor Engine ECU ISC Valve Check Connector...
  • Page 179 CLICK HERE TO VIEW CHAPTER INDEX Pages From Supplement 3RZ-F,3RZ-FE TO MODEL INDEX DI- -90 DIAGNOSTICS ENGINE (2RZ- -FE, 3RZ- -FE) DI1I9- -01 T E RM I NAL S O F E CU ECM Terminals P19559 Symbols (Terminals No.) Wiring Color Condition STD Voltage (V) BATT (E6 - - 1) - - E1 (E4 - - 14)
  • Page 180 CLICK HERE TO VIEW CHAPTER INDEX 3RZ-F,3RZ-FE Pages From Supplement TO MODEL INDEX DI- -91 DIAGNOSTICS ENGINE (2RZ- -FE, 3RZ- -FE) Symbols (Terminals No.) Wiring Color Condition STD Voltage (V) Pulse generation G2 (E4 - - 5) - - NE⊖ (E4 - - 17) B ↔...
  • Page 181 CLICK HERE TO VIEW CHAPTER INDEX 3RZ-F,3RZ-FE Pages From Supplement TO MODEL INDEX DI- -92 DIAGNOSTICS ENGINE (2RZ- -FE, 3RZ- -FE) DI1IA- -01 PROBLEM SYMPTOMS TABLE When the malfunction code is not confirmed in the diagnostic trouble code check and the problem still can not be confirmed in the basic inspection, proceed to this problem symptoms tables and troubleshoot accord- ing to the numbered order given below.
  • Page 182 CLICK HERE TO VIEW CHAPTER INDEX 3RZ-F,3RZ-FE Pages From Supplement TO MODEL INDEX DI- -93 DIAGNOSTICS ENGINE (2RZ- -FE, 3RZ- -FE) 1. ISC valve circuit D I - - 146 2. Air flow meter circuit DI - - 94 Hunting (Poor idling) 3.
  • Page 183 CLICK HERE TO VIEW CHAPTER INDEX 3RZ-F,3RZ-FE Pages From Supplement TO MODEL INDEX PAGE 1 OF 3 DIAGNOSTICS – ENGINE (2RZ-FE, 3RZ-FE) DTC P0100/31: AIR FLOW CIRCUIT MALFUNCTION DI-94 CIRCUIT DESCRIPTION DI-94 WIRING DIAGRAM DI-95 INSPECTION PROCEDURE DI-95/100 DTC P0110/24: INTAKE AIR TEMP. CIRCUIT MALFUNCTION DI-101 CIRCUIT DESCRIPTION DI-101...
  • Page 184 CLICK HERE TO VIEW CHAPTER INDEX 3RZ-F,3RZ-FE Pages From Supplement TO MODEL INDEX DIAGNOSTICS – ENGINE (2RZ-FE, 3RZ-FE) PAGE 2 OF 3 WIRING DIAGRAM DI-137 INSPECTION PROCEDURE DI-138/139 DTC P0340/12: CAMSHAFT POSITION SENSOR CIRCUIT MALFUNCTION DI-140 CIRCUIT DESCRIPTION DI-140 WIRING DIAGRAM DI-140 INSPECTION PROCEDURE DI-141/142...
  • Page 185 CLICK HERE TO VIEW CHAPTER INDEX 3RZ-F,3RZ-FE Pages From Supplement TO MODEL INDEX DIAGNOSTICS – ENGINE (2RZ-FE, 3RZ-FE) PAGE 3 OF 3 FUEL PUMP CONTROL CIRCUIT DI-174 CIRCUIT DESCRIPTION DI-174 WIRING DIAGRAM DI-174 INSPECTION PROCEDURE DI-175/177 EGR SYSTEM (2RZ-FE) DI-178 CIRCUIT DESCRIPTION DI-178 INSPECTION PROCEDURE...
  • Page 186 CLICK HERE TO VIEW CHAPTER INDEX 3RZ-F,3RZ-FE Pages From Supplement TO MODEL INDEX DI- -94 DIAGNOSTICS ENGINE (2RZ- -FE, 3RZ- -FE) DI1IB- -01 CIRCUIT INSPECTION P0100/31 Air Flow Circuit Malfunction CIRCUIT DESCRIPTION The air flow meter uses a platinum hot wire. The hot wire air flow meter consists of a platinum hot wire, therm- istor and a control circuit installed in a plastic housing.
  • Page 187 CLICK HERE TO VIEW CHAPTER INDEX 3RZ-F,3RZ-FE Pages From Supplement TO MODEL INDEX DI- -95 DIAGNOSTICS ENGINE (2RZ- -FE, 3RZ- -FE) WIRING DIAGRAM Engine Room R/B Engine ECU EFI Relay R--L 2RZ--FE B--W (*1) 22 IJ1 (*2) W--B R--L *3 7 IJ4 Driver Side J/B R--L B--R...
  • Page 188 CLICK HERE TO VIEW CHAPTER INDEX 3RZ-F,3RZ-FE Pages From Supplement TO MODEL INDEX DI- -96 DIAGNOSTICS ENGINE (2RZ- -FE, 3RZ- -FE) When using hand- -held tester Connect the hand- -held tester, and read value of air flow rate. PREPARATION: Connect the hand -- held tester to the DLC3. Turn ignition switch ON and push the hand--held tester main switch ON.
  • Page 189 CLICK HERE TO VIEW CHAPTER INDEX 3RZ-F,3RZ-FE Pages From Supplement TO MODEL INDEX DI- -97 DIAGNOSTICS ENGINE (2RZ- -FE, 3RZ- -FE) Check voltage between terminals VG of engine ECU connector and body ground. PREPARATION: Remove the glove compartment (See page FI -- 61). Start the engine.
  • Page 190 CLICK HERE TO VIEW CHAPTER INDEX 3RZ-F,3RZ-FE Pages From Supplement TO MODEL INDEX DI- -98 DIAGNOSTICS ENGINE (2RZ- -FE, 3RZ- -FE) Check continuity between terminal E3 of engine ECU connector and body ground. PREPARATION: Remove the glove compartment (See page FI -- 61). CHECK: Check continuity between terminal E3 of engine ECU connec- tor and body ground.
  • Page 191 CLICK HERE TO VIEW CHAPTER INDEX 3RZ-F,3RZ-FE Pages From Supplement TO MODEL INDEX DI- -99 DIAGNOSTICS ENGINE (2RZ- -FE, 3RZ- -FE) When not using hand- -held tester Check voltage between terminal VG of engine ECU and ground. PREPARATION: Remove the glove compartment (See page FI -- 61).
  • Page 192 CLICK HERE TO VIEW CHAPTER INDEX 3RZ-F,3RZ-FE Pages From Supplement TO MODEL INDEX DI- -100 DIAGNOSTICS ENGINE (2RZ- -FE, 3RZ- -FE) Check for open in harness and connector between air flow meter and engine (See page IN- - 21). Repair or replace harness or connector. Replace air flow meter.
  • Page 193 CLICK HERE TO VIEW CHAPTER INDEX Pages From Supplement 3RZ-F,3RZ-FE TO MODEL INDEX DI- -101 DIAGNOSTICS ENGINE (2RZ- -FE, 3RZ- -FE) DI1IC- -01 P 0110/ 24 I n take Ai r Tem p. Ci rcui t M al functi on CIRCUIT DESCRIPTION (fig.1) The intake air temp.
  • Page 194 CLICK HERE TO VIEW CHAPTER INDEX 3RZ-F,3RZ-FE Pages From Supplement TO MODEL INDEX DI- -102 DIAGNOSTICS ENGINE (2RZ- -FE, 3RZ- -FE) WIRING DIAGRAM Engine ECU Intake Air Temp. Sensor (Inside the air flow meter) Y--G LG--B A00328 INSPECTION PROCEDURE HINT: Read freed frame data using hand--held tester.
  • Page 195 CLICK HERE TO VIEW CHAPTER INDEX Pages From Supplement 3RZ-F,3RZ-FE TO MODEL INDEX DI- -103 DIAGNOSTICS ENGINE (2RZ- -FE, 3RZ- -FE) W hen using hand - - held tester Co n n ect th e h an d - - h eld t ester, an d read valu e o f in take air t emp . PREPARATION: Connect the hand--held tester to DLC3.
  • Page 196 CLICK HERE TO VIEW CHAPTER INDEX Pages From Supplement 3RZ-F,3RZ-FE TO MODEL INDEX DI- -104 DIAGNOSTICS ENGINE (2RZ- -FE, 3RZ- -FE) Check for open in harness or engine ECU. PREPARATION: Remove the glove compartment (See page FI -- 61). Connect between terminals THA and E2 of engine ECU E5 connector.
  • Page 197 CLICK HERE TO VIEW CHAPTER INDEX Pages From Supplement 3RZ-F,3RZ-FE TO MODEL INDEX DI- -105 DIAGNOSTICS ENGINE (2RZ- -FE, 3RZ- -FE) Check for short in harness or engine ECU. PREPARATION: Remove the glove compartment (See page FI -- 61). Disconnect the E5 connector of engine ECU. Engine ECU HINT: Intake Air Temp.
  • Page 198 CLICK HERE TO VIEW CHAPTER INDEX Pages From Supplement 3RZ-F,3RZ-FE TO MODEL INDEX DI- -106 DIAGNOSTICS ENGINE (2RZ- -FE, 3RZ- -FE) W hen not using hand - - held tester Ch eck vo ltag e b etween termin als T HA an d E2 o f en g in e ECU co n n ecter PREPARATION: Remove glove compartment.
  • Page 199 CLICK HERE TO VIEW CHAPTER INDEX Pages From Supplement 3RZ-F,3RZ-FE TO MODEL INDEX DI- -107 DIAGNOSTICS ENGINE (2RZ- -FE, 3RZ- -FE) DI1ID- -01 P 0115/ 22 Water Tem p. Ci rcui t M al functi on CIRCUIT DESCRIPTION A thermistor built into the water temp. sensor changes the resistance value according to the water temp. The structure of the sensor and connection to the engine ECU is the same as in the air flow meter temp.
  • Page 200 CLICK HERE TO VIEW CHAPTER INDEX Pages From Supplement 3RZ-F,3RZ-FE TO MODEL INDEX DI- -108 DIAGNOSTICS ENGINE (2RZ- -FE, 3RZ- -FE) W hen using hand - - held tester Co n n ect th e h an d - - h eld t ester, an d read valu e o f water t emp . PREPARATION: Connect the hand--held tester to the DLC3.
  • Page 201 CLICK HERE TO VIEW CHAPTER INDEX Pages From Supplement 3RZ-F,3RZ-FE TO MODEL INDEX DI- -109 DIAGNOSTICS ENGINE (2RZ- -FE, 3RZ- -FE) Check for open in harness or engine ECU. PREPARATION: Remove the glove compartment (See page FI -- 61). Connect between terminals THW and E2 of engine ECU connector.
  • Page 202 CLICK HERE TO VIEW CHAPTER INDEX Pages From Supplement 3RZ-F,3RZ-FE TO MODEL INDEX DI- -110 DIAGNOSTICS ENGINE (2RZ- -FE, 3RZ- -FE) Check for short in harness or engine ECU. PREPARATION: Remove the glove compartment (See page FI -- 61). Disconnect the E5 connector of Engine ECU. Engine ECU HINT: Water Temp.
  • Page 203 CLICK HERE TO VIEW CHAPTER INDEX Pages From Supplement 3RZ-F,3RZ-FE TO MODEL INDEX DI- -111 DIAGNOSTICS ENGINE (2RZ- -FE, 3RZ- -FE) W hen not using hand - - held tester Check voltage between terminals THW and of engine ECU connector. PREPARATION: Remove glove compartment.
  • Page 204 CLICK HERE TO VIEW CHAPTER INDEX 3RZ-F,3RZ-FE Pages From Supplement TO MODEL INDEX DI- -112 DIAGNOSTICS ENGINE (2RZ- -FE, 3RZ- -FE) Check for open and short in harness and connector between engine ECU and water temp. sensor (See page IN- -21). Repair or replace harness or connector Check and replace Engine ECU (See page IN- -21).
  • Page 205 CLICK HERE TO VIEW CHAPTER INDEX 3RZ-F,3RZ-FE Pages From Supplement TO MODEL INDEX DI- -113 DIAGNOSTICS ENGINE (2RZ- -FE, 3RZ- -FE) DI1IE- -01 P0120/41 Throttle Position Sensor/Switch Circuit Malfunction CIRCUIT DESCRIPTION The throttle position sensor is mounted in the throttle body and detects the throttle valve opening angle.
  • Page 206 CLICK HERE TO VIEW CHAPTER INDEX 3RZ-F,3RZ-FE Pages From Supplement TO MODEL INDEX DI- -114 DIAGNOSTICS ENGINE (2RZ- -FE, 3RZ- -FE) WIRING DIAGRAM Engine ECU Throttle Position Sensor G--Y LG--B A00374 INSPECTION PROCEDURE HINT: Read freed frame data using hand--held tester. Because freeze frame records the engine conditions when the malfunction is detected, when troubleshooting it is useful for determining whether the vehicle was running or stopped, the engine warmed up or not, the air--fuel ratio lean or rich, etc.
  • Page 207 CLICK HERE TO VIEW CHAPTER INDEX 3RZ-F,3RZ-FE Pages From Supplement TO MODEL INDEX DI- -115 DIAGNOSTICS ENGINE (2RZ- -FE, 3RZ- -FE) When using hand- -held tester Connect the hand- - held tester and read the throttle valve opening percentage. PREPARATION: Connect the hand--held tester to DLC3.
  • Page 208 CLICK HERE TO VIEW CHAPTER INDEX 3RZ-F,3RZ-FE Pages From Supplement TO MODEL INDEX DI- -116 DIAGNOSTICS ENGINE (2RZ- -FE, 3RZ- -FE) Check throttle position sensor. PREPARATION: Throttle Position Sensor Disconnect the throttle position sensor connector. CHECK: Measure resistance between terminals 1, 3 and 2 of the throttle position sensor.
  • Page 209 CLICK HERE TO VIEW CHAPTER INDEX 3RZ-F,3RZ-FE Pages From Supplement TO MODEL INDEX DI- -117 DIAGNOSTICS ENGINE (2RZ- -FE, 3RZ- -FE) Check voltage between terminals VC and E2 of engine ECU connector. PREPARATION: Remove the glove compartment (See page FI -- 61). Turn ignition switch ON.
  • Page 210 CLICK HERE TO VIEW CHAPTER INDEX 3RZ-F,3RZ-FE Pages From Supplement TO MODEL INDEX DI- -118 DIAGNOSTICS ENGINE (2RZ- -FE, 3RZ- -FE) Check throttle position sensor. PREPARATION: Throttle Position Sensor Disconnect the throttle position sensor connector. CHECK: Measure resistance between terminals 1, 3 and 2 of throttle position sensor terminals Throttle valve...
  • Page 211 CLICK HERE TO VIEW CHAPTER INDEX 3RZ-F,3RZ-FE Pages From Supplement TO MODEL INDEX DI- -119 DIAGNOSTICS ENGINE (2RZ- -FE, 3RZ- -FE) DI1IF- -01 P0130/21, 28 Heated Oxygen Sensor Circuit Mal- function (Bank 1 Sensor 1) (2RZ- -FE). CIRCUIT DESCRIPTION To obtain a high purification rate for the CO, HC and NOx components of the exhaust gas, a three--way catalytic converter is used, but for the most efficient use of the three--way catalytic converter, the air--fuel ratio must be precisely controlled so that it is always close to the stoichiometric air--fuel ratio.
  • Page 212 CLICK HERE TO VIEW CHAPTER INDEX 3RZ-F,3RZ-FE Pages From Supplement TO MODEL INDEX DI- -120 DIAGNOSTICS ENGINE (2RZ- -FE, 3RZ- -FE) HINT: Bank 1 refers to the bank that includes cylinder No.1. Sensor 1 is the oxygen sensor of front side. The heated oxygen sensor’s output voltage and the short---term fuel trim value can be read using the hand---held tester.
  • Page 213 CLICK HERE TO VIEW CHAPTER INDEX 3RZ-F,3RZ-FE Pages From Supplement TO MODEL INDEX DI- -121 DIAGNOSTICS ENGINE (2RZ- -FE, 3RZ- -FE) CONFIRMATION DRIVING PATTERN Vehicle Speed 50 ∼ 65 km/h (31 ∼ 40 mph) Idling (1)(2) IG SW OFF 1 ∼ 3 min. 1 min.
  • Page 214 CLICK HERE TO VIEW CHAPTER INDEX 3RZ-F,3RZ-FE Pages From Supplement TO MODEL INDEX DI- -122 DIAGNOSTICS ENGINE (2RZ- -FE, 3RZ- -FE) INSPECTION PROCEDURE HINT: Read freed frame data using hand--held tester. Because freeze frame records the engine conditions when the malfunction is detected, when troubleshooting it is useful for determining whether the vehicle was run- ning or stopped, the engine warmed up or not, the air--fuel ratio lean or rich, etc.
  • Page 215 CLICK HERE TO VIEW CHAPTER INDEX 3RZ-F,3RZ-FE Pages From Supplement TO MODEL INDEX DI- -123 DIAGNOSTICS ENGINE (2RZ- -FE, 3RZ- -FE) Refernce INSPECTION USING OSCILLOSCOPE With the engine racing (4,000 rpm) measure waveform Ox Signal Waveform between terminals OX1 and E1 of engine ECU. HINT: The correct wavefrom is as shown oscillating between approx.
  • Page 216 CLICK HERE TO VIEW CHAPTER INDEX 3RZ-F,3RZ-FE Pages From Supplement TO MODEL INDEX DI- -124 DIAGNOSTICS ENGINE (2RZ- -FE, 3RZ- -FE) When not using hand- -held tester Are these any other codes (besides code P0130/21,28) being output. Go to referents DTC chart (See page DI- -119) Replace heated oxygen sensor.
  • Page 217 CLICK HERE TO VIEW CHAPTER INDEX 3RZ-F,3RZ-FE Pages From Supplement TO MODEL INDEX DI- -125 DIAGNOSTICS ENGINE (2RZ- -FE, 3RZ- -FE) DI1IG- -01 P0135/21,28 Heated Oxygen Sensor Heater Circuit Malfunction (Bank 1 Sensor 1)(2RZ- -FE) P0141/27,29 Heated Oxygen Sensor Heater Circuit Malfunction (Bank 1 Sensor 2)(2RZ- -FE) CIRCUIT DESCRIPTION Refer to DTC P0130/21,28 (Oxygen Sensor circuit Malfunction (Bank1))
  • Page 218 CLICK HERE TO VIEW CHAPTER INDEX 3RZ-F,3RZ-FE Pages From Supplement TO MODEL INDEX DI- -126 DIAGNOSTICS ENGINE (2RZ- -FE, 3RZ- -FE) Check voltage between terminals HT1, HT2 of engine ECU connector and body ground. PREPARATION: Remove the glove compartment (See page FI -- 61). Turn ignition switch ON.
  • Page 219 CLICK HERE TO VIEW CHAPTER INDEX Pages From Supplement 3RZ-F,3RZ-FE TO MODEL INDEX DI- -127 DIAGNOSTICS ENGINE (2RZ- -FE, 3RZ- -FE) DI1IH- -01 P 0136/ 27, 29 Heated Oxygen S ensor Ci rcui t M al - functi on (Bank 1 S ensor 2) (2RZ - - F E ). CIRCUIT DESCRIPTION Refer to DTC P0130/21,28 (Oxygen Sensor Circuit Malfunction (Bank1) on page DI -- 119.
  • Page 220 CLICK HERE TO VIEW CHAPTER INDEX 3RZ-F,3RZ-FE Pages From Supplement TO MODEL INDEX DI- -128 DIAGNOSTICS ENGINE (2RZ- -FE, 3RZ- -FE) Check the output voltage of heated oxygen sensor (bank 1 sensor 2). PREPARATION: Connect the hand--held tester to the DLC3. Warm up engine to normal operating temp.
  • Page 221 CLICK HERE TO VIEW CHAPTER INDEX Pages From Supplement 3RZ-F,3RZ-FE TO MODEL INDEX DI- -129 DIAGNOSTICS ENGINE (2RZ- -FE, 3RZ- -FE) DI1II- -01 P 0171/ 25 S ystem too L ean (Fuel Tri m ) CIRCUIT DESCRIPTION Fuel trim refers to the feedback compensation value compared against the basic injection time. Fuel trim includes short--term fuel trim and long--term fuel trim.
  • Page 222 CLICK HERE TO VIEW CHAPTER INDEX 3RZ-F,3RZ-FE Pages From Supplement TO MODEL INDEX DI- -130 DIAGNOSTICS ENGINE (2RZ- -FE, 3RZ- -FE) Check for heated oxygen sensor data. PREPARATION: Connect the hand--held tester to the DLC3. Warm up engine to normal operating temp. CHECK: Read the heated oxygen sensor output voltage and short--term fuel trim.
  • Page 223 CLICK HERE TO VIEW CHAPTER INDEX 3RZ-F,3RZ-FE Pages From Supplement TO MODEL INDEX DI- -131 DIAGNOSTICS ENGINE (2RZ- -FE, 3RZ- -FE) Check air flow meter and water temp. sensor (See page FI- - 29). Repair or replace. Check for spark and ignition (See page IG- - 1).
  • Page 224 CLICK HERE TO VIEW CHAPTER INDEX 3RZ-F,3RZ-FE Pages From Supplement TO MODEL INDEX DI- -132 DIAGNOSTICS ENGINE (2RZ- -FE, 3RZ- -FE) Check injector injection (See page FI- -20). Replace injector. Check air flow meter (See page FI- - 29). Repair or replace. Check water temp.
  • Page 225 CLICK HERE TO VIEW CHAPTER INDEX 3RZ-F,3RZ-FE Pages From Supplement TO MODEL INDEX DI- -133 DIAGNOSTICS ENGINE (2RZ- -FE, 3RZ- -FE) Does malfunction disappear when a good oxygen sensor installed. Replace oxygen sensor. Check and replace engine ECU (See page IN- -21).
  • Page 226 CLICK HERE TO VIEW CHAPTER INDEX 3RZ-F,3RZ-FE Pages From Supplement TO MODEL INDEX DI- -134 DIAGNOSTICS ENGINE (2RZ- -FE, 3RZ- -FE) DI1IJ- -01 P0325/52 Knock Sensor Circuit Malfunction CIRCUIT DESCRIPTION Knock sensor are fitted to the cylinder block to detect engine knocking. This sensor contains a piezoelectric element which generates a voltage when it becomes deformed, which occurs when the cylinder block vi- brates due to knocking.
  • Page 227 CLICK HERE TO VIEW CHAPTER INDEX 3RZ-F,3RZ-FE Pages From Supplement TO MODEL INDEX DI- -135 DIAGNOSTICS ENGINE (2RZ- -FE, 3RZ- -FE) INSPECTION PROCEDURE HINT: Read freed frame data using hand--held tester. Because freeze frame records the engine conditions when the malfunction is detected, when troubleshooting it is useful for determining whether the vehicle was run- ning or stopped, the engine warmed up or not, the air--fuel ratio lean or rich, etc.
  • Page 228 CLICK HERE TO VIEW CHAPTER INDEX 3RZ-F,3RZ-FE Pages From Supplement TO MODEL INDEX DI- -136 DIAGNOSTICS ENGINE (2RZ- -FE, 3RZ- -FE) Check knock sensor (See page FI- - 58). Replace knock sensor. Check for open and short in harness and connector between engine ECU and knock sensor (See page IN- - 21).
  • Page 229 CLICK HERE TO VIEW CHAPTER INDEX 3RZ-F,3RZ-FE Pages From Supplement TO MODEL INDEX DI- -137 DIAGNOSTICS ENGINE (2RZ- -FE, 3RZ- -FE) DI1IK- -01 P0335/12 Crankshaft Position Sensor Circuit Malfunction CIRCUIT DESCRIPTION Crankshaft position sensor (NE signal) consist of a signal plate and pick up coil. The NE signal plate has 34 teeth and is mounted on the crankshaft.
  • Page 230 CLICK HERE TO VIEW CHAPTER INDEX 3RZ-F,3RZ-FE Pages From Supplement TO MODEL INDEX DI- -138 DIAGNOSTICS ENGINE (2RZ- -FE, 3RZ- -FE) INSPECTION PROCEDURE HINT: Read freed frame data using hand--held tester. Because freeze frame records the engine conditions when the malfunction is detected, when troubleshooting it is useful for determining whether the vehicle was running or stopped, the engine warmed up or not, the air--fuel ratio lean or rich, etc.
  • Page 231 CLICK HERE TO VIEW CHAPTER INDEX 3RZ-F,3RZ-FE Pages From Supplement TO MODEL INDEX DI- -139 DIAGNOSTICS ENGINE (2RZ- -FE, 3RZ- -FE) Inspect sensor installation and teeth of signal plate. Tighten the sensor. Replace signal plate. Check and replace engine ECU (See page IN- -21).
  • Page 232 CLICK HERE TO VIEW CHAPTER INDEX 3RZ-F,3RZ-FE Pages From Supplement TO MODEL INDEX DI- -140 DIAGNOSTICS ENGINE (2RZ- -FE, 3RZ- -FE) DI1IL- -01 P0340/12 Camshaft Position Sensor Circuit Malfunction CIRCUIT DESCRIPTION Camshaft position sensor (G2+ signal) consist of a signal plate and pick up coil. The G2+ signal plate has one tooth on its outer circumference and is mounted on the camshaft.
  • Page 233 CLICK HERE TO VIEW CHAPTER INDEX 3RZ-F,3RZ-FE Pages From Supplement TO MODEL INDEX DI- -141 DIAGNOSTICS ENGINE (2RZ- -FE, 3RZ- -FE) INSPECTION PROCEDURE HINT: Read freed frame data using hand--held tester. Because freeze frame records the engine conditions when the malfunction is detected, when troubleshooting it is useful for determining whether the vehicle was run- ning or stopped, the engine warmed up or not, the air--fuel ratio lean or rich, etc.
  • Page 234 CLICK HERE TO VIEW CHAPTER INDEX 3RZ-F,3RZ-FE Pages From Supplement TO MODEL INDEX DI- -142 DIAGNOSTICS ENGINE (2RZ- -FE, 3RZ- -FE) Inspect sensor installation. Tighten the sensor. Check and replace engine ECU (See page IN- -21).
  • Page 235 CLICK HERE TO VIEW CHAPTER INDEX 3RZ-F,3RZ-FE Pages From Supplement TO MODEL INDEX DI- -143 DIAGNOSTICS ENGINE (2RZ- -FE, 3RZ- -FE) DI1IM- -01 P0500/42 Vehicle Speed Sensor Malfunction CIRCUIT DESCRIPTION The vehicle speed sensor outputs a 4--pulse signal for every revolution of the rotor shaft, which is rotated by the transmission output shaft via the driven gear.
  • Page 236 CLICK HERE TO VIEW CHAPTER INDEX 3RZ-F,3RZ-FE Pages From Supplement TO MODEL INDEX DI- -144 DIAGNOSTICS ENGINE (2RZ- -FE, 3RZ- -FE) INSPECTION PROCEDURE HINT: Read freed frame data using hand--held tester. Because freeze frame records the engine conditions when the malfunction is detected, when troubleshooting it is useful for determining whether the vehicle was run- ning or stopped, the engine warmed up or not, the air--fuel ratio lean or rich, etc.
  • Page 237 CLICK HERE TO VIEW CHAPTER INDEX 3RZ-F,3RZ-FE Pages From Supplement TO MODEL INDEX DI- -145 DIAGNOSTICS ENGINE (2RZ- -FE, 3RZ- -FE) Check voltage between terminal SPD of engine ECU and body ground. PREPARATION: Remove the glove compartment (See page FI -- 61). Disconnect the E6 engine ECU connector.
  • Page 238 CLICK HERE TO VIEW CHAPTER INDEX 3RZ-F,3RZ-FE Pages From Supplement TO MODEL INDEX DI- -146 DIAGNOSTICS ENGINE (2RZ- -FE, 3RZ- -FE) DI1IN- -01 P0505/33 Idle Control System Malfunction CIRCUIT DESCRIPTION The rotary solenoid type ISC valve is located in front of the in- Intake Air take air chamber and intake air bypassing the throttle valve is Throttle Valve...
  • Page 239 CLICK HERE TO VIEW CHAPTER INDEX 3RZ-F,3RZ-FE Pages From Supplement TO MODEL INDEX DI- -147 DIAGNOSTICS ENGINE (2RZ- -FE, 3RZ- -FE) INSPECTION PROCEDURE HINT: Read freed frame data using hand--held tester. Because freeze frame records the engine conditions when the malfunction is detected, when troubleshooting it is useful for determining whether the vehicle was run- ning or stopped, the engine warmed up or not, the air -- fuel ratio lean or rich, etc.
  • Page 240 CLICK HERE TO VIEW CHAPTER INDEX Pages From Supplement 3RZ-F,3RZ-FE TO MODEL INDEX DI- -148 DIAGNOSTICS ENGINE (2RZ- -FE, 3RZ- -FE) Check voltage between terminals RSO, RSC of engine ECU connector and body ground. PREPARATION: Remove glove compartment. (See page FI -- 61). Disconnect the E4 connector of engine ECU.
  • Page 241 CLICK HERE TO VIEW CHAPTER INDEX 3RZ-F,3RZ-FE Pages From Supplement TO MODEL INDEX DI- -149 DIAGNOSTICS ENGINE (2RZ- -FE, 3RZ- -FE) Check the blockage of ISC valve and the passage to bypass the throttle valve. Repair or replace ISC valve. Check and replace engine ECU (See page IN- -21).
  • Page 242 CLICK HERE TO VIEW CHAPTER INDEX 3RZ-F,3RZ-FE Pages From Supplement TO MODEL INDEX DI- -150 DIAGNOSTICS ENGINE (2RZ- -FE, 3RZ- -FE) Check operation of the ISC valve. Replace ISC valve. Check the blockage of ISC valve and the passage to bypass the throttle valve. Repair or replace ISC valve.
  • Page 243 CLICK HERE TO VIEW CHAPTER INDEX 3RZ-F,3RZ-FE Pages From Supplement TO MODEL INDEX DI- -151 DIAGNOSTICS ENGINE (2RZ- -FE, 3RZ- -FE) DI1IO- -01 P1300/14,15 Ignition Circuit Malfunction (Bank 1) P1310/14,15 Ignition Circuit Malfunction (Bank 2) CIRCUIT DESCRIPTION A DIS (Direct Ignition System) has been adopted, The DIS improves the ignition timing accuracy, reduces high--voltage loss, and enhances the overall reliability of the ignition system by eliminating the distributor.
  • Page 244 CLICK HERE TO VIEW CHAPTER INDEX 3RZ-F,3RZ-FE Pages From Supplement TO MODEL INDEX DI- -152 DIAGNOSTICS ENGINE (2RZ- -FE, 3RZ- -FE) WIRING DIAGRAM junction Connector Engine ECU Ignition Switch B--R B--R * B J3 * B J4 B--R W--R Ignition Coil and Igniter No.2 IGT2 L--W...
  • Page 245 CLICK HERE TO VIEW CHAPTER INDEX 3RZ-F,3RZ-FE Pages From Supplement TO MODEL INDEX DI- -153 DIAGNOSTICS ENGINE (2RZ- -FE, 3RZ- -FE) Disconnect ignition coil (w/ igniter) connector and check voltage between termi- nal IGF of engine ECU connector and body ground. PREPARATION: Disconnect the ignition coil (w/ igniter) connector.
  • Page 246 CLICK HERE TO VIEW CHAPTER INDEX 3RZ-F,3RZ-FE Pages From Supplement TO MODEL INDEX DI- -154 DIAGNOSTICS ENGINE (2RZ- -FE, 3RZ- -FE) Check voltage between terminals IGT1 and IGT2 of engine ECU connector and body ground. PREPARATION: START Remove the grove compartment. CHECK: Measure voltage between terminals IGT1 and IGT2 of engine ECU connector and body ground when engine is cranked.
  • Page 247 CLICK HERE TO VIEW CHAPTER INDEX 3RZ-F,3RZ-FE Pages From Supplement TO MODEL INDEX DI- -155 DIAGNOSTICS ENGINE (2RZ- -FE, 3RZ- -FE) Check ignition coil (w/ igniter) power source circuit. PREPARATION: Disconnect the ignition coil (w/ igniter) with igniter connector. CHECK: START Measure voltage between terminal 1 of ignition coil (w/ igni- tor)connector and body ground, when ignition switch is turned...
  • Page 248 CLICK HERE TO VIEW CHAPTER INDEX 3RZ-F,3RZ-FE Pages From Supplement TO MODEL INDEX DI- -156 DIAGNOSTICS ENGINE (2RZ- -FE, 3RZ- -FE) Check EFI main relay (Marking: EFI) (See page IN- - 21). Replace EFI main relay (Marking: EFI) Replace ignition coil (w/ igniter).
  • Page 249 CLICK HERE TO VIEW CHAPTER INDEX 3RZ-F,3RZ-FE Pages From Supplement TO MODEL INDEX DI- -157 DIAGNOSTICS ENGINE (2RZ- -FE, 3RZ- -FE) DI1IP- -01 P1335/13 Crankshaft Position Sensor Circuit Malfunction (during engine running) CIRCUIT DESCRIPTION Refer to DTC P0335/12 (Crankshaft Position Sensor Circuit Malfunction) on page DI -- 137.
  • Page 250 CLICK HERE TO VIEW CHAPTER INDEX 3RZ-F,3RZ-FE Pages From Supplement TO MODEL INDEX DI- -158 DIAGNOSTICS ENGINE (2RZ- -FE, 3RZ- -FE) DI1IQ- -01 Injector Circuit CIRCUIT DESCRIPTION The injectors are located in the intake manifold. They inject fuel into the cylinders based on the signals from the engine ECU.
  • Page 251 CLICK HERE TO VIEW CHAPTER INDEX 3RZ-F,3RZ-FE Pages From Supplement TO MODEL INDEX DI- -159 DIAGNOSTICS ENGINE (2RZ- -FE, 3RZ- -FE) INSPECTION PROCEDURE Check voltage between terminals #10 ∼ 40 of engine ECU and body ground. PREPARATION: Remove glove compartment (See page FI -- 61).
  • Page 252 CLICK HERE TO VIEW CHAPTER INDEX 3RZ-F,3RZ-FE Pages From Supplement TO MODEL INDEX DI- -160 DIAGNOSTICS ENGINE (2RZ- -FE, 3RZ- -FE) Check resistance of injectors (See page FI- - 20). Replace injector. Check and repair harness and connector be- tween engine ECU and battery. Check for open in harness and connector between terminal E01, E02 of engine ECU connector and body ground (See page IN- -21).
  • Page 253 CLICK HERE TO VIEW CHAPTER INDEX Pages From Supplement 3RZ-F,3RZ-FE TO MODEL INDEX DI- -161 DIAGNOSTICS ENGINE (2RZ- -FE, 3RZ- -FE) Ch eck in jecto rs. PREPARATION: Disconnect injector connector (See page FI -- 61). Ohmmeter CHE CK: Measure resistance of injector. Resistance: Approx.
  • Page 254 CLICK HERE TO VIEW CHAPTER INDEX 3RZ-F,3RZ-FE Pages From Supplement TO MODEL INDEX DI- -162 DIAGNOSTICS ENGINE (2RZ- -FE, 3RZ- -FE) DI1IR- -01 Starter Signal Circuit CIRCUIT DESCRIPTION When the engine is cranked, the intake air flow is slow, so fuel vaporization is poor. A rich mixture is therefore necessary in order to achieve good startability.
  • Page 255 CLICK HERE TO VIEW CHAPTER INDEX 3RZ-F,3RZ-FE Pages From Supplement TO MODEL INDEX DI- -163 DIAGNOSTICS ENGINE (2RZ- -FE, 3RZ- -FE) Engine ECU Ignition Switch 7.5A P--B P--B Engine Room J/B P--B Starter Engine Relay Room J/B W--B B--W 2 EB1 A J1 B--W W--B...
  • Page 256 CLICK HERE TO VIEW CHAPTER INDEX 3RZ-F,3RZ-FE Pages From Supplement TO MODEL INDEX DI- -164 DIAGNOSTICS ENGINE (2RZ- -FE, 3RZ- -FE) INSPECTION PROCEDURE HINT:This diagnostic chart is based on the premise that engine is cranked normally. If the engine is not cranked, proceed to the problem symptoms table (See page DI -- 92) Check the starter signal.
  • Page 257 CLICK HERE TO VIEW CHAPTER INDEX 3RZ-F,3RZ-FE Pages From Supplement TO MODEL INDEX DI- -165 DIAGNOSTICS ENGINE (2RZ- -FE, 3RZ- -FE) DI1IS- -01 Back Up Power Source Circuit CIRCUIT DESCRIPTION Battery voltage is supplied to terminal BATT of the engine ECU even when the ignition switch is OFF for use by the DTC memory and air--fuel ratio adaptive control value memory, etc.
  • Page 258 CLICK HERE TO VIEW CHAPTER INDEX 3RZ-F,3RZ-FE Pages From Supplement TO MODEL INDEX DI- -166 DIAGNOSTICS ENGINE (2RZ- -FE, 3RZ- -FE) INSPECTION PROCEDURE Check voltage between terminal BATT of engine ECU connector and body ground PREPARATION: LOCK Remove glove compartment (See page FI -- 61).
  • Page 259 CLICK HERE TO VIEW CHAPTER INDEX 3RZ-F,3RZ-FE Pages From Supplement TO MODEL INDEX DI- -167 DIAGNOSTICS ENGINE (2RZ- -FE, 3RZ- -FE) DI1IT- -01 Neutral Start Switch Circuit (3RZ- -FE). CIRCUIT DESCRIPTION The neutral start switch goes on when the shift lever is in the N or P shift position. When it goes on terminal NSW of the engine ECU is grounded to body ground via the starter relay thus the terminal NSW voltage be- comes 0V.
  • Page 260 CLICK HERE TO VIEW CHAPTER INDEX 3RZ-F,3RZ-FE Pages From Supplement TO MODEL INDEX DI- -168 DIAGNOSTICS ENGINE (2RZ- -FE, 3RZ- -FE) INSPECTION PROCEDURE Check , 2, L and NSW signals. When using hand- -held tester: PREPARATION: Connect the hand--held tester to the DLC3. Turn the ignition switch ON and hand--held tester main switch ON.
  • Page 261 CLICK HERE TO VIEW CHAPTER INDEX 3RZ-F,3RZ-FE Pages From Supplement TO MODEL INDEX DI- -169 DIAGNOSTICS ENGINE (2RZ- -FE, 3RZ- -FE) Check neutral start switch. PREPARATION: Remove the neutral start switch CHECK: Check continuity between each terminal shown below when the shift lever is shifted to each position.
  • Page 262 CLICK HERE TO VIEW CHAPTER INDEX 3RZ-F,3RZ-FE Pages From Supplement TO MODEL INDEX DI- -170 DIAGNOSTICS ENGINE (2RZ- -FE, 3RZ- -FE) DI1IU- -01 ECU Power Source Circuit CIRCUIT DESCRIPTION When the ignition switch is turned ON, battery positive voltage is applied to the coil, closing the contacts of the EFI main relay and supplying power to the terminal +B of the engine ECU.
  • Page 263 CLICK HERE TO VIEW CHAPTER INDEX 3RZ-F,3RZ-FE Pages From Supplement TO MODEL INDEX DI- -171 DIAGNOSTICS ENGINE (2RZ- -FE, 3RZ- -FE) INSPECTION PROCEDURE Check voltage between terminals +B and E1 of engine ECU connector. PREPARATION: Remove glove compartment (See Page FI -- 61). Turn ignition switch ON.
  • Page 264 CLICK HERE TO VIEW CHAPTER INDEX 3RZ-F,3RZ-FE Pages From Supplement TO MODEL INDEX DI- -172 DIAGNOSTICS ENGINE (2RZ- -FE, 3RZ- -FE) Check EFI fuse . Check for short in all the harness and compo- nents connected to EFI fuse. Check for open in harness and connector between main relay and battery, main relay and engine ECU (See page IN- -21).
  • Page 265 CLICK HERE TO VIEW CHAPTER INDEX 3RZ-F,3RZ-FE Pages From Supplement TO MODEL INDEX DI- -173 DIAGNOSTICS ENGINE (2RZ- -FE, 3RZ- -FE) Check ignition switch . Replace ignition switch. Check for open in harness and connector be- tween IG switch and main relay, main relay and body ground (See page IN- -21).
  • Page 266 CLICK HERE TO VIEW CHAPTER INDEX 3RZ-F,3RZ-FE Pages From Supplement TO MODEL INDEX DI- -174 DIAGNOSTICS ENGINE (2RZ- -FE, 3RZ- -FE) DI1IV- -01 Fuel Pump Control Circuit CIRCUIT DESCRIPTION In the diagram below, when the engine is cranked, current flows from terminal ST of the ignition switch to the starter relay coil and also current flows to terminal STA of engine ECU (STA signal).
  • Page 267 CLICK HERE TO VIEW CHAPTER INDEX 3RZ-F,3RZ-FE Pages From Supplement TO MODEL INDEX DI- -175 DIAGNOSTICS ENGINE (2RZ- -FE, 3RZ- -FE) INSPECTION PROCEDURE Check fuel pump operation. PREPARATION: Connect the hand held tester to the DLC3. Turn the ignition switch ON and hand--held tester main switch ON.
  • Page 268 CLICK HERE TO VIEW CHAPTER INDEX 3RZ-F,3RZ-FE Pages From Supplement TO MODEL INDEX DI- -176 DIAGNOSTICS ENGINE (2RZ- -FE, 3RZ- -FE) Check circuit opening relay. PREPARATION: Remove the lower instrument cover. Remove circuit opening relay. CHECK: Check continuity between terminals of circuit opening relay shown below.
  • Page 269 CLICK HERE TO VIEW CHAPTER INDEX 3RZ-F,3RZ-FE Pages From Supplement TO MODEL INDEX DI- -177 DIAGNOSTICS ENGINE (2RZ- -FE, 3RZ- -FE) Check fuel pump (See page FI- - 11). Repair or replace fuel pump. Check for open in harness and connector between circuit opening relay and fuel pump, fuel pump and body ground (See page IN- - 21).
  • Page 270 CLICK HERE TO VIEW CHAPTER INDEX 3RZ-F,3RZ-FE Pages From Supplement TO MODEL INDEX DI- -178 DIAGNOSTICS ENGINE (2RZ- -FE, 3RZ- -FE) DI1IW- -01 EGR System (2RZ- -FE). CIRCUIT DESCRIPTION The EGR system recirculates exhaust gas, which is controlled to the proper quantity to suit the driving conditions, into the in- take air mixture to slow down combustion, reduce the combus- Throttle Body tion temperature and reduce NOx emissions.
  • Page 271 CLICK HERE TO VIEW CHAPTER INDEX Pages From Supplement 3RZ-F,3RZ-FE TO MODEL INDEX DI- -179 DIAGNOSTICS ENGINE (2RZ- -FE, 3RZ- -FE) INSPECTION PROCEDURE W hen using hand - - held tester Ch eck th e co n n ectio n o f vacu u m h o se. Repair or replace.
  • Page 272 CLICK HERE TO VIEW CHAPTER INDEX Pages From Supplement 3RZ-F,3RZ-FE TO MODEL INDEX DI- -180 DIAGNOSTICS ENGINE (2RZ- -FE, 3RZ- -FE) Ch eck th e vacu u m b etween EGR valve an d VSV fo r EGR at 3,500 rp m. PREPARATION: Vacuum Gauge Using a 3--way connector, connect a vacuum gauge to the...
  • Page 273 CLICK HERE TO VIEW CHAPTER INDEX Pages From Supplement 3RZ-F,3RZ-FE TO MODEL INDEX DI- -181 DIAGNOSTICS ENGINE (2RZ- -FE, 3RZ- -FE) Ch eck VSV fo r EGR (See p ag e F I - - 53) Replace VSV for EGR. Ch eck fo r o p en an d sh o rt in h arn ess an d co n n ecto r b etween VSV fo r EGR an d en g in e ECU ( See p ag e IN - - 21)
  • Page 274 CLICK HERE TO VIEW CHAPTER INDEX Pages From Supplement 3RZ-F,3RZ-FE TO MODEL INDEX DI- -182 DIAGNOSTICS ENGINE (2RZ- -FE, 3RZ- -FE) Ch eck th e vacu u m b etween EGR valve an d VSV fo r EGR at 3,500 rp m Type I Replace EGR vacuum modulator.
  • Page 275 CLICK HERE TO VIEW CHAPTER INDEX 3RZ-F,3RZ-FE Pages From Supplement TO MODEL INDEX DI- -183 DIAGNOSTICS ENGINE (2RZ- -FE, 3RZ- -FE) DI1IX- -01 Variable Resistor Circuit (3RZ- -FE) CIRCUIT INSPECTION This resistor is used change the air--fuel ratio of the air--fuel mixture. The idle mixture is adjusted using this resistor.
  • Page 276 CLICK HERE TO VIEW CHAPTER INDEX 3RZ-F,3RZ-FE Pages From Supplement TO MODEL INDEX DI- -184 DIAGNOSTICS ENGINE (2RZ- -FE, 3RZ- -FE) INSPECTION PROCEDURE NOTICE: Always use a CO meter when adjusting the idle mixture. If a CO meter is not available, DO NOT ATTEMPT TO ADJUST IDLE MIXTURE.
  • Page 277 CLICK HERE TO VIEW CHAPTER INDEX 3RZ-F,3RZ-FE Pages From Supplement TO MODEL INDEX DI- -185 DIAGNOSTICS ENGINE (2RZ- -FE, 3RZ- -FE) Adjust CO concentration. PREPARATION: Same condition as step 1 of this chart. CHE CK: Using SST, adjust the idle mixture by turning the idle mixture ad- justing screw in the variable resistor.
  • Page 278 CLICK HERE TO VIEW CHAPTER INDEX 3RZ-F,3RZ-FE Pages From Supplement TO MODEL INDEX DI- -186 DIAGNOSTICS ENGINE (2RZ- -FE, 3RZ- -FE) Check resistance of variable resistor. Check Resistance Between 1 and 2: Ohmmeter PREPARATION: 2(E2) Disconnect the variable resistor connector. CHECK: 3(VAF) Measure resistance between terminals 1 and 2 the variable...
  • Page 279 CLICK HERE TO VIEW CHAPTER INDEX 3RZ-F,3RZ-FE Pages From Supplement TO MODEL INDEX DI- -187 DIAGNOSTICS ENGINE (2RZ- -FE, 3RZ- -FE) Check voltage between terminals VAF and E2 of engine engine ECU connector. PREPARATION: Reconnect the variable resistor connector. Remove the instrument panel under cover. Turn the ignition switch ON.
  • Page 280 TO MODEL INDEX ENG I NE M ECHANI CAL ( 1RZ , 3RZ -- F ) ......
  • Page 281 3RZ-F,3RZ-FE Pages From Supplement TO MODEL INDEX EM- -1 ENGINE MECHANICAL CO (1RZ, 3RZ- -F) CO (1 RZ, 3 RZ - - F) EM08O- -01 INSPECTION VISUALLY INSPECT CARBURE TO R Check for loose screws or a loose mounting to the man- ifold.
  • Page 282 3RZ-F,3RZ-FE Pages From Supplement TO MODEL INDEX EM- -2 ENGINE MECHANICAL CO (1RZ, 3RZ- -F) INSPECT CO CONCENTRATION 2,500 rpm 180 Seconds Check that the CO meter is properly calibrated. Race the engine 180 seconds at about 2,500 rpm before measuring concentration.
  • Page 283 3RZ-F,3RZ-FE Pages From Supplement TO MODEL INDEX EM- -3 ENGINE MECHANICAL CO (1RZ- -E, 3RZ- -FE) CO (1 RZ - - E, 3 RZ - - F E) EM08P- -01 INSPECTION HINT: This check is used only to determine whether or not the idle CO complies with regulations.
  • Page 284 3RZ-F,3RZ-FE Pages From Supplement TO MODEL INDEX EM- -4 ENGINE MECHANICAL CO (1RZ- -E, 3RZ- -FE) HINT: The idle mixture adjusting screw can be tightened through on angle of 260˚. If the CO concentration is within specification, this adjustment is complete.
  • Page 285 CLICK HERE TO VIEW CHAPTER INDEX 3RZ-F,3RZ-FE Pages From Supplement TO MODEL INDEX EM- -5 ENGINE MECHANICAL CO/HC (2RZ- -FE) CO/HC ( 2 RZ - - F E) EM08Q- -01 INSPECTION HINT: This check is used only to determine whether or not the idle CO/ HC complies with specifications.
  • Page 286 CLICK HERE TO VIEW CHAPTER INDEX 3RZ-F,3RZ-FE Pages From Supplement TO MODEL INDEX EM- -6 ENGINE MECHANICAL CO/HC (2RZ- -FE) Problems Causes Normal High Rough idle 1. Fault ignitions: S Incorrect timing S Fouled, shorted or improperly gapped plugs S Open or crossed high- -tension cords 2.
  • Page 287 CLICK HERE TO VIEW CHAPTER INDEX 3RZ-F,3RZ-FE Pages From Supplement TO MODEL INDEX EM- -7 ENGINE MECHANICAL COMPRESSION (2RZ- -FE) COMPRESSION (2RZ - - FE) EM08R- -01 INSPECTION HINT: If there is lack of power, excessive oil consumption or poor fuel economy, measure the compression pressure.
  • Page 288 CLICK HERE TO VIEW CHAPTER INDEX Pages From Supplement 3RZ-F,3RZ-FE TO MODEL INDEX EM- -8 ENGINE MECHANICAL VALVE CLEARANCE (2RZ- -FE) VALVE CLEARANCE (2 RZ - - FE) EM08S- -01 INSPECTION HINT: Inspect and adjust the valve clearance when the engine is cold. REMOVE PCV HOSES DI S CO NNE CT HI G H - - TE NS I O N CO RDS FRO M S PARK P L UG S...
  • Page 289 CLICK HERE TO VIEW CHAPTER INDEX Pages From Supplement 3RZ-F,3RZ-FE TO MODEL INDEX EM- -9 ENGINE MECHANICAL VALVE CLEARANCE (2RZ- -FE) INSPECT VALVE CLEARANCE Check only the valves indicated. Using a thickness gauge, measure the clearance between the valve lifter and camshaft. Record the out--of--specification valve clearance measurements.
  • Page 290 CLICK HERE TO VIEW CHAPTER INDEX 3RZ-F,3RZ-FE Pages From Supplement TO MODEL INDEX EM- -10 ENGINE MECHANICAL VALVE CLEARANCE (2RZ- -FE) Determine the replacement adjusting shim size by these Formula or Charts: Using a micrometer, measure the thickness of the removed shim.
  • Page 291 CLICK HERE TO VIEW CHAPTER INDEX 3RZ-F,3RZ-FE Pages From Supplement TO MODEL INDEX EM- -11 ENGINE MECHANICAL VALVE CLEARANCE (2RZ- -FE) V00831 CONTINUED...
  • Page 292 CLICK HERE TO VIEW CHAPTER INDEX 3RZ-F,3RZ-FE Pages From Supplement TO MODEL INDEX EM- -12 ENGINE MECHANICAL VALVE CLEARANCE (2RZ- -FE) V00832 CONTINUED...
  • Page 293 CLICK HERE TO VIEW CHAPTER INDEX 3RZ-F,3RZ-FE Pages From Supplement TO MODEL INDEX EM- -13 ENGINE MECHANICAL VALVE CLEARANCE (2RZ- -FE) INSTALL CYLINDER HEAD COVER RE CO NNE CT E NG I NE WI RE RE I NS TALL HI G H - - TE NS I O N CO RDS TO S PARK PLUGS 11 .
  • Page 294 Pages From Supplement 3RZ-F,3RZ-FE TO MODEL INDEX EM- -14 ENGINE MECHANICAL IGNITION TIMING (1RZ- -E) IGNITION TIMING (1 RZ - - E) EM08T- -01 INSPECTION WARM UP E NG I NE Allow the engine to warm up to normal operating temperature.
  • Page 295 CLICK HERE TO VIEW CHAPTER INDEX Pages From Supplement 3RZ-F,3RZ-FE TO MODEL INDEX EM- -15 ENGINE MECHANICAL IGNITION TIMING (1RZ- -E) FURTHE R CHE CK I G NI T I O N TI MI NG Ignition timing: 7˚ - - 17˚ BTDC @ idle HINT: The timing mark moves in range between 7˚...
  • Page 296 CLICK HERE TO VIEW CHAPTER INDEX Pages From Supplement 3RZ-F,3RZ-FE TO MODEL INDEX EM- -16 ENGINE MECHANICAL IGNITION TIMING (2RZ- -FE, 3RZ- -FE) IGNITION TIMING (2 RZ - - FE, Hand--Held Tester 3RZ - - FE) EM08U- -01 INSPECTION WARM UP E NG I NE Allow the engine to warm up to normal operating temperature.
  • Page 297 3RZ-F,3RZ-FE Pages From Supplement TO MODEL INDEX EM- -17 ENGINE MECHANICAL IDLE SPEED (1RZ- -E) IDLE SPEED (1RZ - - E) EM08V- -01 INSPECTION INITIAL CONDITIONS Engine at normal operating temperature Air cleaner installed AII pipes and hoses of air induction system connected...
  • Page 298 CLICK HERE TO VIEW CHAPTER INDEX 3RZ-F,3RZ-FE Pages From Supplement TO MODEL INDEX EM- -18 ENGINE MECHANICAL IDLE SPEED (2RZ- -FE, 3RZ- -FE) IDLE SPEED (2RZ - - FE, 3 RZ - - FE) EM08W- -01 INSPECTION INITIAL CONDITIONS Engine at normal operating temperature Air cleaner installed AII pipes and hoses of air induction system connected AII accessories switched OFF...
  • Page 299 CLICK HERE TO VIEW CHAPTER INDEX 3RZ-F,3RZ-FE Pages From Supplement TO MODEL INDEX EM- -19 ENGINE MECHANICAL TIMING CHAIN (1RZ, 1RZ- -E) TIMING CHAIN (1 RZ, 1 RZ - - E) EM08X- -01 COM P ONE NT S z Gasket Alternator Drive Belt...
  • Page 300 CLICK HERE TO VIEW CHAPTER INDEX 3RZ-F,3RZ-FE Pages From Supplement TO MODEL INDEX EM - - 20 ENGINE MECHANICAL TIMING CHAIN (2RZ - - FE) TIMING CHAIN (2RZ - FE) E M 08Y - - 01 COMPONENTS z Gasket Timing Chain Cover Water Bypass Pipe z Gasket 210 (2.650, 193)
  • Page 301 CLICK HERE TO VIEW CHAPTER INDEX 3RZ-F,3RZ-FE Pages From Supplement TO MODEL INDEX EM- -21 ENGINE MECHANICAL TIMING CHAIN (2RZ- -FE) EM08Z- -01 RE M O VAL DRAI N E NG I NE O I L REMOVE CYLINDER HEAD ASSEMBLY (See page EM - - 33) RE MO V E CRANKS HAFT P O S I T I O N S E NS O R Remove the 2 bolts crankshaft position sensor.
  • Page 302 CLICK HERE TO VIEW CHAPTER INDEX 3RZ-F,3RZ-FE Pages From Supplement TO MODEL INDEX EM- -22 ENGINE MECHANICAL TIMING CHAIN (2RZ- -FE) RE MO V E TI MI NG CHAI N CO V E R Remove the 2 water bypass pipe nuts. Remove the 2 timing chain cover bolts.
  • Page 303 CLICK HERE TO VIEW CHAPTER INDEX 3RZ-F,3RZ-FE Pages From Supplement TO MODEL INDEX EM- -23 ENGINE MECHANICAL TIMING CHAIN (2RZ- -FE) 1 2 . RE MO V E TI MI NG CHAI N O I L J E T Remove the bolt, oil jet and gasket. P22266...
  • Page 304 CLICK HERE TO VIEW CHAPTER INDEX 3RZ-F,3RZ-FE Pages From Supplement TO MODEL INDEX EM- -24 ENGINE MECHANICAL TIMING CHAIN (2RZ- -FE) EM090- -01 INSPECTION INSPECT TIMING CHAI NS , T I MI NG G E ARS AND TI MI NG S P RO CKE TS Measure the length of 16 links with the chain fully stretched.
  • Page 305 CLICK HERE TO VIEW CHAPTER INDEX 3RZ-F,3RZ-FE Pages From Supplement TO MODEL INDEX EM- -25 ENGINE MECHANICAL TIMING CHAIN (2RZ- -FE) EM091- -01 INSTALLATION INSTALL OIL JET Front Mark Install a new gasket and the oil jet with the bolt. Torque: 18 N∙m (185 kgf∙cm, 13 ft∙lbf) I NS TALL CRANKS HAFT P O S I T I O N S E NS O R RO TO R Install the rotor to the crankshaft with the front mark (cavity) of...
  • Page 306 CLICK HERE TO VIEW CHAPTER INDEX Pages From Supplement 3RZ-F,3RZ-FE TO MODEL INDEX EM- -26 ENGINE MECHANICAL TIMING CHAIN (2RZ- -FE) Tie the No.1 timing chain with a cord as shown in the il- lustration, and make sure it doesn’t come loose. A01412 I NS TALL T I MI NG CHAI N CO V E R Install 3 new gaskets to the cylinder block and water by-...
  • Page 307 CLICK HERE TO VIEW CHAPTER INDEX 3RZ-F,3RZ-FE Pages From Supplement TO MODEL INDEX EM- -27 ENGINE MECHANICAL TIMING CHAIN (2RZ- -FE) INSTALL OIL PAN Remove any old packing (FIPG) material and be careful not to drop any oil on the contact surface of the oil pan. Using a razor blade and gasket scraper, remove all the old packing (FIPG) material from the gasket surfaces and sealing grooves.
  • Page 308 CLICK HERE TO VIEW CHAPTER INDEX 3RZ-F,3RZ-FE Pages From Supplement TO MODEL INDEX EM- -28 ENGINE MECHANICAL TIMING CHAIN (3RZ- -F, 3RZ- -FE) TIMING CHAIN (3 RZ - - F, 3 RZ - - FE) EM092- -01 COM P ONE NT S z Gasket Timing Chain Cover 210 (2,650, 193)
  • Page 309 3RZ-F,3RZ-FE CLICK HERE TO VIEW CHAPTER INDEX Pages From Supplement TO MODEL INDEX EM- -29 ENGINE MECHANICAL CYLINDER HEAD (1RZ- -E) CYLINDER HEAD(1 RZ - - E) EM093- -01 COM P ONE NT S PCV Hose Gasket 1st 39 (400, 29) 2nd Turn 90˚...
  • Page 310 CLICK HERE TO VIEW CHAPTER INDEX 3RZ-F,3RZ-FE Pages From Supplement TO MODEL INDEX EM- -30 ENGINE MECHANICAL CYLINDER HEAD (1RZ- -E) 15 (160, 11) Heat Insulator Camshaft Camshaft Bearing Cap Adjusting Shim Valve Lifter Keeper Spring Retainer Valve Spring 49 (500, 36)
  • Page 311 CLICK HERE TO VIEW CHAPTER INDEX 3RZ-F,3RZ-FE Pages From Supplement TO MODEL INDEX PAGE 1 OF 3 ENGINE MECHANICAL – CYLINDER HEAD (2RZ-FE) CYLINDER HEAD (2RZ-FE) – COMPONENTS EM-31/32 REMOVEL 1. REMOVE PCV HOSES EM-33 2. REMOVE IGNITION COILS EM-33 3.
  • Page 312 CLICK HERE TO VIEW CHAPTER INDEX 3RZ-F,3RZ-FE Pages From Supplement TO MODEL INDEX ENGINE MECHANICAL – CYLINDER HEAD (2RZ-FE) PAGE 2 OF 3 14. INSPECT CAMSHAFT FOR RUNOUT EM-47 15. INSPECT CAM LOBES EM-48 16. INSPECT CAMSHAFT JOURNALS EM-48 17. INSPECT CAMSHAFT BEARINGS EM-48 18.
  • Page 313 Pages From Supplement CLICK HERE TO VIEW CHAPTER INDEX 3RZ-F,3RZ-FE TO MODEL INDEX ENGINE MECHANICAL – CYLINDER HEAD (2RZ-FE) PAGE 3 OF 3 26. CONNECT ENGINE WIRE EM-59 27. INSTALL IGNITION COILS EM-59 28. INSTALL PCV HOSES EM-59 29. FILL WITH ENGINE COOLANT EM-59 30.
  • Page 314 CLICK HERE TO VIEW CHAPTER INDEX 3RZ-F,3RZ-FE Pages From Supplement TO MODEL INDEX EM- -31 ENGINE MECHANICAL CYLINDER HEAD (2RZ- -FE) CYLINDER HEAD(2 RZ - - F E) EM094- -01 COM P ONE NT S z Gasket EGR Pipe z Gasket Heat Insulator z Gasket 21 (210, 15)
  • Page 315 CLICK HERE TO VIEW CHAPTER INDEX 3RZ-F,3RZ-FE Pages From Supplement TO MODEL INDEX EM- -32 ENGINE MECHANICAL CYLINDER HEAD (2RZ- -FE) PCV Valve Cylinder Head Cover X 10 Gasket z Spark Plug Adjusting Tube Gasket Shim 15.5 (160, 12) Valve Lifter Spark Plug x 10 Keeper...
  • Page 316 CLICK HERE TO VIEW CHAPTER INDEX 3RZ-F,3RZ-FE Pages From Supplement TO MODEL INDEX EM- -33 ENGINE MECHANICAL CYLINDER HEAD (2RZ- -FE) EM095- -01 RE M O VAL REMOVE PCV HOSES RE MOVE IGNITION COILS Disconnect the 2 connectors from the ignition coils. Disconnect high--tension cords at rubber boot from the cylinder head.
  • Page 317 CLICK HERE TO VIEW CHAPTER INDEX 3RZ-F,3RZ-FE Pages From Supplement TO MODEL INDEX EM- -34 ENGINE MECHANICAL CYLINDER HEAD (2RZ- -FE) Camshaft position sensor connector A01271 Disconnect the check connector from the bracket. Disconnect the engine wire clamp. DI S CO NNE CT I NJ E CTO R CO NNE CTO RS A01272 REMOVE EGR PIPE Remove the 4 nuts, bolt, EGR pipe and 2 gasket.
  • Page 318 CLICK HERE TO VIEW CHAPTER INDEX 3RZ-F,3RZ-FE Pages From Supplement TO MODEL INDEX EM- -35 ENGINE MECHANICAL CYLINDER HEAD (2RZ- -FE) REMOVE FUEL INLET PIPE Remove the pulsation damper, 2 gaskets and fuel inlet pipe. A01269 REMOVE FUEL RETURN PIPE Disconnect these hoses: Fuel return hose from fuel pressure regulator Fuel return hose from fuel return pipe...
  • Page 319 CLICK HERE TO VIEW CHAPTER INDEX 3RZ-F,3RZ-FE Pages From Supplement TO MODEL INDEX EM- -36 ENGINE MECHANICAL CYLINDER HEAD (2RZ- -FE) 1 2 . RE MO V E E X HAUS T MANI FO LD Remove the 2 bolts, 2 nuts and heat insulator. Remove the 6 nuts, exhaust manifold and gasket.
  • Page 320 CLICK HERE TO VIEW CHAPTER INDEX Pages From Supplement 3RZ-F,3RZ-FE TO MODEL INDEX EM- -37 ENGINE MECHANICAL CYLINDER HEAD (2RZ- -FE) 1 7 . RE MO V E CY LI NDE R HE AD CO V E R Remove the 10 bolts, seal washers, cylinder head cover and gasket.
  • Page 321 CLICK HERE TO VIEW CHAPTER INDEX 3RZ-F,3RZ-FE Pages From Supplement TO MODEL INDEX EM- -38 ENGINE MECHANICAL CYLINDER HEAD (2RZ- -FE) Hold the intake camshaft with a wrench and remove the bolt. Remove the camshaft timing gear and chain from the in- take camshaft and leave on the slipper and damper.
  • Page 322 CLICK HERE TO VIEW CHAPTER INDEX 3RZ-F,3RZ-FE Pages From Supplement TO MODEL INDEX EM- -39 ENGINE MECHANICAL CYLINDER HEAD (2RZ- -FE) Remove intake camshaft. Uniformly loosen and remove the 10 bearing cap bolts, in several passes, in the sequence shown. Remove the 5 bearing caps and camshaft.
  • Page 323 CLICK HERE TO VIEW CHAPTER INDEX 3RZ-F,3RZ-FE Pages From Supplement TO MODEL INDEX EM- -40 ENGINE MECHANICAL CYLINDER HEAD (2RZ- -FE) 2 4 . RE MO V E CY LI NDE R HE AD Remove the 2 bolts in front of the head before the other head bolts are removed.
  • Page 324 CLICK HERE TO VIEW CHAPTER INDEX 3RZ-F,3RZ-FE Pages From Supplement TO MODEL INDEX EM- -41 ENGINE MECHANICAL CYLINDER HEAD (2RZ- -FE) EM096- -01 DI SASSEMBLY RE MO V E VALV E L I FTE RS AND S HI MS HINT: Arrange the valve lifters and shims in correct order.
  • Page 325 CLICK HERE TO VIEW CHAPTER INDEX 3RZ-F,3RZ-FE Pages From Supplement TO MODEL INDEX EM- -42 ENGINE MECHANICAL CYLINDER HEAD (2RZ- -FE) EM097- -01 INSPECTION CLE AN TO P S URFACE S O F P I S TO NS AND CY LI NDE R BLO CK Turn the crankshaft, and bring each piston to top dead center (TDC).
  • Page 326 CLICK HERE TO VIEW CHAPTER INDEX 3RZ-F,3RZ-FE Pages From Supplement TO MODEL INDEX EM- -43 ENGINE MECHANICAL CYLINDER HEAD (2RZ- -FE) CLEAN CYLINDER HEAD Using a soft brush and solvent, thoroughly clean the cylinder head. P14663 INSPECT FOR FLATNESS Using a precision straight edge and thickness gauge, measure the surfaces contacting the cylinder block and the manifolds for warpage.
  • Page 327 CLICK HERE TO VIEW CHAPTER INDEX Pages From Supplement 3RZ-F,3RZ-FE TO MODEL INDEX EM- -44 ENGINE MECHANICAL CYLINDER HEAD (2RZ- -FE) INSPECT VALVE STEMS AND GUIDE BUSHINGS Using a caliper gauge, measure the inside diameter of the guide bushing. Bushing inside diameter: 6.010 - - 6.030 mm (0.2366 - - 0.2374 in.) P14659 Using a micrometer, measure the diameter of the valve...
  • Page 328 CLICK HERE TO VIEW CHAPTER INDEX Pages From Supplement 3RZ-F,3RZ-FE TO MODEL INDEX EM- -45 ENGINE MECHANICAL CYLINDER HEAD (2RZ- -FE) Select a new guide bushing (STD size or O/S 0.05). Both intake and exhaust If the bushing bore diameter of the cylinder head is greater than 11.027 mm (0.4341 in.), machine the bushing bore to these di- Bushing bor diameter Bushing size...
  • Page 329 CLICK HERE TO VIEW CHAPTER INDEX Pages From Supplement 3RZ-F,3RZ-FE TO MODEL INDEX EM- -46 ENGINE MECHANICAL CYLINDER HEAD (2RZ- -FE) Check the valve overall length. Standard overall length: Intake: 103.45 mm (4.0728 in.) Exhaust: 103.60 mm (4.0787 in.) Overall Length Minimum overall length: Intake: 102.95 mm (4.0531 in.)
  • Page 330 CLICK HERE TO VIEW CHAPTER INDEX 3RZ-F,3RZ-FE Pages From Supplement TO MODEL INDEX EM- -47 ENGINE MECHANICAL CYLINDER HEAD (2RZ- -FE) If the seating is too low on the valve face, use 60˚ and 45˚ cutters to correct the seat. 60˚...
  • Page 331 CLICK HERE TO VIEW CHAPTER INDEX 3RZ-F,3RZ-FE Pages From Supplement TO MODEL INDEX EM- -48 ENGINE MECHANICAL CYLINDER HEAD (2RZ- -FE) INSPECT CAM LOBES Using a micrometer, measure the cam lobe height. Standard cam lobe height: Intake 45.31 - - 45.41 mm (1.7839 - - 1.7878 in.) Exhaust 45.06 - - 45.16 mm (1.7740 - - 1.7779 in.) If the cam lobe height is less than standard allowable, replace...
  • Page 332 CLICK HERE TO VIEW CHAPTER INDEX 3RZ-F,3RZ-FE Pages From Supplement TO MODEL INDEX EM- -49 ENGINE MECHANICAL CYLINDER HEAD (2RZ- -FE) INSPECT CAMSHAFT THRUS T CLE ARANCE Install the camshaft. (See page EM -- 55) Using a dial indicator, measure the thrust clearance while moving the camshaft back and forth.
  • Page 333 CLICK HERE TO VIEW CHAPTER INDEX 3RZ-F,3RZ-FE Pages From Supplement TO MODEL INDEX EM- -50 ENGINE MECHANICAL CYLINDER HEAD (2RZ- -FE) INSPECT INTAKE MANIFOLD Cylinder Head Side Using a precision straight edge and thickness gauge, measure the surface contacting the cylinder head and air intake chamber for warpage.
  • Page 334 CLICK HERE TO VIEW CHAPTER INDEX 3RZ-F,3RZ-FE Pages From Supplement TO MODEL INDEX EM- -51 ENGINE MECHANICAL CYLINDER HEAD (2RZ- -FE) IF NECESSARY, REPLACE SPARK PLUG TUBE GASKETS Using a screwdriver, pry out the tube gasket. P14681 Using SST and a hammer, tap in a new tube gasket as shown in the illustration.
  • Page 335 CLICK HERE TO VIEW CHAPTER INDEX 3RZ-F,3RZ-FE Pages From Supplement TO MODEL INDEX EM- -52 ENGINE MECHANICAL CYLINDER HEAD (2RZ- -FE) EM098- -01 RE AS S E M BLY HINT: Thoroughly clean all parts to be assembled. Before installing the parts, apply fresh engine oil to all sliding and rotating surfaces.
  • Page 336 CLICK HERE TO VIEW CHAPTER INDEX 3RZ-F,3RZ-FE Pages From Supplement TO MODEL INDEX EM- -53 ENGINE MECHANICAL CYLINDER HEAD (2RZ- -FE) Install these parts: Valve Spring seat Valve spring Spring retainer P14652 Using SST, compress the valve spring and place the 2 keepers around the valve stem.
  • Page 337 CLICK HERE TO VIEW CHAPTER INDEX 3RZ-F,3RZ-FE Pages From Supplement TO MODEL INDEX EM- -54 ENGINE MECHANICAL CYLINDER HEAD (2RZ- -FE) EM099- -01 INSTALLATION P L ACE CY LI NDE R HE AD O N CY L I NDE R BLO CK Apply seal packing to the 2 locations as shown.
  • Page 338 CLICK HERE TO VIEW CHAPTER INDEX 3RZ-F,3RZ-FE Pages From Supplement TO MODEL INDEX EM- -55 ENGINE MECHANICAL CYLINDER HEAD (2RZ- -FE) ASSEMBLE EXHAUS T CAMS HAFT Mount the hexagon wrench head portion of the camshaft in a vise. NOTICE: Be careful not to damage the camshaft. Install these parts: Camshaft gear spring Camshaft sub--gear...
  • Page 339 CLICK HERE TO VIEW CHAPTER INDEX 3RZ-F,3RZ-FE Pages From Supplement TO MODEL INDEX EM- -56 ENGINE MECHANICAL CYLINDER HEAD (2RZ- -FE) Install exhaust camshaft. Straight Pin Apply MP grease to the thrust portion of the exhaust camshaft. Engage the exhaust camshaft gear to the intake camshaft gear by matching the timing marks (1 and 2 dots) on each gear.
  • Page 340 CLICK HERE TO VIEW CHAPTER INDEX 3RZ-F,3RZ-FE Pages From Supplement TO MODEL INDEX EM- -57 ENGINE MECHANICAL CYLINDER HEAD (2RZ- -FE) I NS TALL CHAI N T E NS I O NE R Place a new gasket so that the front mark is toward the front side.
  • Page 341 CLICK HERE TO VIEW CHAPTER INDEX Pages From Supplement 3RZ-F,3RZ-FE TO MODEL INDEX EM- -58 ENGINE MECHANICAL CYLINDER H EAD (2RZ - - FE) CHE CK VALV E T I MI NG Turn the crankshaft pulley, and align its groove with the Dot Mark timing mark ”0”...
  • Page 342 CLICK HERE TO VIEW CHAPTER INDEX 3RZ-F,3RZ-FE Pages From Supplement TO MODEL INDEX EM- -59 ENGINE MECHANICAL CYLINDER HEAD (2RZ- -FE) 1 9 . I NS TALL I NJ E CTO RS AND DE LI V E RY P I P E New Spacer (S e e pa ge FI - - 2 2 ) HINT:...
  • Page 343 CLICK HERE TO VIEW CHAPTER INDEX 3RZ-F,3RZ-FE Pages From Supplement TO MODEL INDEX EM- -60 ENGINE MECHANICAL CYLINDER HEAD (3RZ- -FE) CYLINDER HEAD(3 RZ - - F E) EM09A- -01 COM P ONE NT S z Gasket Intake Chamber Assembly Heat Insulator Exhaust Manifold z Gasket...
  • Page 344 Pages From Supplement 3RZ-F,3RZ-FE CLICK HERE TO VIEW CHAPTER INDEX TO MODEL INDEX EM- -61 ENGINE MECHANICAL CYLINDER HEAD (3RZ- -FE) PCV Valve Cylinder Head Cover X 10 Gasket z Spark Plug Adjusting Tube Gasket Shim 15.5 (160, 12) Valve Lifter Spark Plug x 10 Keeper...
  • Page 345 Pages From Supplement CLICK HERE TO VIEW CHAPTER INDEX 3RZ-F,3RZ-FE TO MODEL INDEX PAGE 1 OF 2 ENGINE MECHANICAL – CYLINDER BLOCK (2RZ-FE, 3RZ-F) CYLINDER BLOCK – COMPONENTS EM-62/63 DISASSEMLBY 1. REMOVE FLYWHEEL EM-64 2. REMOVE REAR END PLATE EM-64 3.
  • Page 346 Pages From Supplement CLICK HERE TO VIEW CHAPTER INDEX 3RZ-F,3RZ-FE TO MODEL INDEX ENGINE MECHANICAL – CYLINDER BLOCK (2RZ-FE, 3RZ-F) PAGE 2 OF 2 17. CYLINDER BORING EM-74/75 18. INSPECT CRANKSHAFT FOR RUNOUT EM-75 19. INSPECT MAIN JOURNALS AND CRANK PINS EM-75/76 20.
  • Page 347 CLICK HERE TO VIEW CHAPTER INDEX Pages From Supplement 3RZ-F,3RZ-FE TO MODEL INDEX EM- -62 ENGINE MECHANICAL CYLINDER BLOCK (2RZ- -FE, 3RZ- -F) CYLINDER BLOCK (2 RZ - - FE, 3 RZ - - F) EM09B- -01 COM P ONE NT S Water Bypass Pipe Oil Filter Bracket Union Bolt...
  • Page 348 CLICK HERE TO VIEW CHAPTER INDEX Pages From Supplement 3RZ-F,3RZ-FE TO MODEL INDEX EM- -63 ENGINE MECHANICAL CYLINDER BLOCK (2RZ- -FE, 3RZ- -F) Piston Ring (No.1 Compression) PIston Ring (Side Rail) Piston Ring (No.2 Compression) Piston Ring (Expander) PIston Snap Ring Piston Pin Connecting Rod Connecting Rod Bearing...
  • Page 349 CLICK HERE TO VIEW CHAPTER INDEX 3RZ-F,3RZ-FE Pages From Supplement TO MODEL INDEX EM- -64 ENGINE MECHANICAL CYLINDER BLOCK (2RZ- -FE, 3RZ- -F) EM09C- -01 DI SASSEMBLY REMOVE FLYWHEEL Remove the 10 bolts and flywheel. RE MO V E RE AR E ND P LATE Remove the 3 bolts and rear end plate.
  • Page 350 CLICK HERE TO VIEW CHAPTER INDEX 3RZ-F,3RZ-FE Pages From Supplement TO MODEL INDEX EM- -65 ENGINE MECHANICAL CYLINDER BLOCK (2RZ- -FE, 3RZ- -F) 1 6 . CHE CK CO NNE CTI NG RO D THRUS T CLE ARANCE Using a dial indicator, measure the thrust clearance while mov- ing the connecting rod back and forth.
  • Page 351 CLICK HERE TO VIEW CHAPTER INDEX 3RZ-F,3RZ-FE Pages From Supplement TO MODEL INDEX EM- -66 ENGINE MECHANICAL CYLINDER BLOCK (2RZ- -FE, 3RZ- -F) Measure the Plastigage at its widest point. Standard oil clearance: 0.030 - - 0.055 mm (0.0012 - - 0.0022 in.) U/S 0.25 0.031 - - 0.071 mm (0.0012 - - 0.0026 in.) Maximum oil clearance:...
  • Page 352 CLICK HERE TO VIEW CHAPTER INDEX Pages From Supplement 3RZ-F,3RZ-FE TO MODEL INDEX EM- -67 ENGINE MECHANICAL CYLINDER BLOCK (2RZ- -FE, 3RZ- -F) 1 9 . CHE CK CRANKS HAFT T HRUS T CLE ARANCE Using a dial indicator, measure the thrust clearance while prying the crankshaft back and forth with a screwdriver.
  • Page 353 CLICK HERE TO VIEW CHAPTER INDEX 3RZ-F,3RZ-FE Pages From Supplement TO MODEL INDEX EM- -68 ENGINE MECHANICAL CYLINDER BLOCK (2RZ- -FE, 3RZ- -F) Measure the Plastigage at its widest point. Standard clearance: No.3 0.030 - - 0.055 mm (0.0012 - - 0.0022 in.) Others 0.024 - - 0.049 mm (0.0009 - - 0.0019 in.) U/S 0.25...
  • Page 354 CLICK HERE TO VIEW CHAPTER INDEX Pages From Supplement 3RZ-F,3RZ-FE TO MODEL INDEX EM- -69 ENGINE MECHANICAL CYLINDER BLOCK (2RZ- -FE, 3RZ- -F) CHECK FIT BETWEEN PISTON AND PISTON PIN Try to move the piston back and forth on the piston pin. If any movement is felt, replace the piston and pin as a set.
  • Page 355 CLICK HERE TO VIEW CHAPTER INDEX 3RZ-F,3RZ-FE Pages From Supplement TO MODEL INDEX EM- -70 ENGINE MECHANICAL CYLINDER BLOCK (2RZ- -FE, 3RZ- -F) EM09D- -01 INSPECTION REMOVE GASKET MATERIAL Using a gasket scraper, remove all the gasket material from the top surface of the cylinder block.
  • Page 356 CLICK HERE TO VIEW CHAPTER INDEX 3RZ-F,3RZ-FE Pages From Supplement TO MODEL INDEX EM- -71 ENGINE MECHANICAL CYLINDER BLOCK (2RZ- -FE, 3RZ- -F) INSPECT MAIN BEARING CAP BOLTS Using vernier calipers, measure the minimum diameter of the elongated thread at the measuring point. Standard outside diameter: 10.76 - - 10.97 mm (0.4236 - - 0.4319 in.) Elongated...
  • Page 357 CLICK HERE TO VIEW CHAPTER INDEX Pages From Supplement 3RZ-F,3RZ-FE TO MODEL INDEX EM- -72 ENGINE MECHANICAL CYLINDER BLOCK (2RZ- -FE, 3RZ- -F) INSPECT PISTON RING GROOVE CLEARANCE Using a thickness gauge, measure the clearance between new piston ring and the wall of the piston ring groove. Ring groove clearance: No.1 2RZ - - FE: 0.020 - - 0.070 mm (0 .0008 - - 0.0028 in.)
  • Page 358 CLICK HERE TO VIEW CHAPTER INDEX 3RZ-F,3RZ-FE Pages From Supplement TO MODEL INDEX EM- -73 ENGINE MECHANICAL CYLINDER BLOCK (2RZ- -FE, 3RZ- -F) INSPECT PISTON PIN OIL CLEARANCE Using a caliper gauge, measure the inside diameter of the connecting rod bushing. Bushing inside diameter: 24.008 - - 24.017 mm (0.9452 - - 0.9455 in.) P03868...
  • Page 359 CLICK HERE TO VIEW CHAPTER INDEX 3RZ-F,3RZ-FE Pages From Supplement TO MODEL INDEX EM- -74 ENGINE MECHANICAL CYLINDER BLOCK (2RZ- -FE, 3RZ- -F) Check the piston pin fit at normal room temperature. Coat the piston pin with engine oil, and push it into the connect- ing rod with your thumb.
  • Page 360 CLICK HERE TO VIEW CHAPTER INDEX 3RZ-F,3RZ-FE Pages From Supplement TO MODEL INDEX EM- -75 ENGINE MECHANICAL CYLINDER BLOCK (2RZ- -FE, 3RZ- -F) Size to be rebored = P + C - - H P = Piston diameter C = Piston clearance 0.057 - - 0.080 mm (0.0022 - - 0.0031 in.) H = Allowance for honing 0.020 mm (0.0008 in.) or less...
  • Page 361 CLICK HERE TO VIEW CHAPTER INDEX 3RZ-F,3RZ-FE Pages From Supplement TO MODEL INDEX EM- -76 ENGINE MECHANICAL CYLINDER BLOCK (2RZ- -FE, 3RZ- -F) Check each main journal and crank pin for taper and out-- of--round as shown. Maximum taper and out- -of- -round: 0.005 mm (0.0002 in.) If the taper and out--of--round is greater than maximum, replace the crankshaft.
  • Page 362 CLICK HERE TO VIEW CHAPTER INDEX 3RZ-F,3RZ-FE Pages From Supplement TO MODEL INDEX EM- -77 ENGINE MECHANICAL CYLINDER BLOCK (2RZ- -FE, 3RZ- -F) EM09E- -01 RE AS S E M BLY RE P L ACE CRANKS HAFT F RO NT O I L S E AL (S e e pa ge LU - - 8 ) RE P L ACE CRANKS HAFT RE AR O I L S E AL HINT:...
  • Page 363 CLICK HERE TO VIEW CHAPTER INDEX Pages From Supplement 3RZ-F,3RZ-FE TO MODEL INDEX EM- -78 ENGINE MECHANICAL CYLINDER BLOCK (2RZ- -FE, 3RZ- -F) ASSEMBLE PISTON AND CONNECTING ROD Install a new snap ring on one side of the piston pin hole. Gradually heat the pistion to 80 -- 90 ˚C (176 -- 194 ˚F).
  • Page 364 CLICK HERE TO VIEW CHAPTER INDEX 3RZ-F,3RZ-FE Pages From Supplement TO MODEL INDEX EM- -79 ENGINE MECHANICAL CYLINDER BLOCK (2RZ- -FE, 3RZ- -F) I NS TALL MAI N BE ARI NG S Align the bearing claw with the claw groove of the cylinder block, and push in the 5 upper bearings.
  • Page 365 CLICK HERE TO VIEW CHAPTER INDEX 3RZ-F,3RZ-FE Pages From Supplement TO MODEL INDEX EM- -80 ENGINE MECHANICAL CYLINDER BLOCK (2RZ- -FE, 3RZ- -F) Install the 5 main bearing caps in their proper locations. HINT: Each bearing cap has a number and front mark. 1 0 .
  • Page 366 CLICK HERE TO VIEW CHAPTER INDEX Pages From Supplement 3RZ-F,3RZ-FE TO MODEL INDEX EM- -81 ENGINE MECHANICAL CYLINDER BLOCK (2RZ- -FE, 3RZ- -F) 1 3 . I NS TALL CO NNE CTI NG RO D CAP NUTS HINT: The connecting rod cap nuts are tightened in 2 progres- sive steps (steps (b) and (d)).
  • Page 367 CLICK HERE TO VIEW CHAPTER INDEX 3RZ-F,3RZ-FE Pages From Supplement TO MODEL INDEX EM- -82 ENGINE MECHANICAL CYLINDER BLOCK (2RZ- -FE, 3RZ- -F) Parts must be assembled within 5 minutes of ap- plication. Otherwise the material must be removed and reapplied. Immediately remove nozzle from the tube and rein- stall cap.
  • Page 368 CLICK HERE TO VIEW CHAPTER INDEX 3RZ-F,3RZ-FE Pages From Supplement TO MODEL INDEX EM- -83 ENGINE MECHANICAL CYLINDER BLOCK (2RZ- -FE, 3RZ- -F) 2 4 . I NS TALL T I MI NG CHAI NS , G E ARS AND SPROCKETS (See page EM - - 25) INSTALL CYLINDER HEAD...
  • Page 369 EC -- 10 REFER TO FOLLOWING REPAIR MANUALS: Manual Name Pub. No. 1RZ, 2RZ- -E Engine Repair Manual For Emission Control ERM103E 3RZ- -F Engine Repair Manual For Emission Control RM055E NOTE: The above pages contain only the points which differ...
  • Page 370 (6) Secondary air bleed Improves drivability 1RZ--E:, 2RZ--FE:, 3RZ--FE: The emission control systems are installed to reduce the amount of CO, HC and NOx exhausted from the engine ((3), (4) and (5)), to prevent the atmospheric release of blow--by gas--containing HC (1) and evaporated fuel containing HC being released from the fuel tank (2).
  • Page 371 TO MODEL INDEX EC- -2 EMISSION CONTROL PARTS LAYOUT AND SCHEMATIC DRAWING PARTS L AY OUT AND SCHEMATIC DRAWING EC03L- -01 LOCATION 1RZ - - FE: Charcoal Canister A01731 2RZ - - FE:, 3RZ - - FE: PCV Valve EGR Valve (2RZ--FE)
  • Page 372 Pages From Supplement TO MODEL INDEX EC- -3 EMISSION CONTROL PARTS LAYOUT AND SCHEMATIC DRAWING EC03M- -01 DRAWI NG 1RZ - - E: Charcoal Canister A01732 2RZ - - FE:, 3RZ - - FE: VSV for EGR (2RZ--FE) VSV for EVAP...
  • Page 373 CLICK HERE TO VIEW CHAPTER INDEX 3RZ-F,3RZ-FE Pages From Supplement TO MODEL INDEX EC- -4 EMISSION CONTROL POSITIVE CRANKCASE VENTILATION (PCV) SYSTEM POSITIVE CRANKCASE Cylinder Head Cover Side VENTILATION (PCV) SYSTEM EC03N- -01 INSPECTION Clean Hose REMOVE PCV VALVE I NS TALL CLE AN HO S E TO P CV VALV E INSPECT PCV VALVE OPERATION Blow air into the cylinder head cover side, and check that air passes through easily.
  • Page 374 Check if the cap and/or gasket are deformed or damaged. If necessary, repair or replace the cap. 1RZ - - FE:, 2RZ - - FE:, 3RZ - - FE: RE MO V E CHARCO AL CANI S T E R...
  • Page 375 No activated carbon should come out. S S S S 2RZ - - FE:, 3RZ - - FE: REINSTALL VSV A01264 1RZ - - E:, 2RZ - - FE:, 3RZ - - FE: RE I NS TALL CHARCO AL CANI S T E R...
  • Page 376 CLICK HERE TO VIEW CHAPTER INDEX 3RZ-F,3RZ-FE Pages From Supplement TO MODEL INDEX EC- -7 EMISSION CONTROL EXHAUST GAS RECIRCULATION (EGR) SYSTEM (2RZ- -FE) EXHAUST GAS RECIRCULAT ION (EGR) SYSTEM (2RZ - - FE) EC03P- -01 INSPECTION INSPECT AND CLEAN FILTER IN EGR VACUUM MO DULATO R Remove the cap and filter.
  • Page 377 CLICK HERE TO VIEW CHAPTER INDEX 3RZ-F,3RZ-FE Pages From Supplement TO MODEL INDEX EC- -8 EMISSION CONTROL EXHAUST GAS RECIRCULATION (EGR) SYSTEM (2RZ- -FE) If you have no hand--held tester, check these procedures: Low Vacuum Remove the 3--way connector with the vacuum 3--Way hose.
  • Page 378 CLICK HERE TO VIEW CHAPTER INDEX 3RZ-F,3RZ-FE Pages From Supplement TO MODEL INDEX EC- -9 EMISSION CONTROL EXHAUST GAS RECIRCULATION (EGR) SYSTEM (2RZ- -FE) INSPECT EGR VALVE Check for sticking and heavy carbon deposits. If a problem is found, replace the EGR valve. P15876 1 3 .
  • Page 379 CLICK HERE TO VIEW CHAPTER INDEX 3RZ-F,3RZ-FE Pages From Supplement TO MODEL INDEX EC- -10 EMISSION CONTROL THREE- -WAY CATALYTIC CONVERTER (TWC) SYSTEM (2RZ- -FE) THREE - - WAY CATALYTIC CONVERTER (TWC) SYSTEM(2RZ - - FE) EC03Q- -01 INSPECTION CHE CK TWC F O R DE NTS O R DAMAG E If any part of the protector is damaged or dented to the extent that it touches the three--way catalytic convert- er, repair or replace it.
  • Page 380 CLICK HERE TO VIEW CHAPTER INDEX 3RZ-F,3RZ-FE Pages From Supplement TO MODEL INDEX EC- -11 EMISSION CONTROL THREE- -WAY CATALYTIC CONVERTER (TWC) SYSTEM (2RZ- -FE) EC03R- -01 REPLACEMENT RE MO V E CO NV E RTE R Jack up the vehicle. Check that the converter is cool.
  • Page 381 ......F I -- 64 REFER TO FOLLOWING REPAIR MANUALS: Manual Name Pub. No. 1RZ, 2RZ, 2RZ- -E Engine Repair Manual RM167E 2RZ, 2RZ- -E Engine Repair Manual RM558E 3RZ- -F, 3RZ- -FE Engine Repair Manual...
  • Page 382 Precaution when the connecting gauge. 2RZ--FE:, 3RE--FE: Use battery as the power source for the timing light, etc. 1RZ--E: Use battery as the power source for the timing light, tachometer, etc. 1RZ--E: Connect the tester probe of a tachometer to the ter- minal IG ⊖...
  • Page 383 CLICK HERE TO VIEW CHAPTER INDEX 3RZ-F,3RZ-FE Pages From Supplement TO MODEL INDEX FI- -2 ELECTRONIC FUEL INJECTION EFI SYSTEM Disconnection, looseness or cracks in the parts of the air induction system between the throttle body and cylinder head will cause air suction and cause the engine to run out of tune.
  • Page 384 CLICK HERE TO VIEW CHAPTER INDEX 3RZ-F,3RZ-FE Pages From Supplement TO MODEL INDEX FI- -3 ELECTRONIC FUEL INJECTION EFI SYSTEM FUEL SYSTEM Plug When disconnecting the high pressure fuel line, a large amount of gasoline will spill out, so observe these proce- dures: Put a container under the connector.
  • Page 385 Delivery Pipe O--Ring Grommet Injector Insulator P15128 1RZ--E: Check that these are no fuel leaks after performing main- tenance any where on the fuel system. Using SST, connect terminals +B and FP the check connector. 09843 -- 18020 Turn the ignition switch ON.
  • Page 386 CLICK HERE TO VIEW CHAPTER INDEX 3RZ-F,3RZ-FE Pages From Supplement TO MODEL INDEX FI- -5 ELECTRONIC FUEL INJECTION EFI SYSTEM 2RZ--FE:, 3RZ--FE: Hand--Held Tester Check that there are no fuel leaks after doing mainte- nance anywhere on the fuel system. Connect the hand--held tester to the DLC3.
  • Page 387 FUEL PUMP FUEL PUMP FI00Q- -01 ON - - V E HI CL E I NS P E CT I O N 1RZ - - E: CHECK FUEL PUMP OPERATION Using SST, connect terminals +B and FP of the check connector.
  • Page 388 Disconnect the negative (--) terminal cable from the bat- tery. Purchase the new fuel pipe and take out the fuel tube con- nector from its pipe. Part No. 1RZ- -FE: 23801- -75060 2RZ- -FE: 23801- -75070 B02481 3RZ- -FE: 23801- -75080 Remove the fuel hose from the clamp.
  • Page 389 09268 -- 41046, 09268 -- 41091, 09268 -- 45012 Wipe off any splattered gasoline. Reconnect the negative (--) terminal cable to the battery. Retainer 1RZ--E: Fuel Pipe Using SST, connect terminals +B and FP of the check connector. 09843 -- 18020 2RZ--FE:, 3RZ--FE: Connect the hand--held tester to the DLC3.
  • Page 390 CLICK HERE TO VIEW CHAPTER INDEX 3RZ-F,3RZ-FE Pages From Supplement TO MODEL INDEX FI- -9 ELECTRONIC FUEL INJECTION FUEL PUMP FI00R- -01 COM P ONE NT S Fuel Pump Bracket z Gasket Fuel Hose Fuel Pump Fuel Pump Filter z Clip Rubber Cushion z Non--reusable part A01279...
  • Page 391 CLICK HERE TO VIEW CHAPTER INDEX 3RZ-F,3RZ-FE Pages From Supplement TO MODEL INDEX FI- -10 ELECTRONIC FUEL INJECTION FUEL PUMP FI00S- -01 RE M O VAL CAUTION: Do not smoke or work near an open flame when working on the fuel pump. RE MO V E FUE L TANK RE MO V E FUE L P UMP BRACKE T A SSEMBLY FROM FUE L TANK...
  • Page 392 CLICK HERE TO VIEW CHAPTER INDEX 3RZ-F,3RZ-FE Pages From Supplement TO MODEL INDEX FI- -11 ELECTRONIC FUEL INJECTION FUEL PUMP FI00T- -01 DI SASSEMBLY INSPECT FUEL PUMP RESISTANCE Using an ohmmeter, measure the resistance between the ter- minals 4 and 5. Resistance: At 20˚C (68˚F): 0.2 - - 3.0 Ω...
  • Page 393 CLICK HERE TO VIEW CHAPTER INDEX 3RZ-F,3RZ-FE Pages From Supplement TO MODEL INDEX FI- -12 ELECTRONIC FUEL INJECTION FUEL PUMP FI00U- -01 REASSEMBLY Reassembly is in the reverse order of disassembly. (S e e pa ge FI - - 11 )
  • Page 394 CLICK HERE TO VIEW CHAPTER INDEX 3RZ-F,3RZ-FE Pages From Supplement TO MODEL INDEX FI- -13 ELECTRONIC FUEL INJECTION FUEL PUMP INSTALLATION FI00V- -01 Installation is in the reverse order of removal. (S e e pa ge FI - - 1 0 )
  • Page 395 CLICK HERE TO VIEW CHAPTER INDEX 3RZ-F,3RZ-FE Pages From Supplement TO MODEL INDEX FI- -14 ELECTRONIC FUEL INJECTION FUEL PRESSURE REGULATOR (2RZ- -FE) FUEL PRESSURE REGULATOR (2RZ - - F E) FI00W- -01 COM P ONE NT S Vacuum Sensing Fuel Pressure Hose Regulator...
  • Page 396 CLICK HERE TO VIEW CHAPTER INDEX 3RZ-F,3RZ-FE Pages From Supplement TO MODEL INDEX FI- -15 ELECTRONIC FUEL INJECTION FUEL PRESSURE REGULATOR (2RZ- -FE) FI00X- -01 RE M O VAL DI S CO NNE CT VACUUM S E NS I NG HO S E FRO M FUE L PRESSURE REGULATOR DI S CO NNE CT FUE L RE TURN HO S E FRO M FUE L PRESSURE REGULATOR...
  • Page 397 CLICK HERE TO VIEW CHAPTER INDEX 3RZ-F,3RZ-FE Pages From Supplement TO MODEL INDEX FI- -16 ELECTRONIC FUEL INJECTION FUEL PRESSURE REGULATOR (2RZ- -FE) FI00Y- -01 INSTALLATION Installation is in the reverse order of removal. (S e e pa ge FI - - 2 5 )
  • Page 398 CLICK HERE TO VIEW CHAPTER INDEX Pages From Supplement 3RZ-F,3RZ-FE TO MODEL INDEX FI- -17 ELECTRONIC FUEL INJECTION INJECTOR (2RZ- -FE, 3RZ- -FE) INJ ECTOR (2 RZ - - FE, 3 RZ - - FE) FI00Z- -01 ON - - V E HI CL E I NS P E CT I O N INSPECT INJ ECTOR OPERATION Check operation sound from each injector.
  • Page 399 CLICK HERE TO VIEW CHAPTER INDEX 3RZ-F,3RZ-FE Pages From Supplement TO MODEL INDEX FI- -18 ELECTRONIC FUEL INJECTION INJECTOR (2RZ- -FE, 3RZ- -FE) FI010- -01 COM P ONE NT S PCV Hose (2RZ--FE) PCV Hose (3RZ--FE) Acceleartor Cable Vacuum Hose Throttle Position Sensor Connector Throttle Cable...
  • Page 400 CLICK HERE TO VIEW CHAPTER INDEX 3RZ-F,3RZ-FE Pages From Supplement TO MODEL INDEX FI- -19 ELECTRONIC FUEL INJECTION INJECTOR (2RZ- -FE, 3RZ- -FE) FI011- -01 RE M O VAL DI S CO NNE CT FUE L I NLE T P I P E Remove the fuel hose from the clamp.
  • Page 401 A01703 Purchase the new fuel pipe and take out the fuel tube con- nector from its pipe. Part No.: 1RZ- -FE: 23801 - - 75060 2RZ- -FE: 23801 - - 75070 3RZ- -FE: 23801 - - 75080 B02481 Connect SST (hose) and fuel tube connector to the fuel Fuel Tube filter outlet.
  • Page 402 CLICK HERE TO VIEW CHAPTER INDEX Pages From Supplement 3RZ-F,3RZ-FE TO MODEL INDEX FI- -21 ELECTRONIC FUEL INJECTION INJECTOR (2RZ- -FE, 3RZ- -FE) Install the O--ring to the injector. SST (Hose) Connect SST (union and hose) to the injector, and hold the injector and union with SST (clamp).
  • Page 403 CLICK HERE TO VIEW CHAPTER INDEX 3RZ-F,3RZ-FE Pages From Supplement TO MODEL INDEX FI- -22 ELECTRONIC FUEL INJECTION INJECTOR (2RZ- -FE, 3RZ- -FE) FI013- -01 INSTALLATION I NS TALL I NJ E CTO RS TO DE LI V E RY P I P E Install a new grommet to the injector.
  • Page 404 CLICK HERE TO VIEW CHAPTER INDEX 3RZ-F,3RZ-FE Pages From Supplement TO MODEL INDEX FI- -23 ELECTRONIC FUEL INJECTION INJECTOR (2RZ- -FE, 3RZ- -FE) CO NNE CT FUE L I NLE T P I P E Connect the fuel inlet pipe (fuel tube connector) to the fuel filter.
  • Page 405 CLICK HERE TO VIEW CHAPTER INDEX 3RZ-F,3RZ-FE Pages From Supplement TO MODEL INDEX FI- -24 ELECTRONIC FUEL INJECTION FUEL PRESSURE PULSATION DAMPER (2RZ- -FE, 3RZ- -FE) FUEL PRESSURE PULSAT ION DAMPER (2RZ - - FE, 3 RZ - - FE) FI014- -01 COM P ONE NT S Fuel Pressure Pulsation Damper...
  • Page 406 CLICK HERE TO VIEW CHAPTER INDEX 3RZ-F,3RZ-FE Pages From Supplement TO MODEL INDEX FI- -25 ELECTRONIC FUEL INJECTION FUEL PRESSURE PULSATION DAMPER (2RZ- -FE, 3RZ- -FE) FI015- -01 RE M O VAL REMOVE FUEL PRESSURE PULSATION DAMPER Using SST, remove the pulsation damper and upper gas- ket.
  • Page 407 CLICK HERE TO VIEW CHAPTER INDEX 3RZ-F,3RZ-FE Pages From Supplement TO MODEL INDEX FI- -26 ELECTRONIC FUEL INJECTION FUEL PRESSURE PULSATION DAMPER (2RZ- -FE, 3RZ- -FE) FI016- -01 INSTALLATION Installation is in the reverse order of removal. (S e e pa ge FI - - 2 5 )
  • Page 408 CLICK HERE TO VIEW CHAPTER INDEX 3RZ-F,3RZ-FE Pages From Supplement TO MODEL INDEX FI- -27 ELECTRONIC FUEL INJECTION AIR FLOW METER (2RZ- -FE, 3RZ- -FE) AIR FLOW METER (2RZ - - FE, 3 RZ - - FE) FI01H- -01 COM P ONE NT S Air Flow Meter Air Flow Meter Connector A01424...
  • Page 409 CLICK HERE TO VIEW CHAPTER INDEX 3RZ-F,3RZ-FE Pages From Supplement TO MODEL INDEX FI- -28 ELECTRONIC FUEL INJECTION AIR FLOW METER (2RZ- -FE, 3RZ- -FE) FI01I- -01 RE M O VAL REMOVE AIR FLOW METER Disconnect the air flow meter connecter. Remove the 2 screws, air flow meter and gasket.
  • Page 410 CLICK HERE TO VIEW CHAPTER INDEX 3RZ-F,3RZ-FE Pages From Supplement TO MODEL INDEX FI- -29 ELECTRONIC FUEL INJECTION AIR FLOW METER (2RZ- -FE, 3RZ- -FE) FI01J- -01 INSPECTION INSPECT AIR FLOW METER RESISTANCE Using an ohmmeter, measure the resistance between terminals THA and E2.
  • Page 411 CLICK HERE TO VIEW CHAPTER INDEX 3RZ-F,3RZ-FE Pages From Supplement TO MODEL INDEX FI- -30 ELECTRONIC FUEL INJECTION AIR FLOW METER (2RZ- -FE, 3RZ- -FE) FI01K- -01 INSTALLATION Installation is in the reverse order of removal. (S e e pa ge FI - - 2 8 )
  • Page 412 CLICK HERE TO VIEW CHAPTER INDEX Pages From Supplement 3RZ-F,3RZ-FE TO MODEL INDEX FI- -31 ELECTRONIC FUEL INJECTION THROTTLE BODY (1RZ- -E) THROTTLE BODY (1RZ- -E) FI017- -01 ON- -VEHICLE INSPECTION INSPECT THROTTLE BODY Check that the throttle linkage moves smoothly.
  • Page 413 CLICK HERE TO VIEW CHAPTER INDEX 3RZ-F,3RZ-FE Pages From Supplement TO MODEL INDEX FI- -32 ELECTRONIC FUEL INJECTION THROTTLE BODY (1RZ- -E) INSPECT AND ADJ UST DASHPOT Warm up engine Allow the engine to warm up to normal operating tempera- ture. Check idle speed...
  • Page 414 CLICK HERE TO VIEW CHAPTER INDEX 3RZ-F,3RZ-FE Pages From Supplement TO MODEL INDEX FI- -33 ELECTRONIC FUEL INJECTION THROTTLE BODY (1RZ- -E) INSPECT THROTTLE OPENER Warm up engine Allow the engine to warm up to normal operating temperature. Check idle speed...
  • Page 415 CLICK HERE TO VIEW CHAPTER INDEX 3RZ-F,3RZ-FE Pages From Supplement TO MODEL INDEX FI- -34 ELECTRONIC FUEL INJECTION THROTTLE BODY (1RZ- -E) FI018- -01 COM P ONE NT S Throttle Position Sensor Connector 18 (185, 13) Vacuum Hose Throttle Body...
  • Page 416 Pages From Supplement TO MODEL INDEX FI- -35 ELECTRONIC FUEL INJECTION THROTTLE BODY (1RZ- -E) FI019- -01 RE M O VAL DRAI N E NG I NE CO O L ANT DI S CO NNE CT THRO TTLE P O S I TI O N S E NS O R...
  • Page 417 CLICK HERE TO VIEW CHAPTER INDEX 3RZ-F,3RZ-FE Pages From Supplement TO MODEL INDEX FI- -36 ELECTRONIC FUEL INJECTION THROTTLE BODY (1RZ- -E) FI01A- -01 INSPECTION CLE AN T HRO TTLE BO DY Using a soft brush and carburetor cleaner, clean the cast parts.
  • Page 418 3RZ-F,3RZ-FE Pages From Supplement TO MODEL INDEX FI- -37 ELECTRONIC FUEL INJECTION THROTTLE BODY (1RZ- -E) Apply vacuum to the throttle opener. Ohmmeter Insert a 0.65 mm (0.026 in.) thickness gauge between the throttle stop screw and stop lever. Connect the test probe of an ohmmeter to the terminals IDL and E2 of the sensor.
  • Page 419 CLICK HERE TO VIEW CHAPTER INDEX 3RZ-F,3RZ-FE Pages From Supplement TO MODEL INDEX FI- -38 ELECTRONIC FUEL INJECTION THROTTLE BODY (1RZ- -E) FI01B- -01 INSTALLATION Installation is in the reverse order of removal. (s e e pa ge FI - - 4 2 )
  • Page 420 CLICK HERE TO VIEW CHAPTER INDEX 3RZ-F,3RZ-FE Pages From Supplement TO MODEL INDEX FI- -39 ELECTRONIC FUEL INJECTION THROTTLE BODY (2RZ- -FE, 3RZ- -FE) THROTTLE BODY (2RZ - - FE, 3RZ - - FE) FI01C- -01 ON - - V E HI CL E I NS P E CT I O N INSPECT THRO TTLE BO DY Check that the throttle linkage moves smoothly.
  • Page 421 CLICK HERE TO VIEW CHAPTER INDEX 3RZ-F,3RZ-FE Pages From Supplement TO MODEL INDEX FI- -40 ELECTRONIC FUEL INJECTION THROTTLE BODY (2RZ- -FE, 3RZ- -FE) Check the throttle opener setting speed. Throttle opener setting speed: 1,200 - - 1,500 rpm If the throttle opener setting is not as specified, replace the throttle body.
  • Page 422 CLICK HERE TO VIEW CHAPTER INDEX 3RZ-F,3RZ-FE Pages From Supplement TO MODEL INDEX FI- -41 ELECTRONIC FUEL INJECTION THROTTLE BODY (2RZ- -FE, 3RZ- -FE) FI01D- -01 COM P ONE NT S PCV Hose (2RZ--FE) PCV Hose (3RZ--FE) Acceleator Cable Throttle Position Sensor Connector Vacuum Hose (2RZ--FE) EVAP Hose Throttle Cable...
  • Page 423 CLICK HERE TO VIEW CHAPTER INDEX 3RZ-F,3RZ-FE Pages From Supplement TO MODEL INDEX FI- -42 ELECTRONIC FUEL INJECTION THROTTLE BODY (2RZ- -FE, 3RZ- -FE) FI01E- -01 RE M O VAL DRAI N E NG I NE CO O L ANT (M/ T) DI S CO NNE CT ACCE LE RATO R CABLE F RO M THRO TTLE BO DY...
  • Page 424 CLICK HERE TO VIEW CHAPTER INDEX 3RZ-F,3RZ-FE Pages From Supplement TO MODEL INDEX FI- -43 ELECTRONIC FUEL INJECTION THROTTLE BODY (2RZ- -FE, 3RZ- -FE) FI01F- -01 INSPECTION CLE AN T HRO TTLE BO DY Using a soft brush and carburetor cleaner, clean the cast parts.
  • Page 425 CLICK HERE TO VIEW CHAPTER INDEX 3RZ-F,3RZ-FE Pages From Supplement TO MODEL INDEX FI- -44 ELECTRONIC FUEL INJECTION THROTTLE BODY (2RZ- -FE, 3RZ- -FE) INSTALLATION FI01G- -01 Installation is in the reverse order of removal. (S e e pa ge FI - - 4 2 )
  • Page 426 CLICK HERE TO VIEW CHAPTER INDEX 3RZ-F,3RZ-FE Pages From Supplement TO MODEL INDEX FI- -45 ELECTRONIC FUEL INJECTION IDLE SPEED CONTROL (ISC) VALVE (2RZ- -FE) IDLE SPEED CONTROL (ISC) VA LV E ( 2 R Z - - F E ) FI01L- -01 ON - - V E HI CL E I NS P E CT I O N INSPECT ISC VALVE OPERATION...
  • Page 427 CLICK HERE TO VIEW CHAPTER INDEX 3RZ-F,3RZ-FE Pages From Supplement TO MODEL INDEX FI- -46 ELECTRONIC FUEL INJECTION IDLE SPEED CONTROL (ISC) VALVE (2RZ- -FE) FI01M- -01 COM P ONE NT S PCV Hose Accelerator Cable Throttle Position Sensor Connector Vacuum Hose Throttle Body...
  • Page 428 CLICK HERE TO VIEW CHAPTER INDEX 3RZ-F,3RZ-FE Pages From Supplement TO MODEL INDEX FI- -47 ELECTRONIC FUEL INJECTION IDLE SPEED CONTROL (ISC) VALVE (2RZ- -FE) FI01N- -01 RE M O VAL RE MO V E THRO TTLE BO DY (S e e pa ge FI - - 4 2 ) RE MO V E I S C VALV E Remove the 4 screws, ISC valve and gasket.
  • Page 429 CLICK HERE TO VIEW CHAPTER INDEX Pages From Supplement 3RZ-F,3RZ-FE TO MODEL INDEX FI- -48 ELECTRONIC FUEL INJECTION IDLE SPEED CONTROL (ISC) VALVE (2RZ- -FE) FI01O- -01 INSPECTION INSPECT ISC VALVE RESISTANCE NOTICE: ”Cold” and ”Hot” in the following sentences express the Ohmmeter temperature of the coils themselves.
  • Page 430 CLICK HERE TO VIEW CHAPTER INDEX 3RZ-F,3RZ-FE Pages From Supplement TO MODEL INDEX FI- -49 ELECTRONIC FUEL INJECTION IDLE SPEED CONTROL (ISC) VALVE (2RZ- -FE) FI01P- -01 INSTALLATION New Gasket INSTALL ISC VALVE Place a new gasket on the throttle body. Install the ISC valve with the 4 screws.
  • Page 431 CLICK HERE TO VIEW CHAPTER INDEX 3RZ-F,3RZ-FE Pages From Supplement TO MODEL INDEX FI- -50 ELECTRONIC FUEL INJECTION EFI MAIN RELAY EFI MAIN RELAY EFI Main Relay FI01Q- -01 INSPECTION REMOVE EFI MAIN RELAY (Ma rking: EFI) A01747 INSPECT EFI MAIN RELAY Using an ohmmeter, check that there is continuity be- tween terminals 1 and 2.
  • Page 432 CLICK HERE TO VIEW CHAPTER INDEX 3RZ-F,3RZ-FE Pages From Supplement TO MODEL INDEX FI- -51 ELECTRONIC FUEL INJECTION CIRCUIT OPENING RELAY CIRCUIT OPENING RELAY FI01R- -01 COM P ONE NT S Circuit Opening Relay Circuit Opening Relay Connecter Lower Finish No1 Panel A01745...
  • Page 433 CLICK HERE TO VIEW CHAPTER INDEX 3RZ-F,3RZ-FE Pages From Supplement TO MODEL INDEX FI- -52 ELECTRONIC FUEL INJECTION CIRCUIT OPENING RELAY FI01S- -01 INSPECTION RE MO V E CI RCUI T O P E NI NG RE L AY INSPECT CIRCUI T O P E NI NG RE L AY CO NTI NUI TY Using an ohmmeter, check that there is continuity be- tween terminals 1 and 2.
  • Page 434 CLICK HERE TO VIEW CHAPTER INDEX 3RZ-F,3RZ-FE Pages From Supplement TO MODEL INDEX FI- -53 ELECTRONIC FUEL INJECTION VSV FOR EXHAUST GAS RECIRCULATION (EGR) (2RZ- -FE) VSV FOR EXHAUST GAS RECIRCULATION (EGR) (2RZ- -FE) FI01T- -01 INSPECTION Remove the bolt. Disconnect the connector and 2 vacuum hoses from the VSV.
  • Page 435 CLICK HERE TO VIEW CHAPTER INDEX 3RZ-F,3RZ-FE Pages From Supplement TO MODEL INDEX FI- -54 ELECTRONIC FUEL INJECTION VSV FOR EVAPORATIVE EMISSION (EVAP) (2RZ- -FE, 3RZ- -FE) VSV FOR EVAPORATIVE EMISSION (EVAP) (2RZ - - FE, 3RZ - - FE) FI01U- -01 INSPECTION REMOVE VSV...
  • Page 436 CLICK HERE TO VIEW CHAPTER INDEX 3RZ-F,3RZ-FE Pages From Supplement TO MODEL INDEX FI- -55 ELECTRONIC FUEL INJECTION WATER TEMPERATURE SENSOR (2RZ- -FE) WATER T EMPERAT URE SENSOR (2RZ - - FE) FI01V- -01 INSPECTION DRAI N E NG I NE CO O L ANT REMOVE WATER TEMPERATURE SENSOR Disconnect the water temperature sensor connector.
  • Page 437 SST. 09243 -- 00020 VAF (+) E2(--) Check that voltage changes smoothly from 0 V to approx. 5 V. 1RZ- -E: HINT: These is no sudden jump up to 5 V or down to 0V. 3RZ- -FE: VAF (+) E2(--)
  • Page 438 CLICK HERE TO VIEW CHAPTER INDEX 3RZ-F,3RZ-FE Pages From Supplement TO MODEL INDEX FI- -57 ELECTRONIC FUEL INJECTION VARIABLE RESISTOR Using SST, turn the idle mixture adjusting screw fully Ohmmeter counterclockwise . 09243 -- 00020 Connect the ohmmeter to terminals VAF and E2 of the variable resister, and turn the idle mixture adjusting screw fully clockwise and check that the resistance value changes from approx.
  • Page 439 CLICK HERE TO VIEW CHAPTER INDEX 3RZ-F,3RZ-FE Pages From Supplement TO MODEL INDEX FI- -58 ELECTRONIC FUEL INJECTION KNOCK SENSOR (2RZ- -FE, 3RZ- -FE) KNOCK SENSOR ( 2RZ - - F E, 3RZ - - FE) FI01Y- -01 INSPECTION REMOVE KNOCK SENSER Disconnect the knock sensor connecter.
  • Page 440 CLICK HERE TO VIEW CHAPTER INDEX 3RZ-F,3RZ-FE Pages From Supplement TO MODEL INDEX FI- -59 ELECTRONIC FUEL INJECTION OXYGEN SENSOR (2RZ- -FE) OXYGEN SENSOR (2RZ- -FE) Ohmmeter FI01W- -01 INSPECTION INSPECT HEATER RESISTANCE OF HEATED OXYGEN SENSORS Using an ohmmeter, measure the resistance between terminals +B and HT.
  • Page 441 CLICK HERE TO VIEW CHAPTER INDEX 3RZ-F,3RZ-FE Pages From Supplement TO MODEL INDEX FI- -60 ELECTRONIC FUEL INJECTION ENGINE CONTROL UNIT (ECU) ENGINE CONTROL UNIT ( ECU) FI01Z- -01 COM P ONE NT S Lower Finish No.2 Panel ECU Connector Glove Compartment Door A01743...
  • Page 442 ENGINE CONTROL UNIT (ECU) FI020- -01 RE M O VAL REMOVE GLOVE COMPARTMENT DOOR REMOVE LOWER FINISH NO.2 PANEL REMOVE ECU 1RZ--E: Disconnect the 2 ECU connecter. 2RZ--FE: 3RZ--FE: Disconnect the 3 ECU connector. Remove the 2 bolts and ECU P23352...
  • Page 443 CLICK HERE TO VIEW CHAPTER INDEX Pages From Supplement TO MODEL INDEX FI- -62 ELECTRONIC FUEL INJECTION ENGINE CONTROL UNIT (ECU) FI021- -01 INSPECTION (See page DI - - 17 and DI - - 90)
  • Page 444 CLICK HERE TO VIEW CHAPTER INDEX 3RZ-F,3RZ-FE Pages From Supplement TO MODEL INDEX FI- -63 ELECTRONIC FUEL INJECTION ENGINE CONTROL UNIT (ECU) FI022- -01 INSTALLATION Installation is in the reverse order of removal. (s e e pa ge FI - - 6 1 )
  • Page 445 Using a sound scope, check for injector operating noise. Check that when the throttle lever is released, injector op- eration noise stops momentarily and then resumes. HINT: Measure with the A/C OFF. Fuel return rpm: 1RZ- -E: Sound Scope P25104 1,200rpm 2RZ- -FE: 1,400 rpm...
  • Page 446 ......CO -- 11 REFER TO FOLLOWING REPAIR MANUALS: Manual Name Pub. No. 1RZ, 2RZ, 2RZ- -E Engine Repair Manual RM167E 2RZ, 2RZ- -E Engine Repair Manual RM558E 3RZ- -F, 3RZ- -FE Engine Repair Manual...
  • Page 447 CLICK HERE TO VIEW CHAPTER INDEX 3RZ-F,3RZ-FE Pages From Supplement TO MODEL INDEX CO- -1 COOLING COOLANT COOLANT CO06X- -01 REPLACEMENT CHECK ENGINE COOLANT LEVEL AT RADI ATO R RESERVOIR The coolant level should be between the ”L” and ”F” lines. If low, check for leaks and add coolant up to the ”F”...
  • Page 448 The coolant should be mixed with demineralized wa- S S S S ter or distilled water. Capacity: 1RZ- -E: 7.8 liters (8.2 US qts, 6.9 lmp. qts) 1RZ: w/ Heater: 7.8 liters (8.2 US qts, 6.9 lmp. qts) w/o Heater: 7.3 liters (7.7 US qts, 6.4 lmp. qts) 2RZ- -FE: w/ Heater: 7.4 liters (7.8 US qts, 6.5 lmp.
  • Page 449 CLICK HERE TO VIEW CHAPTER INDEX 3RZ-F,3RZ-FE Pages From Supplement TO MODEL INDEX CO- -3 COOLING WATER PUMP WAT E R P U M P CO06Y- -01 COM P ONE NT S z Gasket Water Pump z Non--reusable part P22377...
  • Page 450 CLICK HERE TO VIEW CHAPTER INDEX 3RZ-F,3RZ-FE Pages From Supplement TO MODEL INDEX CO- -4 COOLING WATER PUMP CO06Z- -01 RE M O VAL DRAI N E NG I NE CO O L ANT RE MO V E DRI V E BE LT, FAN, FLUI D CO UP LI NG AND WATE R P UMP P ULLE Y Stretch the belt and loosen the fan pulley mounting nuts.
  • Page 451 CLICK HERE TO VIEW CHAPTER INDEX 3RZ-F,3RZ-FE Pages From Supplement TO MODEL INDEX CO- -5 COOLING WATER PUMP CO070- -01 INSPECTION INSPECT WATER PUMP Visually check the air hole and water hole for coolant leak- Air Hole age. If leakage is found, replace the water pump. Turn the pulley, and check that the water pump bearing moves smoothly and quietly.
  • Page 452 CLICK HERE TO VIEW CHAPTER INDEX 3RZ-F,3RZ-FE Pages From Supplement TO MODEL INDEX CO- -6 COOLING WATER PUMP CO071- -01 INSTALLATION Installation is in the reverse order of removal. (S e e pa ge CO - - 4 )
  • Page 453 CLICK HERE TO VIEW CHAPTER INDEX 3RZ-F,3RZ-FE Pages From Supplement TO MODEL INDEX CO- -7 COOLING THERMOSTAT THERMOSTAT CO072- -01 COM P ONE NT S Thermostat z Gasket Water Inlet z Non--reusable part P23587...
  • Page 454 CLICK HERE TO VIEW CHAPTER INDEX 3RZ-F,3RZ-FE Pages From Supplement TO MODEL INDEX CO- -8 COOLING THERMOSTAT CO073- -01 RE M O VAL HINT: Removal of the thermostat would have an adverse effect, causing a lowering of cooling efficiency. Do not remove the thermostat, even if the engine tends to overheat.
  • Page 455 CLICK HERE TO VIEW CHAPTER INDEX 3RZ-F,3RZ-FE Pages From Supplement TO MODEL INDEX CO- -9 COOLING THERMOSTAT CO074- -01 INSPECTION INSPECT THERMOSTAT HINT: The thermostat is numbered with the valve opening tempera- ture. Immerse the thermostat in water and gradually heat the water.
  • Page 456 CLICK HERE TO VIEW CHAPTER INDEX 3RZ-F,3RZ-FE Pages From Supplement TO MODEL INDEX CO- -10 COOLING THERMOSTAT CO075- -01 INSTALLATION 15˚ 15˚ P L ACE THE RMO S TAT I N WATE R I NLE T HO US I NG Install a new gasket to the thermostat.
  • Page 457 CLICK HERE TO VIEW CHAPTER INDEX 3RZ-F,3RZ-FE Pages From Supplement TO MODEL INDEX CO- -11 COOLING RADIATOR RADIATOR CO076- -02 ON - - V E HI CL E CL E ANI NG Using water or a steam cleaner, remove any mud or dirt from the radiator core. NOTICE: If using a high pressure type cleaner, be careful not to deform the fins of the radiator core.
  • Page 458 CLICK HERE TO VIEW CHAPTER INDEX 3RZ-F,3RZ-FE Pages From Supplement TO MODEL INDEX CO- -12 COOLING RADIATOR CO077- -01 ON - - V E HI CL E I NS P E CT I O N RE MO V E RADI ATO R CAP CAUTION: To avoid the danger of being burned, do not remove the ra- diator cap while the engine and radiator are still hot, as fluid...
  • Page 459 CO078- -01 COM P ONE NT S 1 Upper Tank Radiator Cap Radiator Support z O--Ring Washer Radiator Support Core 1RZ--E Oil Cooler z O--Ring z O--Ring Oil Cooler Pipe Plate Washer Lower Tank Drain Plug z O--Ring Lower Tank...
  • Page 460 Lightly tap the radiator port (inlet or outlet) with a soft-- faced hammer, and remove the tank. Remove the O--ring. A01602 1RZ - - E: RE MOVE OIL COOLER FROM LOWE R TANK Remove the pipes. HINT: Make a note of the direction to face the pipes.
  • Page 461 COOLING RADIATOR CO07A- -01 RE AS S E M BLY 1RZ - - E: INSTALL OIL COOLER TO LOWE R TANK Clean the O--ring contact surface of the lower tank and oil cooler. Install new O--rings (1) to the oil cooler (2).
  • Page 462 CLICK HERE TO VIEW CHAPTER INDEX 3RZ-F,3RZ-FE Pages From Supplement TO MODEL INDEX CO- -16 COOLING RADIATOR ASSEMBLE SST Part ”A” 09230 -- 01010, 09231 -- 14010 Install the punch assembly to the overhaul handle, insert- ing it in the hole in part ”A” as shown in the illustration. While gripping the handle, adjust the stopper bolt so that Dimension ”B”...
  • Page 463 CLICK HERE TO VIEW CHAPTER INDEX 3RZ-F,3RZ-FE Pages From Supplement TO MODEL INDEX CO- -17 COOLING RADIATOR Check the lock plate height (H) after completing the caulk- ing. Plate height (H): 7.4 - - 7.8 mm (0.2959 - - 0.3119 in.) If not within the specified height, adjust the stopper bolt of the handle again and caulk again.
  • Page 464 ......LU -- 4 REFER TO FOLLOWING REPAIR MANUALS: Manual Name Pub. No. 1RZ, 2RZ, 2RZ- -E Engine Repair Manual RM167E 2RZ, 2RZ- -E Engine Repair Manual RM558E 3RZ- -F, 3RZ- -FE Engine Repair Manual...
  • Page 465 CLICK HERE TO VIEW CHAPTER INDEX 3RZ-F,3RZ-FE Pages From Supplement TO MODEL INDEX LU- -1 LUBRICATION OIL AND FILTER OIL AND FILTER Recommended Viscosity (SAE) LU03V- -01 INSPECTION 20 W - - 50 15 W - - 40 CHECK ENGINE OIL QUALITY 10 W - - 30 Check the oil for deterioration, entry of water, discoloring or thin- ning.
  • Page 466 CLICK HERE TO VIEW CHAPTER INDEX 3RZ-F,3RZ-FE Pages From Supplement TO MODEL INDEX LU- -2 LUBRICATION OIL AND FILTER Apply adhesive to 2 or 3 threads of the oil pressure switch. Adhesive Adhesive: Part No. 08833- -00080, THREE BOND 1344, LOCTITE 242 or equivalent Using SST, install the oil pressure switch.
  • Page 467 CLICK HERE TO VIEW CHAPTER INDEX 3RZ-F,3RZ-FE Pages From Supplement TO MODEL INDEX LU- -3 LUBRICATION OIL AND FILTER Fill with fresh engine oil. Oil capacity 2WD: Dry fill 5.1 liters (5.4 US qts, 4.5 lmp. qts) Drain and refill w/ Oil filter change 4.7 liters (5.0 US qts, 4.1 lmp.
  • Page 468 CLICK HERE TO VIEW CHAPTER INDEX 3RZ-F,3RZ-FE Pages From Supplement TO MODEL INDEX LU- -4 LUBRICATION OIL PUMP OI L P UMP LU03W- -01 COM P ONE NT S z Gasket Water Bypass Pipe Oil Pump (Timing Chain Cover) Oil Strainer (4WD) Oil Strainer (2WD) z Gasket z Gasket...
  • Page 469 CLICK HERE TO VIEW CHAPTER INDEX 3RZ-F,3RZ-FE Pages From Supplement TO MODEL INDEX LU- -5 LUBRICATION OIL PUMP LU03X- -01 RE M O VAL REMOVE CYLINDER HEAD ASSEMBLY (See page EM - - 40) REMOVE OIL PAN RE MO V E WATE R I NLE T AND WATE R I NLE T HO US I NG Remove the 2 nut, water inlet and thermostat.
  • Page 470 CLICK HERE TO VIEW CHAPTER INDEX 3RZ-F,3RZ-FE Pages From Supplement TO MODEL INDEX LU- -6 LUBRICATION OIL PUMP LU03Y- -01 DI SASSEMBLY RE MO V E DRI V E AND DRI V E N RO TO RS Remove the 9 screws, pump cover, drive rotor, driven rotor and O--ring.
  • Page 471 CLICK HERE TO VIEW CHAPTER INDEX 3RZ-F,3RZ-FE Pages From Supplement TO MODEL INDEX LU- -7 LUBRICATION OIL PUMP LU03Z- -01 INSPECTION INSPECT RELIEF VALVE Coat the valve with engine oil and check that it falls smoothly into the valve hole by its own weight. If it does not, replace the relief valve.
  • Page 472 CLICK HERE TO VIEW CHAPTER INDEX 3RZ-F,3RZ-FE Pages From Supplement TO MODEL INDEX LU- -8 LUBRICATION OIL PUMP LU040- -01 REPLACEMENT HINT: There are 2 methods (A and B) to replace the oil seal which are as follows: IF OIL PUMP IS REMOVED FROM CYLINDER BLOCK Using a screwdriver and a hammer, tap out the oil seal.
  • Page 473 CLICK HERE TO VIEW CHAPTER INDEX 3RZ-F,3RZ-FE Pages From Supplement TO MODEL INDEX LU- -9 LUBRICATION OIL PUMP LU041- -01 RE AS S E M BLY INSTALL RELIEF VALVE Install these parts: Relief valve Spring(s) Retainer Using snap ring pliers, install the snap ring. Snap Ring Plier S01977 I NS TALL DRI V E AND DRI V E N RO TO RS...
  • Page 474 CLICK HERE TO VIEW CHAPTER INDEX 3RZ-F,3RZ-FE Pages From Supplement TO MODEL INDEX LU- -10 LUBRICATION OIL PUMP LU042- -01 INSTALLATION I NS TALL T I MI NG CHAI N CO V E R. (See page EM - - 26) I NS TALL WAT E R I NLE T AND WATE R I NLE T HO US I NG INSTALL OIL PAN...
  • Page 475 ..... I G -- 11 REFER TO FOLLOWING REPAIR MANUALS: Manual Name Pub. No. 1RZ, 2RZ, 2RZ- -E Engine Repair Manual RM167E 2RZ, 2RZ- -E Engine Repair Manual RM558E 3RZ- -F, 3RZ- -FE Engine Repair Manual...
  • Page 476 CLICK HERE TO VIEW CHAPTER INDEX 3RZ-F,3RZ-FE Pages From Supplement TO MODEL INDEX IG- -1 IGNITION IGNITION SYSTEM (2RZ- -FE, 3RZ- -FE) IGNITION SYSTEM (2RZ - - FE, 3RZ - - FE) IG04B- -01 ON- -VEHICLE INSPECTION NOTICE: ”Cold” and ”Hot” in the following sentences express the temper- ature of the coils themselves.
  • Page 477 CLICK HERE TO VIEW CHAPTER INDEX 3RZ-F,3RZ-FE Pages From Supplement TO MODEL INDEX IG- -2 IGNITION IGNITION SYSTEM (2RZ- -FE, 3RZ- -FE) INSPECT HIGH - - TENSION CORDS CORRECT Remove the air cleaner cap and MAF meter assembly. Remove the intake air connector. WRONG Disconnect the high--tension cords from the spark plugs.
  • Page 478 CLICK HERE TO VIEW CHAPTER INDEX 3RZ-F,3RZ-FE Pages From Supplement TO MODEL INDEX IG- -3 IGNITION IGNITION SYSTEM (2RZ- -FE, 3RZ- -FE) Connect the high--tension cords to the spark plugs. Secure the high--tension cords with the clamps as shown in the illustration. Install the intake air connector.
  • Page 479 CLICK HERE TO VIEW CHAPTER INDEX 3RZ-F,3RZ-FE Pages From Supplement TO MODEL INDEX IG- -4 IGNITION IGNITION SYSTEM (2RZ- -FE, 3RZ- -FE) INSPECTION CAMSHAFT POSITION SENSOR Ohmmeter Disconnect the camshaft position sensor connector. Using an ohmmeter, measure the camshaft position sen- sor resistance between terminals.
  • Page 480 CLICK HERE TO VIEW CHAPTER INDEX 3RZ-F,3RZ-FE Pages From Supplement TO MODEL INDEX IG- -5 IGNITION IGNITION COIL (2RZ- -FE, 3RZ- -FE) IGNITION COIL(2 RZ - - FE, 3 RZ - - FE) IG04C- -01 COM P ONE NT S High--Tension Cords 10 (100, 7) Ignition Coil...
  • Page 481 CLICK HERE TO VIEW CHAPTER INDEX 3RZ-F,3RZ-FE Pages From Supplement TO MODEL INDEX IG- -6 IGNITION IGNITION COIL (2RZ- -FE, 3RZ- -FE) IG04D- -01 RE M O VAL DI S CO NNE CT HI G H - - TE NS I O N CO RDS FRO M I G NI - TION COILS (S e e pa ge I G - - 1 ) RE MOVE IGNITION COILS...
  • Page 482 CLICK HERE TO VIEW CHAPTER INDEX 3RZ-F,3RZ-FE Pages From Supplement TO MODEL INDEX IG- -7 IGNITION IGNITION COIL (2RZ- -FE, 3RZ- -FE) IG04E- -01 INSTALLATION Installation is in the reverse order of removal. (S e e pa ge I G - - 6 )
  • Page 483 CLICK HERE TO VIEW CHAPTER INDEX 3RZ-F,3RZ-FE Pages From Supplement TO MODEL INDEX IG- -8 IGNITION CAMSHAFT POSITION SENSOR (2RZ- -FE, 3RZ- -FE) CAMSHAFT POSITION SENSOR(2RZ - - F E, 3RZ - - F E) IG04F- -01 COM P ONE NT S PCV Hose (3RZ--FE) PCV Hose...
  • Page 484 CLICK HERE TO VIEW CHAPTER INDEX 3RZ-F,3RZ-FE Pages From Supplement TO MODEL INDEX IG- -9 IGNITION CAMSHAFT POSITION SENSOR (2RZ- -FE, 3RZ- -FE) IG04G- -02 RE M O VAL RE MO V E THRO TTLE BO DY (S e e pa ge FI - - 4 2 ) RE MO V E CAMS HAFT P O S I T I O N S E NS O R Disconnect the camshaft position sensor connector.
  • Page 485 CLICK HERE TO VIEW CHAPTER INDEX 3RZ-F,3RZ-FE Pages From Supplement TO MODEL INDEX IG- -10 IGNITION CAMSHAFT POSITION SENSOR (2RZ- -FE, 3RZ- -FE) IG04H- -01 INSTALLATION Installation is in the reverse order of removal. (S e e pa ge I G - - 11 )
  • Page 486 CLICK HERE TO VIEW CHAPTER INDEX 3RZ-F,3RZ-FE Pages From Supplement TO MODEL INDEX IG- -11 IGNITION CRANKSHAFT POSITION SENSOR (2RZ- -FE, 3RZ- -FE) CRANKSHAFT POSITION SENSOR(2RZ - - F E, 3RZ - - F E) IG04I- -01 RE M O VAL RE MO V E E NG I NE UNDE R CO V E R RE MO V E G E NE RATO R (S e e pa ge CH - - 7 )
  • Page 487 CLICK HERE TO VIEW CHAPTER INDEX 3RZ-F,3RZ-FE Pages From Supplement TO MODEL INDEX IG- -12 IGNITION CRANKSHAFT POSITION SENSOR (2RZ- -FE, 3RZ- -FE) IG04J- -01 INSPECTION Ohmmeter NOTICE: ”Cold” and ”Hot” in these sentences express the tempera- ture of the sensors themselves. ”Cold” is from - -10˚C (14˚F) to 50˚C (122˚F) and ”Hot is from 50˚C (122˚F) to 100˚C (212˚F).
  • Page 488 CLICK HERE TO VIEW CHAPTER INDEX 3RZ-F,3RZ-FE Pages From Supplement TO MODEL INDEX IG- -13 IGNITION CRANKSHAFT POSITION SENSOR (2RZ- -FE, 3RZ- -FE) IG04K- -01 INSTALLATION Installation is in the reverse order of removal. (S e e pa ge I G - - 11 )
  • Page 489 BACK TO MAIN INDEX 3RZ-F,3RZ-FE Pages From Supplement TO MODEL INDEX STARTI NG START ER ....... ST -- 1 START ER RELAY .
  • Page 490 CLICK HERE TO VIEW CHAPTER INDEX 3RZ-F,3RZ-FE Pages From Supplement TO MODEL INDEX STARTING – STARTER STARTER – COMPONENTS ST-1/2 DISASSEMBLY 1. REMOVE FIELD FRAME AND ARMATURE ST-3 2. REMOVE STARTER HOUSING, CLUTCH ASSEMBLY AND GEAR ST-3 3. REMOVE STEEL BALL ST-4 4.
  • Page 491 CLICK HERE TO VIEW CHAPTER INDEX 3RZ-F,3RZ-FE Pages From Supplement TO MODEL INDEX ST- -1 STARTING STARTER STARTER ST03S- -01 COM P ONE NT S 1.0kW Type Bearing Armature Bearing Field Frame (Field Coil) Brush Holder End Frame Through Bolt Idle Gear Brush Spring Steel Ball...
  • Page 492 CLICK HERE TO VIEW CHAPTER INDEX 3RZ-F,3RZ-FE Pages From Supplement TO MODEL INDEX ST- -2 STARTING STARTER Terminal Insulator Terminal Contact Bolt Plate Terminal Nut Terminal C Kit Part Wave Washer Terminal Insulator O--Ring Plunger Lead Terminal z Gasket (1.2kW, 1.4kW) Lead Clamp (1.0kW, 2.0kW) End Cover...
  • Page 493 CLICK HERE TO VIEW CHAPTER INDEX 3RZ-F,3RZ-FE Pages From Supplement TO MODEL INDEX ST- -3 STARTING STARTER ST03T- -01 DI SASSEMBLY RE MO V E FI E L D F RAME AND ARMAT URE Remove the nut and disconnect the lead wire from the magnetic switch terminal.
  • Page 494 CLICK HERE TO VIEW CHAPTER INDEX 3RZ-F,3RZ-FE Pages From Supplement TO MODEL INDEX ST- -4 STARTING STARTER REMOVE STEEL BALL Using a magnetic finger, remove the steel ball from the clutch shaft hole. Magnetic Finger P04515 RE MO V E BRUS H HO L DE R Remove the 2 screws and end cover from the field frame.
  • Page 495 CLICK HERE TO VIEW CHAPTER INDEX 3RZ-F,3RZ-FE Pages From Supplement TO MODEL INDEX ST- -5 STARTING STARTER ST03U- -01 INSPECTION INSPECT COMMUTATOR FOR OPEN CIRCUI T Continuity Using an ohmmeter, check that there is no continuity between the commutator and armature coil core. If there is continuity, replace the armature.
  • Page 496 CLICK HERE TO VIEW CHAPTER INDEX 3RZ-F,3RZ-FE Pages From Supplement TO MODEL INDEX ST- -6 STARTING STARTER Standard undercut depth: 1.0kW, 1.2 kW, 1.4kW type: 0.6 mm (0.024 in.) 2.0 kW type: 0.7 mm (0.028 in.) Minimum undercut depth: 0.2 mm (0.008 in.) If the undercut depth is less than the minimum, correct it with a hacksaw blade.
  • Page 497 CLICK HERE TO VIEW CHAPTER INDEX 3RZ-F,3RZ-FE Pages From Supplement TO MODEL INDEX ST- -7 STARTING STARTER INSPECT BRUS H L E NG T H Brush Holder Side Using vernier calipers, measure the brush length. Standard length: 1.0 kW type: 13.5 mm (0.531 in.) 1.2 kW, 1.4 kW type: 15.5 mm (0.610 in.) 2.0 kW type: 15.0 mm (0.596 in.) Minimum length:...
  • Page 498 CLICK HERE TO VIEW CHAPTER INDEX 3RZ-F,3RZ-FE Pages From Supplement TO MODEL INDEX ST- -8 STARTING STARTER INSPECT GEAR TEETH Check the gear teeth on the pinion gear, idle gear and clutch assembly for wear or damage. If damaged, replace the gear or clutch assembly. If damaged, also check the fly wheel ring gear for wear or dam- age.
  • Page 499 CLICK HERE TO VIEW CHAPTER INDEX 3RZ-F,3RZ-FE Pages From Supplement TO MODEL INDEX ST- -9 STARTING STARTER Using a press, press in a new rear bearing. P10594 1 9 . DO P ULL - - I N CO I L O P E N CI RCUI T T E S T Terminal 50 Using an ohmmeter, check that there is continuity between ter- minals 50 and C.
  • Page 500 CLICK HERE TO VIEW CHAPTER INDEX 3RZ-F,3RZ-FE Pages From Supplement TO MODEL INDEX ST- -10 STARTING STARTER ST03V- -01 REPLACEMENT REMOVE MAGNETIC SWITCH END COVER Remove the 3 bolts, lead clamp(1.0 kW, 2.0 kW type:), end cov- er, gasket and plunger. P25590 INSPECT CONTACT PLATE FOR WEAR Using vernier calipers, measure the contact plate for depth of...
  • Page 501 CLICK HERE TO VIEW CHAPTER INDEX 3RZ-F,3RZ-FE Pages From Supplement TO MODEL INDEX ST- -11 STARTING STARTER Install these new parts: Long Terminal C: Short Terminal insulator (inside) NOTICE: Be careful to install the terminal insulator in the correct direction. Contact plate Terminal bolt Lead Terminal...
  • Page 502 CLICK HERE TO VIEW CHAPTER INDEX 3RZ-F,3RZ-FE Pages From Supplement TO MODEL INDEX ST- -12 STARTING STARTER CLE AN CO NTACT S URFACE S O F CO NTACT P L AT E AND P L UNG E R Clean the contact surfaces of the remaining contact plate and plunger with a dry shop rag.
  • Page 503 CLICK HERE TO VIEW CHAPTER INDEX 3RZ-F,3RZ-FE Pages From Supplement TO MODEL INDEX ST- -13 STARTING STARTER ST03W- -01 REASSEMBLY Assembly is in the reverse order of disassembly. (S e e pa ge S T - - 3 )
  • Page 504 CLICK HERE TO VIEW CHAPTER INDEX 3RZ-F,3RZ-FE Pages From Supplement TO MODEL INDEX ST- -14 STARTING STARTER ST03X- -01 TEST Terminal 50 NOTICE: These tests must be done within 3 to 5 seconds to avoid burning out the coil. DO PULL - - IN TEST Disconnect the field coil lead wire from terminal C.
  • Page 505 CLICK HERE TO VIEW CHAPTER INDEX 3RZ-F,3RZ-FE Pages From Supplement TO MODEL INDEX ST- -15 STARTING STARTER RELAY STARTER RELAY Starter Relay ST03Y- -01 INSPECTION RE MO V E S TARTE R RE LAY (Ma r k i ng:”S T”) A01118 INSPECTION RELAY CONTINUITY Continuity...
  • Page 506 BACK TO MAIN INDEX 3RZ-F,3RZ-FE Pages From Supplement TO MODEL INDEX CHARG I NG CHARG I NG SYST EM ....CH -- 1 A LT E RNATO R .
  • Page 507 CLICK HERE TO VIEW CHAPTER INDEX 3RZ-F,3RZ-FE Pages From Supplement TO MODEL INDEX CH- -1 CHARGING CHARGING SYSTEM CHARGING SYSTEM CH033- -01 PRECAUTION Check that the battery cables are connected to the correct terminals. Disconnect the battery cables when the battery is given a quick charge. Do not pe rform tests with a high voltage ins ulation resistance tester.
  • Page 508 CLICK HERE TO VIEW CHAPTER INDEX 3RZ-F,3RZ-FE Pages From Supplement TO MODEL INDEX CH- -2 CHARGING CHARGING SYSTEM CH034- -01 ON- -VEHICLE INSPECTION CHECK BATTERY ELECTROLYTE LEVEL Check the electrolyte quantity of each cell. Maintenance--Free Battery: Upper Level If under the lower level, replace the battery (or add distilled wa- ter if possible).
  • Page 509 CLICK HERE TO VIEW CHAPTER INDEX 3RZ-F,3RZ-FE Pages From Supplement TO MODEL INDEX CH- -3 CHARGING CHARGING SYSTEM INSPECT DRIVE BELT Visually check the belt for excessive wear, frayed cords etc. If any defect has been found, replace the drive belt. HINT: Cracks on the rib side of a belt are considered acceptable.
  • Page 510 CLICK HERE TO VIEW CHAPTER INDEX 3RZ-F,3RZ-FE Pages From Supplement TO MODEL INDEX CH- -4 CHARGING CHARGING SYSTEM INSPECT CHARGING CIRCUIT WITHOUT LOAD Ammeter HINT: Disconnect Wire from Terminal B If a battery/alternator tester is available, connect the tester to the charging circuit as per manufacturer’s instructions.
  • Page 511 CLICK HERE TO VIEW CHAPTER INDEX 3RZ-F,3RZ-FE Pages From Supplement TO MODEL INDEX CHARGING – ALTERNATOR ALTERNATOR – COMPONENTS CH-5/6 DISASSEMBLY 1. REMOVE REAR END COVER CH-7 2. REMOVE BRUSH HOLDER AND IC REGULATOR CH-7 3. 55A:, 70:A REMOVE RECTIFIER HOLDER CH-7/8 4.
  • Page 512 CLICK HERE TO VIEW CHAPTER INDEX 3RZ-F,3RZ-FE Pages From Supplement TO MODEL INDEX CH- -5 CHARGING ALTERNATOR ALTERNATOR CH035- -01 COM P ONE NT S Rear Bearing Bearing Cover Rotor Retainer Alternator Washer Front Bearing Bearing Cover Drive End Frame Pully Rear end Cover Bush Holder...
  • Page 513 CLICK HERE TO VIEW CHAPTER INDEX 3RZ-F,3RZ-FE Pages From Supplement TO MODEL INDEX CH- -6 CHARGING ALTERNATOR Drive End Frame Pully Front Bearing 110 (1,125, 81) Retainer Rotor Bearing Cover Rear Bearing Bearing Cover IC Regulator Bush Holder Alternator Washer Rectifier End Frame Spring Rectifier Holder...
  • Page 514 CLICK HERE TO VIEW CHAPTER INDEX 3RZ-F,3RZ-FE Pages From Supplement TO MODEL INDEX CH- -7 CHARGING ALTERNATOR CH036- -01 DI SASSEMBLY REMOVE REAR END COVER Remove the nut and terminal insulator. P14459 Remove the 3 nuts, and end cover. P14460 RE MO V E BRUS H HO L DE R AND I C RE G ULATO R Remove the 5 screws, brush holder and IC regulator.
  • Page 515 CLICK HERE TO VIEW CHAPTER INDEX 3RZ-F,3RZ-FE Pages From Supplement TO MODEL INDEX CH- -8 CHARGING ALTERNATOR 55A: Remove the 4 rubber insulators. A01823 45A: RE MO V E RE CTI F I E R HO L DE R Remove the 4 screws. Using needle--nose pliers, straighten the stator lead wire.
  • Page 516 CLICK HERE TO VIEW CHAPTER INDEX 3RZ-F,3RZ-FE Pages From Supplement TO MODEL INDEX CH- -9 CHARGING ALTERNATOR Turn SST (B) and remove SST (A and B). SST (A) Remove the pulley nut and pulley. SST (B) Turn P04393 RE MO V E RE CTI F I E R E ND FRAME 55A:, 70A: Remove the 4 nuts.
  • Page 517 CLICK HERE TO VIEW CHAPTER INDEX 3RZ-F,3RZ-FE Pages From Supplement TO MODEL INDEX CH- -10 CHARGING ALTERNATOR CH037- -01 INSPECTION Ohmmeter INSPECT ROTOR FOR OPEN CIRCUI T Using an ohmmeter, check that there is continuity between the slip rings. Standard resistance (Cold): 45A: 2.1 - - 2.5 Ω...
  • Page 518 CLICK HERE TO VIEW CHAPTER INDEX 3RZ-F,3RZ-FE Pages From Supplement TO MODEL INDEX CH- -11 CHARGING ALTERNATOR INSPECT EXPOSED BRUS H L E NG T H Using vernier calipers, measure the exposed brush length. Standard exposed length: Length 10.5 mm (0.413 in.) Minimum exposed length: 1.5 mm (0.059 in.) If the exposed length is less than the minimum, replace the...
  • Page 519 CLICK HERE TO VIEW CHAPTER INDEX 3RZ-F,3RZ-FE Pages From Supplement TO MODEL INDEX CH- -12 CHARGING ALTERNATOR INSPECT FRONT BEARING Check that the bearing is not rough or worn. 11 . IF NECESSARY, REPLACE FRONT BEARING Remove the 4 screws, bearing retainer and bearing. P14471 Using SST and press, press out the bearing.
  • Page 520 CLICK HERE TO VIEW CHAPTER INDEX 3RZ-F,3RZ-FE Pages From Supplement TO MODEL INDEX CH- -13 CHARGING ALTERNATOR Using SST and a press, press in a new bearing. 09820 -- 00030 N00578 Using SST, push in the bearing cover. 09285 -- 76010 P00074...
  • Page 521 CLICK HERE TO VIEW CHAPTER INDEX 3RZ-F,3RZ-FE Pages From Supplement TO MODEL INDEX CH- -14 CHARGING ALTERNATOR CH038- -01 RE AS S E M BLY P L ACE DRI V E E ND F RAME O N P ULLE Y I NS TALL RO TO R TO DRI V E E ND F RAME P14543 INSTALL RECTIFIER END FRAME...
  • Page 522 CLICK HERE TO VIEW CHAPTER INDEX 3RZ-F,3RZ-FE Pages From Supplement TO MODEL INDEX CH- -15 CHARGING ALTERNATOR To torque the pulley nut, turn SST (A) in the direction shown in the illustration. Torque:110 N∙m (1,125 kgf∙cm, 81 ft∙lbf) SST (C) Remove the alternator from SST (C).
  • Page 523 CLICK HERE TO VIEW CHAPTER INDEX 3RZ-F,3RZ-FE Pages From Supplement TO MODEL INDEX CH- -16 CHARGING ALTERNATOR Install the 4 screws. Torque:2.0 N∙m (20 kgf∙cm, 17.4 in.∙lbf) A01822 I NS TALL I C RE G ULATO R AND BRUS H Upward HO LDE R Install the brush holder cover to the brush holder.
  • Page 524 ....IN - - 9 CYLINDER H EAD (1RZ - - E) ..... . .
  • Page 525 ....FI - - 39 TIMING CHAIN (1RZ, 1RZ - - E) .....

This manual is also suitable for:

1rz-e2rz-fe3rz-f3rz-fe