Table of Contents
Advertisement
Advertisement
Table of Contents

Related Manuals for FeiYu Tech AK2000C


Summary of Contents for FeiYu Tech AK2000C
- Page 1 3-Axis Stabilized Handheld Gimbal for Camera Instruction EN V 2.1...
-
Page 2: Table Of Contents
Catalogue 1. Product Overview ……………………………………………… 2 2. Start to Use ……………………………………………………… 3 2.1 Charging ……………………………………………………………………… 3 2.2 Unlock and Lock …………………………………………………………… 4 2.3 Camera Installation ………………………………………………………… 5 2.4 Gimbal Balancing …………………………………………………………… 5 2.5 Power ON/OFF ……………………………………………………………… 10 3. Function operation ……………………………………………… 10 3.1 Mode/Function Introduction ………………………………………………... - Page 3 AK2000C is equipped with function buttons and a touch screen so that userscan switch the working modes, control the rotating orientation, and set parameters by one hand.
-
Page 4: Product Overview
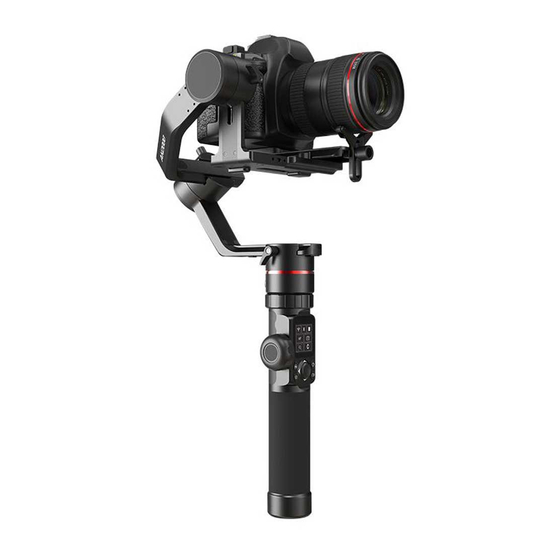
1. Product Overview * This product does not include the camera. 1. Arca quick release plate 12. Touch screen 24. Cross arm lock screw 2. Quick release plate 13. Joystick 25. Roll axis 3. Fixed plate 14. Mode button 26. Roll axis position lock 4. -
Page 5: Start To Use
2.5mm)(Panasonic shutter cable)×1 Optional accessories Versatile arm Hyperlink remote Multifunctional bracket for Extension rod×1 ( for AK2000S and controller×1 tilt axis×1 AK2000C)×1 Wireless MIC Kit L-shaped quick release Wireless MIC×1 Wireless receiver×1 plate×1 2. Start to Use 2.1 Charging TIP: •... -
Page 6: Unlock And Lock
2.2 Unlock and Lock Each rotating axes has a position lock for convenient balancing and storage. Be sure to unlock the position locks before using the gimbal. Lock Unlock Step: Stored lock satus Balanced lock satus www.feiyu-tech.com... -
Page 7: Camera Installation
2.3 Camera Installation TIP: Camera is ready to shoot. (The lens cover should be removed from the camera and the memory card and battery needs to be inserted to the camera to complete all the connections.) ① 2.4 Gimbal Balancing For ideal shooting effects, balancing the gimbal is necessary, and accurate balance will offer longer battery life. - Page 8 2.4.1 Balance tilt axis Step (a) · Turn the camera lens upwards. · Let it go, observe the dropping direction of the camera. · Loosen the lock screw(red). · Move the camera. Tip: Slide the fixed plate slightly in the Status A: direction of the arrow.
- Page 9 Step (b) · Turn the camera lens forward. · Let it go, observe the dropping direction of the camera. · Unlock the safety lock(red). · Move the camera. Tip: Slide the quick release plate Status A: slightly in the direction of the arrow. Tip: Slide the quick release plate Status B: slightly in the direction of the arrow.
- Page 10 2.4.2 Balance roll axis · Unlock the safety lock(red). · Let it go, observe the dropping direction of the camera. · Loosen the lock screw(red). · Move the camera. Tip: Slide the cross arm slightly in the Status A: direction of the arrow. Tip: Slide the cross arm slightly in the Status B: direction of the arrow.
- Page 11 2.4.3 Balance pan axis · Hold the handle and slant it (>15°), put the vertical arm horizontally. · Let it go, observe the dropping direction of the camera. · Loosen the lock screw(red). · Move the camera. Tip: Slide the vertical arm slightly in Status A: the direction of the arrow.
-
Page 12: Power On/Off
2.5 Power ON/OFF Check before powering on: • Gimbal has enough energy. • All the position locks have been unlocked , safety lock, lock screw have been tightened. • Camera is ready to shoot. (The lens cover should be removed from the camera and the memory card and battery needs to be inserted to the camera to complete all the connections.) •... - Page 13 ③ All follow Mode The camera moves according to the user's hand. ④ Lock Mode The orientation of the camera is fixed. ⑤ Reset Return to Pan Mode, 3-axis return to initial position. ⑥ Auto-rotation mode (See P16 for more Auto-rotation mode helps user setup and automatically taketime-lapse photography.
-
Page 14: Button Operation
3.2 Button Operation 3.2.1 Mode operation Button Function Description Single tap Pan/Lock mode (default mode) Mode Button Double tap Pan mode Triple tap All follow mode 3.2.2 Shutter button Button Function Description 1. Focus Single tap (half-way press) 2. Photography Full-way press after focusing. - Page 15 3.2.4 Joystick Button Function Description 1. Camera lens move to upward, select the Move to upward option above on display 2. Camera lens move to downward, select Move to downward the option below on display Joystick 3. Camera lens move to left, select the Move to left option on the left on display 4.
-
Page 16: Usb Port
3.2.6 Trigger button Button Function Description 1. Follow mode Press & hold 2. Reset Double tap Trigger Button 3. Selfie shooting (Pan axis rotate 180° Triple tap to shoot) 3.3 USB Port There are USB2.0 and Type C port at the fixed plate, which enable to connect to camera/follow focus and other devices. -
Page 17: Touch Screen
3.4 Touch Screen 3.4.1 Touch Screen Icon Mode Icon Mode Camera Connected/Photography Battery Level Camera Unconnected Bluetooth Video Recording Mode Bluetooth Unconnected All Lock Mode Pan Mode Follow Mode All Follow Mode 3.4.2 Display screen switch 3.4.3 Usage of touch screen Slide right to left: Flip to the right sub page. -
Page 18: Modes Setting
3.4.4 Lock/unlock screen 3.5 Modes Setting Description: Slide right to left Slide left to right Tap to select current menu 3.5.1 Inception Mode setting Single tap Inception Mode on screen, the camera lens will rotate to upward. Holding the gimbal horizontally, and set rotation direction/speed/one circle or continuous circle. - Page 19 3.5.3 Selfie Setting Hold the gimbal horizontally, tap Selfie on screen to enter Selfie shooting, the camera turns 180° horizontally. A blue wireframe shows around the icon during Selfie shooting. Double tap trigger button to recenter the gimbal. 3.5.4 Protrait setting Holding the gimbal horizontally, tap Portrait on screen to enter protrait shooting.
- Page 20 Set scene modes according to camera function. Joystick setting Settings www.feiyu-tech.com...
-
Page 21: Motion-Timelapse Mode
3.6 Motion-timelapse Mode 3.6.1 Motion-timelapse setting Method 1: Set the Motion-timelapse mode parameters on Feiyu ON App. Enter the parameter setting interface to select the Motion-timelapse mode for setting. The maximum interval time is 59 seconds, while maximum staying time for long exposure photograhy is 58 seconds. - Page 22 Minimum time Maximum time Display icon Mode/Status setting setting PAN (T1) Pan axis rotation period 00:00:00 07:59:59 TILT (T2) Tilt axis rotation period 00:00:00 07:59:59 INVL (t) Photographic interval 00:00:00 00:00:59 DWELL (P) Photography waiting time 00:00:00 00:00:58 PAN: Time required for the pan axis to rotate from the start point to the end point. TILT: Time required for the tilt axis to rotate from the start point to the end point.
-
Page 23: Initialization
(4) Gimbal rotate automatically from the start position to the end position gimbal return the start initial position after setting, and then tilt and pan axis will start to rotate according to the parameter that has been set. To get more videography skills with gimbal and it's tutorial, please kindly visit our official or download Feiyu ON App. -
Page 24: Manual Lock
Steps: (1) Select Settings - Calibration on the display to enter the gimbal initialization. (2) Place the gimbal on the table, and the gimbal automatically initializes. If the touch screen prompts that the calibration is successful, the initialization ends, otherwise the initialization fails. (3) After the initialization is successful, slide the touch screen interface to the left/ right or click the ESC on the screen to wake up. -
Page 25: Feiyu On App
Watch tutorials in video skill page on Feiyu ON. * Requires iOS 9.0 or above, Android 6.0 or above. 4.2 App Connecting AK2000C Steps: (1) Power on the gimbal. (2) Select Wi-Fi connection menu on camera (find in setting-network-Wi-Fi ), keep this page which has Wi-Fi name and its password on. -
Page 26: Firmware Upgrade
Repair or update the icons in the screen. (Support for AK LED icons update series gimbal only) Repair/update or newly add control cameras/follow focus through USB cable, repair the bugs about camera USB Hub update control, and etc. (AK2000C and other some feiyu DSLR gimbals support this update) www.feiyu-tech.com... -
Page 27: Accessories
Noted: this chapter introduce the Optional accessories only, please refer to the manual instruction for more information of the specific accessory. 5.1 Tripod AK2000C is equiped with 1/4 inch thread hole and 3/8 inch thread hole to mount all type of Tripod for standing shooting. www.feiyu-tech.com... -
Page 28: Versatile Arm (Optional Accessories)
(1) Powering on AK2000C and remote controller. (2) Tap setting menu on remote controller screen, select bluetooth connection and connect it. (3) After successful connection,the function of AK2000C enable to operate on remote controller, and the tilt/pan movement can follow the movement of the www.feiyu-tech.com... - Page 29 Hyperlink remote controller. Please operate on hyperlink remote controller. Notice: The function of horizontal adjustment button is disable for AK2000C. www.feiyu-tech.com...
-
Page 30: Extension Rod (Optional Accessories)
5.5 Extension Rod (Optional Accessories) It can be used as a mini crane, or take the footage of emulating flying at a low altitude. 5.6 Multifunctional Bracket (Optional Accessories) To extra stabilize the camera by mounting it on top of camera and tilt axis. The bracket can be used an extension plate for mounting other accessories on it. -
Page 31: Wireless Mic Kit (Optional Accessories)
5.7 Wireless MIC Kit (Optional Accessories) The wireless receiver can collect the sound from the wireless microphone within 20m range. Accessories: How to connect and use it: Usage scenario 1 Step 1: Two way to enter video recording mode: (1) Manually set video mode on camera. (2) Single tap function button to switch to video mode on gimbal, after it connected to camera via cable. - Page 32 Step 2: Plug in the receiver to camera receiver jack and turn it on. Step 3: Turn on the MIC, and it is ready to be used. (Wireless communication distance ≦20mm, please put it close to sound source for ideal recording ) Step 4: Plug the wireless clip-on microphone in the MIC.
-
Page 33: Specifications
Step 2: Turn on the MIC, and it is ready to be used.(follow the step 1.3 to use it) (1) You can plug the wireless clip-on microphone in the MIC mount to use it. (2) You can plug the DC 3.5mm microphone in DC 3.5 to micro adaptor, then connect it to MIC for using. -
Page 34: Compatible Cameras For Reference
Compatible Cameras for Reference AK2000C Lens Compatible List Can be equipped with a lens Brand Camera(H/W/D) Model Lens size & weight (Φ×L) Camera E 10–18mm F4 OSS Φ70mm*63.5mm 225g √ FE 12-24mm F4 G Φ87mm*117mm 565g √ FE 16-35mm F2.8 GM Φ89mm*122mm 680g... - Page 35 AK2000C Lens Compatible List Can be equipped with a lens Brand Camera(H/W/D) Model Lens size & weight (Φ×L) Camera NIKKOR Z 35mm f/1.8 370g √ 18-140mm f/3.5-5.6G ED VR Φ78mm*97mm 490g Z6 134×100.5×67.5mm 675g √ NIKKOR Z 50mm f/1.8 S...
-
Page 36: Disclaimer
Disclaimer Thanks for using FeiyuTech product. The information in this document affects your safety and your legal rights and responsibilities. Read the entire document carefully to ensure proper configuration before use, Failure to read and follow instructions and warnings in this document may result in serious injury to yourself or others, or damage to your products or damage to other objects in the vicinity. - Page 37 Official Social Media Website Facebook Youtube Twitter Instagram Website: www.feiyu-tech.com Facebook: www.facebook.com/feiyutech YouTube Channel: www.youtube.com/c/Feiyu-tech Twitter: www.twitter.com/feiyutech Instagram: www.instagram.com/FeiyuTech Online Store: store.feiyu-tech.com www.feiyu-tech.com...
Need help?
Do you have a question about the AK2000C and is the answer not in the manual?
Questions and answers