Table of Contents
Advertisement
Advertisement
Table of Contents

Related Manuals for FeiYu Tech AK2000S


Summary of Contents for FeiYu Tech AK2000S
- Page 1 3-Axis Stabilized Handheld Gimbal for Camera Instruction EN V 1.1...
-
Page 2: Table Of Contents
Catalogue 1. Product Overview ……………………………………………… 2 2. Start to Use ……………………………………………………… 4 2.1 Charging ……………………………………………………………………… 4 2.2 Position Lock ………………………………………………………………… 4 2.3 Camera Installation ………………………………………………………… 5 2.4 Gimbal Balancing …………………………………………………………… 6 2.5 Power ON/OFF ……………………………………………………………… 8 3. Function operation ……………………………………………… 8 3.1 Mode/Function Introduction ………………………………………………... - Page 3 AK2000S is designed with function button and LCD touch screen, which can switch the gimbal working mode, control the rotation and the parameters setting by one hand.
-
Page 4: Product Overview
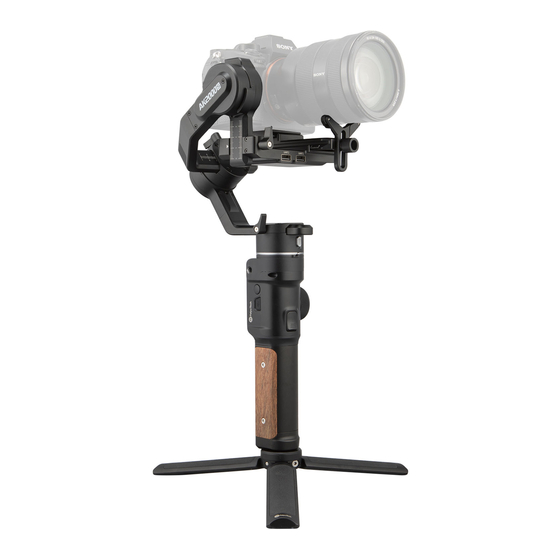
1. Product Overview * This product does not include the camera. www.feiyu-tech.com... - Page 5 www.feiyu-tech.com...
-
Page 6: Start To Use
2. Start to Use TIPS 1) Please mount the camera and balance it before Power ON. 2) When the battery is low, please charge the gimbal. 3) When not in use for a long time, power off the gimbal. 2.1 Charging Please fully charge the battery before power on the gimbal for the first time. -
Page 7: Camera Installation
2.3 Camera Installation Make sure the battery and memory card are installed before camera installation. Step 1: Mount quick release plate ① on fixed plate ②, lock it. Loosen the ARCA quick release plate safety lock ③, take out ARCA quick release plate ④. Step 2: Mount camera on ARCA quick release plate ④. -
Page 8: Gimbal Balancing
2.4 Gimbal Balancing For ideal shooting effects, balancing the gimbal is necessary, and accurate balance will offer longer battery life. TIPS 1) Before balancing the gimbal, please lock the gimbal at the balanced lock status, and the lens cover should be removed from the camera and the memory card needs to be inserted to the camera to complete all the connections to ensure that the camera is ready for shooting. - Page 9 2.4.2 Balance Roll Axis a. Tighten the tilt axis position lock ①, unlock the roll axis position lock ②, check gravity center of camera. b. Loosen the cross arm lock screw ③, slide cross arm ④ to balance the camera position.
-
Page 10: Power On/Off
2.5 Power ON/OFF Be sure to unlock the position lock before using the gimbal. Long press power button, release the button until it shows on display. 3. Function operation 3.1 Mode/Function Introduction ① Pan Mode (Default mode) The roll and tilt direction are fixed, and the camera moves according to the left- right movements of the user's hand. - Page 11 ⑥ Manual Lock Slide the tilt axis to a desired position, and hold on for 0.5 second. Set the camera position accurately and conveniently. ⑦ Auto-rotation mode Auto-rotation mode helps user setup and automatically taketime-lapse photography. It can set rotation route and time. ⑧...
-
Page 12: Button Operation
3.2 Button Operation 3.2.1 Mode operation Button Function Description Single tap Pan/Lock mode (default mode) Mode Button Double tap Pan mode Triple tap All follow mode 3.2.2 Shutter button Button Function Description 1. Focus Single tap (half-way press) 2. Photography Full-way press after focusing. - Page 13 Button Function Description 1. Camera lens move to upward, select the Move to upward option above on display 2. Camera lens move to downward, select Move to downward the option below on display Joystick 3. Camera lens move to left, select the Move to left option on the left on display 4.
-
Page 14: Usb Port
3.2.7 Multi-function knob Button Function Description 1. Control the current axis Rotate knob (default pan rotation mode) rotate direction 2. Switch between follow Long press to switch Focus/Zoom Multi-function Knob 3. Switch axis rotate among Single tap to switch (under the control of Tilt/Roll/Pan Axis the axis direction mode) 4. -
Page 15: Touch Screen
3.4 Touch Screen 3.4.1 Screen Icon Mode Icon Mode Camera Connected/Photography All Lock Mode Camera Unconnected Pan Mode Video Recording Mode Follow Mode Wifi Connected All Follow Mode Wifi Unconnected Tilt Axis Enabled Multi-function Knob Dnabled Roll Axis Enabled Multi-function Knob Disabled Pan Axis Enabled Zoom Status Battery Level... -
Page 16: Modes Setting
3.4.2 Display screen switch 3.4.3 Usage of touch screen Slide right to left: Flip to the right sub page/return to previous option. Slide left to right: Flip to the left sub page. Tap: Select current option. 3.4.4 Lock/unlock screen 3.5 Modes Setting Slide right to left Slide left to right Tap to select current menu... - Page 17 3.5.2 Motion-timelapse mode setting Please refer to the Motion Timelapse Mode chapter. 3.5.3 Protrait setting Holding the gimbal horizontally, tap Portrait on screen to enter protrait shooting. 3.5.4 Other setting Set motor power according to camera weight. www.feiyu-tech.com...
- Page 18 Set scene modes according to camera function. Higher sensitivity gives faster reaction of gimbal/camera. System setting www.feiyu-tech.com...
-
Page 19: Motion-Timelapse Mode
3.6 Motion-timelapse Mode 3.6.1 Motion-timelapse setting Method 1: Set the Motion-timelapse mode parameters on Feiyu ON App. Enter the parameter setting interface to select the Motion-timelapse mode for setting. The maximum interval time is 59 seconds, while maximum staying time for long exposure photograhy is 58 seconds. - Page 20 Minimum time Maximum time Display icon Mode/Status setting setting PAN (T1) Pan axis rotation period 00:00:00 07:59:59 TILT (T2) Tilt axis rotation period 00:00:00 07:59:59 INVL (t) Photographic interval 00:00:00 00:00:59 DWELL (P) Photography waiting time 00:00:00 00:00:58 PAN: Time required for the pan axis to rotate from the start point to the end point. TILT: Time required for the tilt axis to rotate from the start point to the end point.
-
Page 21: Initialization
(4) Gimbal rotate automatically from the start position to the end position gimbal return the start initial position after setting, and then tilt and pan axis will start to rotate according to the parameter that has been set. To get more videography skills with gimbal and it's tutorial, please kindly visit our official or download Feiyu ON App. -
Page 22: Manual Lock
(3) The surrounding temperature changes abruptly. Steps: (1) Select Settings - Calibration on the display to enter the gimbal initialization. (2) Place the gimbal on the table, and the gimbal automatically initializes. If the touch screen prompts that the calibration is successful, the initialization ends, otherwise the initialization fails. -
Page 23: Feiyu On App
4. Feiyu ON App 4.1 Download the Feiyu ON App Scan the QR code to download the app, or search for Feiyu ON in the App Store or Google Play. * Requires iOS 9.0 or above, Android 6.0 or above. 4.2 App Connecting Steps: (1) Power on the gimbal. -
Page 24: Firmware Upgrade
Repair/update or newly add control cameras/follow USB Hub update focus through USB cable, repair the bugs about camera control, and etc. (Support for AK4500/AK2000S only) Noted: Gimbal has an update protection function. When the update fails, restart the gimbal, it will return to the previous firmware. -
Page 25: Accessories
5.1 Tripod AK2000S is equiped with 1/4 inch thread hole and 3/8 inch thread hole to mount all type of Tripod for standing shooting. 5.2 Versatile Arm Installation: Install the versatile arm on the handle, align screw holes and tighten the screws by L shape wrench.(it is attached on versatile arm, the end cover of... -
Page 26: Brushless Follow Focus
(2) Tap setting menu on remote controller screen, select bluetooth connection and connect it. (3) After successful connection,the function of AK2000S enable to operate on remote controller, and the tilt/pan movement can follow the movement of the Hyperlink remote controller. -
Page 27: Extension Rod
Notice: The function of horizontal adjustment button is disable for AK2000S. 5.5 Extension Rod It can be used as a mini crane, or take the footage of emulating flying at a low altitude. www.feiyu-tech.com... -
Page 28: Multifunctional Bracket
5.6 Multifunctional Bracket To extra stabilize the camera by mounting it on top of camera and tilt axis. The bracket can be used an extension plate for mounting other accessories on it. 5.7 Wireless MIC Kit The receiver transmitter can collect the sound from the transmitter within 20m range. - Page 29 5.7.1 How to use (1) Two way to enter video recording mode: ① Manually set video mode on camera. ② Single tap function button to switch to video recording mode on gimbal, after it connected to camera via USB cable. (2) Plug in the wireless microphone (receiver terminal) to camera MIC jack.
- Page 30 5.7.2 Wireless microphone kit is available to use individually. 5.7.3 The indicator description of wireless microphone kit * Workable for both receiver and transmitter terminal. Status Indicator ICON Power ON Blue light stays on to flashes regularly Power OFF Red light stays on to off Low battery Red light flashes regularly Fully charged...
-
Page 31: Specifications
6. Specifications Product Size (well balanced) 158.7×203.6×372.8mm Max. Tilting Range 230° Max. Rolling Range 360° Max. Panning Range 360° Tilt Follow Speed 2°/s ~ 75°/s Pan Follow Speed 3°/s ~ 150°/s Payload Capability 2200g/4.85 lb (well balanced) About 1100g/2.4 lb (not included the battery, shutter Weight release cable, camera, lens and so forth) Battery... -
Page 32: Compatible Cameras For Reference
Compatible Cameras for Reference AK2000S Lens Compatible List Brand Can be equipped with a lens Lens size & weight Camera(H/W/D) Model Brushless follow Brand Camera (Φ×L) Remark focus + Camera E 10–18mm F4 OSS Φ70mm×63.5mm 225g √ √ FE 12-24mm F4 G Φ87mm×117mm 565g... - Page 33 AK2000S Lens Compatible List Brand Can be equipped with a lens Lens size & weight Camera(H/W/D) Model Brushless follow Brand Camera (Φ×L) Remark focus + Camera LEICA DG SUMMILUX 15mm f/1.7 115g ASPH √ × LEICA DG SUMMILUX 25mm f/1.4 Φ77.7mm×75mm 510g...
-
Page 34: Disclaimer
Disclaimer Thanks for using Feiyu Gimbal. The information in this document affects your safety and your legal rights and responsibilities. Read the entire document carefully to ensure proper configuration before use, Failure to read and follow instructions and warnings in this document may result in serious injury to yourself or others, or damage to your products or damage to other objects in the vicinity. - Page 35 5. Never use the gimbal when the temperature is too high or too low. www.feiyu-tech.com...
Need help?
Do you have a question about the AK2000S and is the answer not in the manual?
Questions and answers