
Related Manuals for FeiYu Tech AK4000


Summary of Contents for FeiYu Tech AK4000
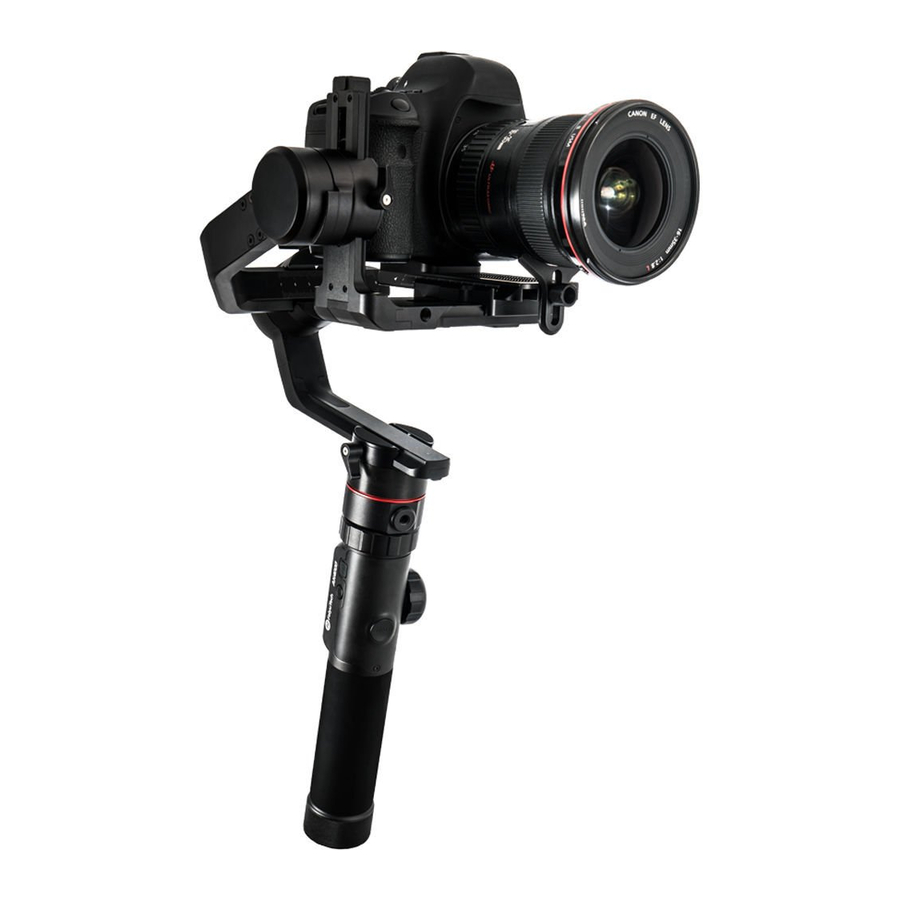
- Page 1 3-Axis Stabilized Handheld Gimbal for Camera Instructions Guilin Feiyu Technology Incorporated Company U s e r M a n u a l V 1 . 0...
-
Page 2: Table Of Contents
3.Balance the Gimbal 3.1Balance Adjustment of the Tilting Axis 3.2Balance Adjustment of the Rolling Axis 3.3Balance Adjustment of the Panning Axis 4.AK4000 Function / Operation 4.1Handle - Function / Operation 4.2Function 5.App - Download and Connecting 5.1Download and Install Feiyu ON App 5.2Connecting App... -
Page 3: Product Overview
1.Product Overview 1/4 Inch Thread Hole Tilt Lock Screw Safety Lock 1/4 Inch Thread Hole Tilt Axis Cross Arm Roll Lock Screw Quick Release Plate Fixed Plate Sliding Arm Screw anti-column 1/4 Inch Thread Hole Roll Axis Lens Support Frame fixed screw Pan Lock Screw Vertical Arm... -
Page 4: Install
2.Install TIPS (1) Please mount the camera before powering on the gimbal. (2) When the battery is low, please charge the gimbal. (3) When not in use, turn off the gimbal and then remove the batteries. Charge the Batteries Please fully charge the batteries before powering on the gimbal for the first time. Charge the batteries with the charger. -
Page 5: Mount The Camera
Attach Camera 1. Lock the lens support frame with the screw to the quick release plate; 2. Use the thumb screw to lock the camera from the bottom slot of the quick release plate, and slightly adjust the lens support frame after locking the camera; (Select the long/short thumb screw according to the position of the camera to be mounted on the quick release plate) Thumb Screw... -
Page 6: Balance The Gimbal
Balance the Gimbal Balance Adjustment of the Tilting Axis Adjust the center of gravity of the camera in two steps to the axis of rotation of the tilting axis. Adjust the center of gravity position of the tilting axis up and down: point the camera lens down, adjust cross arm to maintain the level, as shown in figure ①, let go and observe the state of rotation. - Page 7 Adjust the center of gravity position of the tilting axis forward and backward: point the camera lens horizontal forward, adjust cross arm to maintain the level as shown in figure ①,let go and observe the state of rotation. Loosen the safety lock on the right side of the camera, and adjust the balance by sliding up and down the quick release plate on the bottom of the camera (refer to Figure ②...
-
Page 8: Balance Adjustment Of The Rolling Axis
Balance Adjustment of the Rolling Axis When the balance adjustment of tilting axis completed, the balance of the rolling axis can be adjusted:keep the gimbal socket connector vertical to the ground with the hand -held control handle as shown infigure ①, leave the gimbal powered off and observe the balance. -
Page 9: Balance Adjustment Of The Panning Axis
Balance Adjustment of the Panning Axis When the balance adjustment of tilting axis and rolling axis is completed, the balance of the panning axis can be adjusted. Keep the gimbal socket connector in the horizontal position,adjust hand-held panning axis as shown in figure ①,let go and observe the state of rotation. -
Page 10: Ak4000 Function / Operation
4.AK4000 Function / Operation Handle - Function / Operation 1.Touch screen * Click the option to switch or select the function mode, and slide the touch-screen interface to the left or right to switch the screen. Single tap the power button in the panning follow mode to enter the panning follow mode and rolling follow (rolling follow angle ≤... - Page 11 Screen interface The load setting is performed according to the camera. Click on the 0-150 g 1100-3500g Custom 2 Slide the touch- Payload Capture touch-screen Setting screen interface Mode 150-450 g >3500g Custom 3 up and down Rotation Auto 450-750 g Auto-adapt Time Rotation...
- Page 12 2.Mode Button Note: The firmware upgrade may occur manual operation function and the actual product features do not match. Please find the latest manual on the official website. Panning Mode / Single tap to switch between panning Single tap Lock Mode mode and lock mode Under all follow, single tap to switch to Double tap...
- Page 13 5.Video Button * Need to connect to the shutter release cable or the camera WiFi (for Camera with WiFi function). Video Single tap Start shooting / Stop shooting Button 6.hortcut button Long press the shortcut button, Long press Fast follow mode enter the quick follow mode.
- Page 14 8.Function Button Single tap Return / Lock / Unlock Function Button On other interfaces, single tap the function button to return to the main interface. Single tap the function key on the main interface to enter the locked/unlocked state. 9. Multifunction Knob Control the current axial rotation / Rotate Rotate...
-
Page 15: Function
Function Modes Panning Mode(Default mode) The roll and tilt direction are fixed, and the camera moves according to the left-right movements of the user's hand. Follow Mode The roll direction is fixed, and the camera moves according to the left-right movements, up- down movements of the user's hand. - Page 16 Auto-rotation Mode Auto-rotation Mode Parameter Setting Method 1. Enter the Feiyu ON App to set the auto-rotation mode parameters. Enter the parameter setting interface to select the auto-rotation mode for setting. The maximum time setting for panning and tilting rotation time is less than 8 hours, and the maximum setting time for photographing stop time and photographing interval is 59 seconds.
- Page 17 Auto- rotation mode setting (1) Select auto-rotation to enter the auto-rotation (2) Set rotation start position mode on the display interface. Rotate the panning axis or tilting axis to the start position and stay for half a second, and click OK option on the screen to record the start position.
-
Page 18: App - Download And Connecting
5.App - Download and Connecting Download and Install Feiyu ON * Requires iOS 9.0 or later, Android 5.0 or later iOS Version Android Version Connecting App 1. Turn on the mobile phone Bluetooth and start the gimbal; 2. Open the App, and connect to AK2000 according to the App prompts. After the connection is successful, you can control AK2000 on the App. -
Page 19: Advanced Operation
6.Advanced Operation Gimbal Initialization You can initialize your gimbal when: (1) When camera is not level. (2) If not used for a long period of time. (3) In case of extreme temperature variations. (1) Select System Settings on the display screen to enter the PTZ calibration. (2) Place the gimbal on the table, and the gimbal automatically initializes. -
Page 20: Accessories Expansion
Accessories expansion 1. Extension Rod 2. Tripod 3. Stable and Extension Support of Titling Axis www.feiy u-tech.co m... -
Page 21: Firmware Upgrade
Firmware Upgrade Connect the gimbal to the Feiyu ON App, to upgrade the firmware through the App. Settings Updata Query Update Your Gimbal version is ***, The latest version is ***, do you want to upgrade? Feiyu ON Later Download www.feiy u-tech.co m... -
Page 22: Parameters
7.Specifications 242mm 191mm 141.5mm 43mm 57.4mm 230° Max. Tilting Range 360° Max. Rolling Range 360° Max. Panning Range 2°/s ~ 75°/s Tilting Speed 3°/s ~ 150°/s Panning Speed Operation Time Hours Weight About 1436g (not including the batteries) 4000g Payload ( In center of gravity balanced state ) www.feiy u-tech.co m www.feiy u-tech.co m... -
Page 23: Compatible Cameras For Reference
8.Compatible Cameras for Reference Brand Model Can be equipped with a lens Canon EF 100mm f/2.8L IS USM+Camera hood Canon EF 135mm f/2L USM+Camera hood Canon 5DMarkIV Canon EF 85mm f/1.2 L II USM+Camera hood Canon EF 50mm f/1.2L USM+Camera hood Canon EF 35mm f/2 IS USM+Camera hood Canon EF 35mm f/2 IS USM+Camera hood Canon EF 50mm f/1.2L USM+Camera hood*... - Page 24 Brand Model Can be equipped with a lens Sony E 50mm F1.8 Sony E PZ 18-105mm F4 OSS Sony FE 85mm F1.8 Sony α9 Sony FE 35mm F1.4 sony FE 24-240mm F3.5-6.3 Sony α7R2 SonyVario-Sonnar T* 24-70mm f/2.8 ZA SSM Sony Sony α6500 SonyFE 28-70mm f/3.5-5.6 OSS...
- Page 25 Guilin Feiyu Technology Incorporated Company +86(0)773 2320865 Due to software and hardware improvements, your actual product might differ from the descriptions and pictures in this user manual. You can get the latest user manual from the official website. For more information, please visit our official website D I S C L A I M E R Prohibit any user for any illegal purpose.
Need help?
Do you have a question about the AK4000 and is the answer not in the manual?
Questions and answers