Advertisement
Quick Links
Advertisement

Related Manuals for Draper Foundation 302005


Summary of Contents for Draper Foundation 302005
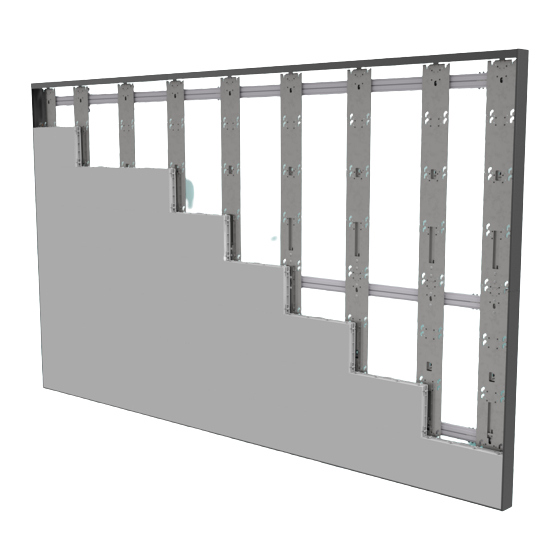
- Page 1 FOUNDATION ™ Left to Right Installation LEFT to RIGHT...
-
Page 2: Important Safety Information
Do not affix the unit to wall or ceilings that have inadequate strength to permanently hold the unit during use. It is the owner’s and installer’s responsibility to confirm the wall to which the unit attaches is sufficient to permanently hold the weight and stress loads of the unit at all times. Draper, Inc., is not responsible for improper installation, application, testing or workmanship related to the product at place of installation. -
Page 3: Section 2 - Components
page 4 of 32 page 5 of 32 Foundation for LED Panels Foundation for LED Panels ™ ™ Section 2 - Components Standard Array Size RAIL CONNECTOR Component Part # RAIL CONNECTOR Top / Bottom Slot WALL 4 X 4 5 X 5 6 X 6 8 X 8... - Page 4 page 6 of 32 page 7 of 32 Foundation for LED Panels Foundation for LED Panels ™ ™ TOP CENTER TRIM SECTION Section 2 - Trim Frame Components (continued) Standard Array Size Trim Component Part # 4 X 4 5 X 5 6 X 6 8 X 8 10 X 10...
-
Page 5: Side View
page 8 of 32 page 9 of 32 Foundation for LED Panels Foundation for LED Panels ™ ™ Section 3.2 - For LED arrays 7 panels or higher - 3 Horizontal Rails Section 3 - Determining Mounting Location 1. Mark the location of the Bottom Left Corner of the viewing area. Section 3.1 - For LED arrays up to 6 panels high - 2 Horizontal Rails 2. - Page 6 page 10 of 32 page 11 of 32 Foundation for LED Panels Foundation for LED Panels ™ ™ Section 4 - Assembling Horizontal Rails Section 5 - Hanging Horizontal Rails The horizontal rails must be assembled prior being secured to the wall. Section 5.1 - For LED arrays up to 6 panels high - 2 Horizontal Rails To assemble the Horizontal rails: 1.
- Page 7 page 12 of 32 page 13 of 32 Foundation for LED Panels Foundation for LED Panels ™ ™ Section 6 - Adjusting and Aligning Horizontal Rails Section 7 - Securing Inner Wall Brackets 1. Using a 3mm Hex Wrench adjust all remaining wall mounting brackets. Ensure that each bracket is flush to the wall and secure to the wall with the TOP VIEW - CONCAVE WALL appropriate mounting hardware.
- Page 8 page 14 of 32 page 15 of 32 Foundation for LED Panels Foundation for LED Panels ™ ™ Section 9 - Inserting Front Rail Connector and Vertical Rail Fasteners Section 8.2 - Vertical Rail Assembly - For LED arrays 7 panels or higher - 3 Horizontal Rails Section 9.1 - For LED arrays up to 6 panels high - 2 Horizontal Rails Section 8.2.1 - Lower Section of Vertical Rail Assembly 1.
- Page 9 page 16 of 32 page 17 of 32 Foundation for LED Panels Foundation for LED Panels ™ ™ Section 9.2 - For LED arrays 7 panels or higher - 3 Horizontal Rails Section 10 - Attaching Vertical Rails 1. Insert horizontal rail connector and vertical rail fasteners into the top, middle and bottom horizontal rails. Section 10.1 - For LED arrays up to 6 panels high - 2 Horizontal Rails WORK GLOVES RECOMMENDED...
- Page 10 page 18 of 32 page 19 of 32 Foundation for LED Panels Foundation for LED Panels ™ ™ Section 11 - Adjusting Verticals Section 10.2 - For LED arrays 7 panels or higher - 3 Horizontal Rails Section 11.1 - Y - Axis Adjustment Section 10.2.1 - Attaching Bottom Vertical Sections WORK GLOVES RECOMMENDED...
- Page 11 page 20 of 32 page 21 of 32 Foundation for LED Panels Foundation for LED Panels ™ ™ Please note: All Vertical Rails must be aligned and level with each other. Section 11.2 - X - Axis Adjustment (Squaring Verticals with provided Alignment Tool) Section 11.2.2 - For LED arrays 7 panels or higher - 3 Horizontal Rails Adjust Vertical Section 11.2.1 - For LED arrays up to...
- Page 12 page 22 of 32 page 23 of 32 Foundation for LED Panels Foundation for LED Panels ™ ™ Section 11.3 - Z - Axis Adjustment WALL ADJUSTMENT BRACKET Mounting Access Hole 1. Using a 3mm hex wrench, adjust each Wall Adjuster Bracket until it contacts the wall. 2.
- Page 13 page 24 of 32 page 25 of 32 Foundation for LED Panels Foundation for LED Panels ™ ™ Section 12 - Attaching Trim Brackets Section 12.4 - Installing Bottom Trim brackets Section 12.1 - Installing TOP Trim Brackets SPLIT LOCK WASHER - SOCKET HEAD SCREW...
- Page 14 page 26 of 32 page 27 of 32 Foundation for LED Panels Foundation for LED Panels ™ ™ Section 14 - Attaching LED Panels LED Cabinets 2. Attach the next LED cabinet direct to the right of the first. Continue until the first row is complete. NOTE: All trim brackets and the Bottom Trim Panels MUST be installed (Section 13) before installing LED CABINETS...
- Page 15 page 28 of 32 page 29 of 32 Foundation for LED Panels Foundation for LED Panels ™ ™ Section 15 - Attaching Trim to Trim Brackets TOP TRIM LED CABINETS REMOVED FROM VIEW FOR CLARITY SIDE TRIM...
- Page 16 page 30 of 32 page 31 of 32 Foundation for LED Panels Foundation for LED Panels ™ ™ Section 16 - Assembled Dimensions for Common Array sizes Foundation for BARCO XT - Dimensions Array Size DIM A DIM B DIM C DIM D DIM E 4x4*...
- Page 17 FOUNDATION ™...
Need help?
Do you have a question about the Foundation 302005 and is the answer not in the manual?
Questions and answers