
Subscribe to Our Youtube Channel
Related Manuals for pts Diagnostics CardioChek Plus


Summary of Contents for pts Diagnostics CardioChek Plus
- Page 1 Professional Test System Portable Whole Blood Test System User Guide For Pro...
-
Page 2: Table Of Contents
How to Set the Units ....................18 How to Set the Sound ..................19 How to Set the Wi-Fi On or Off ................20 How to Set Up the CardioChek Plus Professional Analyzer for Printing…………..21 Testing the Printer ....................22 How to Print Results From Memory..............22 How to Get Help and Information Regarding Your CardioChek Plus Professional Analyzer ........................23... - Page 3 Storage and Handling ..................38 Cleaning and Disinfection..................38 X. TROUBLESHOOTING....................42 XI. INTERPRETING RESULTS ...................44 XII. CLIA INFORMATION ...................45 XIII. SPECIFICATIONS ....................46 XIV. CONTACT INFORMATION .................47 XV. WARRANTY......................48 CardioChek Plus Professional Analyzer Limited Two-Year Warranty....48 XVI. EXPLANATION OF SYMBOLS................49 Symbols ......................49 XVII. INDEX ........................50...
-
Page 4: Introduction
CardioChek Plus Intended Use The CardioChek Plus test system is a small, portable analyzer and test strip system intended for multiple-patient use in professional healthcare settings. This system should only be used with single-use, auto-disabling lancing devices. This system is for in vitro diagnostic use only. The test strips are... - Page 5 Please remember to return the enclosed warranty card to PTS, Inc. to ensure that you receive product updates and other important information. For questions or additional assistance with your CardioChek Plus test system, please contact PTS, Inc. (Hours: 8:00 a.m. to 5:00 p.m. US EST) using the following contact information: Polymer Technology Systems, Inc.
-
Page 6: Introduction To The Cardiochek Plus Professional Test System
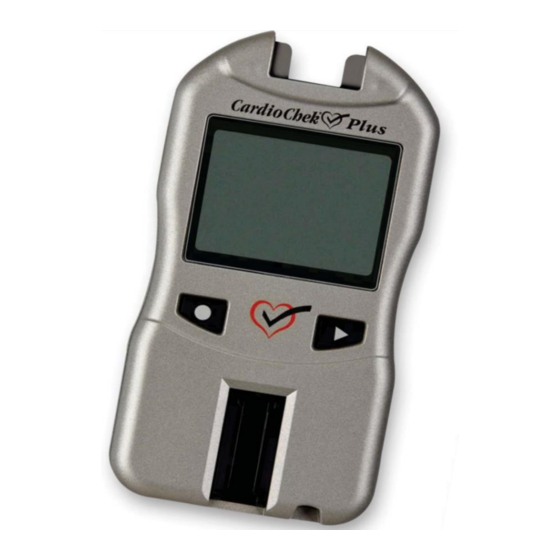
II. INTRODUCTION TO THE CARDIOCHEK PLUS PROFESSIONAL TEST SYSTEM The CardioChek Plus Professional Test System The CardioChek Plus professional test system consists of three main parts. These include the CardioChek Plus professional analyzer, PTS Panels ® test strips, and a ®... - Page 7 II. INTRODUCTION TO THE CARDIOCHEK PLUS PROFESSIONAL TEST SYSTEM, continued Display (A) Display shows test results, messages, time, date, and stored results. Enter Button (B) Press this button to turn on the analyzer or to accept the current menu choice.
-
Page 8: The Memo Chip
II. INTRODUCTION TO THE CARDIOCHEK PLUS PROFESSIONAL TEST SYSTEM, continued The MEMo Chip Each package of PTS Panels test strips contains a color-coded lot-specific MEMo Chip. The color-coded MEMo Chip contains the settings for each test. The top of the MEMo Chip has a finger notch. - Page 9 II. INTRODUCTION TO THE CARDIOCHEK PLUS PROFESSIONAL TEST SYSTEM, continued The MEMo Chip port is located at the top center of the analyzer. The MEMo Chip is inserted into this port with the finger notch facing up. Push firmly, but gently, until the MEMo Chip is fully inserted.
- Page 10 II. INTRODUCTION TO THE CARDIOCHEK PLUS PROFESSIONAL TEST SYSTEM, continued Limitations PTS Panels eGLU Test Strips LIMITATIONS OF THE PROCEDURE 1. The analyzer should not be used to test critically ill patients. 2. Blood samples from patients in shock, patients with severe dehydration, or patients in a hyperosmolar state (with or without ketosis) have not been tested.
- Page 11 II. INTRODUCTION TO THE CARDIOCHEK PLUS PROFESSIONAL TEST SYSTEM, continued 4. NEONATAL USE and ARTERIAL BLOOD: This product has not been tested using neonatal or arterial blood. This test system should not be used with these blood samples. This test system is specific for glucose. Other sugars or reducing substances such as ascorbic acid at normal blood concentrations have no significant effect on test results.
-
Page 12: Setup
Caution: Improper installation of batteries can result in decreased battery life or damage to the analyzer. How to Install/Replace the Batteries: Open the battery door on the back of the CardioChek Plus professional analyzer by releasing the latch and pulling the door away from the back of the analyzer. -
Page 13: Cardiochek Plus Professional Analyzer Menus
III. SETUP, continued CardioChek Plus Professional Analyzer Menus The following diagram provides a layout of the menus within the CardioChek Plus professional analyzer. Detailed information on the use of each menu follows. Use the following buttons to navigate the menus:... - Page 14 III. SETUP, continued CardioChek Plus Analyzer Menus Note: If the units are locked, the UNITS screen does not appear.
-
Page 15: How To Turn Off The Analyzer
III. SETUP, continued How to Turn Off the Analyzer To turn off the analyzer, press both buttons (Enter and Next) at the same time for three seconds. After three minutes of idle time (without a test strip or check strip inserted), the analyzer will perform a 6 second count down and turn off. -
Page 16: How To Reset The Language
III. SETUP, continued How to Reset the Language Turn off the analyzer. Press and hold down Enter for approximately 5 seconds during the analyzer power-up stage until LANGUAGE is displayed. Press Enter. Press Enter again to select English or press Next to scroll through the language choices. - Page 17 III. SETUP, continued How to Set the Date and Time, continued The display will then highlight the hour. Press Enter to accept the displayed hour, or press Next to advance the hour. Press Enter to select. The display will then highlight the minutes. Press Enter to accept the displayed minutes, or press Next to advance the minutes.
-
Page 18: How To Set The Units
III. SETUP, continued How to Set the Units The CardioChek Plus professional analyzer may be shipped with preset units. If the SETTINGS menu does not display UNITS, the analyzer is locked in preset units. The units cannot be changed if the system has been locked. -
Page 19: How To Set The Sound
III. SETUP, continued How to Set the Sound The CardioChek Plus professional analyzer sound has been preset to on. To turn the sound on or off, follow the steps listed below: If the analyzer is off, press either button to turn on the analyzer. Wait for the display to read INSTALL MEMO CHIP or INSERT STRIP. -
Page 20: How To Set The Wi-Fi On Or Off
III. SETUP, continued How to Set the Wi-Fi On or Off The CardioChek Plus professional analyzer wireless communication has been preset to off. To turn the Wi-Fi to on or off, follow the steps listed below: If the analyzer is off, press either button to turn on the analyzer. Wait for the display to read INSTALL MEMO CHIP or INSERT STRIP. -
Page 21: How To Set Up The Cardiochek Plus Professional Analyzer For Printing
III. SETUP, continued How to Set Up the CardioChek Plus Professional Analyzer for Printing The CardioChek Plus professional analyzer supports printing only on CardioChek branded printers. If the analyzer is off, press either button to turn on the analyzer. Wait for the display to read INSTALL MEMO CHIP or INSERT STRIP. -
Page 22: Testing The Printer
III. SETUP, continued Testing the Printer If the analyzer is off, press either button to turn on the analyzer. Wait for the display to read INSTALL MEMO CHIP or INSERT STRIP. Note: If RUN TEST is displayed, go to Step 3. Press Next. -
Page 23: How To Get Help And Information Regarding Your Cardiochek Plus Professional Analyzer
Press Next until INFORMATION is displayed. Press Enter, then TECHNICAL SUPPORT is displayed. Press Enter to display contact information. Press Enter, then Next for ABOUT CardioChek Plus display. Press Enter to display serial number (SN) and software version information. Press Next to display wireless IP address and SSID (if applicable). -
Page 24: Checking The System
IV. CHECKING THE SYSTEM Analyzer Check Strips A check of the analyzer operation can be performed using the gray check strip. Two are included in the analyzer carrying case. The check strip verifies ® that the CardioChek Plus professional analyzer’s electronic and optical systems are functioning properly. - Page 25 IV. CHECKING THE SYSTEM, continued Note: If the analyzer displays FAILED: Clean the CardioChek Plus professional analyzer test strip slot (where the check strip is inserted into the analyzer). See Section IX. Care and Cleaning. Inspect the check strip to make sure it is not dirty or damaged. Use the spare check strip and repeat.
-
Page 26: Quality Control Testing
Important: Check the expiration date printed on the control bottles. Do not use control solutions that have expired. For performing a quality control test, see the instructions below. To perform a control test you need: CardioChek Plus Professional Analyzer PTS Panels test strips Quality control materials ... -
Page 27: How To Run A Quality Control Test On Reflectance Test Strips
V. QUALITY CONTROL TESTING, continued How to Run a Quality Control Test on Reflectance Test Strips Refer to the instructions for use provided with your quality control materials. If Quality Control Results Are Not in Range Patient tests should not be performed until control results are IMPORTANT: within range. -
Page 28: How To Run A Quality Control Test On Electrochemical Test Strips
V. QUALITY CONTROL TESTING, continued How to Run a Quality Control Test on Electrochemical Test Strips Refer to the instructions for use provided with your quality control materials. If Quality Control Results Are Not in Range Patient tests should not be performed until control results IMPORTANT: are within range. -
Page 29: Running A Test
VI. RUNNING A TEST Blood Testing ® A package insert is included with each box of PTS Panels test strips. Please read the test strip package insert and this section of the user guide completely and carefully before testing. Testing Supplies To perform a blood test you need: ... -
Page 30: How To Obtain A Blood Sample
VI. RUNNING A TEST, continued How to Obtain a Blood Sample A new pair of clean gloves should be worn by the user before testing each patient. Clean the finger. Be sure the finger is completely dry. Use a new, sterile, disposable lancet to puncture the skin. Stick the finger on the side of the fingertip, instead of the center. - Page 31 VI. RUNNING A TEST, continued It is recommended that users refer to the following practice guidelines: Biosafety in Microbiological and Biomedical Laboratories (BMBL) found at http://www.cdc.gov/biosafety/publications/bmbl5/ “Protection of Laboratory Workers From Occupationally Acquired Infections; Approved Guideline-Third Edition” Clinical and Laboratory Standards Institute (CLSI) M29-A3.
-
Page 32: How To Run A Reflectance Test
VI. RUNNING A TEST, continued How to Run a Reflectance Test Insert correct MEMo Chip for the lot of strips in use. Insert MEMo Chip with finger notch (top) side up, lot number code facing down. Press either button to turn on the analyzer. When INSERT STRIP is displayed, insert the test strip into the analyzer as far as it will go. -
Page 33: How To Run An Electrochemical Test With A Reflectance Test
VI. RUNNING A TEST, continued How to Run an Electrochemical Test with a Reflectance Test Insert the MEMo Chip that matches the lot number on both the electrochemical AND the reflectance test strip vials. Press either button to turn on the analyzer. Remove a single electrochemical test strip from the test strip vial and immediately replace the cap. - Page 34 VI. RUNNING A TEST, continued For the reflectance test: After applying blood to the electrochemical test strip, wipe the finger to remove any blood with a clean piece of gauze. 2. Gently, without force, apply pressure to the fingertip to accumulate a large drop of blood.
-
Page 35: Memory
VII. MEMORY Test results are automatically stored in the CardioChek ® Plus Professional Analyzer’s memory. The analyzer can store up to 50 results of each chemistry and 10 results for control tests. The analyzer allows review of the results in order from the most recent to the oldest. Each result is displayed with time and date. -
Page 36: How To Clear Results Stored In Memory
VII. MEMORY, continued How to Clear Results Stored in Memory Press either button to turn on the analyzer. Wait for the display to read either INSTALL MEMO CHIP or INSERT STRIP. Press Enter, then press Next until UTILITY is displayed. Press Enter. Press Next until CLEAR MEMORY is displayed. -
Page 37: Wi-Fi
Contact PTS Customer Service for additional information Data Management The CardioChek Plus Professional Analyzer is designed to connect to any IEEE 802.11b, 802.11g, or 802.11n network which uses the WPA Personal or WPA2 Personal network encryption schemes. The wireless module is... -
Page 38: Care And Cleaning
IX. CARE AND CLEANING Storage and Handling ® Handle the CardioChek Plus professional analyzer with care; do not drop Do not store or operate the analyzer in direct light, such as sunlight, spotlight, under a lamp, or by a window ... - Page 39 IX. CARE AND CLEANING, continued Frequency: Always clean after each use. Always clean and disinfect before storing and between each patient test. Please read the disinfectant manufacturer’s product label. ® Recommended Disinfectant: Super Sani-Cloth wipes or any disinfectant with the same EPA Reg.
- Page 40 IX. CARE AND CLEANING, continued Disinfection Instructions After cleaning, the next step is to disinfect. Always both clean and disinfect. 1. Using a fresh wipe, wring the wipe to remove excess liquid and wipe all areas thoroughly. Keep area wet for 2 minutes to ensure disinfectant remains in contact for a sufficient time to kill all bloodborne pathogens.
- Page 41 After disinfection, users’ gloves should be removed and hands should be thoroughly washed with soap and water before proceeding to the next patient. The Cardiochek Plus Professional Analyzer has been validated for 11,001 cleaning and disinfection cycles. Please obtain a new analyzer after cleaning and disinfecting the analyzer 11,001 times or once the lifetime of the analyzer (5 years) has been reached, whichever comes first.
-
Page 42: Troubleshooting
X. TROUBLESHOOTING MESSAGE or ISSUE PROBABLE CAUSE WHAT TO DO Desired language is not Language has been set Turn analyzer off. See Section III. Setup – How to Reset the displayed. incorrectly. Language. Section III. Setup – How The wrong date and/or Date and time have not been time is displayed. - Page 43 X. TROUBLESHOOTING, continued MESSAGE or ISSUE PROBABLE CAUSE WHAT TO DO IX. TR OUBLESHOOTING , co ntinued INSTALL MEMO CHIP MEMo Chip is not properly Insert same or new MEMo Chip properly. inserted or is defective. Test strips are expired, wrong EXPIRED LOT Check test strip expiration date MEMo Chip is inserted, or...
-
Page 44: Interpreting Results
XI. INTERPRETING RESULTS All test results must be assessed by a qualified medical professional. Depending on the analyte being assessed, high or low results may have medical consequences. If the result reads > (greater than) or < (less than) or results are not as expected, always repeat the test correctly with a new unused test strip. -
Page 45: Clia Information
XII. CLIA INFORMATION General CLIA Information (US Only) (Please read before testing) CLIA-waived. Each laboratory or testing site using the PTS Panels ® test strips MUST have a CLIA Certificate of Waiver (or other CLIA operating license) before testing. To obtain a Certificate of Waiver or any other type of laboratory license, call your state health department or PTS, Inc. -
Page 46: Specifications
XIII. SPECIFICATIONS ® CardioChek Plus Professional Analyzer ® Calibration Curve: Input from MEMo Chip per test strip lot Batteries: (4) AA 1.5 volt alkaline Operating Temperature Range: 50-104°F (10-40°C) Humidity Range: Between 20 and 80% RH Dimensions: Width: 3.2 in (8.13 cm) Length: 6.0 in (15.24 cm) Height:... -
Page 47: Contact Information
XIV. CONTACT INFORMATION Help For assistance with the CardioChek Plus test system, please contact PTS Customer Service (M-F, 8 a.m.--5 p.m. US EST) or your local authorized CardioChek dealer. Polymer Technology Systems, Inc. 7736 Zionsville Road Indianapolis, IN 46268 USA... -
Page 48: Warranty
XV. WARRANTY CardioChek Plus Professional Analyzer Limited Two-Year Warranty ® PTS, Inc. warrants to the original purchaser only, that the CardioChek Plus Professional Analyzer shall be free of any defects in materials or workmanship for a period of two years from the date of original purchase. -
Page 49: Explanation Of Symbols
XVI. EXPLANATION OF SYMBOLS Symbols Consult Instructions for Use Temperature Limitation In vitro diagnostic medical device Serial Number Manufacturer Catalog Number Authorized Representative in the European Community This product fulfills the requirements of the European Directive 98/79 EC for in vitro diagnostic medical devices. Product requires separate collection for electrical and electronic equipment per the WEEE Directive Federal Communications Commission... -
Page 50: Index
XVII. INDEX Analyzer Introduction ..................6 Battery Installation ...................12 Blood Testing ....................29 Check Strip ...................... 24 Cleaning......................38 CLIA Information ....................45 Contact Information..................47 Date (Setting)....................16 Help ......................... 47 Interpreting Results ..................44 Language (Setting) ..................15 Memory ......................35 Quality Control .................... - Page 51 ® The CardioChek brand analyzers and associated test strips may be covered by one or more of the following patents: U.S. Patent Nos. 7,435,577, 7,625,721, 7,087,397, 7,214,504, 7,374,719, 7,494,818, 5,597,532, and D534444 Australian Patent No. 2002364609 Eurasian Patent No. 010414 Mexican Patent No.
Need help?
Do you have a question about the CardioChek Plus and is the answer not in the manual?
Questions and answers
Good morning , My machine isn't working correctly at first saying low temp . But is kept at room temperature. And now asking to inset strip but wont commence the test . I would appreciate any advice .