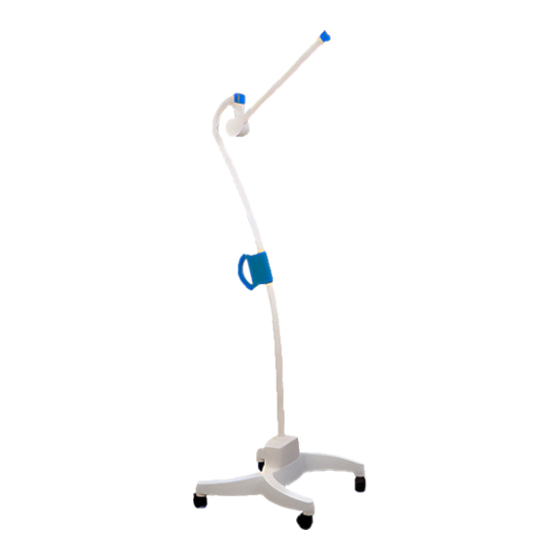
Summary of Contents for Ondal ACROBAT Swing
- Page 1 Installation instructions Montageanweisung Stativgerät Stativgerät Stativgerät Stativgerät Stativgerät T T T T T ripod-mounted device ripod-mounted device ripod-mounted device ripod-mounted device ripod-mounted device...
-
Page 2: Table Of Contents
+49 / (0)6652 / 81-600 Fax: +49 / (0)6652 / 81-392 Fax: +49 / (0)6652 / 81-392 © Ondal Medical Systems GmbH, 2012 © Ondal Medical Systems GmbH, 2012 38628, Edition 2012-05, Version 5 38628, Ausgabe 2012-05, Version 5 Seite / Page 2... - Page 3 38628, Edition / Ausgabe 2012-05, Version 5 English Deutsch Instructions for safe assembly Instructions for safe assembly Hinweise zur sicheren Montage Hinweise zur sicheren Montage Instructions for safe assembly Instructions for safe assembly Instructions for safe assembly Hinweise zur sicheren Montage Hinweise zur sicheren Montage Hinweise zur sicheren Montage Dear user,...
- Page 4 9, Technische Daten” belastet werden. Contraindications Kontraindikation • The ACROBAT Swing pendant system must not be used close to strong magnetic fields. • Das Tragarmsystem Acrobat Swing darf nicht in der • No BF or CF application parts in accordance with IEC Nähe von starken Magnetfeldern eingesetzt werden.
- Page 5 CE-Kennzeichnung: CE mark: Ondal erklärt, dass die Produkte den einschlägigen Bestim- mungen der anwendbaren europäischen Richtlinien entspre- Ondal declares that the products comply with the relevant chen. regulations set forth in the applicable European Directives. Anerkannte cUL Komponente: Recognised cUL component: Diese Komponente ist von Underwriters Laboratories Inc.
- Page 6 38628, Edition / Ausgabe 2012-05, Version 5 English Deutsch Instructions for safe assembly Instructions for safe assembly Hinweise zur sicheren Montage Hinweise zur sicheren Montage Instructions for safe assembly Instructions for safe assembly Instructions for safe assembly Hinweise zur sicheren Montage Hinweise zur sicheren Montage Hinweise zur sicheren Montage Mounting / dismantling:...
-
Page 7: Mounting The Rollers
38628, Edition / Ausgabe 2012-05, Version 5 English Deutsch Figure / Abbildung Mounting the Rollen montieren Figure / Abbildung 1 rollers Fig. 1 Abb. 1 NOTE – Versions: HINWEIS – Versionen: For the 6.5kg tripod base version, no Bei der Ausführung Stativfuß 6,5kg earthing cables are required. -
Page 8: Stativrohr Montieren
38628, Edition / Ausgabe 2012-05, Version 5 English Deutsch Figure / Abbildung Mount tripod Stativrohr Figure / Abbildung 3 tube Fig. 3 montieren Abb. 3 CAUTION - Damage to the VORSICHT - Schäden am equipment: Gerät: If the nose fastening is not inser- Ohne Einrasten der Nasensiche- ted properly, and then the tripod rung und anschließendem Ver-... -
Page 9: Federarm Montieren
38628, Edition / Ausgabe 2012-05, Version 5 English Deutsch Figure / Abbildung Mounting the spring Federarm Figure / Abbildung 5 montieren Align the spring arm Federarm dem Stativ- with the tripod base fuß zuordnen Fig. 5 Abb. 5 NOTE: HINWEIS: The spring force of the spring arm Die Federkraft des Federarmes and the tripod base is designed... - Page 10 38628, Edition / Ausgabe 2012-05, Version 5 English Deutsch Figure / Abbildung Mounting the spring Federarm Figure / Abbildung 6 montieren Assembly Montage Fig. 6 Abb. 6 1. Unscrew the cross-slotted 1. Kreuzschlitzschraube (1) screw (1), pull the cover (2) herausschrauben und Ab- forward and move it upward deckkappe (2) nach vorne...
-
Page 11: Mounting The End Device
38628, Edition / Ausgabe 2012-05, Version 5 English Deutsch Figure / Abbildung Mounting the Endgerät Figure / Abbildung 7 end-device Fig. 7 montieren Abb. 7 1. Pull out the plug and secure it 1. Netzstecker ziehen und gegen from being inserted again. Wiedereinstecken sichern. -
Page 12: Federkraft Einstellen
38628, Edition / Ausgabe 2012-05, Version 5 English Deutsch Figure / Abbildung Adjusting the spring Federkraft Figure / Abbildung 8 force Fig. 8 einstellen Abb. 8 Like every technical component, Wie jedes technisches Bauteil unter- springs are subjected to natural liegen Federn einem natürlichen wear. -
Page 13: Change The Fuses
The connecting cable may only be replaced by an installer authorised by Ondal. HINWEIS - Austausch der Anschlussleitung: Die Anschlussleitung darf nur von einem von Ondal auto- Circuit diagrams and more detailed information on the com- risierten Monteur ausgetauscht werden. - Page 14 38628, Edition / Ausgabe 2012-05, Version 5 Figure / Abbildung 9 Seite / Page 14...
-
Page 15: Technical Data
38628, Edition / Ausgabe 2012-05, Version 5 English Deutsch Technical data Technische Daten Seite / Page 15...


Need help?
Do you have a question about the ACROBAT Swing and is the answer not in the manual?
Questions and answers