Advertisement
U s e r M a n u a l
CAM-VL1-AD
PRODUCT FEATURES
•
Front and rear camera inputs (with auto switching)
•
LVDS output support: 800 x 400 / 400 x 240 / 1024 x 480 screens
•
Dynamic parking guidelines with original radar-detection image
•
Plug & play harness
•
Compatible with NTSC cameras
•
Updatable firmware via Micro SD
Disclaimer
Read the manual prior to installation. Technical knowledge is necessary for installation. Please ensure
you use the correct tools to avoid damage to the vehicle or product.
Connects2 can not be held responsible for the installation of this product.
Technical Support
Connects2 want to provide a fast and suitable resolution should you encounter any technical issues. With
this in mind, when contacting Connects2, try to provide as much Information as possible. This will speed
up the process and help us to help you.
Please use our dedicated online technical support centre: support.connects2.com
Camera Add-On Interface
Volvo S60, XC60, V40 2015-UP
For vehicles with OEM Sensus systems
Advertisement
Table of Contents

Related Manuals for Connects2 Vision CAM-VL1-AD


Summary of Contents for Connects2 Vision CAM-VL1-AD
- Page 1 Connects2 want to provide a fast and suitable resolution should you encounter any technical issues. With this in mind, when contacting Connects2, try to provide as much Information as possible. This will speed up the process and help us to help you.
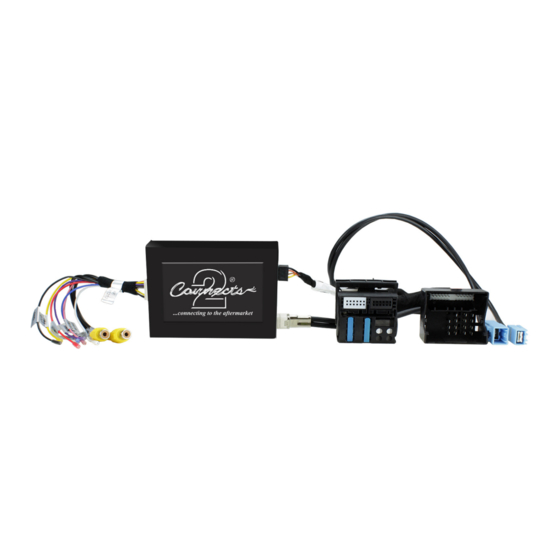
- Page 2 POWER HARNESS Antenna (Male) Connect to OEM head unit Quadlock Connector (Female) Connect fiber connector from OEM quadlock connector Antenna (Female) Plug in OEM antenna connection Plug into OEM head unit Quadlock Connector (Male) Plug into OEM female quadlock connector www.connects2.com...
- Page 3 4. Remove the two screws behind the centre console and then pull out the OEM head unit 5. Unplug the 40 way quadlock connector from the back of the OEM head unit and remove the orange fiber cable from the quadlock connector www.connects2.com...
- Page 4 The interface supports front and rear cameras which can be connected to the dedicat- ed yellow RCA connections on the CAM-VL1-AD camera harness. Connect the required flying wires to the vehicle: Black ACC OUT White TRIG IN Pink RIGHT TURN OUT Blue LEFT TURN OUT Purple CAM OUT Yellow +B OUT www.connects2.com...
Need help?
Do you have a question about the Vision CAM-VL1-AD and is the answer not in the manual?
Questions and answers