
Related Manuals for V2 SLAID Series


Summary of Contents for V2 SLAID Series
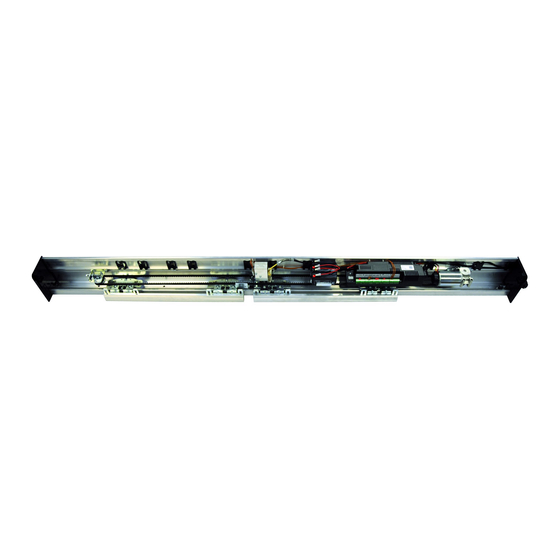
- Page 1 Value moves the world IL 456 EDIZ. 12/11/2016 SLAID AUTOMATISMO PER PORTE SCORREVOLI AUTOMATISM FOR SLIDING DOORS AUTOMATISME POUR PORTES COULISSANTES...
-
Page 3: Table Of Contents
INDICE 1.1 - SERVIZIO DI ASSISTENZA TECNICA ........................1.2 - DICHIARAZIONE UE DI CONFORMITÀ ........................1.3 - DIRETTIVA MACCHINE ............................2 - CARATTERISTICHE TECNICHE ..........................3 - ELENCO DEI COMPONENTI ............................3.1 - ELENCO DELLE ATTREZZATURE NECESSARIE ......................4 - TAGLIO DEI PROFILI ESTRUSI IN ALLUMINIO E GOMMA ................... 5 - MONTAGGIO DELLA VIA DI CORSA ......................... -
Page 4: Servizio Di Assistenza Tecnica
Dichiarazione in accordo alle Direttive: 2014/35/UE (LVD); manuale del sensore/i utilizzato/i. 2014/30/UE (EMC); 2006/42/CE (MD) ALLEGATO II, PARTE B Il fabbricante V2 S.p.A., con sede in Corso Principi di Piemonte 65, 12035, Racconigi (CN), Italia Dichiara sotto la propria responsabilità che: l’automatismo modello:... -
Page 5: Caratteristiche Tecniche
2 - CARATTERISTICHE TECNICHE SLAID140 SLAID160 Alimentazione 230V ±10% AC 50/60Hz 230V ±10% AC 50/60Hz Potenza nominale 150W 180W Alimentazione dispositivi esterni 15Vdc - 12W MAX 15Vdc - 12W MAX Alimentazione batteria di emergenza 24V 1,3Ah 24V 1,3Ah Velocità di apertura 1 Anta =70cm/s 1 Anta =70cm/s 2 Ante =140 cm/s... -
Page 6: Taglio Dei Profili Estrusi In Alluminio E Gomma
4 - TAGLIO DEI PROFILI ESTRUSI IN 6 - PREDISPOSIZIONI PER ALLUMINIO E GOMMA L’INSTALLAZIONE Per ricavare la lunghezza delle tre tipologie di profili (Fig.2-3-6-7-8) seguire le seguenti indicazioni: PERICOLO: verificare con attenzione il peso delle ante in modo che rientrino nelle portate massime consentite dall’automatismo;... -
Page 7: Quote Per Il Fissaggio Del Cassonetto
7 - QUOTE PER IL FISSAGGIO DEL 8 - FISSAGGIO DEL CASSONETTO A CASSONETTO PARETE Negli ingressi a due ante è necessario centrare l’automatismo rispetto al vano di passaggio in modo da far coincidere il punto di PERICOLO: le fasi di installazione e fissaggio incontro delle ante con la mezzeria del vano luce (Fig. -
Page 8: Dati Per Il Posizionamento Dei Componenti
9 - DATI PER IL POSIZIONAMENTO DEI 12 - MONTAGGIO DELLA PULEGGIA COMPONENTI RINVIO E DEL MOTORIDUTTORE (TRAVERSA 1 ANTA) Rilevare le caratteristiche principali dell’automatismo per poter calcolare le posizioni dei componenti (Fig.6-7-8): Utilizzare viti e dadi del sacchetto viterie e montarli sulle staffe di • Numero ante motore e rinvio. -
Page 9: Taglio Della Cinghia (Valido Per 1 Anta E 2 Ante)
14 - TAGLIO DELLA CINGHIA 17 - REGOLAZIONE DELLE ANTE (VALIDO PER 1 ANTA E 2 ANTE) La regolazione delle ante può avvenire sui tre assi X, Y, Z (Fig.26) in modo distinto a seconda delle esigenze di installazione. Calcolare la lunghezza della cinghia con la seguente formula: LC = (L - PMDX - PMSX - 14) x 2 REGOLAZIONE TRASVERSALE (Y) Fig.26 - Fig.27 Dove LC è... -
Page 10: Tensionamento Della Cinghia
18 - TENSIONAMENTO DELLA CINGHIA 20 - MONTAGGIO DEL MODULO BATTERIE (OPZIONALE) Per ottenere una corretta tensione della cinghia procedere come segue (Fig.24): Il kit modulo batteria è fornito in una scatola dove sono presenti: 1. assicurarsi che il gruppo motore sia posizionato e fissato come • il modulo batterie indicato precedentemente • sacchetto viti cod. SA40570... -
Page 11: Montaggio Dello Sblocco Di Emergenza (Opzionale) Figure 45A-B-C-D
Per un’anta con apertura a destra utilizzare la formula (Fig.41): Con riferimento alla Fig.45C inserire la guaina F e il cavo D nel BLO = A - 70 + PS tenditore E ed avvitare il tenditore nell’apposita sede della leva. Inserire il barilotto G dotato di relativi grani H assicurandosi Per un’anta con apertura a sinistra utilizzare la formula (Fig.42): che questi non ostruiscano il foro di passaggio cavi presente... -
Page 12: Collaudo
25 - COLLAUDO 26 - FISSAGGIO DEL COPERCHIO Per il collaudo è necessario utilizzare i pulsanti posizionati di fianco Agganciare il coperchio al cassonetto (Fig.54). al display della centrale di comando. Fissare il coperchio con la vite (Fig.55). I pulsanti + o - servono per selezionare i parametri, il pulsante ENT In alternativa è... -
Page 13: Descrizione Della Centrale Di Comando
L1 e la superficie della trave dell’automatismo. ATTENZIONE: verificare il verso corretto di inserimento In caso contrario potrebbe essere compromessa una del connettore batterie; usare solo batterie fornite da V2; importante funzione di sicurezza dell’intero impianto usare solo cavo di cablaggio scheda/batterie munito di e potrebbero verificarsi scosse elettriche mortali o protezione a fusibile del valore di 6,3AT. -
Page 14: Centrale Di Comando Esensori Conformi En16005
31 - CENTRALE DI COMANDO E SENSORI CONFORMI EN16005 In Fig.10 sono riportati i sensori collegabili alla centrale di I sensori di sicurezza A e D svolgono le seguenti 2 funzioni: comando: 1. sicurezza in apertura: rilevano presenza in zona A3 o A4 e in sensore sinistro di sicurezza in apertura caso di ostacolo fermano le ante in apertura sensore interno di comando e sicurezza in chiusura... -
Page 15: Collegamenti Alla Morsettiera (Da Fig.68 A 73)
32 - COLLEGAMENTI ALLA MORSETTIERA (DA Fig.68 A 73) Collegare tutti i componenti della porta automatica alla centrale di comando con cavi elettrici di sezione opportuna rispettando le indicazioni della tabella seguente: RIFERIMENTO DEFAULT DESCRIZIONE FIGURA START1 Sensore esterno per il comando di apertura Fig.68 Comune per gli ingressi 1 - 5 OPTOREF... -
Page 16: Messa In Funzione Dell'automatismo
33 - MESSA IN FUNZIONE DELL’AUTOMATISMO La messa in funzione dell’automatismo prevede l’esecuzione della sequenza sotto riportata: 1. controllo del corretto serraggio di tutte le viti, dell’antideragliamento carrelli, del cassonetto e di tutti gli elementi sollecitati a sforzi e vibrazioni durante il funzionamento; 2. -
Page 17: Procedura Di Learn Sensor (Ls)
34 - PROCEDURA DI LEARN SENSOR 6. il codice x indica quali sensori sono stati rilevati secondo la corrispondenza della tabella sotto; verificare che l’indicazione sul display corrisponda ai sensori realmente installati e in caso di esito positivo premere ENT per confermare e salvare La procedura learn sensor ( ) permette alla centrale di comando la configurazione (a questo punto il display visualizzerà... -
Page 18: Procedura Di Learn Parameters (Lp)
35 - PROCEDURA DI LEARN 7. il codice x lampeggiante indica che la procedura non può terminare perché uno o più ingressi delle sicurezze risultano PARAMETERS ( attivi (condizione di errore) invece che a riposo (condizione corretta); servirsi della tabella sotto per individuare gli ingressi La procedura di acquisizione dei parametri ( ) permette dal codice del display:... -
Page 19: Modalità Di Impostazione Parametri
36 - MODALITÀ DI IMPOSTAZIONE PARAMETRI 3. selezionare il valore desiderato con i tasti +/- quindi premere Dopo aver completato le procedure la centrale di ENT per confermare il valore scelto: il valore viene memorizzato comando è pronta per funzionare con i parametri di fabbrica dalla centrale;... - Page 20 DESCRIZIONE REGOLAZIONE DEFAULT Non gestito Mantenere a Selezione pesi ante Apprendimento automatico <50kg ad anta 50kg-100kg ad anta >100kg ad anta Polarità ingresso Start 1 Polarità ingresso Start 2 Polarità ingresso Safe Open 1 Polarità ingresso Safe Open 2 Polarità ingresso Safe Close 1 Polarità...
-
Page 21: Diagnostica
37 - DIAGNOSTICA Errori sugli ingressi delle sicurezze attive Prima di ogni apertura/chiusura la centrale verifica le sicurezze attive (sensori) tramite l’apposito circuito di test e in caso di Visualizzazione dati memoria anomalia non esegue la manovra prevista. In tal caso sul display Il display della centrale di comando permette di visualizzare viene segnalato un errore a codice lampeggiante (rif. - Page 22 Stati di anomalia al momento dell’accensione I messaggi di errore sotto indicano un’anomalia presente al momento della messa in funzione dell’impianto: SEGNALAZIONE DESCRIZIONE Lampeggiante Errore mancata acquisizione parametri porta, procedere con procedura Lampeggiante Errore main key non inserita o non configurata Lampeggiante Errore mancata acquisizione sensori supervisionati, procedere con procedura Per risolvere gli errori E1 e E6 eseguire le procedure del manuale alla sezione Learn Parameters e Learn Sensors.
- Page 23 INDEX 1.1 - TECHNICAL SUPPORT SERVICE ..........................1.2 - EU DECLARATION OF CONFORMITY ........................1.3 - MACHINERY DIRECTIVE ............................2 - TECHNICAL CHARACTERISTICS ..........................3 - LIST OF PARTS ................................3.1 - LIST OF NECESSARY EQUIPMENT .......................... 4 - SIZE OF EXTRUDED PROFILES IN ALUMINIUM AND RUBBER ..................5 - TRACK ASSEMBLY ..............................
- Page 24 COMPLETED MACHINE as per the instructions in the manual of the sensor/s used. Declaration in accordance with Directives: 2014/35/UE (LVD); 2014/30/UE (EMC); 2006/42/CE (MD) ANNEX II, PART B The manufacturer V2 S.p.A., headquarters in Corso Principi di Piemonte 65, 12035, Racconigi (CN), Italy Under its sole responsibility hereby declares that: the partly completed machinery model(s):...
- Page 25 2 - TECHNICAL CHARACTERISTICS SLAID140 SLAID160 Power supply 230V ±10% AC 50/60Hz 230V ±10% AC 50/60Hz Nominal power 150W 180W External devices power supply 15Vdc - 12W MAX 15Vdc - 12W MAX Emergency battery power supply 24V 1,3Ah 24V 1,3Ah Opening speed 1 Door =70cm/s 1 Door =70cm/s 2 Doors =140 cm/s 2 Doors =140 cm/s Passageway...
- Page 26 4 - CUTTING THE EXTRUDED PROFILES 6 - PREPARATION FOR INSTALLATION IN ALUMINIUM AND RUBBER DANGER: carefully check the weight of the doors To obtain the length of the three types of profiles are within the maximum capacity permitted for the (Fig.2-3-6-7-8) follow the instructions below: automatism; if in doubt, do not proceed beyond the installation phases;...
- Page 27 7 - MEASUREMENTS FOR BOX 8 - BOX FASTENING TO WALL FASTENING DANGER: the installation and fastening phases of For the inputs with two doors, you need to centre the automatism the automatism require movement of parts and heavy based on the passage compartment so the meeting point of the equipment at a height over 2 or 3 metres. Accidental falling doors coincides with the centre line of the opening (Fig. 6A).
- Page 28 9 - DATA FOR COMPONENT 12 - ASSEMBLY OF RETURN PULLEY POSITIONING AND GEARMOTOR (1 DOOR CROSSBEAM) Use the main characteristics of the automatism to calculate the positions of the parts (Fig.6-7-8): Use the nuts and bolts from the bag of screws and assemble them • Door number on the motor and return brackets. • T = length of crossbeam • LUP = useful width of passage ATTENTION: To facilitate insertion of the parts in the...
- Page 29 14 - BELT CUTTING 17 - DOOR ADJUSTMENT (VALID FOR 1 DOOR AND 2 DOORS) Adjustment of the doors can be on three axes X, Y, Z (Fig.26) based on installation requirements. Calculate the length of the belt with the following formula: LC = (L - PMDX - PMSX - 14) x 2 TRANSVERSAL ADJUSTMENT (Y) Fig.26 - Fig.27 Loosen the fastening screws F and move the door on axis Y until Where LC is the length of the belt and the two values PMDX -...
- Page 30 18 - BELT TIGHTENING 20 - ASSEMBLY OF BATTERIES MODULE (OPTIONAL) To obtain correct tightening of the belt, proceed as follows (Fig.24): The batteries module kit is supplied in a box with: 1. ensure the motor unit is positioned and fastened as previously • the batteries module indicated • bag of screws code SA40570 2. ensure the nuts D are loosened so the entire assembly can • cabling wires to connect batteries to the control unit move sideways • battery charger board 3. ensure the screw E is loosened and not pressing on spring F 4.
- Page 31 For a door with right hand opening, use the formula (Fig.41): With reference to Fig.45C insert the sheath F and the cable D in the tightening device E and screw in the tightening device in the • BLO = A - 70 + PS specific lever compartment. Insert the barrel G equipped with For a door with left hand opening, use the formula (Fig.42): the relevant grub screws H ensuring they are not obstructing • BLO = A - 48 + PD the cable passage hole on the barrel itself. Insert cable D in the hole in the barrel G. Close the lever and slightly tighten by hand For two doors, use the formula (Fig.43): to recover the ranges. Holding the cable tight, firmly tighten the...
- Page 32 25 - TESTING 26 - FASTENING THE COVER For testing, you need to use the buttons positioned on the side of Fasten the cover on the box (Fig.54). the display on the control unit. Fasten using the screw (Fig.55). The buttons + or - are used to select the parameters, the ENT Alternatively, you can fasten the cover on the lower side using the button to confirm and the ESC button to exit. optional cover closure kit.
- Page 33 ATTENTION: check the correct insertion direction of the Check perfect electrical continuity between ground pole L1 battery connector; only use batteries supplied by V2; only and the surface of the automatism beam. use a cable for the board /batteries with a protection fuse On the contrary, an important safety function could be 6.3AT.
- Page 34 31 - CONTROL UNIT AND SENSORS COMPLIANT WITH EN16005 Fig.10 outlines the sensors which can be connected to the control The safety sensors A and D perform the following 2 functions: unit: 1. safety in opening: detects the presence in zone A3 or A4 and A - left safety sensor in opening in the event of an obstacle prevents opening of the doors B - internal safety sensor in opening 2. test: check safety in opening (function 1) is working properly; in the event of a fault, they prevent door opening (ref. C - external safety sensor in opening EN16005 performance level C) D - right safety sensor in opening The following table outlines the connections of sensors A, B, C, D The opening sensors B and C perform the following 3 functions: with the control unit terminals.
- Page 35 32 - TERMINAL BOARD CONNECTIONS (FROM Fig.68 TO 73) Connect all the components of the automatic door to the control unit with the appropriately sectioned electrical cables, in compliance with the instructions in the following table: REFERENCE DEFAULT DESCRIPTION FIGURE START1 External sensor for opening command Fig.68 Common for inputs 1-5 OPTOREF Not used (bridged) -OO- Not used (bridged) START2 Internal sensor for opening command OUT 15VDC Negative power supply for opening command sensors: 15Vdc - max.
- Page 36 33 - AUTOMATISM START-UP To prepare the automated system for use, follow the sequence below: 1. connection of battery and network power supply (230Vac); 2. Learn Sensors ( ) procedure 3. Learn Parameters ( ) procedure; 4. adjustment of parameters if necessary; 5. checks of screws, anti-derailing carriages, case and all elements subjected to vibrations during operation; 6. final test of the correct function of all safety devices installed with the use of specific instrumentation prescribed by EN16005; DANGER: each of the activities 1 to 6 listed above are fundamental to the safety of the system; ensure the person responsible is suitably qualified and do not skip any steps or checks.
- Page 37 34 - LEARN SENSOR PROCEDURE ( Safe Safe Safe Safe Signal Open 2 Open 1 Close 2 Close 1 The learn sensor procedure ( ) allows the control unit to automatically detect the sensors connected with particular reference to the presence and quantity of supervised sensors. After detection, the control unit shows on the display the configuration and type of sensors it has detected: it is the responsibility of the installation technician to verify that the configuration shown on the display corresponds with the actual installation and then definitively confirm the configuration if it is correct for the purpose. From that moment, the control unit with use the configuration confirmed. DANGER: before confirming the acquisition, carefully check that the configuration detected by the control unit is suitable for the system and check that all the safety devices are detected correctly.
- Page 38 35 - LEARN PARAMETERS ( 7. the flashing ... code indicates that the cannot terminate because one or more of the inputs of the safety devices are PROCEDURE active instead of at rest; use the table below to identify the inputs from the code on the display: The learn parameters ( ) procedure allows the control unit to acquire essential operation data such as the dimensions of the Safe Safe Safe Safe doorway opening, the weight of the leaves and the direction of Signal Open 2 Open 1 Close 2...
- Page 39 36 - PARAMETERS SETTING MODE After completing the procedures, the control unit is ready to operate with the default parameters or with the latest 3. select the desired value with the +/- keys then press ENT to parameters set by the installation technician. It is possible to confirm the value selected: the value is saved by the control change the settings using the keys of the control unit and relative unit; display. 4. press ESC to end the procedure To change the adjustments of the table below, proceed as follows: NOTE: if the keys are not pressed for 10 seconds during the 1. press the +/- keys to show the number of the parameter to be adjustment, the control unit exits the procedure and returns to modified: opening speed, closing speed, etc.;...
- Page 40 DESCRIPTION ADJUSTMENT DEFAULT Unmanaged Maintaining Leaf weight selection Self-learning <50kg per leaf 50kg-100kg per leaf >100kg per leaf Start 1 input polarity Start 2 input polarity Terminal 17 input polarity Not used Not used Terminal 18 input polarity Aux In1 input polarity Aux In2 input polarity Key input polarity Aux Out output polarity Not used Not used First Input Mode Bistable Monostable Battery Management Battery Not used Battery Present normal function Battery Present emergency function Battery Present safety function with battery capacity control Photocell Management...
- Page 41 37 - DIAGNOSTICS Errors on inputs of active safety devices Before each opening/closing manoeuvre, the control unit checks the active safety devices (sensors) via the test circuit and if a fault Memory data view is detected does not carry out the manoeuvre. In this case, the The control unit display allows you to view the values saved by display will show an F code error (ref. table below) which refers the system during operation and programming, such as: firmware to the pending test (awaiting completion) of one of the safety version loaded, number of manoeuvres performed, etc. devices installed: To view the value desired, proceed as follows: SIGNAL DESCRIPTION 1. press the +/- keys on the display until the “ ”...
- Page 42 Faulty states on start-up I messaggi di errore sotto indicano un’anomalia presente al momento della messa in funzione dell’impianto: SIGNAL DESCRIPTION Flashing Door parameters acquisition fail error, proceed with procedure Flashing Main key not inserted or not configured error Flashing Supervised sensors acquisition fail error, proceed with procedure To resolve errors , follow the procedures described in the manual in the Learn Parameters and Learn Sensors section.
- Page 43 INDEX 1.1 - SERVICE D’ASSISTANCE TECHNIQUE ........................1.2 - DÉCLARATION UE DE CONFORMITÉ ........................1.3 - DIRECTIVE MACHINES ............................2 - CARACTÉRISTIQUES TECHNIQUES ........................... 3 - LISTE DES COMPOSANTS ............................3.1 - LISTE DES OUTILLAGES NÉCESSAIRES ........................4 - COUPE DES PROFILÉS EXTRUDÉS EN ALUMINIUM ET CAOUTCHOUC ..............5 - MONTAGE DU CHEMIN DE ROULEMENT .........................
- Page 44 : 1.1 - SERVICE D’ASSISTANCE TECHNIQUE • Préparer le Livret Technique avec les documents indiqués dans Pour tout précision technique ou problème d’installation V2 l’annexe VII de la Directive Machines et le conserver pendant au dispose d’un Service Clients à Votre disposition du lundi au moins 10 ans.
- Page 45 2 - CARACTÉRISTIQUES TECHNIQUES SLAID140 SLAID160 Alimentation 230V ±10% AC 50/60Hz 230V ±10% AC 50/60Hz Puissance nominale 150W 180W Alimentation dispositifs externes 15Vdc - 12W MAX 15Vdc - 12W MAX Alimentation batterie d'urgence 24V 1,3Ah 24V 1,3Ah Vitesse d'ouverture 1 Vantail =70cm/s 1 Vantail =70cm/s 2 Vantaux =140 cm/s 2 Vantaux =140 cm/s...
- Page 46 4 - COUPE DES PROFILÉS EXTRUDÉS EN 6 - PRÉDISPOSITION POUR ALUMINIUM ET CAOUTCHOUC L’INSTALLATION Pour obtenir la longueur des trois typologies de profilés (Fig.2-3-6-7-8) suivre les indications suivantes : DANGER : vérifier avec attention le poids des vantaux de façon à ce qu’ils rentrent dans les portées maximums admises par l’automatisme ;...
- Page 47 7 - COTES POUR LA FIXATION DU 8 - FIXATION DU CAISSON MURAL CAISSON DANGER : les phases d’installation et de fixation Dans les entrées à deux vantaux, il faut centrer l’automatisme par de l’automatisme demandent la manutention de parties rapport à...
- Page 48 9 - DONNÉES POUR LE 12 - MONTAGE DE LA POULIE DE POSITIONNEMENT DES COMPOSANTS RENVOI ET DU MOTORÉDUCTEUR (TRAVERSE 1 VANTAIL) Relever les caractéristiques principales de l’automatisme pour pouvoir calculer les positions des composants (Fig.6-7-8) : Utiliser des vis et écrous du sachet vis et les monter sur les étriers • Nombre vantail de moteur et renvoi.
- Page 49 14 - COUPE DE LA COURROIE 17 - RÉGLAGE DES VANTAUX (POUR 1 VANTAIL ET 2 VANTAUX) Le réglage des vantaux peut se faire sur les trois axes X, Y, Z (Fig.26) de façon distincte suivant les exigences d’installation. Calculer la longueur de la courroie avec la formule suivante : LC = (L - PMDX - PMSX - 14) x 2 RÉGLAGE TRANSVERSAL (Y) Fig.26 - Fig.27 Où...
- Page 50 18 - MISE EN TENSION DE LA 20 - MONTAGE DU MODULE COURROIE BATTERIES (EN OPTION) Pour obtenir une tension correcte de la courroie, procéder de la Le kit module batterie est fourni dans une boîte où sont présents : façon suivante (Fig.24) : • le module batteries 1.
- Page 51 Pour un vantail avec ouverture à droite, utiliser la formule (Fig.41): Avec référence à la Fig.45C introduire la gaine F et le câble D dans le tendeur E et visser le tendeur dans l’emplacement prévu du • BLO = A - 70 + PS levier. Introduire le baril G doté d’écrous relatifs H en s’assurant Pour un vantail avec ouverture à...
- Page 52 25 - ESSAI 26 - FIXATION DU COUVERCLE Pour l’essai, il faut utiliser les boutons positionnés à côté de Accrocher le couvercle au caisson (Fig.54). l’afficheur de la centrale de commande. Fixer le couvercle avec la vis (Fig.55). Les boutons + ou - servent à sélectionner les paramètres, le En alternative il est possible de fixer le couvercle sur le côté...
- Page 53 ; utiliser uniquement des batteries En cas contraire, une importante fonction de sécurité de fournies par V2 ; utiliser uniquement câble de câblage/ toute l’installation pourrait être compromise et des chocs batteries muni de protection à fusible de la valeur de 6,3AT.
- Page 54 31 - CENTRALE DE COMMANDE ET CAPTEURS CONFORMES EN16005 Dans la Fig.10 sont reportés les capteurs qui peuvent être Les capteurs de sécurité A et D remplissent les 2 fonctions connectés à la centrale de commande : suivantes : 1. sécurité en ouverture : détectent présence dans zone A3 ou A4 capteur gauche de sécurité...
- Page 55 32 - BRANCHEMENT AU BORNIER (D’APRÈS Fig.68 A 73) Brancher tous les composants de la porte automatique à la centrale de commande avec câbles électriques de section adaptée en respectant les indications du tableau suivant : RÉFÉRENCE DEFAULT DESCRIPTION FIGURE START1 Capteur externe pour la commande d'ouverture Fig.68...
- Page 56 33 - MISE EN FONCTIONNEMENT DE L’AUTOMATISME La mise en marche de l’automatisme prévoit l’exécution de la séquence indiquée ci-après : 1. branchement batterie et alimentation de réseau (230Vac) ; 2. procédure Learn Sensors ( 3. procédure Learn Parameters ( 4.
- Page 57 34 - PROCEDURE DE LEARN SENSOR 6. le code … indique les capteurs qui ont été détectés selon la correspondance du tableau ci-dessous ; vérifier que l’indication sur l’écran corresponde aux capteurs réellement installés et, si oui presser ENT pour confirmer et sauvegarder la configuration La procédure learn sensor ( ) permet à...
- Page 58 35 - PROCEDURE DE LEARN 7. le code … clignotant indique que la ne peut terminer parce qu’une ou plusieurs entrées des sécurité sont actives et PARAMETERS ( non pas au repos ; se servir du tableau ci-dessous pour localiser les entrées à...
- Page 59 36 - MODALITES DE REGLAGE DES PARAMETRES 3. sélectionner la valeur désirée avec les touches +/- puis presser Après avoir complété la l’armoire de commande est ENT pour confirmer la valeur choisie: la valeur est mémorisée prête à fonctionner avec les paramètres d’usine ou avec les par la centrale ;...
- Page 60 DESCRIPTION RÉGLAGE DEFAULT Non managé Maintenir Sélection poids battants Apprentissage automatique <50kg par battant 50kg-100kg par battant >100kg par battant Polarité entrée Start 1 Polarité entrée Start 2 Polarité entrée Safe Open 1 Polarité entrée Safe Open 2 Polarité entrée Safe Close 1 Polarité...
- Page 61 37 - DIAGNOSTIC Erreurs sur les entrées des sécurités actives Avant chaque ouverture/fermeture l’armoire de commande vérifie les sécurités actives (capteurs) à l’aide du circuit de test et Visualisation des données de mémoire en cas d’anomalie elle n’exécute pas la manœuvre prévue. Dans L’écran de l’armoire de commande permet de visualiser les valeurs ce cas l’écran affiche une erreur portant le code (réf.
- Page 62 États d’anomalie au moment de l’allumage Les messages d’erreur ci-dessous indiquent une anomalie présente au moment de la mise en marche de l’installation: SIGNALISATION DESCRIPTION Clignotant Erreur échec d'acquisition des paramètres de la porte, procéder à l'aide de la procédure Clignotant Erreur main key pas insérée ou pas configurée...
- Page 64 Fax +34 93 6992855 Fax + 212 522 861514 spain@v2home.com v2maroc@v2maroc.com FRANCE PORTUGAL TUNISIE AFCA - V2 SAS V2 AUTOMATISMOS 4 bis, rue Henri Becquerel - B.P. 43 V2 TUNISIE SARL 69740 GENAS (FRANCE) PORTUGAL LDA 47, rue El Moez El Manzah 1 Tel.
Need help?
Do you have a question about the SLAID Series and is the answer not in the manual?
Questions and answers