
Subscribe to Our Youtube Channel
Related Manuals for KKT KOLBE EBD8501ED


Summary of Contents for KKT KOLBE EBD8501ED
- Page 1 User’s manual → English language Benutzerhandbuch für Ihren Einbau - Dampfgarer Modell: EBD8501ED Version: 1.0 / 180802...
- Page 2 Hinweise und Symbole Dieses Symbol verdeutlicht einen Sicherheitshinweis. Dieses Symbol auf dem Produkt oder der Verpackung weist darauf hin, dass dieses Produkt nicht als Hausmüll Sie finden es insbesondere bei allen Beschreibungen der behandelt werden darf. Arbeitsschritte, bei welchen Gefahr für Personen entste- Stattdessen sollte es zur entsprechenden Sammelstelle hen kann.
- Page 3 Sicherheitshinweise Sicherheitshinweise Installationsvorkehrungen Bei der Verwendung des Produkts • Dieses Gerät ist mit einem 15 Ampere Stecker und • Dieses Gerät ist nur für den Hausgebrauch empfohlen. Kabel ausgestattet, daher ist keine feste Verkabelung Für den Einsatz in jeder Art von Gewerbekönnen sich erforderlich.
- Page 4 Lieber Kunde, wir danken Ihnen für das in uns gesetzte Ver- freundlichkeit und dem Schutz des Benutzers trauen und für den Erwerb dieses KKT KOLBE- und dem Gerät dienen und einem aktuellen Gerätes. Das von Ihnen erworbene Gerät ist technischen Standard entsprechen.
-
Page 5: Table Of Contents
Inhaltsverzeichnis Anwendung ............... . •... -
Page 6: Anwendung
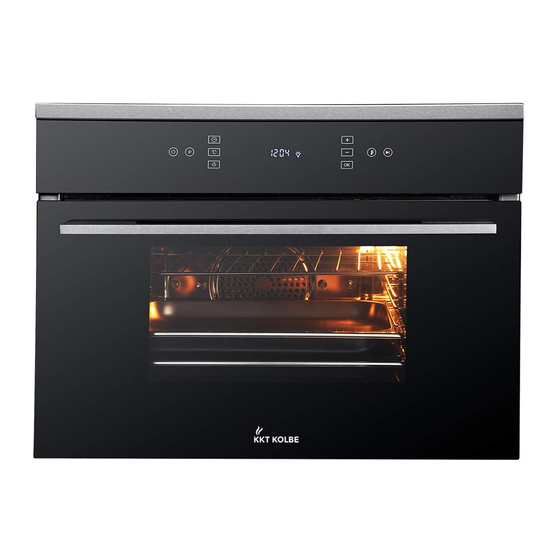
Anwendung Beschreibung des Geräts Bedienfeld Einschub-Schienen Gitterrost Perforiertes Blech tiefes Blech / Auffangwanne Türscharniere Auffangmulde Tür Wassertank Saugball Produktabmessungen... -
Page 7: Ofenbeleuchtung
Anwendung Ofenbeleuchtung Das Gerät ist mit einer Lampe ausgestattet, die sich an Um die Beleuchtung jederzeit einzuschalten, drücken Sie der rechten hinteren Seite des Garraums befindet und die Licht-Taste . Durch erneutes Drücken der Taste es ermöglicht, das Gargut zu prüfen, ohne die Tür öffnen wird die Beleuchtung ausgeschaltet. - Page 8 Anwendung Bedienfeld Haupt - An/Aus - Schalter Plus Programme- / Modus Minus Licht OK / Bestätigung Temperatureinstellung Schnell - Aufheizen Timer / Uhr Start / Stopp Display / Bildschirm Bedienungsablauf Hinweis: Um den Dampfgarer richtig bedienen zu können, OK / Bestätigung drücken - nachdem alle Anpassun- muss der folgende Bedienablauf eingehalten werden.
- Page 9 Anwendung Bedienungsanleitung Erste Schritte Timer - Programmierung Hinweis: Dampfgarprogramme funktionieren nicht, ohne Uhrzeit einstellen dass eine Garzeit gewählt wurde. Herkömmliche Pro- Wenn der Dampfgarer zum ersten Mal angeschlossen gramme müssen keine Zeitdauer haben, mit Ausnahme wird, blinkt die Minutenanzeige. Diese blinkt nur für 10 Se- von Programmen mit kombiniertem Dampfgaren.
-
Page 10: Garprogramme / Modi
Anwendung Garprogramme / Modi Garprogramme Der Dampfgarer hat 8 Programme, davon 6 Garprogramme. Diese Programme haben Voreinstellungen, die aber je nach Vorliebe des Anwenders oder nach einem beliebigen Rezept angepasst werden können. Wie Sie die Voreinstellungen vornehmen können, entnehmen Sie bitte dem Abschnitt ‘Bedienfeld / Bedienungsablauf‘. Sowohl die Dampfgarprogramme, als auch die traditionellen Konvektionsgarprogramme arbeiten in bestimmten einen Temperaturbereich, der je nach gewähltem Programm variiert. -
Page 11: Richtlinien Für Das Kochen
Richtlinien für das Kochen Dampfgarprinzipien und Anwendungstipps Vorteile des Dampfgarens Verwendung eigener Behälter Der Vorteil des Kochens mit einem Dampfgarer ist, dass Die Verwendung eigener Container ist möglich, die wertvollen Vitamine und Nährstoffe während des wenn Folgendes beachtet wird: Kochens erhalten bleiben, verglichen mit ihren Verlusten •... -
Page 12: Richtlinien Für Das Dampfgaren / Gartabelle
Richtlinien für das Kochen Richtlinien für das Dampfgaren Die Angaben in der folgenden Tabelle beziehen sich nur auf das Dampfgaren und sind lediglich Richtlinien. Es kann ein wenig „Try and error“ geben, bevor man die Kunst des Dampfgarens beherrscht. Wir empfehlen, die Temperatur und die Garzeit bei der Arbeit mit diesem Ofen etwas zu reduzieren, bis Sie sich daran gewöhnt haben und verstehen, welche Programme die besten Ergebnisse liefern. -
Page 13: Reinigung Und Pflege
Reinigung und Pflege Reinigung und Pflege Reinigung des Dampfgarers • Das Ofenzubehör und die seitlichen Einschubgitter Hinweis: Die Reinigung des Dampfgarers sollte regel- sollten regelmäßig entfernt werden, um Lebensmit- mäßig durchgeführt werden, um die Lebensdauer des telteile sowie Fett- und Ölspritzer zu entfernen. Siehe Gerätes zu verlängern. -
Page 14: Austauschen Der Lampe Im Garraum
Reinigung und Pflege Austauschen der Lampe im Garraum Warnung: Stellen Sie sicher, dass das Gerät vor dem Auswechseln der Lampe vom Stromnetz ge- trennt ist, um einen Stromschlag zu vermeiden. • Falls zugänglich, einfach den Stecker ziehen, ansonsten am Schaltschrank oder Leistungsschalter ausschalten! •... - Page 15 Reinigung und Pflege Entfernung der Ofentür • Schließen Sie die Tür (Abbildung 3.) vorsichtig, bis die Hinweis: Das Entfernen der Tür kann notwendig sein, um linken und rechten Scharnierhebel A (Abbildung 2) am den Zugang zum Ofeninneren zu verbessern oder wenn Teil B (Abbildung 2) der Tür eingehängt sind.
-
Page 16: Fehlerbehebung
Fehlerbehebung Anleitung zur Fehlerbehebung Hinweis: Wenn während der Benutzung des Dampfgarers ein Problem auftritt, stellen Sie die Benutzung des Geräts ein und trennen Sie es vom Stromnetz. Lesen Sie die folgende Anleitung zur Fehlerbehebung, da dies bei der Behebung des Problems hilfreich sein kann. Falls dies nicht hilft, wenden Sie sich bitte an unseren Kundendienst. -
Page 17: Installation
Installation Einbaumaße (Abbildung für den Einbau in einen Hochschrank) Produktabmessungen 595 (B) x 455 (H) x 532 (T) mm Ausschnittmaße 560(B) x 450 (H) x 550 (T) mm Eine vollständige Maßzeichnung Ihres Gerätes finden Sie auf Seite 6. -
Page 18: Technischen Daten
Technische Daten Technische Daten Modellname EBD8501ED Hersteller KKT KOLBE Kapazität Garraum 36 Liter Kapazität Wassertank 1,2 Liter Nennspannung 220-240 Volt Frequenz 50 Hertz Gesamtverbrauch 3050 Watt Hinteres Ventilatorelement 1600 Watt Oberes Grillelement 1400 Watt Heizelement (Dampf) 1200 + 500 Watt... -
Page 19: Gewährleistung
6. Wir haften nicht für Schäden und Mängel an Geräten Fall die Vorlage des Kaufbeleges erforderlich. und deren Teile, die verursacht wurden durch: Für unsere KKT KOLBE Geräte leisten wir unabhängig • Äußere chemische oder physikalische Einwirkungen bei von den Verpflichtungen des Händlers aus dem Kaufver- Transport, Lagerung, Aufstellung und Benutzung (z.B. - Page 20 Vielen Dank fürs Lesen. Wir wünschen Ihnen viel Freude mit Ihrem Gerät. Thanks for reading. Version: 1.0 / 180802...
- Page 21 User‘s manual for your built-in steam oven Model: EBD8501ED Version: 1.0 / 180802...
- Page 22 Hints and symbols This icon indicates a hazardous situation. This symbol on the product, or in its packaging, indicates that this product may not be treated as household waste. You‘ll find it especially with all descriptions of the steps Instead, it should be taken to the appropriate waste that might cause danger to persons arising.
- Page 23 Safety instructions Safety instructions Installation precautions Product use precautions • This appliance is fitted with a 15 Amp plug and lead, • This appliance is recommended for domestic use only. therefore, no requirement to be hardwired. A 15 Amp In any type of commercial environment the warranty powerpoint should be fitted to the wall or interior of the terms are reduced.
- Page 24 Thank you Dear customer, thank you for the trust placed in us and for the purchase of this KKT KOLBE device. Your new appliance is designed for the requirements in yourhousehold. Please read this user’s and instruction manual carefully, which describes the capabilities and operation of your KKT KOLBE-mounted device.
- Page 25 Table of content Using the device ............. . •...
-
Page 26: Using The Device
Using the device Description of the appliance Control panel Side racks Wire shelf Perforated tray Baking / drip tray Door hinges Spill tray Door Water tank Suction ball Produkt dimensions... -
Page 27: Oven Lamp
Using the device Oven lamp The oven is fitted with a lamp, located at the rear right Should you want to turn the lamp on at any any time press hand side of the oven enabling the user to check the the Light key to illuminate the interior of the oven. - Page 28 Using the device Control panel Main on / off switch Plus key Programme / Mode key Minus key Light key OK / confirmation key Temperature adjust key Rapid heat-up key Timer / clock set key Start / stop key Display screen Control panel operating sequence Note: In order to use the steam oven correctly, the fol- OK / confirmation key is pressed - this is done once...
- Page 29 Using the device Operating instructions Getting started Using the timer / programmer Note: Steam programmes will not function without a coo- Setting the time of day king duration time being selected. Conventional program- When the steam oven is first connected the minutes mes do not have to have a duration time selected with time display will flash.
-
Page 30: Cooking Programmes / Modes
Using the device Cooking programmes / modes Cooking programmes The steam oven has 8 programmes with 6 of these as cooking programmes. These programmes have presettings for each of them although can be adjusted according the the users preference or as nominated in any recipe being followed. Refer to ‘Control panel opera- ting sequence’... -
Page 31: Cooking Guidelines
Cooking guidelines Steam cooking principles and usage tips Benefits of steam oven cooking Using your own containers The benefit of cooking with a steam oven is that the valu- Use of your own containers is acceptable although it is able vitamins and nutrients are retained during cooking important to ensure the following is noted: compared to their losses experienced cooking in a micro- •... - Page 32 Cooking guidelines Steam cooking guidelines The guidelines in the table below relate to cooking with steam only and are just that, guidelines. There may be a bit of trial and error before mastering the art of steam cooking. We suggest reducing temperature and cooking times slightly when working with this oven until you get used to it and understanding what programmes give the best results.
-
Page 33: Care An Cleaning
Care and cleaning Care and cleaning Cleaning the oven • Regular removal of the oven accessories and side racks Note: Cleaning of the steam oven should be carried out should be carried out to remove any foodpartilces and on a regular basis to prolong the life of this appliance. grease and oil spatters. -
Page 34: Replacing The Oven Lamp
Care and cleaning Replacing the oven lamp Warning: Ensure that the appliance is unplugged before replacing the lamp to avoid the possibility of electric shock. • If accessible, simply unplug the oven from the power- point, otherwise switch off at the switchboard or circuit breaker! •... - Page 35 Care and cleaning Removal of oven door • Gently close the door (Figure 3.) until left and right Note: Removal of the door may be necessary for better hinge levers A (Figure 2) are hooked to part B (Figure2) access to the oven interior or if the glass panels need to of the door.
-
Page 36: Troubleshooting
Troubleshooting Troubleshooting guide Note: If there happens to be an anomaly during use of the steam oven, stop using the oven and disconnect from the power. Refer to the below troubleshooting guide as this may assist in resolving the issue. If this does not help contact our customer service for further assistance. -
Page 37: Installation
Installation Built-In dimensions (Shown in a tower installation) Product dimensions 595 (w) x 455 (h) x 532 (d) mm Cutout dimensions 560(w) x 450 (h) x 550 (d) mm A complete dimensional drawing of your appliance can be found on page 26. -
Page 38: Technical Details
Technical details Techical details Oven model name EBD8501ED Supplier’s name KKT KOLBE Oven capacity 36 litres Water tank capacity 1.2 litres Rated voltage 220-240 volts Frequency 50 hertz Total consumption 3050 watts Rear fan element 1600 watts Top grill element... - Page 39 This product must not be disposed together with the domestic waste. This product has to be disposed at an authorized place for recycling of electrical and electronic appliances. By collecting and recycling waste, you help to save natural resources, and make sure that the product is disposed in an environmental friendly and healthy way.
- Page 40 Vielen Dank fürs Lesen. Wir wünschen Ihnen viel Freude mit Ihrem Gerät. Thanks for reading. Version: 1.0 / 180802...
Need help?
Do you have a question about the EBD8501ED and is the answer not in the manual?
Questions and answers