Burkert AirLINE 8640 Quick Start Manual
Hide thumbs
Also See for AirLINE 8640:
- Operating instructions manual (196 pages) ,
- Quick start manual (6 pages) ,
- Operating instructions manual (26 pages)
Table of Contents
Advertisement
Quick Links
Advertisement
Table of Contents

Subscribe to Our Youtube Channel
Related Manuals for Burkert AirLINE 8640


Summary of Contents for Burkert AirLINE 8640
- Page 1 Type 8640 AirLINE Quickstart English Deutsch Français...
- Page 2 We reserve the right to make technical changes without notice. Technische Änderungen vorbehalten. Sous réserve de modifications techniques. © Bürkert Werke GmbH & Co. KG, 2009 - 2019 Operating Instructions 1901/11_EU-ML_00804431 / Original DE...
-
Page 3: Table Of Contents
Type 8640 Contents 6 Technical daTa ...................7 1 The QuicksTarT ..................4 6.1 Conformity ..................7 1.1 Definition of the Term “Device” ............. 4 6.2 Standards ................... 7 1.2 Symbols ....................4 6.3 General Technical Data ..............7 2 inTended use ....................5 7 assembly ......................8 2.1 Restrictions ..................5 7.1 Safety instructions ................ -
Page 4: The Quickstart
▶ Failure to observe the warning may result in a fatal or serious The Quickstart must be available to each new owner of the device. injury. important safety information! Warning! ▶ Carefully read these instructions. Warns of a potentially dangerous situation! ▶ Observe in particular the safety instructions, intended use and ▶ Failure to observe the warning may result in serious injuries or operating conditions. death. ▶ Persons, who work on the device, must read and understand these instructions. Caution! The operating instructions and data sheets for Bürkert Warns of a possible danger! devices can be found on the Internet at: ▶ Failure to observe this warning may result in a moderately severe www.burkert.com or minor injury. note! 1.1 Definition of the Term “Device” Warns of damage to property! In these instructions, the term “device” always refers to the system AirLINE Type 8640. Important tips and recommendations. Refers to information in these operating instructions or in other documentation. ▶ Designates an instruction which you must follow to prevent a hazard. → designates a procedure which you must carry out. english... -
Page 5: Intended Use
Type 8640 Intendeduse inTenDeD use General safeTy informaTion This safety information does not cover: non-intended use of the airline Type 8640 may be a hazard to • Haphazard situations that can arise during installation, operation and people, nearby equipment and the environment. maintenance of the use. ▶ The device may be used for the control of pneumatically oper- ated units. • Locally applicable safety regulations which the operator and instal- ▶ Do not use the device outdoors unprotected. lation personnel are obligated to follow. ▶ Do not physically stress the housing (e.g. by placing objects on General hazardous situations. it or standing on it). To prevent injuries: ▶ Use according to the authorized data, service and operating ▶ Ensure that the system cannot be activated unintentionally. conditions specified in the contract documents and operat- ▶ Note that pipes and valves must not become detached in sys- ing instructions. These are described in the chapter entitled “6 tems which are under pressure. Technical data”. ▶ Before reaching into the system, always switch off the power ▶ The device may be used only in conjunction with third-party supply. devices and components recommended and authorized by ▶... -
Page 6: General Information
Type 8640 Generalsafetyinformation 4.2 Warranty note! The warranty is only valid if the AirLINE Type 8640 is used as intended electrostatic sensitive components/modules! in accordance with the specified application conditions. The device contains electronic components, which react sensitively 4.3 informations in the internet to electrostatic discharge (ESD). Contact with electrostatically charged persons or objects is hazardous to these components. In The operating manual and the data sheets on Type 8640 can be found the worst case scenario, they will be destroyed immediately or will on the Internet under: www.burkert.com fail after start-up. ▶ Observe the requirements in accordance with EN 61340-5-1 Device revision and 5-2 to minimize/avoid the possibility of damage caused by a sudden electrostatic discharge! The hardware and firmware for the device have been revised. ▶ Also, ensure that you do not touch electronic components when The revised version REV.2 is largely compatible with the previous the power supply voltage is present! version. Differences to be taken into account for the user relate to the EthernetIP and ModbusTCP Ethernet variants. The details are described in the operating instructions. General informaTion The operating instructions can be found on the Internet at: www.burkert.com 4.1 contact address... -
Page 7: Technical Data
Type 8640 Technicaldata Technical DaTa 6.3.1 rating plate 6.1 conformity Type The AirLINE system Type 8640 conforms with the EC Directives Operating principle according to the EC Declaration of Conformity. Orifice 6.2 standards The applied standards, which verify conformity with the EC Direc- 6525 H 4,0 tives, can be found on the EC-Type Examination Certificate and / or PN 2,5 - 7 bar 24 V DC 1W the EC Declaration of Conformity. 450000Y W14UN 6.3 General Technical Data Identification number Technical data pilot valve type 0460, pilot valve type 0461, 6524, 6525 6526, 6527 Voltage (± 10 %), capacity Pressure range Vac. -
Page 8: Assembly
Type 8640 Assembly 6.3.2 fluid connection assembly Type 6525 7.1 safety instructions Type 6524 Danger! Design the pressure supply risk of injury from high pressure in the equipment! with the largest possible ▶ Before loosening lines or valves, turn off the pressure and vent volume! the lines. risk of injury due to electrical shock! ▶ Before reaching into the device or the equipment, switch off the power supply and secure to prevent reactivation! X* - pilot control ▶ Observe applicable accident prevention and safety regulations for electrical equipment! Fig. 2: Fluid connection. Types 6524 and 6525 6.3.3 f luid and electrical connection Warning! Observe pin Type 6524 risk of injury from improper assembly! assignment! -
Page 9: Assembly
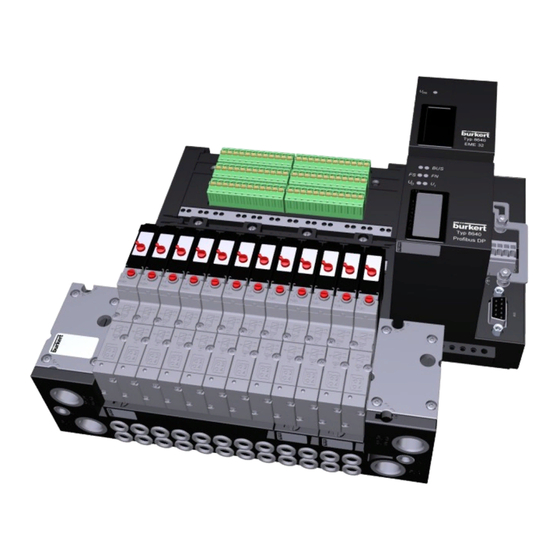
Type 8640 Assembly 7.2 assembly Caution! Danger! escape of medium and malfunction! danger of explosion! If the seals are not seated correctly, leaks and malfunctions may occur due to pressure losses. If systems in the explosion-protected area are installed in a control ▶ Ensure that the seals are seated correctly in the area of the elec- cabinet, the following requirements must be met: tronics and pneumatics. ▶ The control cabinet must be authorized for use in the explosion- protected area. short-circuit, malfunction! ▶ The control cabinet must be large enough to allow the resulting The electrical connection requires exact contacting. lost heat to be dissipated in a suitable manner to the outside. ▶ Do not bend contacts. ▶ The internal temperature of the control cabinet must not exceed ▶ If connections are damaged or bent, replace the affected the max. permitted ambient temperature for the device. components. risk of electric shock! ▶ Do not switch on the system unless the components are in ▶ Before reaching into the device or the equipment, switch off the perfect condition. power supply and secure to prevent reactivation! note! 7.2.1 installation on standard rail operate the system with direct current only! To prevent damage to the system, use only direct current for the... - Page 10 Type 8640 Assembly → → Fasten the standard rail firmly in the control cabinet. Position the valve terminal in the control cabinet on the prepared → opening. Establish a short, wide PE connection between the standard rail → and the control cabinet. From outside attach the stability plate to prevent distortion and secure with screws M 5 x 10 from the enclosed fastening set. The valve terminal must be freely accessible from above. Ensure good heat dissipation! Valve terminal recommended distance when installing in a control cabinet: Type 8640 30 mm 30 mm 30 mm 60 mm AirLINE Quick 7.2.2 installation of airline Quick adapter To install AirLINE Quick, a notch must be first of all provided on the base or the wall of the control cabinet, e.g. through lasing or punching. For the dimensions of the relevant flange image, refer to chapter “7.2.3 D imensions of the flange images for AirLINE Quick”. Control cabinet The distances to the left, right, front and top depend on the selected Fig. 5: Placing the valve terminal in the control cabinet valve terminal configuration.
- Page 11 Type 8640 Assembly 7.2.3 D imensions of the flange images for airline Quick Inside wall control cabinet t>=1.5 Ø 5.3 ± 0.2 R 6.5 only at O= 6 and O = 10 Space requirements reinforcing frame outside Fig. 7: Dimensions of the flange images for AirLINE Quick – for dimensions see “Tab. 1”, page 12 english...
-
Page 12: Installation
Type 8640 Installation insTallaTion version 4-fold 8-fold 12-fold 16-fold 24-fold 8.1 fluid installation feature – – – – on request Danger! 111 155 199 243 331 ±0.4 ±0.4 ±0.4 ±0.4 ±0.4 114 123 ±0.4 ±0.3 ±0.3 ±0.4 ±0.3 risk of injury from high pressure in the equipment! – 158 202 246 200 ▶... - Page 13 Type 8640 Installation procedure: 8.1.3 P neumatic connections - → airline standard Depending on the version, plug the connections in the corre- sponding working connections or screw them in. note! For the plug-in connections the hose pipes must meet the following requirements: ▶ Minimum hardness of 40 Shore D (in accordance with DIN Working connections 53505 or ISO 868); for 5/2-way and ▶ Outer diameter in accordance with DIN 73378 (max. permitted 2 x 3/2-way valves deviation ± 0.1 mm of the nominal dimension); Working connections ▶ Burr-free, cut off at right angles and undamaged on the outer for 3/2-way valves diameter; Fig. 9: Pneumatic connections - valve discs The hose pipes must be pressed all the way into the plug-in procedure:...
- Page 14 Type 8640 Installation 8.1.4 P neumatic connections - 8.1.5 f luid connection airline Quick airline Quick Example of connection adapter Air discharge connection R/S Supply connection P Fig. 11: Fluid connection AirLINE Quick procedure: → Screw connection adapter G1/4” or NPT 1/4” to connections P and R/S. Fig. 10: Pneumatic connections – AirLINE Quick note! procedure: → risk of leakage if screw connection is too tight! Depending on the version, plug the connections in the corre- ▶...
-
Page 15: Fluid Deinstallation
Type 8640 Installation 8.2 fluid deinstallation 8.3 electrical installation note! Danger! irreversible damage to the seal in the thread of the screw risk of injury due to electrical shock! connection! ▶ Before reaching into the device or the equipment, switch off the ▶ When loosening the connection adapters, use a suitable tool to power supply and secure to prevent reactivation! prevent the corresponding supply or air discharge connection from turning. 8.3.1 c onventional connection technology (multipole and multiple connection) module configuration Multiple connection – Ground Functional earth Multi-pole connection Pin 1 Valve 1 for valve outputs Pin 24 Valve 24 Pin 25 Ground Multipole circuit Pin 1 Input 1 feedback indicator inputs... - Page 16 Type 8640 Installation 8.3.2 field bus technology connections male IP20 Socket RJ45 Please observe section “5 Device revision”, page 6. profibus dp canopen / devicenet profinet, 1 2 3 4 5 6 7 8 ethernet/ ip20 ip54 ip20 ip54 D-SUB 9 ip, modbus Pin 1 Pin 4 1 n. c. +5 V n. c. Drain 2 n. c. RxD/TxD-N/A- CAN LOW n. c. TX–...
- Page 17 Type 8640 Installation 8.3.4 DiP switch settings 8.3.5 rio - internal bus extension profibus-dp 24 V DC (2) Outputs 24 V DC (4) Logic Address of the profibus DP subscriber - 125 Electronics Inputs Outputs devicenet / canopen GND (3) Logik GND (1) Address of the field bus module 0 – 63 Baud rate Outputs Fig. 12: Power supply baud rate dip 7/8 125 kB 20 kB 250 kB 125 kB 500 kB 250 kB 500 kB CAN LOW Internal field bus: 4-pole socket M8 CAN HIGH Field bus settings: dip switches Address on the in- Mode inputs...
- Page 18 Type 8640 Installation 8.3.6 a ddress on the internal rio bus: 8.3.7 mode inputs: DiP switches 4 and 5 DiP switches 1 to 3 note! Each peripheral terminal has a unique address. This address is set The input modes allow the entries (feedback indicator) to be on the valve terminal via DIP switches 1 to 3. assigned in different ways in the process image of the inputs (PAE). dip 1 dip 2 dip 3 address peripheral terminal dip 4 dip 5 No entries available Normal mode Mode: shifted inputs Mode: halved inputs Caution! If there are no inputs available, both switches must be set to OFF. english...
-
Page 19: Start-Up
Type 8640 Start-Up sTarT-uP 11 TransPorT, sToraGe, DisPosal Warning! note! Transport damages! risk of injury from improper operation! Inadequately protected equipment may be damaged during transport. Improper operation may result in injuries as well as damage to the ▶ During transportation protect the device against wet and dirt in device and the area around it. shock-resistant packaging. ▶ Before start-up, ensure that the operating personnel are familiar ▶ Avoid exceeding or dropping below the permitted storage with and completely understand the contents of the operating temperature. instructions. ▶ Observe the safety instructions and intended use. incorrect storage may damage the device! ▶ Only adequately trained personnel may start up the equipment/ ▶ Store the device in a dry and dust-free location! the device. ▶ Storage temperature: -20 ... +60 °C. note! damage to the environment caused by device components ▶ Switch on the supply pressure. contaminated with media! ▶ Only then switch on the power supply! ▶... - Page 21 www.burkert.com...
Need help?
Do you have a question about the AirLINE 8640 and is the answer not in the manual?
Questions and answers