Table of Contents
Advertisement
Quick Links
Submerged AM
Submerged AM units on plate are covered 24 months by warranty within the limits mentioned in our General Sales Conditions.
In case of a use other than that mentioned in the Instructions manual, and without preliminary agreement of MOUVEX,
warranty will be canceled.
Z.I. La Plaine des Isles - F 89000 AUXERRE - FRANCE
Tel. : +33 (0)3.86.49.86.30 - Fax : +33 (0)3.86.49.87.17
contact@mouvex.com - www.mouvex.com
Unit on plate
WARRANTY :
INSTRUCTIONS 1010-I00 e
Section
1010
Effective
March 2018
Replaces
March 2017
Translation of the
original instructions
INSTALLATION
OPERATION
MAINTENANCE
Your distributor :
Advertisement
Table of Contents

Related Manuals for Dover PSG MOUVEX SUBMERGED AM UNIT ON PLATE


Summary of Contents for Dover PSG MOUVEX SUBMERGED AM UNIT ON PLATE
- Page 1 INSTRUCTIONS 1010-I00 e Section 1010 Effective March 2018 Replaces March 2017 Translation of the original instructions Submerged AM Unit on plate INSTALLATION OPERATION MAINTENANCE WARRANTY : Submerged AM units on plate are covered 24 months by warranty within the limits mentioned in our General Sales Conditions. In case of a use other than that mentioned in the Instructions manual, and without preliminary agreement of MOUVEX, warranty will be canceled.
-
Page 2: Table Of Contents
TANK TRUCK PUMP SAFETY, STORAGE, INSTALLATION AND MAINTENANCE INSTRUCTIONS MODEL : SUBMERGED AM UNIT ON PLATE TABLE OF CONTENTS Page Definition of safety symbols 1. OVERALL DIMENSIONS ......3 2. -
Page 3: Overall Dimensions
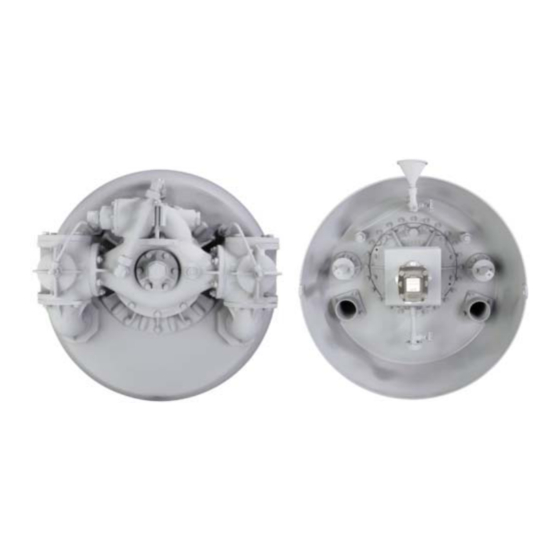
1. OVERALL DIMENSIONS NT 1010-I00 03 18 Submerged AM unit on plate e 3/13... -
Page 4: Operating Limits
2. OPERATING LIMITS Temperature range allowed : -20°C à +200°C Speed Flowrate Power (rpm) (Kw) Products authorised : Bitumen Other products : Consult us. 3. INSTALLATION 3.1 Choice of pump 3.3 Pipe diameter To obtain the service expected from a MOUVEX pump, In order to achieve the best usage conditions, it is impor- regarding both performance and longevity, it is vital that tant to take the following recommendations into account... -
Page 5: Direct Drive By Motor
4. DIRECT DRIVE BY MOTOR 4.1 Alignment of motor/pump and reduction 4.2 Electric motors gearbox/pump shafts WARNING WARNING DISCONNECT THE ELECTRICITY OPERATION WITHOUT THE SHAFT SUPPLY BEFORE ANY MAINTENAN- PROTECTOR CAN CAUSE SERIOUS CE OPERATION. PERSONAL INJURY, MAJOR PROPER- TY DAMAGE OR DEATH. Dangerous voltage. -
Page 6: Diesel Engines Drive
4. DIRECT DRIVE BY MOTOR (continued) 4.3 Diesel engines drive Start the pump empty to check that the connections are good and that the direction of rotation corresponds to the system intake and discharge directions. If it is necessary CAUTION to reverse the direction of rotation, follow the instructions below : Three-phase motor : switch any 2 current input wires. -
Page 7: Use
6. USE 6.3 Starting-up the pump The operator should remain nearby the equipment through- out the use to ensure the proper functioning of the system. WARNING 6.1 Pumping hot liquids CAUTION FAILURE RELIEVE SYSTEM PRESSURE PRIOR TO PERFORMING PUMP SERVICE OR MAINTENANCE CAN CAUSE PERSONAL INJURY OR PROPERTY DAMAGE. -
Page 8: Protection From Frost
6. USE (continued) 6.7 Protection from frost Drain the pump : see § P UMP EMPTYING 6.8 Restarting Follow the standard start-up procedure for the pump/ motor-driven pump, as well as the instructions below. Turn the pump by hand to make sure the parts move freely. -
Page 9: Pump Filling (Solvent)
6. USE (continued) 6.15 Pump filling (solvent) 6.19 Rotation speed When pump is emptied, leave 3-way delivery valve in Always it is necessary to choose a pump rotation speed the position show on the instruction plate : suited to the pumped product viscosity and do not exceed the maximum speed indicated in the attached 5. -
Page 10: Necessary Tools
7. NECESSARY TOOLS • Flat wrenches 8 - 10 - 13 - 14 - 16 - 17 - 19 Makeup torques : • Screwdriver • M12 ...81 Nm • M10 ...47 Nm • M 8 ....23 Nm • M 6 ....10 Nm 8. -
Page 11: Cover Dismountling
8. DISMANTLING AND REASSEMBLY (continued) 8.1 Cover dismountling 8.4 Reassembly Remove bolts of flange 58 from drain valve 53. Check seals of one-piece rotary assembly 697, seals 605 and 707 for good condition. Remove circular flap door in insulation so as to gain access to pump cover. -
Page 12: Maintenance
9. MAINTENANCE 9.1 Bearing lubrication 9.2 3-way valve lubrication Lightly grease the ball bearing on the pump output shaft Indicative list of greases for high temperatures during periodical lubrication of the vehicle. STATERMA 2 Use high quality ball bearing grease, at high drop point. BP ENERGREASE HTG2 UNIREX N°3 ESSO... -
Page 13: Certificate Of Conformity
12. CERTIFICATE OF CONFORMITY NT 1010-I00 03 18 Submerged AM unit on plate e 13/13...
Need help?
Do you have a question about the PSG MOUVEX SUBMERGED AM UNIT ON PLATE and is the answer not in the manual?
Questions and answers