Advertisement
Quick Links
Advertisement

Related Manuals for peerless-AV DS-LEDM Series


Summary of Contents for peerless-AV DS-LEDM Series
- Page 1 DS-LEDM Series 2020-08-10 #:146-9051-1...
- Page 2 WARNING ENG - This product is designed to be installed on plywood walls, solid concrete or cinder block walls. Hardware is included for plywood installation. This product is designed to be installed on flat, unobstructed, vertical walls. Do not install on curved or angled walls. Before installing make sure the supporting surface will support the combined load of the equipment and hardware.
- Page 3 Tools Needed for Assembly. 3/8" (10mm) 5/32" (4mm) 5/16" (8mm) 2020-08-10 #:146-9051-1...
-
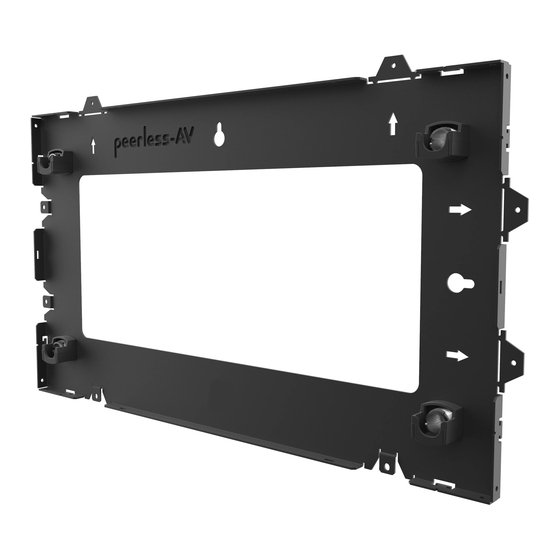
Page 4: Parts List
Parts (Before beginning, make sure you have all parts shown below). Parts List Description A wall plate B bobbin C #14-10 x 1.75" wood screw D bobbin screw E M5 x 8mm philips screw F combination tool A (1) B (4) D (4) wall plate bobbin... - Page 5 Sold separately. Vendidos por separado. Vendu séparément. Separat verkauft. Apart verkocht. Venduto a parte. Prodává se samostatně. ČEŠ Predáva sa samostatne. Vendido em separado. Ayrıca satılır. TÜR E (4) 2020-08-10 #:146-9051-1...
- Page 6 Sold separately. Vendidos por separado. Vendu séparément. Separat verkauft. Apart verkocht. Venduto a parte. Prodává se samostatně. ČEŠ Predáva sa samostatne. Vendido em separado. Ayrıca satılır. TÜR Sold separately. Vendidos por separado. Vendu séparément. Separat verkauft. Apart verkocht. Venduto a parte. Prodává...
- Page 7 Plywood Concrete/Cinder block 2020-08-10 #:146-9051-1...
- Page 8 WARNING ENG - When installing Peerless wall mounts on a wood stud wall covered with plywood, verify that the wood studs are a minimum of 2" x 4" nominal size and plywood is a minimum Grade BC, 1/2" (13mm) thick. Plywood may be covered by gypsum board (drywall) up to 5/8"...
- Page 9 3a-3 1/4" (6mm) C (2) 3/8" (10mm) 3a-4 2020-08-10 #:146-9051-1...
- Page 10 3a-5 Mark mounting holes on plywood (must be minimum Grade BC, 1/2" (13mm) thick). 3a-6 1.75" (44mm) 5/32" 5/32" (4mm) (4mm) Drill mounting holes into supporting surface (1.75" (44mm) minimum depth required). 2020-08-10 #:146-9051-1...
- Page 11 3a-7 Sold separately. Vendidos por separado. 3/8" Vendu séparément. (10mm) Separat verkauft. Apart verkocht. Venduto a parte. Prodává se samostatně. ČEŠ Predáva sa samostatne. Vendido em separado. Ayrıca satılır. TÜR Maximum 80 in. • lb (9 N.M.). Máxima 80 in. • lb (9 N.M.). Maximum 80 in.
- Page 12 3a-9 3/8" (10mm) Maximum 80 in. • lb (9 N.M.). Máxima 80 in. • lb (9 N.M.). Maximum 80 in. • lb (9 N.M.). C (4) Maximum 80 in. • lb (9 N.M.). Maximaal 80 in. • lb (9 N.M.). Massima 80 in.
- Page 13 This page intentionally left blank. 2020-08-10 #:146-9051-1...
- Page 14 WARNING ENG - When installing Peerless wall mounts on a concrete wall, the wall must be at least 8" thick with a minimum compressive strength of 2000 psi. When installing Peerless wall mounts on a cinder block wall, the cinder blocks must meet ASTM C-90 specifications and have a minimum nominal width of 8".
- Page 15 3b-3 Insert anchor flush to concrete. Inserte el anclaje a ras con el concreto. Insérez la cheville d’ancrage au ras du béton. Setzen Sie den Dübel bündig mit dem Beton abschließend ein. Breng anker aan gelijk met beton. Inserire il fermo a paro col calcestruzzo. ČEŠ...
- Page 16 3b-5 3b-6 Mark mounting holes. 2020-08-10 #:146-9051-1...
- Page 17 3b-7 2.5" (64mm) 5/16" 5/16" (8mm) (8mm) Drill mounting holes into supporting surface (2.5" (64mm) minimum depth required). Do not drill into mortar joints. 3b-8 Insert anchor flush to concrete. Inserte el anclaje a ras con el concreto. Insérez la cheville d’ancrage au ras du béton. Setzen Sie den Dübel bündig mit dem Beton abschließend ein.
- Page 18 3b-9 Sold separately. Vendidos por separado. 3/8" Vendu séparément. (10mm) Separat verkauft. Apart verkocht. Venduto a parte. Prodává se samostatně. ČEŠ Predáva sa samostatne. Vendido em separado. Ayrıca satılır. TÜR Maximum 80 in. • lb (9 N.M.). Máxima 80 in. • lb (9 N.M.). Maximum 80 in.
- Page 19 3b-11 3/8" (10mm) Maximum 80 in. • lb (9 N.M.). Máxima 80 in. • lb (9 N.M.). Maximum 80 in. • lb (9 N.M.). C (4) Maximum 80 in. • lb (9 N.M.). Maximaal 80 in. • lb (9 N.M.). Massima 80 in.
- Page 20 This page intentionally left blank. 2020-08-10 #:146-9051-1...
- Page 21 Remove. Replace quite. Remplace retirez. Remettez en place entfernen. Ersetzen verwijderen. Vervangen rimuovere. Rimettere a posto odstranit. ČEŠ ČEŠ Znova nasadit odstrániť. Znova nasadiť remova. Coloque novamente çıkartın. Değiştirin TÜR TÜR 2020-08-10 #:146-9051-1...
- Page 22 Plywood Concrete/Cinder block WARNING ENG - When installing Peerless wall mounts on a wood stud wall covered with plywood, verify that the wood studs are a minimum of 2" x 4" nominal size and plywood is a minimum Grade BC, 1/2" (13 mm) thick. Plywood may be covered by gypsum board (drywall) up to 5/8"...
- Page 23 5a-3 1/4" (6mm) 3/8" (10mm) C (2) 5a-4 2020-08-10 #:146-9051-1...
- Page 24 5a-5 Mark mounting holes on plywood (must be minimum Grade BC, 1/2" (13mm) thick.) 5a-6 1.75" (44mm) 5/32" 5/32" (4mm) (4mm) Drill mounting holes into supporting surface (1.75" (44mm) minimum depth required). 2020-08-10 #:146-9051-1...
- Page 25 5a-7 Sold separately. Vendidos por separado. 3/8" Vendu séparément. (10mm) Separat verkauft. Apart verkocht. Venduto a parte. Prodává se samostatně. ČEŠ Predáva sa samostatne. Vendido em separado. Ayrıca satılır. TÜR Maximum 80 in. • lb (9 N.M.). Máxima 80 in. • lb (9 N.M.). Maximum 80 in.
- Page 26 5a-9 3/8" (10mm) C (4) Maximum 80 in. • lb (9 N.M.). Máxima 80 in. • lb (9 N.M.). Maximum 80 in. • lb (9 N.M.). Maximum 80 in. • lb (9 N.M.). Maximaal 80 in. • lb (9 N.M.). Massima 80 in.
- Page 27 This page intentionally left blank. 2020-08-10 #:146-9051-1...
- Page 28 WARNING ENG - When installing Peerless wall mounts on a concrete wall, the wall must be at least 8" thick with a minimum compressive strength of 2000 psi. When installing Peerless wall mounts on a cinder block wall, the cinder blocks must meet ASTM C-90 specifications and have a minimum nominal width of 8".
- Page 29 5b-3 Insert anchor flush to concrete. Inserte el anclaje a ras con el concreto. Insérez la cheville d’ancrage au ras du béton. Setzen Sie den Dübel bündig mit dem Beton abschließend ein. Breng anker aan gelijk met beton. Inserire il fermo a paro col calcestruzzo. ČEŠ...
- Page 30 5b-5 5b-6 Mark mounting holes. 2020-08-10 #:146-9051-1...
- Page 31 5b-7 2.5" (64mm) 5/16" 5/16" (8mm) (8mm) Drill mounting holes into supporting surface (2.5" (64mm) minimum depth required). Do not drill into mortar joints. 5b-8 Insert anchor flush to concrete. Inserte el anclaje a ras con el concreto. Insérez la cheville d’ancrage au ras du béton. Setzen Sie den Dübel bündig mit dem Beton abschließend ein.
- Page 32 5b-9 Sold separately. Vendidos por separado. 3/8" Vendu séparément. (10mm) Separat verkauft. Apart verkocht. Venduto a parte. Prodává se samostatně. ČEŠ Predáva sa samostatne. Vendido em separado. Ayrıca satılır. TÜR Maximum 80 in. • lb (9 N.M.). Máxima 80 in. • lb (9 N.M.). Maximum 80 in.
- Page 33 5b-11 3/8" (10mm) Maximum 80 in. • lb (9 N.M.). Máxima 80 in. • lb (9 N.M.). C (4) Maximum 80 in. • lb (9 N.M.). Maximum 80 in. • lb (9 N.M.). Maximaal 80 in. • lb (9 N.M.). Massima 80 in.
- Page 34 6a-1 Tie a string (not included) between either the left or right slot on the top edge of the wall plate. Tie the other end of the string to the plumb bob (not included) in the two locations shown. Align the string to each groove of the depth adjustment housing vertically.
- Page 35 6a-2 Adjust using the combination tool (F) to align depth. 2020-08-10 #:146-9051-1...
- Page 36 6a-3 Tie a string (not included) between the center slots of wall plate on the four locations shown to align each groove of the depth adjustment housing horizontally. 2020-08-10 #:146-9051-1...
- Page 37 6a-4 Adjust using the combination tool (F) to align depth. 2020-08-10 #:146-9051-1...
- Page 38 6b-1 Tie a string (not included) between either the left or right slot on the top edge of the wall plate. Tie the other end of the string to the plumb bob (not included) in the two locations shown. Align the string to each groove of the depth adjustment housing vertically.
- Page 39 6b-2 Adjust using the combination tool (F) to align depth. 2020-08-10 #:146-9051-1...
- Page 40 6b-3 Tie a string (not included) between the center slots of wall plate on the four locations shown to align each groove of the depth adjustment housing horizontally. 2020-08-10 #:146-9051-1...
- Page 41 6b-4 Adjust using the combination tool (F) to align depth. 2020-08-10 #:146-9051-1...
- Page 42 B (4) D (4) ENG Attach displays, tighten latching hardware, and run cables one at a time starting from the bottom. 2020-08-10 #:146-9051-1...
- Page 43 ENG To remove, start from the top. Remove latching hardware, disconnect cables, and remove LED's one at a time. DS-LEDM-A27 2020-08-10 #:146-9051-1...
- Page 44 Garantia TÜR Garantı̇ Garanzia Záruka www.peerless-av.com/warranty Peerless-AV Peerless-AV Europe Peerless-AV América Latina 2300 White Oak Circle Unit 3 Watford Interchange, Av. de las Industrias 413 Aurora, IL 60502 Colonial Way, Watford, Herts, Parque Industrial Escobedo Email: tech@peerlessmounts.com WD24 4WP, United Kingdom General Escobedo N.L., México 66062...
Need help?
Do you have a question about the DS-LEDM Series and is the answer not in the manual?
Questions and answers