Advertisement
allen + roth
is a registered trademark of LF, LLC.
®
All rights reserved.
ATTACH YOUR RECEIPT HERE
Purchase Date _________________________
Questions, problems, missing parts? Before returning to your retailer, call our customer
service department at 1-866-439-9800, 8 a.m. - 6 p.m., EST, Monday - Thursday,
8 a.m. - 5 p.m., EST, Friday.
PH19278
welcoming • sophisticated • inspiring
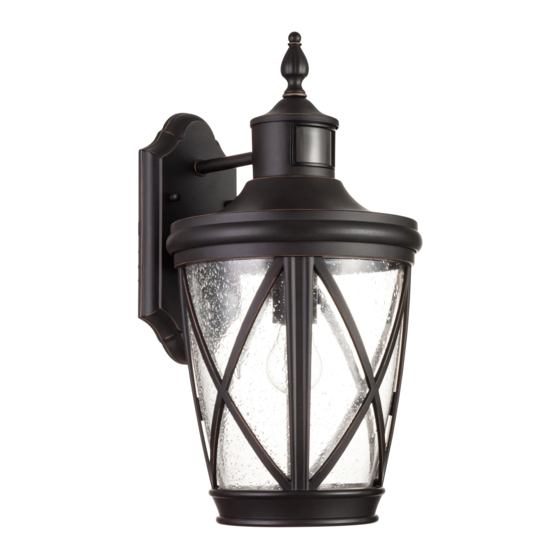
WALL LANTERN
1
C
US
ITEM #0808356
MODEL #41997
Français p. 11
Español p. 21
Advertisement
Table of Contents

Summary of Contents for Allen + Roth 41997
- Page 1 • sophisticated • inspiring allen + roth is a registered trademark of LF, LLC. ® All rights reserved. ITEM #0808356 WALL LANTERN MODEL #41997 ATTACH YOUR RECEIPT HERE Français p. 11 Purchase Date _________________________ Español p. 21 Questions, problems, missing parts? Before returning to your retailer, call our customer service department at 1-866-439-9800, 8 a.m.
-
Page 2: Table Of Contents
TABLE OF CONTENTS Package Contents..............3 Hardware Contents. -
Page 3: Package Contents
PACKAGE CONTENTS PART DESCRIPTION QUANTITY Mounting Bracket (preassembled to Fixture [D]) Mounting Bracket Screw (preassembled to Mounting Bracket [A]) Screw Cap (preassembled to Mounting Screw [B]) Fixture Finial Finial Cap HARDWARE CONTENTS Wire Connector Mounting Screw Qty. 3 Qty. 2 PREPARATION Estimated Assembly Time: 60 minutes Tools Required for Assembly (not included):... -
Page 4: Safety Information
SAFETY INFORMATION Please read and understand this entire manual before attempting to assemble, operate or install the product. Failure to do so could lead to electrical shock, fire or other injuries that could be hazardous or even fatal. • Before you begin installing the light, disconnect the power by removing fuses or turning off the circuit breakers. -
Page 5: Assembly Instructions
ASSEMBLY INSTRUCTIONS 1. Turn off the circuit breakers and the wall switch to the supply line leads. DANGER: Failure to disconnect the power supply prior to installation may result in serious injury or death. 2. Loosen and remove the screw caps (C) from the mounting bracket screws (B) to remove the mounting bracket (A) from fixture (D). - Page 6 ASSEMBLY INSTRUCTIONS WARNING: To reduce the risk of fire, electrical shock or personal injury, wire connectors provided with this fixture are designed to accept only one 12-gauge house wire and two lead wires from the fan. If your house wire is larger than 12-gauge and/or there is more than one house wire to connect to the two fixture lead wires, consult an electrician for the proper size wire connectors to use.
- Page 7 ASSEMBLY INSTRUCTIONS 7. Hang fixture on the two mounting bracket screws (B) and secure with screw caps (C). 8. Lift the finial cap (F) over the threaded rod at the bottom of the finial (E). Attach to the hole in the top of the fixture (D) by turning the finial (E) in a clockwise direction.
- Page 8 ASSEMBLY INSTRUCTIONS 10. Use weather-proof caulk or sealant (sold separately) around top and sides of mounting plate to prevent Mounting water from collecting behind the fixture. Plate 11. Restore the power to the circuit breakers and the wall switch to the supply line leads.
-
Page 9: Operating Instructions
OPERATING INSTRUCTIONS 1. Remove the finial (E) and finial cap (F) to access controls for motion activation. When power is first applied the light will initialize for 45 seconds and then will be in Test Mode. The Test Mode will last for 5 minutes. The motion sensor adjustment dials consist of two knobs to adjust Sensitivity and delay Timer. -
Page 10: Troubleshooting
TROUBLESHOOTING PROBLEM POSSIBLE CAUSE CORRECTIVE ACTION 1. Fixture may be wired 1. Check wiring. incorrectly. 2. Replace bulb. 2. Worn or broken bulb. Fixture does not light. 3. Cover sensor to simulate 3. Fixture is set to Auto darkness. Mode. 1.


Need help?
Do you have a question about the 41997 and is the answer not in the manual?
Questions and answers