Table of Contents
Advertisement
Available languages
Available languages
Quick Links
®
is a registered trademark
allen + roth
of LF, LLC. All Rights Reserved.
ATTACH YOUR RECEIPT HERE
Serial Number
Questions, problems, missing parts? Before returning to your retailer, call our customer service
department at 1-866-439-9800, 8 a.m. - 6 p.m., EST, Monday - Thursday, 8 a.m. - 5 p.m., EST, Friday.
EB14583
welcoming • sophisticated • inspiring
Purchase Date
1
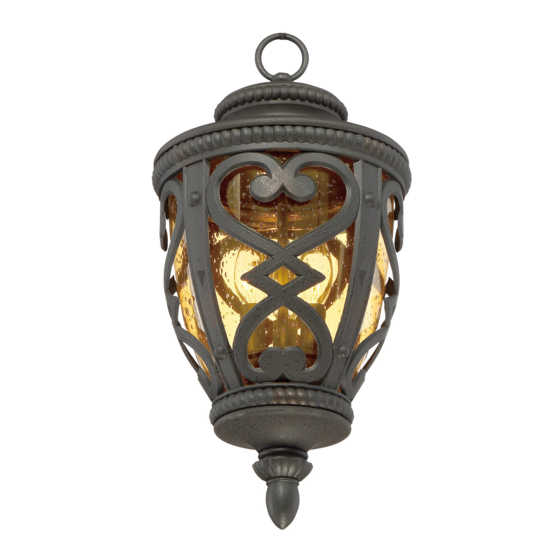
HANGING LANTERN
MODEL #LWS1176E
Lowes.com/allenandroth
ITEM #0336319
Français p. 11
Español p. 21
Advertisement
Table of Contents

Related Manuals for Allen + Roth LWS1176E


Summary of Contents for Allen + Roth LWS1176E
- Page 1 • sophisticated • inspiring ® is a registered trademark allen + roth ITEM #0336319 of LF, LLC. All Rights Reserved. HANGING LANTERN MODEL #LWS1176E Français p. 11 ATTACH YOUR RECEIPT HERE Español p. 21 Serial Number Purchase Date Questions, problems, missing parts? Before returning to your retailer, call our customer service department at 1-866-439-9800, 8 a.m.
-
Page 2: Package Contents
PACKAGE CONTENTS PART DESCRIPTION QUANTITY Fixture Hood Assembly Shade Cage Lowes.com/allenandroth... - Page 3 HARDWARE CONTENTS (shown actual size) Green Ground Lock Hex Nut Screw Washer Wire [preassembled Qty. 3 Connector to Crossbar (FF)] Qty.2 Qty. 3 Outlet Qty. 1 Long Crossbar Screw (not shown to size) Nipple Qty. 2 Qty. 1 Qty. 1 Short Canopy Nipple...
-
Page 4: Safety Information
SAFETY INFORMATION Please read and understand this entire manual before attempting to assemble, operate or install the product. WARNING • RISK OF ELECTRIC SHOCK - Before beginning installation, turn off electricity at the circuit breaker box or the main fuse box. •... - Page 5 ASSEMBLY INSTRUCTIONS Install (3) 60-watt max. candelabra-base incandescent bulbs or (3) 13-watt max. spring self-ballasted candelabra-base CFL (none included). Bulb Socket Locate the center hole on the bottom bar of the cage (C) over the nipple on the bottom center of the junction box.
- Page 6 ASSEMBLY INSTRUCTIONS 4. Thread the short nipple (MM) into the hex coupling (NN). Thread the finial (LL) onto the end of the short nipple (MM) and hand tighten until snug. Hardware Used Finial Short Nipple 5. Secure the crossbar (FF) to the outlet box (not included) with outlet box screws (CC).
- Page 7 ASSEMBLY INSTRUCTIONS Thread another hex nut (EE) onto the end of the long nipple (GG). Place the lock washer (DD) over the end of the long nipple (GG) and then thread the canopy chain loop (HH) onto the end of the long nipple (GG).
- Page 8 ASSEMBLY INSTRUCTIONS 10. Pull the supply wires up through the fixture chain (JJ), alternating links. Push the wires up through the canopy chain loop (HH) into the outlet box. Supply Wires Unthread the canopy lock ring (II) and slide canopy lock ring (II) and ceiling canopy (KK) down the Outlet Box fixture chain (JJ).
-
Page 9: Care And Maintenance
ASSEMBLY INSTRUCTIONS 12. Attach ground fixture wire to either the green ground screw (AA) on crossbar (FF) or to the White or ground wire in the outlet box (usually GREEN Ribbed Side White Wire or BARE). If attaching fixture ground wire to From Outlet Box From Fixture Black or... -
Page 10: Warranty
For replacement parts, call our customer service department at 1-866-439-9800, 8 a.m. - 6 p.m., EST, Monday - Thursday, 8 a.m. - 5 p.m., EST, Friday. PART DESCRIPTION NUMBER Shade G2383SH M1290CHMK Fixture Chain Printed in China ® allen + roth is a registered trademark of LF, LLC. All rights reserved. Revision date:2014-10-08 Lowes.com/allenandroth... - Page 11 + roth ARTICLE N 0336319 déposée de LF, LLC. Tous droits réservés. LANTERNE SUSPENDU MODÈLE N° LWS1176E JOINDRE LE REÇU ICI Numéro de série Date d’achat Des questions, des problèmes, des pièces manquantes? Avant de retourner l'article à votre détaillant, appelez notre service à...
-
Page 12: Contenu De L'emballage
CONTENU DE L'EMBALLAGE PIÈCE DESCRIPTION QUANTITÉ Ensemble du capuchon du luminaire Abat-jour Armature Lowes.com/allenandroth... -
Page 13: Quincaillerie Incluse
QUINCAILLERIE INCLUSE (grandeur réelle) Vis de mise à Rondelle Écrou la terre verte de blocage hexagonal Capuchon (préassemblée à de connexion la traverse) (FF)] Qty.2 Qty. 3 Qty. 3 Vis pour Qty. 1 boîte de sortie Tige filetée Traverse longue ((grandeur non réelle)) Qty. -
Page 14: Consignes De Sécurité
CONSIGNES DE SÉCURITÉ Veuillez vous assurer de lire et de comprendre l’intégralité de ce manuel avant d’assembler, d’utiliser ou d’installer ce produit. AVERTISSEMENT • RISQUE DE CHOC ÉLECTRIQUE - Avant de commencer l'installation, coupez l'électricité au niveau de la boîte de disjoncteurs ou du coffret à fusibles principal. •... - Page 15 INSTRUCTIONS POUR L’ASSEMBLAGE 2. Insérez 3 ampoule à culot moyen d’un maximum de 60 watts ou 3 ampoule fluocompactes à culot moyen avec ballast intégré d’un maximum de 13 watts (non incluses). Ampoule 3. Insérez la tige située au dessous de la boîte de jonction dans le trou central de la barre inférieure de l’armature (C).
- Page 16 INSTRUCTIONS POUR L’ASSEMBLAGE 4. Vissez la tige filetée courte (MM) dans le raccord hexagonal 4 (NN). Vissez l’embout (LL) à l’extrémité de la tige filetée courte (MM) et serrez-le à la main jusqu’à ce qu’il soit fixé. Quincaillerie utilisée Embout Tige filetée courte 5.
- Page 17 INSTRUCTIONS POUR L’ASSEMBLAGE 7. Vissez un autre écrou hexagonal (EE) à l’extrémité de la tige filetée longue (GG). Placez une rondelle de blocage (DD) sur l’extrémité de la tige filetée longue (GG), puis vissez l’anneau de chaîne du couvercle (HH) à l’extrémité de la tige filetée longue (GG).
- Page 18 INSTRUCTIONS POUR L’ASSEMBLAGE 10. Faites passer les cordons d’alimentation à travers les maillons de la chaîne du luminaire (JJ), en alternance. Faites passer les fils à travers l’anneau de chaîne du couvercle (HH), puis dans la boîte de sortie. Cordons d’alimentation 11.
-
Page 19: Soin Et Entretien
INSTRUCTIONS POUR L’ASSEMBLAGE 12.Fixez le fil de mise à la terre à la vis de mise à la terre verte (AA) de la traverse (FF) ou au fil de mise Fil blanc ou à la terre de la boîte de sortie (fil habituellement Fil blanc de la rainuré... -
Page 20: Garantie
8 h et 18 h (HNE), du lundi au jeudi, ou entre 8 h et 17 h (HNE), le vendredi. PIÈCE DESCRIPTION NUMBER Abat-jour G2383SH Chaîne du luminaire M1290CHMK Imprimé en Chine ® allen + roth est une marque de commerce déposée de LF, LLC. Tous droits réservés. Date de révision:2014-10-08 Lowes.com/allenandroth... - Page 21 • sophisticated • inspiring ® es una marca registrada de allen + roth ARTÍCULO #0336319 LF, LLC. Todos los derechos reservados. LINTERNA COLGANTE MODELO #LWS1176E ADJUNTE SU RECIBO AQUÍ Número de serie Fecha de compra ¿Preguntas, problemas, piezas faltantes? Antes de volver a la tienda, llame a nuestro Departamento de Servicio al Cliente al 1-866-439-9800, de lunes a jueves de 8 a.m.
-
Page 22: Contenido Del Paquete
CONTENIDO DEL PAQUETE PIEZA DESCRIPCIÓN CANTIDAD Ensamble de la carcasa de la lámpara Pantalla Rejilla Lowes.com/allenandroth... - Page 23 ADITAMENTOS (se muestra en tamaño real) Tornillo verde Arandela de Tuerca de puesta seguridad hexagonal Conector a tierra de cables [preensamblado Qty.2 Qty. 3 a la placa Qty. 3 Tornillo de perforada (FF)] Placa montaje Manguito perforada Qty. 1 roscado largo (no se muestra Qty.
-
Page 24: Información De Seguridad
INFORMACIÓN DE SEGURIDAD Lea y comprenda completamente este manual antes de intentar ensamblar, usar o instalar el producto. ADVERTENCIA • RIESGO DE DESCARGA ELECTRICA: antes de comenzar con la instalación, desconecte la electricidad en la caja de interruptores o caja de fusibles principal. •... - Page 25 INSTRUCCIONES DE ENSAMBLAJE 2. Instale 3 bombilla de base media de 60 vatios como máximo o 3 bombilla CFL de base media con balastro y resorte de 13 vatios como máximo (ninguna se incluye). Bombillas 3. Coloque el orificio central en la barra inferior de la rejilla (C) sobre el manguito roscado en el centro inferior de la caja de unión.
- Page 26 INSTRUCCIONES DE ENSAMBLAJE 4. Enrosque el manguito roscado corto (MM) en el acoplador hexagonal (NN). Enrosque el remate (LL) en el extremo del manguito roscado corto (MM) y apriete a mano hasta que quede ajustado. Aditamentos utilizados Remate Manguito roscado corto 5.
- Page 27 INSTRUCCIONES DE ENSAMBLAJE 7. Apriete otra tuerca hexagonal (EE) en el extremo del manguito roscado largo (GG). Coloque la arandela de seguridad (DD) sobre el extremo del manguito roscado largo (GG) y enrosque el enganche de la cadena de la cubierta (HH) en el extremo del manguito roscado largo (GG).
- Page 28 INSTRUCCIONES DE ENSAMBLAJE 10.Tire los conductores de suministro hacia arriba a través de la cadena de la lámpara (JJ), alternando los eslabones. Empuje los cables hacia arriba a través del enganche de la cadena de la cubierta (HH) a la caja de salida. Conductores de suministro 11.Desenrosque el anillo de bloqueo de la cubierta (II)
-
Page 29: Resolucion De Problemas
INSTRUCCIONES DE ENSAMBLAJE 12.Fije el conductor de puesta a tierra de la lámpara al tornillo verde de puesta a tierra (AA) en la placa Conductor de perforada (FF) o al conductor de puesta a tierra de la Conductor blanco costado blanco o caja de salida (que generalmente es un conductor desde la caja de acanalado desde... - Page 30 1-866-439-9800, de lunes a jueves de 8 a.m. a 6 p.m. y los viernes de 8 a.m. a 5 p.m., hora estándar del Este. PIEZA DESCRIPCIÓN NÚMERO Pantalla G2383SH M1290CHMK Cadena de la lámpara Impreso en China ® allen + roth es una marca registrada de LF, LLC. Todos los derechos reservados. Fecha de revisión:2014-10-08 Lowes.com/allenandroth...
Need help?
Do you have a question about the LWS1176E and is the answer not in the manual?
Questions and answers