Table of Contents
Advertisement
Available languages
Available languages
Quick Links
ATTACH YOUR RECEIPT HERE
Serial Number
Questions, problems, missing parts? Before returning to your retailer, call our customer
service department at 1-866-439-9800, 8 a.m. - 6 p.m., EST, Monday - Thursday,
8 a.m. - 5 p.m., EST, Friday.
Purchase Date
1
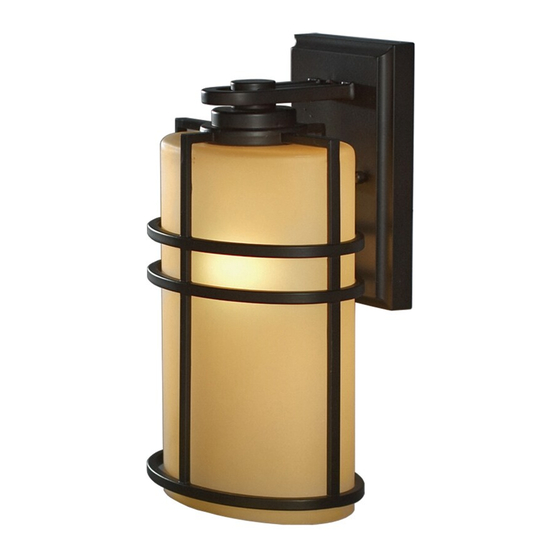
ITEM #0180825
WALL LANTERN
MODEL #RDY1740-01-ORB
Français p. 8
Español p. 15
Advertisement
Table of Contents

Related Manuals for Allen + Roth RDY1740-01-ORB


Summary of Contents for Allen + Roth RDY1740-01-ORB
- Page 1 ITEM #0180825 WALL LANTERN MODEL #RDY1740-01-ORB Français p. 8 Español p. 15 ATTACH YOUR RECEIPT HERE Serial Number Purchase Date Questions, problems, missing parts? Before returning to your retailer, call our customer service department at 1-866-439-9800, 8 a.m. - 6 p.m., EST, Monday - Thursday,...
-
Page 2: Package Contents
PACKAGE CONTENTS QUANTITY PART DESCRIPTION Fixture... -
Page 3: Safety Information
HARDWARE CONTENTS (Shown actual size) Ground Screw (Not to scale) Qty: 1 Wire Threaded Short Connectors Knobs Machine Screws Long Mounting Qty: 2 Qty: 2 Bracket Machine Qty: 2 (Not to scale) Screws Qty: 1 Qty: 2 SAFETY INFORMATION Please read and understand this entire manual before attempting to assemble, operate or install the product. - Page 4 ASSEMBLY INSTRUCTIONS 1. Connect the mounting bracket (EE) with short machine screws (BB) to the outlet box. Orient the mounting bracket (EE) so the raised center portion protrudes into the outlet box. (See Fig. 1.) Hardware Used Short Machine Screws Outlet Box Mounting (Not included)
- Page 5 ASSEMBLY INSTRUCTIONS 3. Supply wire connection guide: Make wire connections, securing with wire connectors (AA), following the reference chart listed below. CONNECT, HOT, BLACK OR RED OUTLET SUPPLY WIRE TO: CONNECT, NEUTRAL, WHITE OUTLET SUPPLY WIRE TO: l e l &...
-
Page 6: Care And Maintenance
OPERATING INSTRUCTIONS • Mounting surface should be clean, dry, flat and 1/4 in. larger than the canopy on all sides. • Any gaps between the mounting surface and canopy exceeding 3/16 in. should be corrected as required. • With silicone calking compound, caulk completely around where back of canopy meets the wall surface to prevent water from seeping into outlet box. -
Page 7: Warranty
WARRANTY Distributor warrants products manufactured by it will be free from defects in material and workmanship for three (3) years following the date of shipment. This warranty does not cover bulbs or finish on outdoor product. If any of the warranted products are found by Distributor to be defective, such products will, at Distributor’s option, be replaced or repaired at Distributor’s cost. - Page 8 ARTICLE #0180825 LANTERNE MURALE MODÈLE #RDY1740-01-ORB JOIGNEZ VOTRE REÇU ICI Numéro de série Date d’achat Des questions, des problèmes, des pièces manquantes? Avant de retourner l’article au détaillant, appelez notre service à la clientèle au 1 866 439-9800, entre 8 h et 18 h (HNE),...
-
Page 9: Contenu De L'emballage
CONTENU DE L’EMBALLAGE QUANTITÉ PIÈCE DESCRIPTION Luminaire... -
Page 10: Consignes De Sécurité
QUINCAILLERIE INCLUSE (grandeur réelle) Vis de mise à la terre (Pas à l’échelle) Capuchons Vis à métaux Boutons Qté : 1 courtes filetés connexion Vis à métaux Support Qté : 2 Qté : 2 de fixation longues Qté : 2 (Pas à... -
Page 11: Instructions Pour L'assemblage
INSTRUCTIONS POUR L’ASSEMBLAGE Fixez le support de fixation (EE) à la boîte de sortie à l’aide des vis à métaux courtes (BB). Placez le support de fixation (EE) de façon à ce que la partie centrale surélevée sorte du côté de la boîte de sortie (consultez la figure 1). - Page 12 INSTRUCTIONS POUR L’ASSEMBLAGE 3. Guide pour la connexion des fils du cordon d’alimentation : Effectuez le raccordement des fils à l’aide des capuchons de connexion (AA), selon le tableau de référence ci-dessous. RACCORDEZ LE FIL D’ALIMENTATION ÉLECTRIQUE CHARGÉ DE RACCORDEZ LE FIL D’ALIMENTATION ÉLECTRIQUE NEUTRE COULEUR NOIR OU ROUGE DE LA BOÎTE DE SORTIE AU FIL SUIVANT : DE COULEUR BLANCHE DE LA BOÎTE DE SORTIE AU FIL SUIVANT : Noir...
-
Page 13: Entretien
MODE D’EMPLOI • La surface de montage doit être propre, sèche et plane, et elle doit être plus large que le couvercle de 6 mm pour chaque côté. • L’espace entre la surface de montage et le couvercle ne doit pas dépasser 5 mm. •... -
Page 14: Garantie
GARANTIE Le distributeur garantit les produits qu’il a fabriqués contre tout défaut de matériaux ou de fabrication pour une période de trois (3) ans à compter de la date d’expédition. Cette garantie ne couvre pas les ampoules ni le fini des produits extérieurs. Si l’un des produits garantis est déclaré défectueux par le distributeur, celui-ci choisira de remplacer ou de réparer le produit à... - Page 15 ARTÍCULO #0180825 FAROL DE PARED MODELO #RDY1740-01-ORB ADJUNTE SU RECIBO AQUÍ Número de serie Fecha de compra ¿Preguntas, problemas, piezas faltantes? Antes de volver a la tienda, llame a nuestro Departamento de Servicio al Cliente al 1-866-439-9800, de lunes a viernes de 8 a.m. a 6 p.m.,...
-
Page 16: Contenido Del Paquete
CONTENIDO DEL PAQUETE PIEZA CANTIDAD DESCRIPCIÓN Lámpara... -
Page 17: Información De Seguridad
ADITAMENTOS (se muestran en tamaño real) Tornillo de puesta a tierra (no está a escala) Conectores Tornillos para Perillas Cantidad: 1 de cables metal cortos roscadas Tornillos para Abrazadera Cantidad: 2 Cantidad: 2 Cantidad: 2 de montaje metal largos (no está a escala) Cantidad: 2 Cantidad: 1 INFORMACIÓN DE SEGURIDAD... -
Page 18: Instrucciones De Ensamblaje
INSTRUCCIONES DE ENSAMBLAJE 1. Conecte la abrazadera de montaje (EE) con los tornillos para metales cortos (BB) a la caja de salida. Oriente la abrazadera de montaje (EE) de modo tal que la sección central elevada sobresalga hacia el interior de la caja de salida. - Page 19 INSTRUCCIONES DE ENSAMBLAJE 3. Guía para la conexión de los conductores del suministro: Realice las conexiones de los conductores asegurándolos con conectores de cables (AA), siguiendo la tabla de referencia que aparece a continuación. CONECTE EL CONDUCTOR NEGRO O ROJO DEL SUMINISTRO CONECTE EL CONDUCTOR DEL SUMINISTRO DEL DEL TOMACORRIENTE, DE CORRIENTE, AL: TOMACORRIENTE BLANCO NEUTRO AL:...
-
Page 20: Solución De Problemas
INSTRUCCIONES DE FUNCIONAMIENTO • La superficie de montaje debe estar limpia, seca y plana, y debe ser 0,64 cm más larga que la base en todos los lados. • Si queda algún espacio que supere los 0,48 cm entre la superficie de montaje y la base, se debe corregir según corresponda. -
Page 21: Lista De Piezas De Repuesto
GARANTÍA El distribuidor garantiza que los productos que él fabrica no presentarán defectos en los materiales ni en la mano de obra durante un período de 3 (tres) años desde la fecha de envío original. Esta garantía no cubre las bombillas ni el acabado de un producto para exteriores. Si el distribuidor comprueba que alguno de los productos cubiertos por la garantía presenta defectos, el distribuidor reemplazará...
Need help?
Do you have a question about the RDY1740-01-ORB and is the answer not in the manual?
Questions and answers