Download Print this page
Tele Radio T60 Series Manual

Tele Radio T60 Series Manual

Hide thumbs Also See for T60 Series:

Advertisement

Quick Links

Tele Radio
T60
Manual
Rev. IM-T60-001-A4

Advertisement

loading
Need help?

Need help?

Do you have a question about the T60 Series and is the answer not in the manual?

Questions and answers

Subscribe to Our Youtube Channel

Summary of Contents for Tele Radio T60 Series

  • Page 1 Tele Radio Manual Rev. IM-T60-001-A4...
  • Page 2 CONTENTS 3-21... Dansk 22-40..Norsk 41-59..Svensk 60-80..Nederlands 81-101.
  • Page 3 CONTENTS /ENGLISH Important information Codes Placement of the antenna and receiver The transmitter The receiver Supplement for the 460 system Service and support Trouble shooting chart Coding tables 1-10,Appendix A Coding tables 0-15,Appendix B Coding tables 460-93,Appendix C Connecting the receiver,Appendix D IMPORTANT! In order to get the best out of your system it is important you take the time to read through the manual before you start to...
  • Page 4 Compatible with system 460 System T60 is compatible with Tele Radio’s system 460. PLACEMENT OF THE ANTENNA AND RECEIVER The receiver should be placed -As far as possible, protected from the wind and weather.
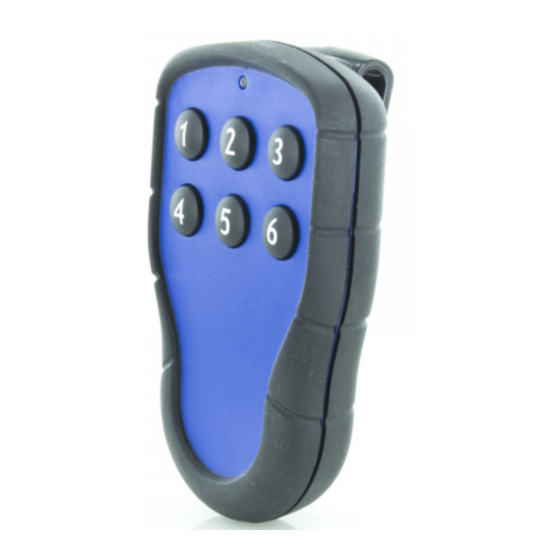
  • Page 5 X= 3, 5, or 10 m antenna cable DIP-433K3 1/4-433Kx 5/8-433Kx HANDHELD TRANSMITTER MINI T60TX-06SHL T60TX-01SHL T60TX-03SHL with 6 button functions with 1 button function with 3 button functions (A) System switch 1 2 3 5 6 7 8 9 1 0 Battery 3V Code switch...
  • Page 6 HANDHELD TRANSMITTER MIDI Code switch System switch T60TX-06SOL with 1, 3, 4 or 6 button functions Battery 9V MOBILE TRANSMITTER MAXI Function buttons Door no. buttons Transmitter T60TX-15SML with 15 button functions Function shortcut T60TX-15DML Code switch System switch* Battery 9V *NOTE! When resetting, the transmitter must be switched off.
  • Page 7 SHORTCUT FOR ONE FUNCTION (T60TX-15DML) The * and # buttons are used to program a shortcut (1 selection per button) for a particular function. To program a shortcut set the door you wish to save, press * or # for more than 3 seconds. (The display flashes.) The door has now been saved as a shortcut.To access the shortcut, press the relevant button once.
  • Page 8 3(7) 1(5) 2(6) 1 2 3 5 6 7 8 9 10 (A2) (A1) 4(8) 1 2 3 5 6 7 8 9 10 4 dual function buttons Stop switch System switch (A1): With (A1) in the ON position, the transmitter communicates with system T60, and in position 1 (OFF) it communicates with system 460.When resetting, the transmitter must be switched off.
  • Page 9 RECEIVER T60RX-0XYSL Operating voltage: 12-28V AC / DC or 48 / 115 / 230V AC Size: 132 x 133 x 45 mm Protection: IP 65 NOTE! Connecting the receiver, see Appendix D 1 2 3 4 5 6 7 8 9 1 0 1 1 1 2 1.Yellow LED.
  • Page 10 ROBUST RECEIVER T60RX-0XYSL Operating voltage: 12-28V AC / DC or 48 / 115 / 230V AC Size: 175 x 125 x 45 mm Protection: IP 65...
  • Page 11 PROGRAMMING THE RECEIVER T60RX-0XYSL The receiver’s function and select buttons are used to program the receivers. The function button is used to scroll through the different program options. The select button is used to confirm the selection of the program option. In the first position it is possible to move between the following options by pressing the function button.
  • Page 12 The red diode (no. 6) flashes as an indication that the transmitter’s adjusta- ble code has been saved. Adjustable code and fixed individual code 1. Select the program option “Self-instruction of code” (RED diode) using the function button. 2. Confirm using the select button.The red diodes above the relays light. 3.
  • Page 13 2. Confirm using the select button. Red diode above relay 1 lights. 3. Select using the select button whether the relay should have a change- over function or not.The YELLOW diode lights when the changeover function is activated. 4. Move to the other relays by using the function button and select whether they should have a changeover or instantaneous function using the select button.
  • Page 14 DIN-RECEIVER T60RX-03ADL Frequency: 433.92 MHz Operating voltage: 12-24V AC/DC Size: 86 x 30 x 58 mm Protection: IP 20, for internal installation The yellow LED indicates the The red LED shows the programming supply voltage. status. The green LED indicates signal reception.
  • Page 15 BNC connector. The red LED shows the programming status. Side Side 2 The yellow LED indicates the supply voltage. The green LED indicates signal reception. Button for self-instruction / erasing. Voltage connection 11-pin terminal 5. 12-24V AC/DC 6. 12-24V AC/DC 10.
  • Page 16 Register fixed individual code: 1.Press the self-instruction button for at least 0.3 sec, at most 4 sec. 2.Release the button (less than 1 sec). 3.Press the button again (longer than 1 sec). -Private program mode, the red LED goes out and comes on again. 4.Press the required function button.
  • Page 17 4. Press the required door number button (0-999) and any function but- ton (up, stop, down) on the transmitter. - The red LED flashes three times. 5. Check that the relay is actuated when one of the transmitter’s buttons is pressed again. T60TX-0XSHL/T60TX0XSOL AND T60RX-03ADL 1.Check that the transmitter’s system switch (A) is in the ON position.
  • Page 18 SUPPLEMENT FOR THE 460 SYSTEM T60TX-15DML* Type 401RVL9 and 403RVL9 transmitter with knob 1-10: 1. Check that the transmitter’s system switch (A) is in position 1 (OFF). 2. Check that the code switch (B) 9 is in the 0 (zero) position. 3.
  • Page 19 Type 460-93 transmitter: 1. Check that the transmitter’s system switch (A) is in position 1 (OFF). 2.Check that the code switch (B) 9 is in the + (plus) position. 3.Set codes on the transmitter’s 3 first switches (code switches 1-3) which are identical to the receiver’s (code switches 4-8 are not used).
  • Page 20 Service If the product stops working during the warranty period,Tele Radio AB of- fers full servicing of the product.The product should be sent to Tele Radio AB (to the stated address). NOTE! The warranty does not apply to faults that have arisen due to modifications to products or incorrect installation.
  • Page 21 The transmitter’s The battery is dead. Replace or charge the LED does not come battery. on when you are The transmitter is Contact Tele Radio’s transmitting. defective. support. The range is too Poor battery. Replace the battery. short. The antenna cables...
  • Page 22: Coding Tables

    APPENDIX A CODING TABLES 1-10 Setting the code on the receiver for operations on the 460 system. Type 401RVL9 and 403RVL9 transmitter with knob 1-10 Table Minus code Table Plus code 1-10 1-10 T5 T6 T7 T8 T5 T6 T7 T8 0(10) 0(10)
  • Page 23 APPENDIX B CODING TABLES 0-15 Setting the code on the receiver for operations on the 460 system (robust transmitter with control knob). Minus code/Mincode (A) Plus code (B)
  • Page 24 APPENDIX C CODING TABLES 460-93 Setting the code on the receiver for operations on the 460 system (460-93 transmitter). Switches 1-3 should have the same setting on both the transmitter and receiver. Note that the positions A0=D0, B0=E0, C0=F0. Code tables ..continued on next page >>>...
  • Page 25 APPENDIX C CODING TABLES 460-93 Code tables ..continued on next page >>>...
  • Page 26 APPENDIX C CODING TABLES 460-93 Code tables ..continued on next page >>>...
  • Page 27 APPENDIX C CODING TABLES 460-93 Code tables ..continued on next page >>>...
  • Page 28 APPENDIX C CODING TABLES 460-93...
  • Page 29: Voltage Connections

    APPENDIX D VOLTAGE CONNECTIONS T60RX-0xASL 12-30V AC / DC T60RX-0xBSL 230V AC T60RX-0xCSL 48V AC T60RX-0xDSL 115V AC T60RX-04ySL (Standard) C NO NC C NO NC C NO NC C NO NC Supply voltage T60RX-08ySL (Robust) C NO NC C NO NC C NO NC C NO NC C NO NC...