
Related Manuals for Analog way Midra 4K Series


Summary of Contents for Analog way Midra 4K Series
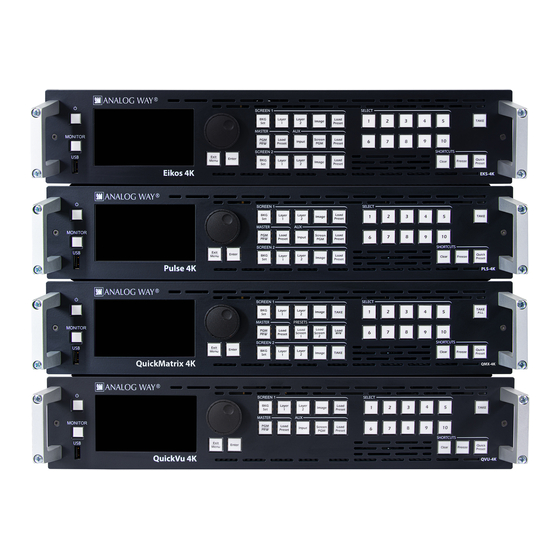
- Page 1 USER MANUAL USER MANUAL Midra™ 4K unit (V1.0) References: EKS-4K, PLS-4K, QMX-4K, QVU-4K www.analogway.com...
- Page 2 USER MANUAL Information contained in this document, in particular data, pictures, information, trademarks and logos are exclusive property of Analog Way and are protected by copyrights and other intellectual property rights. 2020, Analog Way, all rights reserved – 12/2020 Consequently, any representation and/or reproduction, in part or in full, is prohibited and would be considered a violation of Analog Way’s copyright and other intellectual property rights.
-
Page 3: Table Of Contents
USER MANUAL Contents Disclaimer ....................... 10 Copyrights ........................... 10 Warranty ............................. 10 Liability ............................10 Force Majeure ..........................10 Terms and Definition ..................11 Hardware Specifications ................12 Safety instructions ........................12 English ..............................12 French ..............................13 Italian ..............................14 German .............................. - Page 4 USER MANUAL Standby / Restart ..........................26 Dashboard - System settings ....................... 26 Dashboard – Device ..........................26 Dashboard – Firmware / Hardware (Firmware Update) ..............27 Dashboard – Network .......................... 27 Dashboard – Cooling..........................28 Dashboard – Power ..........................28 Dashboard –...
- Page 5 USER MANUAL X and Y areas (Edge-blending mode) ....................40 Advanced output settings (in Preconfig > Canvas) ................41 Preconfig > Backgrounds ......................41 Background sets ..........................41 Background set for a single output Screen ..................42 Background set for an Eikos 4K in Edge-blending mode ..............42 Reset a background set ........................
- Page 6 USER MANUAL 12.2 EDID ............................. 56 EDID bank ............................56 Save an EDID from inputs and outputs ....................56 Replace an Input EDID with an EDID from the bank ................56 Export an EDID to computer ........................ 56 Import an EDID from computer ......................57 Delete a custom EDID ..........................
- Page 7 USER MANUAL 15.6 Change the color of a Memory slot .................... 70 15.7 Reorder memories ........................71 15.8 Delete a memory ........................71 Multiviewer ..................... 72 16.1 Tips and recommendations ......................72 16.2 Multiviewer menu interface ....................... 72 Sources - Left panel ..........................72 Widget selection ..........................
- Page 8 USER MANUAL Set an output Area of interest (AOI) ....................83 Output HDMI plug settings ........................83 Output SDI plug settings ........................83 Output Image correction ........................84 Output pattern ............................ 84 Monitor output on the front panel LCD Screen ................... 84 18.6 Inputs ............................
- Page 9 USER MANUAL Factory reset ............................91 Reset erase specific settings ........................ 91 18.11 Live – Screen settings ........................91 Global Settings ............................. 91 Screen Transitions ..........................91 Screen step back ..........................92 Copy Program to Preview ........................92 Set the Background layer ........................92 Set the Mixing layer ..........................
-
Page 10: Disclaimer
1.3 Liability Analog Way shall not be liable for any loss or damage, be it direct or indirect in regards to the utility or contents of the software or hardware, except to the extent provided by law. Notwithstanding the above, liability for indirect, special, incidental or consequential loss or damage that may arise in respect of the software or hardware, is expressly excluded. -
Page 11: Terms And Definition
RCS: User interface to setup and operate the Midra™ 4K. It is a web browser based Remote Control Software designed by Analog Way. Widget: Multiviewer item displaying one content (Input, Timer, Preview or Program Screen). Similar to a Layer but without visual priority, widgets are displayed on same level and cannot overlap. -
Page 12: Hardware Specifications
The internal Lithium cell battery is not replaceable. In case of problem, contact your supplier or Analog Way. • OPENINGS: Never push objects of any kind into this product through the openings. If liquids have been spilled or objects have fallen into the device, unplug it immediately and have it checked by a qualified technician. -
Page 13: French
USER MANUAL French Afin de mieux comprendre le fonctionnement de cet appareil nous vous conseillons de bien lire toutes les consignes de sécurité et de fonctionnement avant utilisation. Conservez les instructions de sécurité et de fonctionnement afin de pouvoir les consulter ultérieurement. Respectez toutes les consignes marquées dans la documentation, sur le produit et sur ce document. -
Page 14: Italian
USER MANUAL Si un liquide ou un objet pénètre à l’intérieur de l’appareil, débranchez immédiatement l’appareil et faites- le contrôler par un personnel qualifié avant de le remettre en service. Italian Allo scopo di capire meglio il funzionamento di questa apparecchiatura vi consigliamo di leggere bene tutti i consigli di sicurezza e di funzionamento prima dell’utilizzo. -
Page 15: German
USER MANUAL German Um den Betrieb dieses Geräts zu verstehen, raten wir Ihnen vor der Inbetriebnahme alle Sicherheits und Betriebsanweisungen genau zu lesen. Diese Sicherheits- und Betriebsanweisungen für einen späteren Gebrauch sicher aufbewahren. Alle in den Unterlagen, an dem Gerät und hier angegebenen Sicherheitsanweisungen einhalten. -
Page 16: Spanish
USER MANUAL Spanish Para comprender mejor el funcionamiento de este aparato, le recomendamos que le acuidadosamente todas las consignas de seguridad y de funcionamiento del aparato antes de usarlo. Conserve las instrucciones de seguridad y de funcionamiento para que pueda consultarlas posteriormente. Respete todas las consignas indicadas en la documentación, relacionadas con el producto y este documento. -
Page 17: Environmental Specifications For All Midra™ 4K Models
USER MANUAL Environmental specifications for all Midra™ 4K models General: • Cooling air flows from front side to rear. • Max ambient operating temperature: < 40°C (< 104°F). • Operating temperature: 0 to +40°C / +32°F to +104°F • Storage temperature: -40 to +70°C / -40°F to +158°F •... -
Page 18: Introducing Midra™ 4K
USER MANUAL 4 Introducing Midra™ 4K Before setting up the Midra™ 4K for the first time, please read through all of the documentation to become familiar with its powerful features. The Midra™ 4K is an ideally tailored video production tool for small and mid-size live event staging and fixed installation applications. -
Page 19: Front And Rear Panel
USER MANUAL 4.2 Front and rear panel - All models share common keys on the front panel but some keys differ to match the functions of the device. - All models have the same rear panel with the Analog and Dante audio card being an option. Fig. -
Page 20: Quickvu 4K Front Panel
USER MANUAL QuickVu 4K front panel Fig. 2 - QuickVu 4K front panel The QuickVu 4K always has One Screen and One Aux. Screen, so there is no SCREEN 2 area and no keys associated. The other keys work as on other Midra™ 4K devices. QuickMatrix 4K exclusive front panel keys Fig. -
Page 21: Genlock And Loop
USER MANUAL Genlock and Loop Genlock is used to synchronize the frame rate of multiple devices with a physical connection. The Genlock input is used to synchronize the Midra™ 4K unit with an external reference. The Genlock Loop is then used to send the sync signal to other devices. The Genlock Loop can also be used alone (as a sync signal generator). -
Page 22: Forced Shutdown
USER MANUAL 4.3.2.2 Power off from the Web RCS Click in the Web RCS top bar, then click Standby and confirm. Forced shutdown Caution: Use forced shutdown only if the unit has crashed. Using forced shutdown regularly is not recommended. If the Midra™... -
Page 23: Using The Web Rcs
USER MANUAL 5 Using the Web RCS Fig. 5 - Web RCS Interface Web RCS is the main controller for the Midra™ 4K. It is embedded in all units and compatible with all operating systems. Midra™ 4K can be operated from any computer via wired network connection without installing any software. -
Page 24: Default Network Settings
USER MANUAL Default network settings Connect a computer to the Midra™ 4K unit via LAN connection. Use a crossover cable if connecting directly to the unit or use straight cables if connecting through a switch or hub. Tip: All connections should be done before starting the Midra™ 4K unit. Default network settings: IP Address: 192.168.2.140 Subnet Mask: 255.255.255.0... -
Page 25: General Tips
USER MANUAL 5.2 General tips Web browser features The Web RCS is fully browser integrated and behaves like any web site. It manages browser features such as: Previous page / Next Page Multi-selection of items using the Ctrl or Shift keys Open in new tab / Open in new page Enter direct URL Bookmark any page... -
Page 26: Back Panel Shortcuts
USER MANUAL Back panel shortcuts In the top bar, click to show the virtual Back panel. Click the connectors to access their settings directly. Standby / Restart In the top bar, click then Standby or Restart and confirm. 5.3 Dashboard - System settings In the Dashboard, check device status and modify general system settings. -
Page 27: Dashboard - Firmware / Hardware (Firmware Update)
USER MANUAL Dashboard – Firmware / Hardware (Firmware Update) Prerequisite: Go to www.analogway.com and download the latest Midra™ 4K updater. Note: In some cases, updating the Midra™ 4K unit may reset the Configuration (check the Release notes). Tip: Export a configuration to recover it after the update (see 5.4 Save / Load Configuration page 29). 5.3.2.1 Update Firmware from Web RCS 1. -
Page 28: Dashboard - Cooling
USER MANUAL Dashboard – Cooling Caution: If the device temperatures are too high, the device will automatically shutdown to prevent damages. Check the intake and internal device temperature. Two levels of alarms can appear if any temperature is too high: “abnormally high” and “dangerous”. Recommendation: In case of alarms, check that nothing is covering the unit and that the air flow is not blocked. -
Page 29: Save / Load Configuration
Note: The network ports used for AWJ is displayed on the Security card. - AWJ is a JSON based protocol developed by Analog Way for Midra™ 4K. AWJ is a bidirectional TCP API, it grants full control on a Midra™ 4K device and receives real-time status updates from the Midra™ 4K device. For more information, visit www.analogway.com. -
Page 30: Save The Current Configuration In A Slot
USER MANUAL Save the current Configuration in a Slot 1. In the top bar, click , then Save / Load. 2. In the Save panel, click Current Configuration. 3. In the filters, select the settings to save. 4. Click Save to Slot 1 or Save to Slot 2. The configuration is saved in the selected memory slot. -
Page 31: Export A Configuration To The Computer
USER MANUAL Export a Configuration to the computer 1. In the top bar, click , then Save / Load. 2. In the Save panel, select the configuration to export (Current Configuration, Slot 1 or Slot 2). 3. In the filters, select the settings to export. Note: Filtering is possible only if exporting the Current Configuration. -
Page 32: Midra™ 4K Concepts
USER MANUAL 6 Midra™ 4K concepts This chapter only describes the general concepts of the Midra™ 4K product line. Detailed procedures are available in the next chapters of the document. 6.1 Inputs capacity As indicated on the rear panel, Input 1 and Input 2 have a particular design (see Fig. 1 - Midra 4K front and rear panels, page 19). -
Page 33: Edge-Blending Mode
USER MANUAL Edge-blending mode Reminder: Edge-blending mode is only available on Eikos 4K. Edge-blending mode features: One Program Screen using two outputs with a total resolution up to 2x 4096 x 2160 @60Hz. This Screen has one Background layer, two Mixing layers and one Foreground layer. Edge-blending mode is separated in two templates with simplified configurations: Horizontal blend automatically places Output 1 on the left side of Output 2 in a 2x1 Screen. -
Page 34: Image Management - Quick Recap
USER MANUAL Image management - Quick recap Library Transfer and store up to 50 images in the Midra™ 4K unit Background Foreground images images Images Images Assign images to up to 4 Foreground Assign images to up to 4 Background image slots per Screen image slots per Screen Background set... -
Page 35: Screen And Aux. Screen Layers
The Mixing layers can display Live Inputs. They have multiple parameters like size, opacity, borders, etc. Mixing layers offer the most spectacular transition effects which made the reputation of Analog Way. They can display Live Inputs and allow cross transitions with both contents visible at the same time during the transition (seamless transition). -
Page 36: Preconfig Menu
USER MANUAL 7 Preconfig Menu The following chapters describe the Web RCS interface and the procedures via the Web RCS. For procedures via the unit front panel, see chapter 18 Control from the front panel page 79. Fig. 11 - Preconfig Menu Preconfig is composed of the following submenus:... -
Page 37: Quick Hdcp
USER MANUAL Quick HDCP From Preconfig > System, quickly enable / disable HDCP for all inputs and outputs in the same page. Note: Disabling HDCP reduces possible problems when the content is not fully HDCP compliant. When output HDCP is disabled, HDCP inputs will not be displayed anymore. -
Page 38: Preconfig > Canvas
USER MANUAL 7.3 Preconfig > Canvas Preconfig > Canvas, set the outputs settings for each Screen (output format and rate, AOI, covering, blending, etc.) and use test patterns. Fig. 13 - Preconfig - Canvas Rename a Screen By default, all Screens are named S1, S2, or A1. To rename a Screen: 1. -
Page 39: Patterns
USER MANUAL Patterns Display patterns are used during the Screen configuration phase to test and control how outputs are displayed in Screens. Use patterns to identify and test that the displays are set correctly (color, position, resolution, etc.). Enabling a pattern overrides any content displayed in the output. It is possible to use Screen patterns and Output patterns. -
Page 40: And Y Areas (Edge-Blending Mode)
USER MANUAL 7.3.4.2 Output pattern Use Output patterns to test and control how outputs are displayed in Screens. 1. In Preconfig > Canvas, select a Screen (if needed). 2. In the tree view, select an output. The canvas settings are displayed in the right panel. 3. -
Page 41: Advanced Output Settings (In Preconfig > Canvas)
USER MANUAL 7.3.5.2 Create a gap (bezel) Horizontal blend Vertical blend templates, use X and Y areas to create gaps between outputs. 1. Set the device to Horizontal blend Vertical blend template, then go to Canvas. 2. Select the X or Y area where the gap will be created. 3. -
Page 42: Background Set For A Single Output Screen
USER MANUAL Background set for a single output Screen 1. In Preconfig > Backgrounds, select BS1 in Screen 1. 2. If using an Eikos 4K, click a source icon to open the Inputs or Background Images sources. For other models, the Background Images sources are displayed by default. 3. -
Page 43: Multiviewer
USER MANUAL 8 Multiviewer A Multiviewer is an output displaying a user customizable selection of Widgets as display resources. A Widget is a Multiviewer layer containing a program, preview, input or timer. The Multiviewer can display up to 16 Widgets. Multiviewer, set the Label, Signal parameters, Patterns and Image correction. -
Page 44: Multiviewer Pattern
USER MANUAL 8.3 Multiviewer pattern Multiviewer > Pattern / Raster, the following settings are displayed: Setting name Description / Setting selection Patterns Enable On/Off toggle. Display the pattern in Multiviewer Patterns Select the pattern to display Area Set the pattern to fit the format used or the AOI. On/Off toggle. -
Page 45: Outputs
USER MANUAL 9 Outputs Outputs, set the Label, Signal parameters, Patterns and Image correction for each output. 9.1 Outputs main screen Outputs, the outputs main screen displays all outputs in a Grid view. Go to The following information are displayed per output: - Resolution - Format and rate (on hover) - Output label... -
Page 46: Output Pattern
USER MANUAL Output pattern Outputs, select an output. In Pattern, the following settings are displayed: Setting name Description / Setting selection Patterns Enable On/Off toggle. Display the pattern in place of the output signal. Patterns Select the pattern to display Area Set the pattern to fit the format used, the AOI or the Screen On/Off toggle. -
Page 47: 0 Inputs
USER MANUAL Inputs Inputs, set the Label, Signal parameters, Patterns, Image correction, Aspect and Keying. 10.1 Inputs main screen Inputs, the inputs main screen displays all inputs in a Grid view. The following information are displayed per input: - Resolution - Signal Type (on hover) - Input number - Input label... -
Page 48: Input Signal
USER MANUAL Input signal Inputs, select an input. In Signal, the following settings are displayed: Setting name Description / Setting selection Settings Auto, YCbCr, RGB Full (0-255) or RGB Limited (16-235). Signal Type None*; Default; HDCP 1.x Only or HDCP 1.x and 2.x HDCP Control Black... -
Page 49: Input Keying
USER MANUAL 10.2.3.2 Set input crop Crop input (ex: black bars) and keep only wanted area in layers. - On each side (Top, Bottom, Left, Right), enter cropping values (in pixels). Input Keying Inputs, select an input. In Keying, key the content using Chroma Keying or Luma Keying. - Use Chroma Keying to key a color (or hue). -
Page 50: 1 Images And Library
USER MANUAL Images and Library Image management is separated in two menus: Library: transfer images to the Midra™ 4K unit. Images: assign uploaded image to image slot to be used in Background sets and Foreground layers. 11.1 Library Note: Midra™ 4K units can store up to 200 images. Library, all imported images are displayed in a Grid view. -
Page 51: Transfer Images From The Computer To The Unit
USER MANUAL Transfer images from the computer to the unit Note: It is possible to import only one folder at a time. 1. In Library, select one or multiple image files (or a folder) on the computer file browser. 2. Drag and drop the selection in the Drop images or folder of images block. 3. -
Page 52: Images
USER MANUAL 11.2 Images Images main screen Images, images presets are displayed in rows of Foreground images and Background images. Fig. 16 - Images – Main screen The following information are displayed per image slot: - Slot resolution - Slot number - Slot label - The tallies turn red and green if the image slot is used in a... -
Page 53: Assign An Imported Image To A Foreground Image Slot
USER MANUAL Assign an imported image to a Foreground image slot Note: A Foreground image is used in a Foreground layer. Tip: Click an image slot in the slot grid or use the arrows to browse through the image slots. 1. -
Page 54: Image Aspect
USER MANUAL Image aspect Images, select an image slot. In Aspect, set the Aspect ratio. Note: - The Aspect ratio replaces the image slot content and affects every layer using it. If needed, use crop at layer level in Live. - The Aspect ratio set for an image slot remains when changing the image source. -
Page 55: 2 Formats And Edid
USER MANUAL Formats and EDID 12.1 Formats Formats, create and manage up to 16 custom formats. Custom formats are very useful for LED wall applications and non-standard display applications (ex: pixel frequency over 165MHz or Dual-link outputs with single link formats 2400x700@60Hz). Custom formats can also be used to create custom EDIDs and then reset or request the preferred EDID of connected outputs and inputs. -
Page 56: Edid
USER MANUAL 12.2 EDID Fig. 17 - EDID menu EDID is a metadata format used by displays to indicate their preferred format. A Midra™ 4K unit receives EDIDs from connected inputs and outputs. It is possible to store these EDIDs in a memory called EDID bank. It is then possible to overwrite the preferred format of inputs and outputs. -
Page 57: Import An Edid From Computer
USER MANUAL Import an EDID from computer 1. In EDID, hover over an EDID and click in the top right corner to show more settings. 2. Click and select the EDID file to upload from the computer to the unit. Delete a custom EDID EDID, hover over an EDID in the EDID bank then click The selected custom EDID is deleted from the EDID bank. -
Page 58: 3 Timers
USER MANUAL Timers Timers are time-based contents to be displayed in the Multiviewer. Midra™ 4K units can generate up to three timers and three different modes. There are three types of timers: - Current time - Countdown - Stopwatch (count up) 13.1 Create a timer 1. -
Page 59: Screens / Aux
USER MANUAL Screens / Aux. Screens / Aux. is the main page for controlling a show after all pre-configurations are set: - Display content in layers in Screens and Aux Screens - Create dynamic layer transitions - Transition Preview to Program - Save and Load Screen memories and Master memories Fig. -
Page 60: Views
USER MANUAL Views Live menu offers a customizable view of the workspace for Screens and Aux Screens. 14.1.2.1 View filters – Top bar buttons Fig. 20 - View filters Setting name Description / Setting selection Toggle to show/hide all Program, Preview, Screens and/or Aux. Screens. PGM / PRW / ALL Reset to default view (Screens visibility, size and order). -
Page 61: Layer Selection
USER MANUAL Layer selection This bar shows tools and all available layers for the corresponding Screen. Setting Description / Setting selection name Toggle to lock the selected PGM or PRW Screen. Layers cannot be modified but Memories can be loaded and transition can be triggered. PGM or Indicates the Program or Preview Screens. -
Page 62: Transitions - Right Panel
USER MANUAL Transitions - Right panel Setting name Description / Setting selection Screen Select the Screens and Aux affected by transition (by default, all Screens transition filter and all Aux are selected). Copy Program to Preview after the transition. If Preset Toggle is enabled for a Screen, the layers in PGM replace the Preset Toggle layers in PRW during a Take or Take Cut (“swap”... -
Page 63: Set Layer Position And Size
USER MANUAL Set layer position and size 1. In Screens / Aux., select a layer. The selected layer is highlighted. 2. Use drag and drop on the layer to move it in the Screen. 3. Use drag and drop on a layer border point to change its size. It is also possible to use the Properties panel: 4. -
Page 64: Set Layer Opacity
USER MANUAL 14.2.2.4 Remove a content from a layer 1. In Screens / Aux., select one or multiple layers. 2. Press the Del key to remove all layers content (this cannot be reversed). The selected layers are empty but other properties are kept. Tip: It is also possible to remove a content in other ways: - Click next to the layer letter icons then click... -
Page 65: Set Layer Horizontal And Vertical Flip
USER MANUAL Set layer Horizontal and Vertical flip 1. In Screens / Aux., select a layer. 2. In Properties, click Effects to show the corresponding settings. 3. In Transform, toggle the On/Off buttons to enable the corresponding effects (H flip and V flip). 14.3 Layer transition The transition is the animations of the layers during Take. -
Page 66: 5 Memories
USER MANUAL Memories Memories are used to save layers settings. Master memory Saves/loads multiple Screen memories at once (one per screen). Screen memory Saves/loads the layers settings for one Screen. Aux memory Saves/loads the settings for one Aux Screen. The Midra™ 4K is able to save up to 50 Master memories, 200 Screen memories and 200 Aux memories. Memories can be saved from and loaded to Program or Preview Screens. -
Page 67: Master Memories
USER MANUAL 15.2 Master Memories Save a Master memory from current Screens Master memory is the default saving mode and can be used alone as it loads settings on all Screens. A Master memory saves the selected Screens in the current settings. Using Filters, select which Screens, Aux, Layers and Layer settings to save in the Master memory. -
Page 68: Save A Master Memory From Existing Screen Memories
USER MANUAL Save a Master memory from existing Screen memories Because a Master memory is made from Screen memories. It is also possible to create a Master memory by using existing Screen memories. Screens / Aux., click the Memories tab in the right panel. 1. -
Page 69: Screen Memories
USER MANUAL 15.3 Screen Memories Save a Screen memory A Screen memory saves the selected Screen in the current settings. Using Filters, select which Layers and Layer settings to save in the Screen memory. By default, all Layers and all Layer settings are selected. 1. -
Page 70: Edit A Screen Memory
USER MANUAL Edit a Screen memory 1. Load a Screen memory. 2. Click Save to open the Screen memory saving window. 3. Select the settings to save. 4. Select the existing Screen memory slot to edit. 5. Click Save to overwrite the previous Screen memory. Quick overwrite or revert When a Screen memory is loaded in a Screen, a button with the memory slot number appears. -
Page 71: Reorder Memories
USER MANUAL 15.7 Reorder memories 1. In Screens / Aux., click the Memories tab in the right panel. 2. Select Master or Screen mode. 3. Click Edit. 4. Drag a memory slot to a new place to organize the memory slots in a custom order. Note: - Reordering memory slots does not change the memory slot number and does not impact external controllers and RC400T. -
Page 72: 6 Multiviewer
USER MANUAL Multiviewer Tip: Go to Multiviewer after all pre-configurations are set. A Multiviewer is an output displaying a user customizable selection of Widgets as display resources. A Widget works like a layer and can display a program, preview, input or timer. One Multiviewer can display up to 16 Widgets. -
Page 73: Widget Selection
USER MANUAL 16.2.1.1 Control counter timers in the Multiviewer It is possible to run, pause and stop the counters directly in the source panel in Live > Multiviewer. Multiviewer, open the timers source panel. 1. In 2. Hover over a timer and click to show control options. -
Page 74: Multiviewer Layout Editor
USER MANUAL Multiviewer layout editor Click to open the layout editor, a smart tool to place widget in the Multiviewer easily. Setting name Description / Setting selection Columns & Create a custom grid Rows Autofill Select the source content to put in layers Select widgets to include/exclude from this Widgets layout... -
Page 75: Widget Properties
USER MANUAL 16.3 Widget properties When a widget is selected, the following widget settings are displayed in the Properties tab. Setting name Description / Setting selection Enable: Toggle to show/hide the widget. OSD (On Screen Display): View - Off: Hide OSD information. - Basic: Only show the title of the source in widget OSD. -
Page 76: Widget Source - Assign Content To A Widget
USER MANUAL Widget source - Assign content to a widget 1. In Multiviewer, click a source icon in the left panel. 2. Select a widget or make sure it is available for drag and drop. 3. Drag a content to the widget. The content thumbnail is displayed in the widget with the source label at the bottom. -
Page 77: Change The Color Of A Memory Slot
USER MANUAL Change the color of a Memory slot 1. In Multiviewer, click the Memories tab in the right panel. 2. Click Edit. in the top right corner of the memory slot to open the Label and Color fields. 3. Click 4. -
Page 78: 7 User Maintenance And Troubleshooting
USER MANUAL User Maintenance and Troubleshooting 17.1 User Maintenance Midra™ 4K units do not require specific user maintenance operation. 17.2 Troubleshooting The Web browser cannot access the Web RCS Make sure to use correct network cables and that they are free from defects. (Crossover or straight cable as required). -
Page 79: Control From The Front Panel
USER MANUAL Control from the front panel All Midra™ 4K units can be fully controlled from their front panel. This chapter describes procedure to configure the device from the front panel without repeating explanations described in previous chapters. Fig. 23 - Midra™... -
Page 80: Quick Access
USER MANUAL 18.3 Quick access This section describes how to get the show ready within a few minutes using the keys of the front panel. Assign content to layers in Mixer mode 1. In the MASTER area, press the PGM/PRW key to select to work on Program Screens or Preview Screens. -
Page 81: Button Color Guide
USER MANUAL Button color guide Button color Description - Preview mode is active - Element, Source or Function is available Solid green - Layer or Aux element is empty - Input is connected and available Weak green - No Input connected (Safe input mode disabled) Blinking green - Screen layer or Load preset is currently selected and empty - Layer or Aux element has a source... -
Page 82: Set A Covering (Edge-Blending Mode)
USER MANUAL Set a covering (Edge-blending mode) 1. Go to Preconfig > Screen/Aux Configuration > Canvas. 2. In Type, select the area to set. Tip: (X2 is the middle vertical area in Horizontal Blend and Y2 is the middle vertical area in Vertical Blend). 3. -
Page 83: Output Led Blink
USER MANUAL Output LED blink Use the LED blink feature to identify a connector on the rear panel. 1. Go to Outputs. 2. Select an output (1, 2 or MVW). 3. Go to Blink LED to make the LED blink for a few seconds. Set an Output format 1. -
Page 84: Output Image Correction
USER MANUAL Output Image correction 1. Go to Outputs. 2. Select an output (1, 2 or MVW). 3. Select Image Correction. 4. Adjust as needed (Gamma, Brightness, Contrast, etc.). Output pattern 1. Go to Outputs. 2. Select an output (1, 2 or MVW). 3. -
Page 85: Input Led Blink
USER MANUAL Input LED blink Use the LED blink feature to identify a connector on the rear panel. 1. Go to Inputs. 2. Select an input. 3. Go to Blink LED to make the LED blink for a few seconds. Force Black on an input 1. -
Page 86: Monitor Input On The Front Panel Lcd Screen
USER MANUAL 18.6.7.2 Input crop 1. Go to Inputs. 2. Select an input. 3. Go to Image settings. 4. Go to Cropping. 5. Set cropping values for Top, Left, Bottom and Right. 18.6.7.3 Input image correction 1. Go to Inputs. 2. -
Page 87: Capture An Image From An Input To A Usb Drive
USER MANUAL Capture an image from an input to a USB drive 1. Connect a USB drive on the front panel USB plug. 2. Go to Images > Capture. 3. In Capture from, select the Input or Output plug to capture. 4. -
Page 88: Edit A Custom Format
USER MANUAL Edit a Custom Format 1. Go to Extra > Custom Formats > Create New Format. 2. Load the Custom format to edit. 3. Adjust the custom format settings (H Active, V Active, Reduced blanking, etc.) 4. Go to Check to verify if the custom format is valid and can be processed by the unit. 5. -
Page 89: Set Quick Preset Key To Fade To Black
USER MANUAL Set Quick Preset key to Fade to Black Quick Preset is a customizable key available in the Shortcuts area of the front panel. 1. Go to Extra > Quick Preset. 2. Toggle Enable Button on Front Panel to activate the key/feature. 3. -
Page 90: Save A Configuration To The Unit Memory
USER MANUAL Save a configuration to the unit memory 1. Go to Services > Device Config > Internal Device Storage. 2. Go to Save current device configuration. 3. Select a memory slot. Load a configuration from the unit memory 1. Go to Services > Device Config > Internal Device Storage. 2. -
Page 91: Set Device Date And Time
USER MANUAL Set device Date and Time 1. Go to Control > Functions > Date/Time. 2. Set date and time then Apply. Front panel settings 1. Go to Control > Front Panel. 2. Set a lock on all Front panel keys or only the configuration menu. 3. -
Page 92: Screen Step Back
USER MANUAL Screen step back 1. Go to Live > Screen 1 (or Screen 2) > Global Settings. 2. Select Step Back to revert the last changes for this Screen. Copy Program to Preview 1. Go to Live > Screen 1 (or Screen 2) > Global Settings. 2. -
Page 93: Set Layer Transition
USER MANUAL Set layer Transition 1. Go to Live > Screen 1 (or Screen 2). 2. Select a layer (Background, 1, 2 or Foreground). 3. Go to Transition. 4. If applicable, in Options, enable Allow Cross Effect and Allow Cross Depth. 5. -
Page 94: Set A Countdown Timer
USER MANUAL Set a Countdown timer 1. Go to Multiviewer > Timers. 2. Select a Timer. 3. In Type, select Countdown. 4. In Unit Mode, set the display mode (in Hours, in Minutes or in Seconds). 5. In Countdown Duration, set the duration in seconds. 6. -
Page 95: Save A Master Memory From Current Screens (To Screen Memories)
USER MANUAL Save a Master Memory from current Screens (to Screen Memories) 1. Go to Memories > Master Memories > Save > PGM/PRW to Screen/Aux Memories. 2. In Screen/Aux Select, filter the Screens to include in the Master Memory. 3. In Type, select to save from Preview or Program Screens. 4. -
Page 96: Load A Master Memory
USER MANUAL Load a Master Memory 1. Go to Memories > Master Memories > Load. 2. Select a Memory slot. 3. In Destination, select to load the Memory to the Preview or Program Screens. 4. In Screen/Aux Selected, filter the Screens affected by the Master Memory. Unselected Screens remain unchanged after loading the Master Memory. -
Page 97: 9 Audio Settings
USER MANUAL Audio settings All Midra™ 4K units have audio management embedded in the device. They can de-embed audio channels from all inputs and re-embed on all outputs.. With the addition of the optional Analog and Dante audio card, it is possible to route even more audio inputs and outputs audio channels. Note: Audio management is currently only accessible from the front panel menu. -
Page 98: Set An Input Audio (Advanced Mode)
USER MANUAL Set an input audio (Advanced mode) In Advanced mode, each channel of the input has specific settings. 1. Go to Audio > Inputs. The audio status of each input is displayed. 2. Select an input. 3. In Level Meter, check the level for all the channels of the input. 4. -
Page 99: Appendices
Appendix B. Use the Shot Box² and Control Box² with Midra™ 4K Midra™ 4K units are also compatible with the Analog Way Shot Box² (SB80-2) and Control Box² (SB124T-2). Analog Way Shot Box² and Control Box² can be used to recall Memories and trigger transitions. -
Page 100: Contact Information
USER MANUAL CONTACT INFORMATION The Americas Europe, Middle East & Africa Asia Pacific Analog Way SAS - Headquarters Analog Way Inc. Analog Way Ltd Tel.: +33 (0)1 81 89 08 60 Tel.: +1 (678) 487 6644 Tel.: +852 2967 0428... - Page 101 USER MANUAL www.analogway.com...
Need help?
Do you have a question about the Midra 4K Series and is the answer not in the manual?
Questions and answers