Table of Contents
Advertisement
Quick Links
Advertisement
Table of Contents

Related Manuals for John Shearer Pasture Renovation Drill

Summary of Contents for John Shearer Pasture Renovation Drill
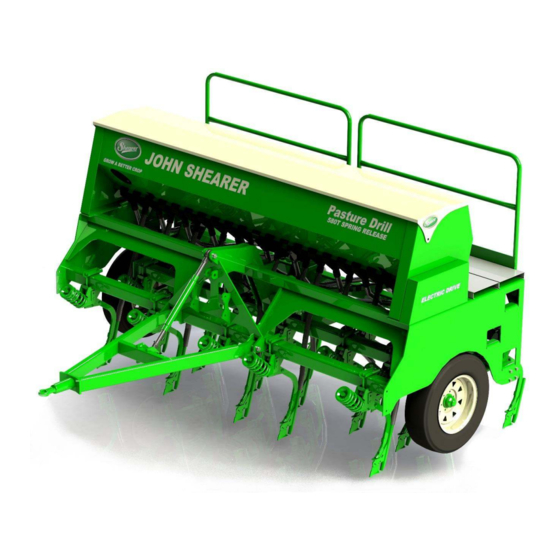
- Page 1 Pasture Renovation Drill Operators Manual 143J1...
- Page 2 SAFETY SAFETY FIRST DO NOT OPERATE THE IMPLEMENT WITH CHAIN DRIVE GUARDS REMOVED DO NOT ATTEMPT ANY WORK ON THE IMPLEMENT WHILE THE IMPLEMENT IS IN MOTION. (I.E. CLEANING OF BOXES OR LUBRICATION OF DRIVES ETC. PRIOR TO WORKING UNDERNEATH THE IMPLEMENT (E.G. CHANGING POINTS ETC.) ALWAYS CHECK THAT THE IMPLEMENT IS ADEQUATELY SUPPORTED ON BLOCKS.
- Page 3 SELLING DEALER: DATE PURCHASED: PLEASE READ THE OPERATOR’S MANUAL TO ENSURE CORRECT APPLICATION, OPERATION AND MAINTAINANCE FOR THIS MACHINE. THANK YOU FOR BUYING JOHN SHEARER PLEASE COMPLETE AND RETURN THE WARRANTY CARDS ON THE FOLLOWING PAGE TO ENSURE WARRANTY IS VALID.
- Page 5 Major activities (please number in order of importance) PURCHASER ACKNOWLEDGES THAT THE IMPLEMENT WAS RECEIVED IN GOOD ORDER & CONDITION AND THAT PURCHASERS ATTENTION HAS BEEN DRAWN TO THE TERMS AND CONDITIONS OF THE JOHN SHEARER LIMITED Sheep and cereal grain...
- Page 7 Limitation of Liability growing number of John Shearer customers and we trust that To the fullest extent permitted by law, John Shearer and the Dealer will not be liable your implement will give you many years of satisfaction. for any actions, suits, proceedings, claims, demands, costs, expenses or damages...
- Page 8 02.19M143J1...
- Page 9 02.19M143J1 PRE-DELIVERY CHECK 1. On delivery of PASTURE RENOVATION DRILL ensure there are no shortages. 2. Check Implement equipment, to ensure as ordered. 3. Check for trans-shipping damage. 4. Refer to lubrication section, page 10, for greasing and routine check points.
-
Page 10: Table Of Contents
02.19M143J1 CONTENTS JOHN SHEARER PAGES DESCRIPTION SPECIFICATION PTY LTD SETTING UP / OPERATING INSTRUCTIONS ESTABLISHED 1877 MAINTAINANCE OF “T” BOOTS INCORPORATED IN SOUTH AUSTRALIA LUBRICATION HEAD OFFICE & FACTORY TYRE PRESSURES SOWING RATES PO Box 2466 REGENCY PARK GRAIN AND FERTILISER CHARTS... -
Page 11: Specification
02.19M143J1 SPECIFICATION No. OF SOWING ROWS: DEPTH WHEELS 235/75 R15 or 215/85 R16 (depending on size of machine) SOWING WIDTH: Max. working depth 76mm (3”) (ft) 6’ 6” 8’ 9’ 6” 11’ SOWING SPACING: SEED & FERTILISER DISTRIBUTORS: (in) (6”) Seed - Fluted roller with restrictor for small seeds, low rates... -
Page 12: Setting Up / Operating Instructions
Your PASTURE RENOVATION DRILL is designed to give FRONT COMPARTMENT = 45%, REAR COMPARTMENT = 55% maximum service life, but a routine lubrication and maintenance... - Page 13 02.19M143J1 STORAGE At seasons end, this implement should be stored away, jacked up and placed on blocks to take the weight off the tyres. It should be thoroughly cleaned, removing all traces of seed or fertilizer from compartments and distributors. Fill gearbox with oil.
- Page 14 02.19M143J1 GATE SETTING Procedure for resetting gates if required: The seed and fertilizer metering rollers have an adjustable gate 1. Remove the sowing cups part number 39948. at the metering point under the roller. This adjustment allows for 2. Loosen collar part number 18503 on gate levers and the diversity in size of seed and types of fertilizer.
- Page 15 02.19M143J1 TYNE SPRING TENSION Set tyne spring tensions equally on each row. Tynes on the front two rows are more likely to need tension. To avoid higher loads than necessary on the tyne assembly components, use the minimum spring tension that will achieve the penetration required.
- Page 16 SAFETY FIRST DO NOT OPERATE THE IMPLEMENT WITH CHAIN DRIVE GUARDS REMOVED. DO NOT ATTEMPT ANY WORK ON THE IMPLEMENT WHILE THE IMPLEMENT IS IN MOTION. (I.E. CLEANING OF BOXES OR LUBRICATION OF DRIVES ETC.). PRIOR TO WORKING UNDERNEATH THE IMPLEMENT (E.G. CHANGING POINTS, ETC.) ALWAYS CHECK THAT THE IMPLEMENT IS ADEQUATELY SUPPORTED ON BLOCKS.
-
Page 17: Maintainance Of "T" Boots
MAINTENANCE OF “T” BOOTS A tungsten carbide insert has been fitted to the leading edge of the blade Because the blade is expected to carve a channel through hard abrasive soils, stones and rocks etc., DO NOT DISREGARD NORMAL MAINTENANCE. Continual maintenance of the blade is necessary. -
Page 18: Lubrication
UNDER INFLATION can result in tyre failures. Trimming Screw Grease Annually Check for leaks (topup if Varidrive Gearbox Annually necessary- 50W/40 Motor TYRE Pasture Renovation Drill Oil) SIZE Check Pressure Tyres Daily Tyne Disc Tyne Disc Tyne Disc Tyne Disc Check adjustment... -
Page 19: Sowing Rates
0.19 × 19 × 50 = 60 /ℎ TYRE LOADED RADIUS WHEEL REVS. /Ha (mm) 2.0m 13 Row PASTURE RENOVATION DRILL 235/75x15 2441 2.4m 16 Row PASTURE RENOVATION DRILL 235/75x15 1983 2.8m 19 Row PASTURE RENOVATION DRILL 215/85x16 1474 3.3m 22 Row PASTURE RENOVATION DRILL... - Page 21 02.19M143J1 NOTES...
- Page 22 02.19M143J1 Setup and Operation The John Shearer App on the tablet will step you through the setup. Here is a guide to how it works: Section 1 - Machine Setup Step 3) enter the sowing width of the machine in metres.
- Page 23 02.19M143J1 Step 1) Press “Calibrate Wheel Sensor” Step 2) Mark the starting position of the wheel Step 6) Measure and enter the distance travelled. Step 3) Move until the sensor is aligned (it will show on screen when ready) Step 4) Drive until 100 sensor pulses are achieved. The screen will show a countdown.
- Page 24 02.19M143J1 The calibration is necessary since not all seeds are the same (for example, wheat from one bag may not be the same as another, due to the size of the grains, moisture content and other factors). The machine remains stationary through this process.
- Page 25 02.19M143J1 The calibration will run – you will see a countdown on the screen which is There is an expected weight shown on the screen with a rough guide to equivalent to 100 meters of travel at 10km/h. how much you can expect, but the actual value can vary quite a lot. Make sure that the weight is entered in the correct units after the number of Settings rows has been selected.
- Page 26 02.19M143J1 Current Bin 1 Bin 2 settings and Speed settings and High speed warning This means that the limits of the motor/s have been exceeded. The solutions could be to either drive slower (or faster for a low speed warning) or to calibrate with a more acceptable sprocket ratio for the selected rate.
- Page 27 02.19M143J1 Continuing with an almost empty bin may lead to the distributor rollers not You can also use a previous record to set the same calibrations. being able to collect enough seed to maintain an accurate rate. Records Tap the View Records button in the main menu. Records of use are kept for reference.
- Page 28 Indicator Lights The secondary box has a number of lights to indicate power, sensor signals and when the Bluetooth link is active with the tablet. These lights can be helpful when testing or troubleshooting.
- Page 29 02.19M143J1 Circuit breakers If the motors draw excessive current, either by using incorrect settings or if something is jammed in a roller, the circuit breaker will trip to protect the electronics. When it trips the button under the clear plastic cover on the end of the metal control box will pop out.
- Page 30 02.19M143J1 Electric Drive Guideline chart Note: In most use cases for pasture drills, a 1 : 3 ratio is acceptable. ratio 1 : 3 1 : 2 1 : 1 2 : 1 3 : 1 medium high rate small medium rate medium very high rate medium medium rate small seeds...
-
Page 31: Gate Settings
02.19M143J1 GATE SETTINGS GATE PRODUCT SETTING GRANULAR SUPER PHOSPHATE HIGH ANALYSIS FERT. UREA (granular) WHEAT PEAS OATS RICE BARLEY LUPIN SOYBEAN SORGHUM MILLET CANARY SUNFLOWER LINSEED LUCERNE CANOLA RYE GRASS... - Page 32 02.19M143J1...
-
Page 33: Troubleshooting
02.19M143J1 TROUBLE SHOOTING PROBLEM CAUSE REMEDY DISTRIBUTORS WILL NOT TURN Clutch not engaged (if trailing hitch kit fitted) Check clutch Gearbox not engaged Check gearbox Gearbox shear pins broken Replace Secondary shaft shear pins broken Replace FERTILIZER RATE VARIES Fertiliser build-up on distributors Clean distributor rollers Ram lug assembly not adjusted properly SOWING DEPTH DIFFERS FROM ONE SIDE OF... - Page 34 02.19M143J1 TROUBLESHOOTING - PHASING HYDRAULIC CYLINDERS [Note: the numbers in brackets below refer to the item numbers on the hydraulics part pages (page 58 & 59)] The two cylinders are connected in series, such that each moves together to provide a level lift of the implement. When the implement is RAISED, oil delivered from the tractor is directed to the piston end of the master cylinder (5), oil from the rod end flows to the piston end of the next cylinder (4), and oil from the rod end of (4) flows back to tractor.
- Page 35 02.19M143J1 580 TYNE LAYOUT – 2.8m...
- Page 36 02.19M143J1 COIL TYNE LAYOUT – 2.4m...
- Page 37 02.19M143J1 DISC LAYOUT...
- Page 38 MAIN FRAME, GRAIN AND FERTILIZER BOX, PLATFORM ETC.
- Page 39 02.19M143J1 MAIN FRAME, GRAIN AND FERTILIZER BOX, PLATFORM ETC. ITEM PART No DESCRIPTION ITEM PART No DESCRIPTION 45889 FRAME ASSEMBLY – 3.3m 46888 FRAME ASSEMBLY – 2.8m 46887 FRAME ASSEMBLY – 2.4m 46886 FRAME ASSEMBLY – 2.0m 46575 HOPPER ASSY CPTE (ELECTRIC DRIVE) – 3.3m / 22R 46574 HOPPER ASSY CPTE (ELECTRIC DRIVE) –...
- Page 40 02.19M143J1...
- Page 41 02.19M143J1 HOPPER ASSEMBLY COMPLETE (ELECTRIC DRIVE) ITEM PART No DESCRIPTION ITEM PART No DESCRIPTION 45890 BOX ASSEMBLY – 2.0m / 13R 45946 SHAFT, DISTRIBUTOR – 2.0m 45891 BOX ASSEMBLY – 2.4m / 16R 45947 SHAFT, DISTRIBUTOR – 2.4m 45892 BOX ASSEMBLY – 2.8m / 19R 45948 SHAFT, DISTRIBUTOR –...
-
Page 42: Electric Drive Components
02.19M143J1 ELECTRIC DRIVE COMPONENTS... - Page 43 02.19M143J1 ELECTRIC DRIVE COMPONENTS ITEM Part No DESCRIPTION QTY. ITEM Part No DESCRIPTION QTY. 44977 MOTOR ASSEMBLY 46445 BOX, MAIN CONTROL 46446 BOX ASSY, SPLITTER 45927 SHAFT, MOTOR 18021 Hex Nut, M16 Gr8 46013 SENSOR, BIN LEVEL 44975 SENSOR, HALL EFFECT 46359 MAGNET 46874...
- Page 44 02.19M143J1 VARIDRIVE GEARBOX...
- Page 45 02.19M143J1 VARIDRIVE GEARBOX ITEM Part No DESCRIPTION QTY. ITEM Part No DESCRIPTION QTY. 46953 DRIVE UNIT ASSEMBLY 46954 SPROCKET, 14T 18802 SPROCKET ASSY, 15T 46955 SPROCKET, 13T 46594 HANDLE ASSEMBLY, ADJUSTMENT 43984 KNOB, M12 46956 GUARD - VARIDRIVE/PRD ITEM 1 MADE OF: 46931 MOUNT ASSY, DRIVE ARM 46930...
- Page 46 02.19M143J1...
-
Page 47: Coil Tyne Assembly
02.19M143J1 COIL TYNE ASSEMBLY ITEM PART No DESCRIPTION ITEM PART No DESCRIPTION 23674 TYNE, COIL - L/H 23675 TYNE, COIL - R/H 18985N BRACKET FOR BAKER BOOT 989-881 POINT, BAKER 19635 CLAMP, TOP TYNE CAST 46821 CLAMP ASSY, COIL TYNE 46825 PLATE, CLAMP 22998... - Page 48 02.19M143J1...
- Page 49 02.19M143J1 580 TYNE ASSEMBLY ITEM PART No DESCRIPTION ITEM PART No DESCRIPTION 22902 TYNE & SPRING ROD ASSEMBLY 22927 SPRING, 16mm 22926 CUP, SPRING 22026 AS 1112.1 S1 - M20-D-N 22931 PIN ASSEMBLY, TYNE CRANKED 36949 CARRIER ASSY, TYNE (100SQ) 34527 CLAMP, TOP SQ MOUNT 28912...
- Page 50 02.19M143J1 DISC ASSEMBLY...
- Page 51 02.19M143J1 DISC ASSEMBLY ITEM PART No DESCRIPTION ITEM PART No DESCRIPTION 42256 DISC ARM ASSY. 34084 SPINDLE Bearing 36949 CARRIER ASSY. Tyne 34085 COLLAR Seal 22913 ROD ASSY. Spring E.O.T. 29751 BEARING Ball – deep 18813 Spring rod 29843 ‘O’ RING 22927 SPRING 10341...
- Page 52 02.19M143J1...
-
Page 53: Transfers
02.19M143J1 TRANSFERS ITEM PART No DESCRIPTION 46263 TRANSFER John Shearer trademark 15875J2 TRANSFER John Shearer 46610 TRANSFER Pasture Renovation Drill 46984 TRANSFER Gate Settings 46985 TRANSFER Tyre pressures 28851 TRANSFER Gate setting levers 15854J1 TRANSFER Sling here 15968J1 PLATE J.S. model & serial no. - Page 54 02.19M143J1 HITCH KIT / HYDRAULICS...
- Page 55 02.19M143J1 HITCH KIT / HYDRAULICS ITEM PART No DESCRIPTION For linkage machines a telescopic link is included in place of 46000 HITCH ASSEMBLY 46687 TOP LINK hydraulic rams. The purpose of these is to adjust the digging depth 46566 ARM AND WHEEL ASSY (LH) – 16” of the tynes or discs in relation to the wheel.
-
Page 56: Uc300 Hectaremeter Calibration
UC 300 Hectaremeter (P/N: 44430) Calibration should automatically go up accordingly. After you have found the automated value, press Program again to move onto the next step. (for Gearbox Models) Programming Step 1 –hold down the programming button for 3 seconds until the screen shows with Un 0 as shown below. - Page 57 02.19M143J1 Use Modes The fourth figure tells you how much distance has The units displayed is chosen in programming. Please read been covered by the above to find out how to change from metric to imperial or vice machine versa. The first figure is the total counter it is the counter The fifth and final figure is...
- Page 58 OPTIONAL JACKAL (P/N: 42978) CALIBRATION MENU key until the input the sensor used for calculating rate information is connected to is 1. Press the displayed (input 1 – 6). Press ENTER to edit the input function and use the NAV keys to select the SPEED option as shown in Figure 13 below.
- Page 59 Jackal - Grain & Fertilizer Shaft Monitoring The distributor shafts have a magnet embedded in them which together with a sensor can be used to monitor shaft rotations. An alarm can be set to warn you if the shaft speed drops below a certain amount (see section 3.2.1.2 of the Farmscan Jackal Manual).
Need help?
Do you have a question about the Pasture Renovation Drill and is the answer not in the manual?
Questions and answers