
Related Manuals for BIXOLON SMP690


Summary of Contents for BIXOLON SMP690
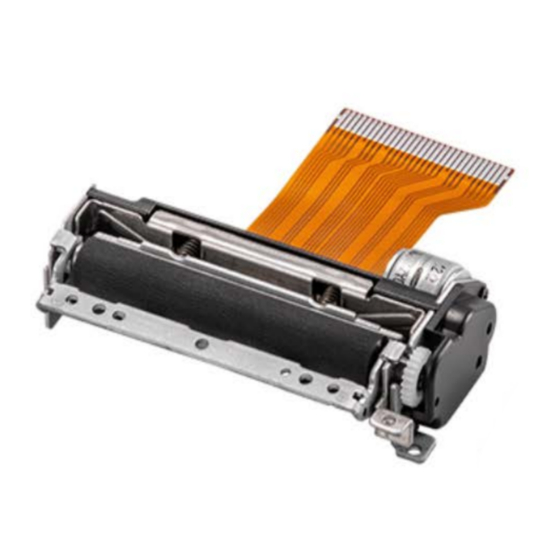
- Page 1 User’s Manual SMP690/691 Thermal Printer Mechanism Rev. 1.04 http://www.bixolon.com...
- Page 2 SMP690/691 REVISION SHEET Revisions Design section Revision REV. Date Page Description 1.00 11.09.19 J.K.SHIMM J.S.LEE J.T.KIM 1.03 17.01.17 M.W.LEE J.K.SHIMM J.S.LEE Spec revision Modified Contents & 1.04 20.06.12 M.H.YU J.S.LEE J.S.LEE Spec revision - 2 - Rev. 1.04...
-
Page 3: Table Of Contents
SMP690/691 ■ Table of Contents 1. Specifications ......................12 2. Exploded View ......................14 2-1 SMP690 ........................14 2-2 SMP691 ........................15 3. Component Names ....................16 3-1 SMP690 ........................16 3-2 SMP691 ........................17 4. Connector Pin Arrangement ..................18 4-1 Main FPC Cable (30Pin) .................. - Page 4 17. Exterior and Dimension ................... 55 17-1 Mechanical Device Assembly (SMP690) .............. 55 17-2 Mechanical Device Assembly (SMP690) – excluding platen roller block ....56 17-3 Mechanical device assembly (SMP691) ............... 57 17-4 Mechanical device assembly (SMP691) – excluding platen roller block ....58 17-5 Platen roller block (SMP690/691) .................
- Page 5 Read this manual carefully and be familiar with the contents when you design printers or terminals using the printer mechanism (SMP690/691). BIXOLON is not responsible for any damage or loss occurring through improper handling of printer mechanism, or use of the product in a way that is not described in this manual, or other components of your company configuring the system.
- Page 6 SMP690/691 ※ Safety Precau tio n s Take precautions with the following items when you design terminals or other products using the printer mechanism. Include the required precautions in the user’s manual so that users can use the products such as terminals safely.
- Page 7 SMP690/691 ※ Desig n Precau tio n s Take precautions on following items when designing products such as terminals using the printer mechanism. a) Power on sequence should be as follows. - Startup: Apply Vdd and then Vp - Shutdown: Shutdown Vp and then Vdd b) The surge voltage between Vp and GND should be less than 10V.
- Page 8 SMP690/691 m) The door rotation system of the external case that holds the platen block should be installed while pressing down the center of the platen roller block. If it is installed by pressing down one side of the platen roller block, it may cause a printing problem or paper jamming.
- Page 9 SMP690/691 ※ Precau tio n s in Han d lin g Incorrect handling may damage or reduce the efficiency of the printer mechanism. Take precautions with the following. * If papers that are not recommended are used - Printing quality drops due to low thermal sensitivity.
- Page 10 SMP690/691 j) Do not apply force to FPC while connecting and disconnecting the connection terminal (printer connection terminal). It may damage FPC. k) Provide a warning to users so that they do not change the thermal paper discharge angle and do not pull the paper during printing. It may case printing defect or paper jamming.
- Page 11 SMP690/691 ■ Features of SMP690/691 printer mechanism This printer mechanism has the following features. * High Speed Printer - Support up to 100 mm per second of printing speed. * High Resolution Printing - Smooth and accurate printing is supported using high-density printer head with a density of 8 dots/mm.
-
Page 12: Specifications
B. PD 160R (75 µm) of New Oji Paper Mfg, Co., Ltd. C. P350 (62 µm) of Kanzaki Specialty Paper, Inc.(USA) D. Hansol Thermo 65(65 µm) of Hansol Paper Co., Ltd.(Korea) SMP690: 66.6mm (H) x 24.5(38.2)mm(D) x 15mm(H) Size (Width x Length x Height) SMP691: 67.4mm(H) x 15.3(29.5)mm(D) x 31.6mm(H) - Page 13 SMP690/691 Operation conditions by temperature / humidity Printing quality guarantee zone Operable zone **Note. 1) Printing speed depends on the controller processing speed and strobe pulse width. *Note. 2) In case of motor driving 2-2 phase, paper supply interval : 0.0625mm *Note.
-
Page 14: Exploded View
SMP690/691 2. Exploded View 2-1 SMP690 - 14 - Rev. 1.04... -
Page 15: Smp691
SMP690/691 2-2 SMP691 - 15 - Rev. 1.04... -
Page 16: Component Names
SMP690/691 3. Component Names 3-1 SMP690 Part No. Part name Descriptions Q’ty A/S KP05-00047A Frame lower SECC 20/20 T1.0 KM05-00056A Frame upper PC-GF10 KP05-00050A Plate lever lock SUS304, T0.7 FPC,Photo interrupter, TPH, AE05-00032A Ass’y TPH(AOI) Bracket tph FPC,Photo interrupter, TPH, AE05-00032B Ass’y TPH(Rohm) -
Page 17: Smp691
SMP690/691 3-2 SMP691 Part No. Part name Descriptions Q’ty A/S KP05-00048A Frame lower SECC 20/20 T1.0 KM05-00056A Frame upper PC-GF10 KP05-00050A Plate lever lock SUS304, T0.7 FPC,Photo interrupter, TPH, AE05-00032A Ass’y TPH(AOI) Bracket tph FPC,Photo interrupter, TPH, AE05-00032B Ass’y TPH(Rohm) -
Page 18: Connector Pin Arrangement
SMP690/691 4. Connector Pin Arrangement 4-1 Main FPC Cable (30Pin) PIN NO SIGNAL Description FEED_A Feeding motor FEED_nA Feeding motor FEED_B Feeding motor FEED_nB Feeding motor TPH Supply voltage TPH Supply voltage TPH Data output nLAT TPH Latch TPH Ground... -
Page 19: Fpc Aux Cable (Black Mark Detection Option)
SMP690/691 4-2 FPC Aux Cable (Black Mark Detection Option) PIN NO SIGNAL Description BMS_IN Black Mark sensor Photo anode Black Mark sensor Ground Black Mark sensor Ground BMS_OUT Black Mark sensor Photo collector ※ User Recommended Connector - Number of terminals: 4 pins with 1.0 ㎜ pitch... -
Page 20: Thermal Printer Head
SMP690/691 5. Thermal Printer Head Thermal head comprises a thermal device and thermal head driver that drives and controls the thermal device. Data input coming from SI terminal is “High” for printing and “Low” for not printing. The data coming from SI terminal are transmitted to the shift registers at the rising edge of the CLK signal. -
Page 21: Head Block Diagram
SMP690/691 5-2 Head Block Diagram COM: TPH Supply voltage (Vset) STB: STROBE (High active) nLAT: /LATCH (Low active) CLK: CLOCK SI: Data input SO: Data output TM: Thermistor VDD: TPH Logic voltage GND: Ground - 21 - Rev. 1.04... -
Page 22: Printing Position Of Transmitted Data
SMP690/691 ※ Relationship between STB terminal and activated thermal device Block No. STB number Heating element number Dots / STB STB1 1 ~ 64 STB2 65 ~ 128 STB3 129 ~ 192 STB4 193 ~ 256 STB5 257 ~ 320... -
Page 23: Dimension Of Thermal Device
SMP690/691 5-4 Dimension of Thermal Device 5-4-1 Heat Element Dimensions 5-4-2 Print Area - 23 - Rev. 1.04... -
Page 24: Electric Characteristics Of Thermal Head
SMP690/691 5-5 Electric Characteristics of Thermal Head Ta = 25℃±10°C 항목 비고 Symbol MIN. TYP. MAX. Umix 공급 전압 로직 전압 논리 전류 ALL-High High Level 입력전압 0.8xV Low Level 입력전압 0.2 xV SI,CLK,nLAT High Level 입력전류 STB at 5V STB at 3.3V... -
Page 25: Thermal Head Drive Timing Diagram
SMP690/691 5-6 Thermal Head Drive Timing Diagram ※ Caution When sufficient driver output delay time cannot be guaranteed, V can be changed significantly. Design the circuit so that V does not exceed the peak voltage. - 25 - Rev. 1.04... -
Page 26: Maximum Ratings (Printer Head Ambient Temperature: 25℃)
SMP690/691 5-7 Maximum Ratings (Printer head ambient temperature: 25℃) Items Maximum rating Condition Voltage among the connector terminals Never exceed Supply Voltage (V 8.5V Driver IC’s high voltage limit, 10V. 0.16 mJ/dot * Note. Supply Energy (E S.L.T. = 0.63ms/line 0.11 mJ/dot... -
Page 27: Peak Current
SMP690/691 5-9 Peak Current Most cases in the following equation can be used to calculate the peak current of the printer head operation. Pay special attention to voltage drop of the circuit. х Vset = ------------------ Rave Average resistance (176 Ω) -
Page 28: Head Operation Pulse Width (Actual Measurement)
SMP690/691 ※ Operating tem perature and head pulse width (calculation exam ple) 사용 온도 및 구동 전압에 대한 Head Pulse Width Head Pulse Width vs Operating Temperature 온도 perature 9.5V Temperature (℃) 5-10-3 Head operation pulse width (actual measurement) Thermister temperature (℃) Head pulse width (usec) Vset=9.5V, 100mm/s... - Page 29 SMP690/691 TEMPERATURE ℃ Temperature (℃) (㏀) Temperature (℃) (㏀) 316.154 24.111 233.694 19.517 174.734 15.904 132.078 13.044 100.862 10.765 77.774 8.935 60.524 7.458 47.511 6.259 37.606 5.280 30.000 2.801 - 29 - Rev. 1.04...
-
Page 30: Detection Of Abnormal Temperature Of The Thermal Head
SMP690/691 ※ Recommended thermister circuit 10㏀/F 10㏀ 10㏀/F TM_out H_TMP TPH Thermistor LM393 3㏀/F 100㎋ 100㎋ Ground User side Printer side 5-10-5 Detection of abnormal temperature of the thermal head In order to protect the thermal head and to guarantee people’s safety, the abnormal temperature of the thermal head should be detected by both hardware and software. -
Page 31: Head History Control
SMP690/691 5-10-6 Head History Control One dot will be printed by THP per Four motor steps. The minimum off-time should be guaranteed since the heating element of TPH should be cooled down sufficiently in order to achieve good printing quality. -
Page 32: Stepping Motor (Paper Feeding)
SMP690/691 6. Stepping Motor (Paper Feeding) 6-1 Specifications Items Specifications Type PM type stepping motor Drive Method Bi-polar chopper Excitation Method 1-2 Phase Terminal Voltage Vp: DC 4.75V ~ DC 9.5V Ω/Phase ±5% Wire Resistance Motor Control Current 0.33A/Phase Motor Drive Pulse 3200 pps Max. - Page 33 SMP690/691 - Constant voltage drive circuit (Vp=7.2V or 8.5V) BA6845FS 100㎋ 100㎌/16V IN11 IN11 VCC1 VCC2 IN21 IN21 FEED_A OUT11 IN12 IN12 OUT12 FEED_nA IN22 IN22 OUT21 FEED_B OUT22 FEED_nB GROUND GROUND GROUND GROUND Maximum drive time should be limited in order to prevent overheating of the motor.
-
Page 34: Drive Sequence (Motor Runs In A Counterclockwise Direction)
SMP690/691 6-3 Drive Sequence (Motor runs in a counterclockwise direction) ※ H: High / L: Low ※ Precautions when designing m otor control circuit and software In order to stop the motor, excite the motor for one step period using the same phase as the final phase of the printing step. -
Page 35: Motor Timing Diagram
SMP690/691 6-4 Motor timing diagram 6-5 Drive frequency acceleration (acceleration control) Acceleration control is required in order to maintain power when driving the motor. Drive the motor in accordance with the acceleration step in the Table. The method of accelerating the motor is as follows... - Page 36 SMP690/691 ※ Acceleration Step Step Step time (usec) Speed (pps) Step Step time (usec) Speed (pps) Start 10000 2251 3328 2291 3072 2332 2816 2367 2560 2404 2304 2441 2048 2480 1728 2512 1536 2553 1344 2587 1216 2622 1075...
-
Page 37: Sensor
SMP690/691 7. Sensor 7-1 Paper detection sensor and black mark detection sensor 7-1-1 Absolute Maximum Ratings (Ta = 25℃) Parameter Symbol Rating Unit ㎃ Forward current Input Reverse current ㎽ Power consumption Collector-Emitter voltage VCEO Emitter-Collector voltage VECO Output ㎃... -
Page 38: External Circuit For Paper Detection Sensor Sampling
SMP690/691 7-1-3 External circuit for paper detection sensor sampling 68㏀/F 180Ω/F or 560Ω/F PS IN SG-105F PS OUT PE_SENSOR 74HC14 PS GND 10㎋ PS GND Ground User side Printer side Paper detection Paper detection sensor (PS OUT) signal level When there is paper... -
Page 39: External Circuit For Black Mark Detection Sensor (Optional Specifications)
SMP690/691 7-1-4 External circuit for black mark detection sensor (Optional specifications) 180Ω/F 18㏀/F BMS IN 33Ω SG-105F BMS OUT BMS_SENSOR 10㎋ Ground User side Printer side Black mark detection Black mark detection sensor (BMS OUT) signal level When there is black mark... -
Page 40: Outer Case Design
SMP690/691 8. Outer Case Design 8-1 Installation Position 8-1-1 How to install the printer mechanism The following picture shows the dimensions required to determine and fix the position of the printer mechanism. * Use the boss #1 and #2 of the main body case to determine the position of the printer main body. - Page 41 SMP690/691 Fig 8-2 Dimensions related to installation (SMP690) Fig 8-3 Dimensions related to installation (SMP691) - 41 - Rev. 1.04...
-
Page 42: Recommended Screws
SMP690/691 8-1-2 Recommended Screws - JIS B1111 M2.0 flat pan head tapping screw 8-1-3 Precautions when mounting printer main body - Avoid excessive impact, deformation and twisting while mounting the printer. Otherwise it may cause degradation of printing quality, misalignment of the paper, paper jamming or printing noise. - Page 43 SMP690/691 Fig 8-4 Rotation center area of the platen roller block and mounting dimensions (SMP690/SMP691) Fig 8-5 Rotation status of the platen roller block and roller moving area - 43 - Rev. 1.04...
-
Page 44: Design Parallel Diagram Of The Platen Roller Block
SMP690/691 8-2-4 Design parallel diagram of the platen roller block Design the system to make two blocks in parallel when the platen roller block is installed in the printer mechanism. * The degree of parallel alignment should be within -0.3 degree ~ +0.3 degree. -
Page 45: Precautions When Fixing The Platen Roller Block
SMP690/691 Fig 8-7 Dimension of the mechanism related to the installation of the platen roller block 8-2-6 Precautions when fixing the platen roller block - The position of the platen roller should be designed within 9.1±0.1 as shown in the dimension drawing of the Fig 8-7. -
Page 46: Recommended Thermal Paper Arrangement
SMP690/691 9. Recommended Thermal Paper Arrangement Design the paper path of the printer mechanism as shown in Fig 9-1. Fig 9-1 Paper Path ※ The distance between the paper detection sensor and head heating line is about 8.2m m. - 46 -... -
Page 47: Designing Platen Roller Block Remove Lever
SMP690/691 10. Designing platen roller block remove lever The following Fig 10-1 shows the operation area and position of the platen roller block remove lever. Fig 10-1 Dimensions related to the operation of platen roller block remove lever Take precautions as follows while designing button or lever to remove the platen roller block. -
Page 48: Designing Thermal Paper Feed Holder
SMP690/691 11. Designing Thermal Paper Feed Holder - The paper feed loading of the paper feed holder should be less than 50gf in design. Design additional devices to meeting the paper loading. If the paper feed loading exceeds 50gf, various problems such as printing failure or paper feed failure could occur. -
Page 49: Designing Thermal Paper Exit
SMP690/691 12. Designing Thermal Paper Exit Take precautions with the following in designing paper exit. Fig 12-1 Dimensions related to paper exit - Secure sufficient space for paper exit in the design so that external force is not applied to the paper during printing. -
Page 50: Precautions In Designing External Case
SMP690/691 13. Precautions in Designing External Case - As the amount of thermal paper installed in a roll becomes smaller, it is more likely to cause curling, causing printing failure or paper jamming. Check the performance by using thermal papers with high curling effects. -
Page 51: Frame Ground
SMP690/691 14. Frame Ground It is recommended to connect the printer main body and the platen roller block to the frame ground (FG) of the external case to prevent damage by static electricity. Check performance by using the device in actual operating conditions. -
Page 52: Designing Black Mark Position (Optional Specifications)
SMP690/691 15. Designing Black Mark Position (Optional specifications) Refer to the dimensions in the following drawing if you use black mark function. Fig 15-1 Dimensions related to black mark and recommended black mark size ※ The distance between the photo sensor and the heating line of the thermal head is about 8.2 mm. -
Page 53: How To Handle The Printer Mechanism
SMP690/691 16. How to handle the Printer Mechanism 16-1 Installation of the thermal paper - Depress the release lever of the platen roller block of the printer mechanism. - Move the platen roller block separated from the printer mechanism to the upper side. -
Page 54: Cleaning Thermal Head
SMP690/691 16-5 Cleaning thermal head Thermal head should be cleaned as foreign substances on the thermal head surface may cause problems in printing after long hours of use. As the temperature of thermal head and peripheral devices may be very high right after printing, wait until the temperature goes down sufficiently before cleaning. -
Page 55: Exterior And Dimension
SMP690/691 17. Exterior and Dimension 17-1 Mechanical Device Assembly (SMP690) - 55 - Rev. 1.04... -
Page 56: Mechanical Device Assembly (Smp690) - Excluding Platen Roller Block
SMP690/691 17-2 Mechanical Device Assembly (SMP690) – excluding platen roller block - 56 - Rev. 1.04... -
Page 57: Mechanical Device Assembly (Smp691)
SMP690/691 17-3 Mechanical device assembly (SMP691) - 57 - Rev. 1.04... -
Page 58: Mechanical Device Assembly (Smp691) - Excluding Platen Roller Block
SMP690/691 17-4 Mechanical device assembly (SMP691) – excluding platen roller block - 58 - Rev. 1.04... -
Page 59: Platen Roller Block (Smp690/691)
SMP690/691 17-5 Platen roller block (SMP690/691) - 59 - Rev. 1.04... - Page 60 SMP690/691 Product Approval Product Name SMP690/691 Manufacturer BIXOLON Product SMP690/691 User’s Manual Specifications Rev.1.04 Company Name Approval Date Approved By Signature - 60 - Rev. 1.04...
Need help?
Do you have a question about the SMP690 and is the answer not in the manual?
Questions and answers