Table of Contents
Advertisement
Advertisement
Table of Contents

Related Manuals for Bernina Virtuosa 153


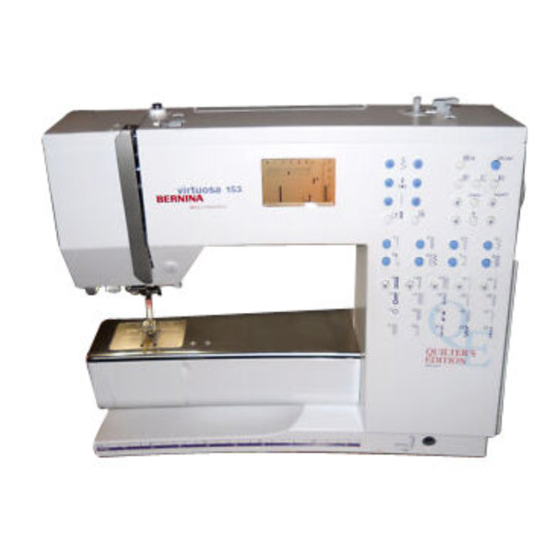
Summary of Contents for Bernina Virtuosa 153
- Page 2 5. Keep fingers away from all moving parts. Special care is required around the sewing needle. SAVE THESE INSTRUCTIONS! 6. Always use the BERNINA original needle plate. The This sewing computer is intended for household use wrong plate can cause the needle to break.
- Page 3 BERNINA ® Choosing BERNINA is a decision which will have a positive impact on your sewing for years to come. Customer satisfaction has been the driving force of our family company for over 100 years and I intend to continue that tradition of delivering superb Swiss quality, future-oriented sewing technology and unparalleled customer service.
- Page 4 Contents Setting up the machine Operating instructions Stitches Presser feet Needle and thread Fabric feed Cleaning Maintenance Trouble shooting Index...
- Page 5 Details Details of the machine Front view Back view...
- Page 6 Details Bobbin cover Stitch plate Attachment base Darning ring fixation hole Presser foot Needle clamp Thread guide Needle threader Thread regulator Thread slit Thread take-up Tension adjustment wheel Bobbin pre-tension Quick reverse button Screen Bobbin winder with on/off switch and thread cutter Stitch width Needle position Stitch length...
- Page 7 Patchwork foot No. 37*** • Height compensating plates • Supplementary spool pin • 3 spool discs • * can vary from country to country ** Available as special accessory for virtuosa 153 QE *** Available as special accessory for virtuosa 163...
- Page 8 Setting up the machine Power cable The power cable is stored Important! (USA/Canada only) in the case This sewing computer has a polarized plug (one blade · plug A into machine wider than the other). To reduce the risk of electric ·...
- Page 9 Setting up the machine Winding the bobbin Winding the bobbin · turn power switch on · following the direction of the arrow take thread through · cut the thread on the · place empty bobbin on · the rear guide and round the pre-tension stud ·...
- Page 10 Setting up the machine Changing the needle Removing the needle · raise the needle · turn power switch to «0» · remove the presser foot · loosen the needle clamp screw · pull the needle down to remove Inserting the needle ·...
- Page 11 Setting up the machine Threading the upper thread · raise the needle and presser foot · turn the power switch to 0 · place spool on pin and attach the appropriate spool disc · – diameter of spool = disc size ·...
- Page 12 Setting up the machine Thread cutter · pull both threads from front to back over · the cutter · the threads release as soon as the first · stitch is sewn Stitch plate Stitch plate markings · the stitch plate is marked with seam ·...
- Page 13 Operating instructions General instructions Main switch to 1 · the machine is ready to sew The screen shows 1 stitch width basic setting blinks constantly 2 stitch length basic setting blinks constantly 3 needle position (9 positions) 4 needle stop up/down (generally up) 5 stitch number 1 (straight stitch) 6 presser foot indicator (recommended foot for selected stitch) Stitch selection...
- Page 14 / del turned off stitch length, stitch width, needle positions, mirror image, single pattern Letters, numbers Exceptions: needle stop down, altered (block letters on virtuosa 153 QE) basic settings for buttonholes, ⁄ speed, · centre-button continuous reverse · select the letter style; the style selected will appear on the screen ·...
- Page 15 Operating instructions Buttonholes All buttonholes can be sewn in all styles. Preparation · thread the lower thread in the finger of the bobbin case · use Buttonhole foot No. 3 or 3A Buttonholes are not only practical closures, they can also be used to decorative effect ·...
- Page 16 Operating instructions Manual multiple-step keyhole buttonhole The individual steps blink on the screen. Sew both forward and reverse beads at the same speed. 1. sew straight stitch forwards, stop the machine, press the quick reverse-button 2. sew the eye and the first bead in reverse, stop the machine at the first stitch (buttonhole begin), press the quick reverse-button 3.
- Page 17 Operating instructions Automatic keyhole buttonhole Both beads are sewn in the same direction. Automatic keyhole buttonhole · when using Buttonhole foot 3A the length of the buttonhole is automatically registered by the lens on the foot Marking the buttonhole Mark the bead length only. The correct eye length will be added when the buttonhole is sewn.
- Page 18 Operating instructions Stitch counter buttonholes (all types) The first bead is sewn forwards, the second bead in reverse. Sew forward and reverse beads at the same speed. Preparation: · Buttonhole foot No. 3 or Automatic foot 3A · insert the lower thread into the finger of the bobbin case Always test sew buttonholes ·...
- Page 19 Operating instructions Saving programmed buttonholes in long term memory mem + · after programming press the mem + -button · the buttonhole is now saved in long term memory · stitch counter buttonholes cannot be saved in long term memory Opening saved buttonholes Programmed saved buttonholes can be opened for re-use even after the machine has been disconnected.
- Page 20 Operating instructions Memory Any combination of 30 stitches, letters of numbers can be saved in Memory, which is long term. They remain saved until deleted by the user. Power failures or disconnection from the electricity supply do not affect the Memory. Alterations to the stitch length, width or needle position can be made at any time.
- Page 21 Operating instructions Programming practical and decorative stitches Open memory · press the mem-button · the cursor appears to the left, the number of available memory spaces (30) blinks and the word mem appears · select a stitch, e.g. 21 · stitch number appears on the screen ·...
- Page 22 Operating instructions Select letter style · press the alphabet-button until the style you want appears on the screen · the letter A in the style of your choice appears on the screen Selecting letters/numbers · press the right button · the letters A-Z appear ·...
- Page 23 Operating instructions Balance Balance For balancing forward and reverse sewn stitches and for fine stitch length adjustments. Note: Normal position Denser stitch formation Finer stitch formation If the balance has been (shorter stitch length) (longer stitch length) adjusted, return it to the normal setting once Applications: sewing is completed.
- Page 24 BERNINA dealer. virtuosa 153 QE = 12, virtuosa 163 = 18 replacement stitches Practical and decorative stitches virtuosa 153 QE...
- Page 25 Stitches Stitch selection virtuosa 153 QE Straight stitch All non-stretch fabrics. All straight stitch work. Zig-zag Most fabric types. All simple zig-zag such as oversewing fine fabrics. Sewing on elastic and lace. Vari-overlock Primarily for fine jerseys, stretch overlock seams and hems.
- Page 26 Stitches Stitch selection virtuosa 163 Straight stitch All non-stretch fabrics. All straight stitch work. Zig-zag Most fabric types. All simple zig-zag such as oversewing fine fabrics. Sewing on elastic and lace. Vari-overlock Primarily for fine jerseys, stretch overlock seams and hems. Running stitch Most types of fabric.
- Page 27 163) BERNINA special presser feet The standard selection of presser feet covers most Ask your BERNINA dealer for details of the complete normal sewing requirements but we recommend the use range. of BERNINA purpose designed feet for special sewing tasks such as pintucking and shell seam.
- Page 28 Needle, thread Important facts about sewing computer needles sewing computer, needle and thread Your BERNINA uses needle system 130/705H. Needle 110 –120 Darning thread Needle and thread The most commonly sold needles are nos. 70 –120. The finer the needle, the lower the number. The table Embroidery shows which needle is suitable for which threads.
- Page 29 Needles Important facts about sewing computer needles Special materials are easier to sew if the appropriate needle is used. Special needles are available at your BERNINA dealer. Needle table Description Needle point Suitable for Standard 130/705 H Normal point, Universal needle for woven,...
- Page 30 Needle, thread, fabric feed Feed-dog and fabric feed Feed-dog and stitch length With each stitch the feed-dog moves forward by one step. The length of this step is determined by the stitch length selected. With an extremely short stitch length, the steps are also short.
- Page 31 Cleaning and Maintenance Cleaning If the machine is stored in a cold room, it should be brought to a warm room about one hour before use. Important: Never use alcohol, petrol, white spirit or any type of solvent to clean the machine! Cleaning Cleaning the hook...
- Page 32 For models with this new CFL sewing-light, the light can · The needle is blunt, bent or incorrectly inserted. ONLY be replaced by an authorized BERNINA dealer. Push right to the top when inserting. · Needle inserted all the way to the top.
- Page 33 Index Index Accessory box Faults Needle Safety instructions Alphabet Feed Dogs · threading Securing-button Altered stitch memory · and fabric feed · and thread Securing function · and presser foot · information Securing stitch 23, 24 · and sewing corners ·...
- Page 34 Sewing Manual...
-
Page 36: Table Of Contents
Contents Straight stitch/zig-zag 2–5 Decorative stitches 6, 7 Memory 8, 9 Seams, hems with practical stitches 10 –14 Sewing knits 15, 16 Zippers Blind hem Elastic 19, 20 Buttonholes/eyelets 21–27 Quilt stitch 28, 29 Darning/mending tears 30–34 Index... - Page 37 Straight stitch Straight stitch Stitch: Straight stitch No. 1 Needle: size and type suitable for the fabric selected Thread: cotton or polyester Feed-dog: up (sewing position) Presser foot: Reverse pattern foot No. 1 Straight stitch (A) The machine is ready to sew as soon as you switch on ·...
- Page 38 Securing stitch Securing stitch (straight stitch) Stitch: Securing stitch No. 5 Needle: size and type suitable for the fabric selected Thread: cotton or polyester Feed-dog: up (sewing position) Presser foot: Reverse pattern foot No. 1 Securing stitch for all fabrics secures beginning and end of seam Stitch selection ·...
- Page 39 Edges Edge stitching Stitch: Straight stitch No. 1 Needle: size and type suitable for the fabric selected Thread: cotton, polyester or cordonnet (topstitching) Feed-dog: up (sewing position) Presser foot: Reverse pattern foot No. 1 or Blind stitch foot No. 5 Edge stitch foot No.
- Page 40 Zig-zag Zig-zag stitch Stitch: Zig-zag No. 2 Needle: size and type suitable for the fabric selected Thread: cotton or polyester Feed-dog: up (sewing position) Presser foot: Reverse pattern foot No. 1 Zig-zag stitch for all fabrics for neatening edges for decorative work Stitch selection ·...
- Page 41 Decorative stitches Decorative stitches Stitch: Decorative stitch Needle: size and type suitable for the fabric selected Thread: cotton or rayon embroidery Feed-dog: up (sewing position) Presser foot: Reverse pattern foot No. 1 or Embroidery foot No. 6 (depending on stitch) Decorative stitches for all fabrics, for embellishing Stitch selection...
-
Page 42: Decorative Stitches
Decorative stitches Combining decorative stitches with functions Stitch: Decorative stitches Needle: size and type suitable for the fabric selected Thread: cotton or rayon embroidery Feed-dog: up (sewing position) Presser foot: Reverse pattern foot No. 1, open Embroidery Foot No. 20 or Embroidery Foot No. 6 (optional) ·... -
Page 43: Memory
Example A: · program a stitch combination of your choice in the memory (No. 29 and No. 36 virtuosa 163 / No. 28 and No. 24 virtuosa 153 QE) · sew repeatedly Example B: · program a stitch (No. 27 virtuosa 163 / No. 20 virtuosa 153) ·... - Page 44 Memory Letters and numbers in memory (Block letters on the virtuosa 153 QE) · The memory has a capacity for 30 stitches. · All letters can be programmed in memory. · All letters and numbers as well as practical and decorative stitches can be combined at will and programmed in memory.
- Page 45 Practical stitch seams Practical stitch seams Open seams Seams which are pressed open · seam allowance width as wide as wanted · seam lies flat · seam does not stretch open Suggested stitches: · straight, narrow zig-zag and super stretch Application: primarily for woven fabrics ·...
- Page 46 Use a Jeans needle and the jeans foot No. 8 for densely woven fabrics Super stretch seam Stitch: Super stretch No. 13 virtuosa 153 / No. 15 virtuosa 163 Needle. universal, ballpoint or stretch as needed Thread: cotton or polyester...
- Page 47 Practical stitch seams Vari-overlock seam Stitch: Vari-overlock No. 3 Needle: size and type suitable for the fabric selected Thread: cotton or polyester Feed-dog: up (sewing position) Presser foot: Overlock foot No. 2 or Reverse pattern foot No. 1 Closed seam stretchy seam in fine, soft knits such as silk jersey and interlock Sewing...
- Page 48 Practical stitch seams Stretch overlock seam Stitch: Stretch overlock No. 16 virtuosa 153 /No. 18 virtuosa 163 Needle: size and type suitable for the fabric selected Thread: cotton or polyester Feed-dog: up (sewing position) Presser foot: Reverse pattern foot No. 1...
- Page 49 · sew hem at desired depth (right side) · trim surplus fabric (wrong side) Visible hem with Jersey stitch Stitch: Jersey stitch No.15 virtuosa 153 QE /No.17 virtuosa 163 Needle: universal, ballpoint or stretch as needed Thread: cotton or polyester...
-
Page 50: Sewing Knits
Self-facing with Honeycomb stitch Stitch: Honeycomb No. 14 virtuosa 153 /No. 16 virtuosa 163 Needle: universal, ballpoint or stretch as needed Thread: cotton or polyester... - Page 51 Sewing knits Ribbing with overlock seam Stitch: Vari-overlock No. 3 Needle: size and type suitable for the fabric selected Thread: cotton or polyester Feed-dog: up (sewing position) Presser foot: Overlock foot No. 2 or Reverse pattern foot No. 1 Ribbing with overlock seam for all fine cotton, synthetic and mixed fiber jersey Preparation ·...
-
Page 52: Zippers
Zippers Zippers Stitch: Straight stitch No. 1 Needle: size and type suitable for the fabric selected Thread: cotton or polyester Feed-dog: up (sewing position) Presser foot: Zipper foot No. 4 Needle position: far right or far left Preparation: · baste in zipper ·... -
Page 53: Blind Hem
Blind hem Blind hem Stitch: Blind hem No. 7 Needle: size and type suitable for the fabric selected Thread: cotton or polyester Feed-dog: up (sewing position) Presser foot: Blind stitch foot No. 5 Blind hem for invisible hems in medium to heavy cotton, wool and blended fabrics Preparation ·... - Page 54 · for children’s or doll’s clothing · sew hem with elastic before sewing side seams Sewing on shirring elastic/cord with Gathering stitch Stitch: Gathering stitch No. 20 virtuosa 163 / No. 27 virtuosa 153 Needle: size and type suitable for the fabric selected Thread:...
-
Page 55: Elastic
Elastic/cord Sewing on wide elastic with Running stitch Stitch: Running stitch No. 4 Stitch length: adjust to suit elastic Needle: size and type suitable for the fabric selected Thread: cotton or polyester Feed-dog: up (sewing position) Presser foot: Reverse pattern foot No. 1 Wide elastic for finishing openings on sports wear and lingerie Preparation... - Page 56 Buttonholes Everything you need to know about buttonholes Thread tension · thread the bobbin thread through the finger of the bobbin case · the bobbin tension is a little tighter · this gives the beads on the right side of the fabric a slightly rounded appearance ·...
- Page 57 Buttonholes Manual buttonhole (all types) The number of steps depends on the type of buttonhole selected. A manual buttonhole cannot be saved. Stitch: any buttonhole Needle: size and type suitable for the fabric selected Thread: cotton or polyester Feed-dog: up (sewing position) Presser foot: Buttonhole foot No.
- Page 58 Buttonholes Automatic buttonholes (without stitch counter buttonhole) Both beads are sewn in the same direction. Stretch buttonholes (virtuosa 163) are particularly effective on all knit fabrics because the double overlock stitch used for the beads stretch with the fabric while keeping its shape.
- Page 59 Both beads are sewn in the same direction. The length of the beads is determined and the keyhole sections are sewn additional. Stitch: Keyhole buttonhole No.10 virtuosa 153/No.12 virtuosa 163 Needle: size and type suitable for the fabric selected Thread:...
- Page 60 Buttonholes Stitch counter buttonholes for all buttonhole types (can not be saved in long term memory) The first (left) bead is sewn forwards, the second (right) bead is sewn in reverse. Stitch: Buttonholes (all types) Needle: size and type suitable for the fabric selected Thread: cotton or polyester Feed-dog:...
- Page 61 Buttonholes Standard and stretch* buttonholes with gimp (*virtuosa 163 only) Gimp · gimp cord reinforces buttonholes and enhances their appearance · the loop of the cord should be at the end of the buttonhole most subject to wear cord loop = where button is sewn on ·...
-
Page 62: Buttonholes/Eyelets
· place the cutter in the centre of the buttonhole · press down on the cutter with your hand or a hammer Eyelet Stitch: Eyelet No. 13 virtuosa 163 / No.11 virtuosa 153 Needle: size and type suitable for the fabric selected Thread:... -
Page 63: Quilt Stitch
Quilt stitch Hand-look quilt stitch Stitch: Quilt stitch No. 21 virtuosa 153 /No. 26 virtuosa 163 Needle: size and type suitable for the fabric selected Upper thread: monofilament Bobbin thread: 30/2 cotton thread Feed-dog: up (sewing position) Presser foot: Reverse pattern foot No. 1 or Walking foot No. - Page 64 Quilt stitches Freehand quilting Stitch: Straight stitch No. 1 Needle: size and type suitable for the fabric selected Thread: cotton or monofilament Feed-dog: down (darning position) Presser foot: Darning foot No. 9 or Quilting foot No. 29 Freehand quilting · for all freehand quilt work Preparation ·...
-
Page 65: Darning/Mending Tears
Darning/mending tears Edging knits with shirring elastic Stitch: Zig-zag No. 2 Stitch width: approx. 5 mm Stitch length: 1 –1,5 mm Needle: size and type suitable for the fabric selected Thread: cotton or polyester Feed-dog: up (sewing position) Presser foot: Reverse pattern foot No. - Page 66 · if necessary, sew a second row somewhat in from the edge Patches on knits and jersey Stitch: Jersey stitch No.15 virtuosa 153 Q /No.17 virtuosa 163 Needle: size and type suitable for the fabric selected Thread: cotton or polyester...
- Page 67 Darning/mending tears Darning and mending tears with Running stitch Stitch: Running stitch No. 4 Needle: size and type suitable for the fabric selected Thread: cotton or polyester Feed-dog: up (sewing position) Presser foot: Reverse pattern foot No. 1 Quick mends for tears and worn areas on all types of fabric Preparation ·...
- Page 68 Darning Darning program Stitch: Darning Program No. 12 virtuosa 153 Darning Program No. 14 virtuosa 163 Needle: size and type suitable for the fabric selected Thread: darning thread Feed-dog: up (sewing position) Presser foot: Reverse Pattern foot No. 1 Buttonhole foot No. 3A Quick darning of holes or worn areas ·...
- Page 69 · do not sew in circles = these do not mimic fabric construction * The darning ring is available as special accessory. ** virtuosa 153 QE optional Thread breaks · uneven movement of darning ring Stitch formation is not good, thread lies on top ·...
-
Page 70: Index
Index Index Blind hem Flat joining seam Numbers in memory Triple straight stitch Buttonhole Freehand quilting seam · balance · cutting open · functions · keyhole Patching · manual Hand stitches/ Patchwork foot Vari-overlock seam · standard quilting stitch Practical and decorative Visible hem with Jersey ·...
Need help?
Do you have a question about the Virtuosa 153 and is the answer not in the manual?
Questions and answers
which direction should the spool feed the thread?
For the Bernina Virtuosa 153, the correct spool thread feeding direction depends on the type of thread:
- Stacked and decorative threads: Use the vertical spool pin.
- Crosswound threads: Use the horizontal spool pin, ensuring to use the spool disc closest to the diameter of the spool.
This answer is automatically generated
I do not have a manual and need to adjust the tension to free motion quilt. How do I do that. Virtuoso 153
TOOK MY BOBBIN CASE OUT TO CLEAN NOW IT WONT SSTAY IN WHEN SEWING THE BACKING BEHIND THE BOBBIN FALLS OUT WHICH WAY DO THEY GO IN
Where should i oil the machine at?