Table of Contents
Advertisement
Quick Links
Advertisement
Table of Contents

Related Manuals for FrontRow symbio 5201R


Summary of Contents for FrontRow symbio 5201R
- Page 1 symbio INSTALLER GUIDE 5201R Receiver...
-
Page 2: Table Of Contents
Chapter 1 Installation ..........3 - 5 Chapter 2 Get Your FrontRow Symbio Parts Ready......6 - 7 Chapter 3 Get Yourself Ready. -
Page 3: Electrical Warnings
DO NOT disassemble the power supply. on the receiver and power supply and in this Return the apparatus to FrontRow for installation guide. qualified service and repair if service or repair is required. Incorrect reassembly may result in a risk of electric shock or fire. -
Page 4: Receiver Components
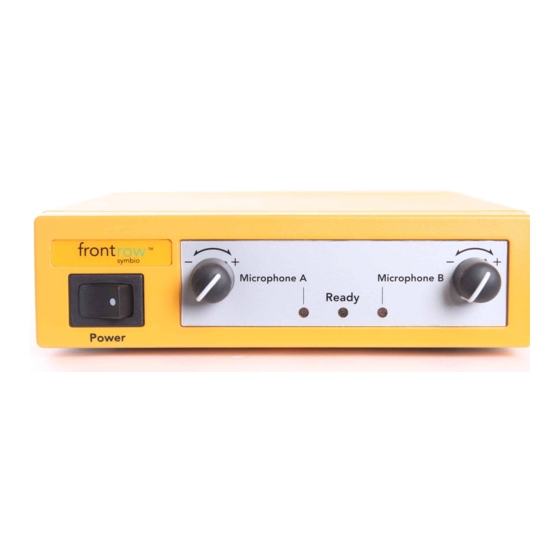
Receiver Components Receiver 1. Receiver 2. Infrared ceiling sensor* 3. Receiver power supply 4. Receiver mounting tray (optional) *Not necessary if FrontRow IR speakers are already installed... -
Page 5: Chapter 1 Installation
Installation Before you begin your installation Make sure you've got everything you need to set up your FrontRow Symbio system. By taking a few minutes to prepare, you'll help ensure the actual set-up is as quick and problem-free as possible. - Page 6 Are your existing speakers a feedback risk? It's very important to assess the position of existing speakers — and move them if necessary — to avoid creating acoustic feedback. Confirm before your begin that your speakers are positioned according to these guidelines: Installing ceiling speakers? Install speakers only over the area where students are sitting —...
- Page 7 b Installing IR speakers? Install speakers only over the area where students are sitting — not the entire room. Speakers should only be placed on the side walls of the classroom. Walls should have a space approximately 10in wide by 5in tall (25 x 13cm) to solidly mount the wall bracket.
-
Page 8: Chapter 2 Get Your Frontrow Symbio Parts Ready
Get Your FrontRow Symbio Parts Ready Check the contents of your FrontRow Symbio installation kit against the parts listed below. To help you stay organized, we recommend that you keep the parts needed for each step separate. 1. Open your main component box... - Page 9 2. Open your RMS Kit (for use with ezRoom) Adapter Cable UTP CAT 5e Cable When using Symbio with ezRoom setup, turn both volume controls to maximum setting Please DO NOT change these volume settings RJ45-RJ45 Adapter Volume Setting Label...
-
Page 10: Chapter 3 Get Yourself Ready
Get Yourself Ready Nearly everything you need to install your FrontRow Symbio system is included in the boxes we shipped. You will need some basic tools and materials, depending on how your classroom is built: 1. What kind of walls do you have? -
Page 11: Chapter 4 Plan Your Sensor Installation
Plan Your Sensor Installation (Skip this section if FrontRow IR speakers have been installed previously) SENSOR & SENSOR CABLE The sensor and sensor cable are critical elements in the system and the most sensitive to electrical noise. DO NOT shorten OR lengthen the sensor cable. Its factory-specified length is critical to the performance of the system. - Page 12 Plan Your Sensor Installation (cont.) Interference and IR Coverage The FrontRow Symbio system uses infrared light to transmit the voice signal from the microphone to the sensor in the ceiling/wall sensors. Proper placement of the sensors is critical for optimal system performance.
- Page 13 Plan Your Sensor Installation (cont.) 1. Positioning a ceiling sensor Sensor symbols: = ceiling sensor Installing one ceiling sensor Mentally divide the room into quarters and locate the center of the room as shown. Use a piece of tape to mark a spot on the ceiling in the center of the room. NOTE: The sensor must be able to "see"...
- Page 14 Plan Your Sensor Installation (cont.) 2. Positioning wall sensors Sensor symbols: = wall sensor Installing 2 wall sensors Use a piece of tape to mark a spot for each sensor as shown below. One near the back corner, one near the front corner. The sensors should be positioned on the side walls relative to whiteboard/main lecture area at right angles to the board.
-
Page 15: Chapter 5 Installing Sensors
IMPORTANT! DO NOT ALTER THE IR SENSOR CABLE Read the FrontRow Installer Guide thoroughly before installing sensor cable. The cable has been rigorously tested and qualified to work with your FrontRow IR sensors. - Page 16 IMPORTANT! DO NOT ALTER THE IR SENSOR CABLE Read the FrontRow Installer Guide thoroughly before installing sensor cable. The cable has been rigorously tested and qualified to work with your FrontRow IR sensors.
- Page 17 (do not attach them to duct work, plumbing, or other secondary work). IMPORTANT! DO NOT ALTER THE IR SENSOR CABLE Read the FrontRow Installer Guide thoroughly before installing sensor cable. The cable has been rigorously tested and qualified to work with your FrontRow IR sensors.
- Page 18 Install the Wall Sensor wall sensor features If you’re installing wall sensors: ceiling 1. Locate the spots you marked in chapter 4 for sensor placement. 2. Bend sensor bracket so that when placed on the wall, the sensor will face the center of the section of the room it’s serving (see chapter 4).
-
Page 19: Install The Receiver
DO NOT bundle the FrontRow power supply (or any power supply) along with the sensor cable. DO NOT place the FrontRow power supply (or any power supply) directly next to or on top of the receiver. 2. Connect cables to receiver 1. - Page 20 Install the Receiver (cont.) 6. Connect free end of UTP Cat 5e to CA1000 or CM3000 amplifier as shown in the following figures: CA1000 Symbio-ezRoom basic connections Symbio Wireless Mic Receiver IR Speaker IR Speaker RJ45-RJ45 Adapter UTP Cat 5e cable NOTE: This is a schematic Adapter cable illustration intended to clarify...
- Page 21 CM3000 Symbio-ezRoom basic connections Symbio Wireless Mic Receiver IR Speaker IR Speaker RJ45-RJ45 Adapter CM3000 Amplifier/ NOTE: This is a schematic Switch illustration intended to clarify UTP Cat 5e cable the relationship of components Adapter cable to each other. The locationof jacks Speaker cable Sensor cable shown here may not reflect their...
- Page 22 Install the Receiver (cont.) 3. Install raceway (optional) You can neatly conceal all cables running between the receiver and the ceiling space using widely-available plastic raceway. Cut enough raceway to extend from just behind your mounted receiver to the ceiling. Using a level or tape measure to ensure straightness, attach the raceway to the wall.
-
Page 23: Adjust The Amplifier
Adjust the Amplifier 1. If using the FrontRow CA1000 amplifier: 1. Follow the instructions in the CA1000 Installer Guide (under the Downloads section at gofrontrow.com/ezroom) to connect the CA1000 to a computer running the CA1000 configuration software. (Note that the configuration software version must match the CA1000 build version. -
Page 24: Chapter 8 Test System
Test System It’s important to confirm that everything is working before packing up your tools. Take a few moments to test your work. To start: Ask another person to assess volume levels Put on the microphone and turn it on. from front and back of room while you speak Walk, talk, and listen to the sound quality (find another person to help... -
Page 25: Chapter 9 Product Specifications
Product Specifications Symbio Receiver: 5201R Pendant Mic Transmitter: 940TM Transmitting frequency: 2.3MHz & 2.8MHz Receiver frequency: 2.3MHz & 2.8MHz (switchable) (2 simultaneous channels) Operating range: 18.5m/60ft line-of-sight Transmission type: Infrared (typical) Operating range: 18.5m/60ft line-of-sight Frequency Response: 50Hz to 10kHz (typical) THD: <... -
Page 26: Chapter 10 Troubleshooting
Troubleshooting Receiver won’t turn on (power light Weak or no output from speaker(s) doesn’t turn on) • Increase the Mic Channel Gain on the amplifier (not the receiver). • Verify that the power supply is plugged into both the receiver and a working wall outlet. •... -
Page 27: Chapter 11 Regulatory
Thus, when disposing of your waste electrical FCC notes and electronic equipment, you must use a The FrontRow Symbio system is approved collection system designated for this purpose, by the FCC (Federal Communications regardless of whether you dispose of your Commission). - Page 28 © 2014 FrontRow Calypso LLC. FrontRow, Calypso and the names of FrontRow and Calypso products are trademarks or registered trademarks of FrontRow Calypso LLC in the US and other countries. Product specifications and accessories subject to change without notice.
Need help?
Do you have a question about the symbio 5201R and is the answer not in the manual?
Questions and answers