TruXedo TruXport Owners & Installation Manual
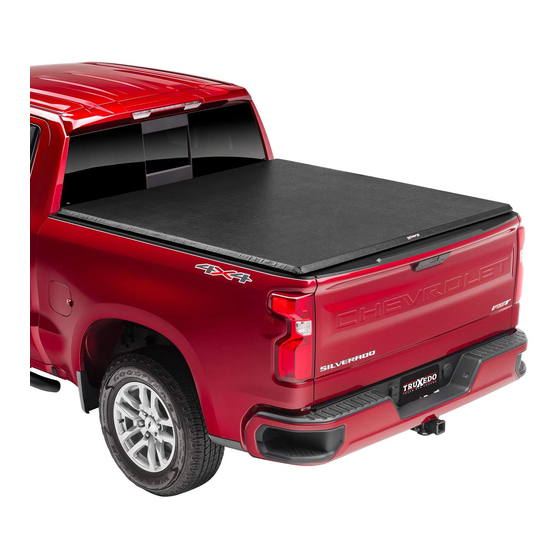
Truck bed cover
Hide thumbs
Also See for TruXport:
- Owners & installation manual (21 pages) ,
- Owner's manual (8 pages) ,
- Owners & installation manual (7 pages)
Advertisement
Owners & Installation Manual
FIVE YEAR WARRANTY
TruXedo, Inc. warrants that all new, unused products are free
from defects in material and workmanship. This Five Year Limited
Warranty is effective if the product is properly installed and used
for the purpose intended. It applies to the original buyer only.
TruXedo's obligation under this Warranty is limited to repairing,
or at its option, replacing any part that is returned, transportation
prepaid, to TruXedo, Inc., Yankton, South Dakota, if the product is,
in our judgment, defective. All materials must be accompanied by
an RMA (Returned Material Authorization) number requested by
and authorized in advance of returning the materials. TruXedo, Inc.
shall not be liable or responsible to supply or pay labor to replace
any part found defective, nor shall it be liable for any damages of
any kind or nature to person, product, or property.
There are no Warranties for used products or products that have
been repaired, altered, modified, subjected to misuse, negligence,
accident or ordinary wear and tear. Warranty registration must be on
file and/or proof of original purchase (detailed and dated receipt)
required for warranty to be effective .
Register online at www.truxedo.com
WARNING
!
Tighten clamps securely on side rails before driving
vehicle, to prevent cover from blowing off.
1. Do not place objects on or against cover or framework.
2. Do not tie cargo to TruXport framework.
3. Never allow children or pets to occupy pickup box while
cover is closed.
4.
Cover is not airtight. Special care is required to keep
cargo clean and dry.
Fabric cover won't prevent theft of contents inside truck
5.
box.
Cover must be rolled fully open and secured with
6.
retainer straps when towing vehicle backwards.
7. Rolled opened cover must be tightly rolled, securely
cinched down with both retainer straps, and away from
the cab and window. DO NOT STOW COVER
AGAINST TRUCK CAB OR BACK WINDOW.
8. Cover must be rolled fully open and secured with
retainer straps if any part of the truck bed cover is worn
or damaged.
READ INSTRUCTIONS - Failure to assemble cover
properly will void warranty.
It is the responsibility of the owner/user to read this manual and
comply with the operating procedures. The owner/user is also
responsible for inspecting their TruXport
parts repaired or replaced when worn or damaged.
Failure to follow safety instructions and warning labels could result
in failure of your cover system and/or personal injury.
• Always wear safety glasses and/or other necessary protective
equipment when installing your TruXport
• These instructions are complete for most pickup models.
Additional instructions are included, if required for your pickup.
Please read entire manual before installing your TruXport
Vinyl cover can be hand washed with mild soap and water or
cleaned in a car wash. Thoroughly rinse cover to remove any
soap residue. Recommended to use the tested and approved
Protex truck bed cleaner or any vinyl protectant made for truck bed
covers. Never use any vinyl conditioners (ie, Armor
All®) that contain silicone, petroleum, or citrus
based products on your truck bed cover as they
may crack and shrink the vinyl.
Warranty registration must be on file
and/or proof of original purchase (detailed
and dated receipt) required for warranty
to be effective.
Register online at www.truxedo.com.
cover, and for having
®
MESSAGES TO INSTALLER
.
®
Questions?
Call our friendly customer service staff
at TruXedo, Inc. Toll Free:
1-877-878-9336
Mon - Fri 8 am - 5 pm CT
P/N 1118257, Rev A
.
®
Advertisement
Table of Contents

Related Manuals for TruXedo TruXport


Summary of Contents for TruXedo TruXport
- Page 1 TruXedo, Inc., Yankton, South Dakota, if the product is, in our judgment, defective. All materials must be accompanied by...
- Page 2 Soft Roll-Up Truck Bed Cover Kit Contents- RamBox Install Call Out Description Quantity Rolled Cover Assembly RH (passenger side) Rail LH (driver side) Rail Bulkhead Seal Corner Seal (front/ cab end) Corner Seal (rear/ tailgate end) Corner Block Seal RamBox Bracket Cap Screw, Hex Head Flat Washer RamBox Clamp...
- Page 3 RAMBOX BED INSTALL 1.0 BULKHEAD SEAL INSTALLATION Prior to installation of the cover, the bulkhead seal needs to be installed to the top of the bulkhead. The surface should be cleaned with rubbing alcohol before application. 1.1 RAMBOX BED INSTALL For RamBox installs, with or without a liner, in addition to the bulkhead seal...
- Page 4 RAMBOX BED INSTALL 3.0 RAIL AND COVER INSTALLATION 3.2 Remove the cargo rail end caps (2) and tie-down cleats (3) on both sides. With two people, the full cover assembly is lifted to the existing cargo rails, the bottom of the cover rail (4) fits into the top slot (5) of the cargo rails.
- Page 5 RAMBOX BED INSTALL 4.0 RAIL BRACKET INSTALLATION The rail mounting brackets slide into the rails at opposite ends on both sides. The top, square head bolts (1) slide into the cover rail in the upper slot (2) at the front/cab end of the rail (3). The lower half of the bracket (4) slides into RamBox rail (5) from the...
-
Page 6: Installation Completion
RAMBOX BED INSTALL 5.0 TAILGATE CORNER SEAL INSTALLATION Fold the cover open at the tailgate, remove the adhesive backing and place a corner seal (F) on both corners of the cover header panel. 6.0 INSTALLATION COMPLETION Installer will fold this document and place it in the vehicle’s glove box. CLOSING THE COVER Release the retainer strap hooks (1) and unroll the... - Page 7 CLOSING THE COVER- continued Make sure to close and latch the cover on both sides, apply closing pressure on both sides of the truck. The latches will provide an audible click. NOTE: Fully engaged (1), not fully engaged (2). click click 4.
-
Page 8: Opening The Cover
OPENING THE COVER With the tailgate open, press downward on one side latch (1) to disengage. Grasp the tailgate header and release the opposite latch. Roll up the cover. Do not disengage the hook and loop fasteners prior to rolling the cover. -
Page 9: Replacement Parts
REPLACEMENT PARTS _______ Cover 1704537 Block Seal_1 X 2 X 1.5_PVC Foam _______ 1703568 Four Corners Weather Seal 1705421 Corner Plug, Driver Side 1117868 Complete Latch Assy, Driver’s Side _______ Cab End Header 1703560 Flat Head Cap Screw 1705420 Corner Plug, Passenger Side 1117869 Complete Latch Assy, Passenger’s Side _______...
Need help?
Do you have a question about the TruXport and is the answer not in the manual?
Questions and answers