Advertisement
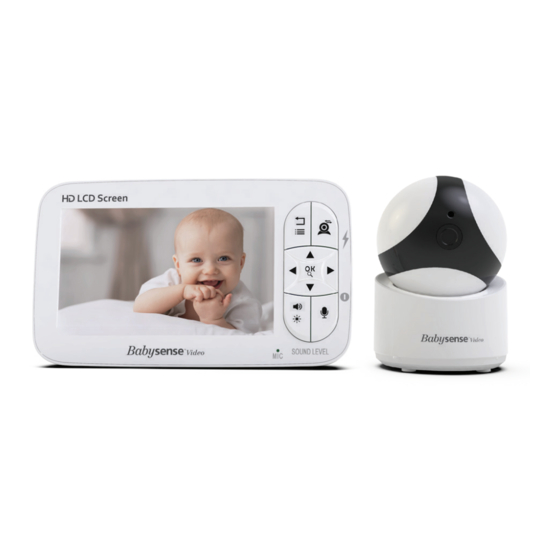
Model: V65-1 (Video Baby Monitor with one camera)
E
Model: V65-2 (Video Baby Monitor with two cameras)
Second camera is supplied only with model V65-2
Always retain your proof of purchase in case of warranty service.
For any product related ques�on please contact us at:
service@hisense.co.il
www.babysensellc.com
Advertisement
Table of Contents

Related Manuals for Hisense Babysense V65-1


Summary of Contents for Hisense Babysense V65-1
- Page 1 Model: V65-1 (Video Baby Monitor with one camera) Model: V65-2 (Video Baby Monitor with two cameras) Second camera is supplied only with model V65-2 Always retain your proof of purchase in case of warranty service. For any product related ques�on please contact us at: service@hisense.co.il www.babysensellc.com...
- Page 2 WARNING Important Safety informa�on It is very important that you read the User Guide carefully as it contains detailed informa�on you will • need to get the most from your Babysense Baby Monitor. If you have any issues se�ng up or using your Babysense Baby Monitor, please contact our Customer Support team.
- Page 3 Ba�ery safety • Ba�eries represent a hazard to health and the environment. • Ba�eries contain toxic, ecologically hazardous heavy metals. Do not dispose of ba�eries in a fire as they may explode. Dispose of ba�eries according to local regula�ons, never in your household rubbish. •...
-
Page 4: Packing List
PACKING LIST Monitor Camera x1 (x2 in Model V65-2 monitor with two cameras) Power Adapter x2 Mount Kit x1 Camera Mount x1 Micro-USB Power User Manual (x3 in Model V65-2 (x2 in Model V65-2 (x2 in Model V65-2 Cable x2 (x3 in monitor with two monitor with 2 monitor with two... - Page 5 Camera 1. Night Vision Sensor 5. Antenna 2. Camera Lens 6. Pair Bu�on 3. IR LED 7. Power Input 9. Moun�ng Bracket 4. Microphone 8. Temperature Sensor 10. Speaker...
- Page 6 Monitor Power/Sleep Bu�on: Long press to turn the monitor on/off; Short press to turn the screen on/off. Menu/Back: Press to access the menu or use as a "Back" bu�on. Camera Switch: Press to switch between cameras if 2 or more cameras are paired. Press and hold for 3 seconds to ac�vate SCAN Mode.
-
Page 7: Getting Started
15. Antenna 16. Ba�ery Compartment 17. Support Stand 18. Speaker 19. Power Input 20. Reset Hole Note: If you RESET the monitor with a pin, the monitor will be forced to shut down Do not open the ba�ery compartment without following the official instruc�ons. GETTING STARTED Step 1: Connect the camera to the supplied AC Adapter... -
Page 8: Camera Setting
CAMERA SETTING Please note that the camera and monitor come automa�cally paired. There is no need to pair the units again unless the camera loses its link with the monitor. To pair an addi�onal camera, follow the procedure below. 1. Pairing Addi�onal Cameras Step 1: 1. - Page 9 Step 4: PAIR bu�on on the back of the camera. Press and hold Once the process is completed the message "PAIRED" will appear on the screen. Repeat the above steps per addi�onal camera. Note: The monitor can pair up to a maximum of 4 cameras. 2.
- Page 10 Step 2: 2. A message "Deleted" will 1. Select DELETE appear on the screen and press the OK bu�on To Delete all paired cameras: Step1: Press to access the menu Choose and press OK bu�on Select (the icon that indicates all paired cameras) and press OK bu�on A message: “Press OK to delete all cameras”...
-
Page 11: Temperature Alarm
WAKE-UP SENSITIVITY This feature is only a sensi�vity level adjustment. To ac�vate the power saving mode (ECO mode), please ac�vate the Sleep Mode. There are four levels of sound sensi�vity: LOW- Low sensi�vity level- higher sound level is required to reac�vate the transmission. MED- Medium sensi�vity level-medium sound level is required to reac�vate the transmission. - Page 12 LANGUAGE There are eight languages to choose from, that are already uploaded onto the monitor. You can change the interface language by following the 2 simple steps below: Step1: 2. Select your language and press OK to confirm 1. Press to access the menu LULLABIES You can soothe your baby to sleep by playing 6 pre-programmed lullabies.
-
Page 13: Sleep Mode
SLEEP MODE This func�on is the power saving mode, and is designed to prolong your monitors ba�ery life by pu�ng the monitor into standby. When no sound is detected the screen turns off. Once the camera registers a sound, louder than the set sensi�vity level, it will automa�cally start transmi�ng the signal (sound and video) to the monitor and the screen will turn on. - Page 14 FEEDING This func�on is a reminder of your baby's feeding rou�ne. There are 8 op�ons to choose from, including OFF which means you have selected to switch this func�onality off Step1: 1. Press to access the menu 2. Select the �me you want. and press OK Select OFF to turn off...
- Page 15 3. Press OK to start/finish se�ng stands for finishing the se�ng stands for star�ng the se�ng Note: * Press Up/Down/Le�/Right to select func�onality and press OK bu�on to confirm. * If OSD is ON, the date and �me will be displayed on the status bar of the monitor, otherwise, it will not be displayed. Restore factory se�ngs: 2.
- Page 16 ICONS EXPLANTION 1. Status Bar Icons : No signal connec�on : Signal strength : Live video loop : Lullabies enabled : Sleep Mode enabled : Current room temperature : Ba�ery Level : Sound detec�on enabled : Temperature alarm enabled : Feeding reminder enabled 2.
- Page 17 Q1. Why did I fail to pair the camera to the monitor? • Make sure that the AC Adapter is securely inserted into the camera and wall socket • Make sure the camera and monitor are within the specified effec�ve distance Q2.
-
Page 18: Warranty Terms
We take quality very seriously. This is why all our products come with a one-year warranty from the original purchase date against defects in workmanship and materials. If you have warranty or support issues, please contact our customer service: service@hisense.co.il... -
Page 19: Customer Support
Email – service@hisense.co.il Website – www.babysensellc.com US Toll Free Number: (833) 568-2229 (USA ONLY) Please take a moment and register your Babysense monitor with us. - Page 20 EC DECLARATION OF CONFORMITY in accordance with the Radio Equipment Directive 2014/53/EU (RED) Hisense Ltd. 27 Shaked Street, Hevel Modi’in Industrial Park 731990, Israel, Declare, under our responsibility that the product: Video Baby Monitor Is in conformity with essential requirements of the Radio Equipment Directive 2014/53/EU (RED), based on the following harmonized standards:...
Need help?
Do you have a question about the Babysense V65-1 and is the answer not in the manual?
Questions and answers