Advertisement
Table of Contents
17 March, 2020, www.brodit.com, © 2020 Brodit AB
Product 521945
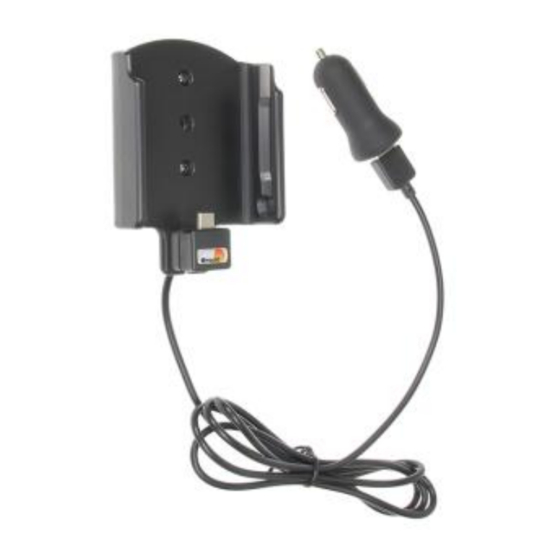
521945 Active holder with cig-plug With cig-plug adapter. With tilt swivel.
The active holder charges your Galaxy A5 (2017) when it is in the holder. You can choose to connect the cig-plug
to the car's 12 Volt socket, or to remove the cig-plug adapter and connect the USB cable to the car's (or stereo's)
USB connector.
The holder is attached onto a tilt swivel and can be adjusted in order to avoid light reflection. 12 Volt. Attach the
holder onto a ProClip Mounting Platform in your car.
Important note!
In order to be able to transmit audio files from your device through the USB-cable, this feature must be supported
by the stereo in your car. You can easily test if this works by connecting your device to the stereo with the
USB/charging cable that comes with your device. Charging through USB works regardless.
Dimensions: 70 x 95 x 47 mm (W x H x D mm)
Weight: 111 g
Cable length (+connector with plug 85 mm): 145 cm
This product supports Qualcomm QC 2.0 quick charge (provided the device supports Qualcomm QC 2.0 quick
charge).
EAN: 7320285219458
Item no 521945 fits:
Samsung Galaxy A5 (2017) (For all countries)
Advertisement
Table of Contents

Subscribe to Our Youtube Channel
Related Manuals for Brodit 521945


Summary of Contents for Brodit 521945
- Page 1 17 March, 2020, www.brodit.com, © 2020 Brodit AB Product 521945 521945 Active holder with cig-plug With cig-plug adapter. With tilt swivel. The active holder charges your Galaxy A5 (2017) when it is in the holder. You can choose to connect the cig-plug to the car's 12 Volt socket, or to remove the cig-plug adapter and connect the USB cable to the car's (or stereo's) USB connector.
- Page 2 INSTALLATION INSTRUCTIONS Please read all of the instructions and look at the pictures before attaching the holder. 1. Loosen the screw in the center of the holder so you can remove the tilt swivel attaching plate on the back. 2. Place the attaching plate onto the desired position. Screw the attaching plate into place with the enclosed screws.
Need help?
Do you have a question about the 521945 and is the answer not in the manual?
Questions and answers