Table of Contents
Advertisement
Quick Links
Advertisement
Table of Contents

Related Manuals for Climax Mobile Lite


Summary of Contents for Climax Mobile Lite
- Page 1 Mobile Lite Cellular Emergency Alarm System Installer’s Guide 12 June, 2020...
-
Page 2: Table Of Contents
S IN THE SYSTEM OVERVIEW ......................3 ....................... 3 2.1. DENTIFYING THE ARTS 2.2........................4 OWER UPPLY GETTING STARTED – SETTING UP MOBILE LITE ............5 ......................5 3.1. SIM C NSERTION 3.2......................5 HARGING OBILE ....................6 3.3. - Page 3 6.5.4. Report Sequence ....................... 45 ........................47 6.6. LEEP 6.7............. 48 SAGE ECOMMENDATION FOR ETECTION ......................... 49 6.8. OICE ROMPTS APPENDIX ..........................50 7.1. SMS R ............50 EMOTE ROGRAMMING OMMANDS ABLE ..........53 7.2. ID C ONTACT OMMUNICATIONS ROTOCOL AND ORMAT 7.3.
-
Page 4: Introduction
Mobile Lite is a light, portable and richly featured cellular medical alarm with GPS positioning, Wi-Fi positioning, GeoFencing and mobile network that protect you wherever you go. With its built -in fall sensor, Mobile Lite will raise an alarm call when a fall has been detected. - Page 5 Lanyard and Attachment Using the Lanyard Step 1. Attach the lanyard to the Mobile Lite unit by looping the lanyard strap through the lanyard holes on the Mobile Lite unit, and then pulling the strap through until it is tight.
-
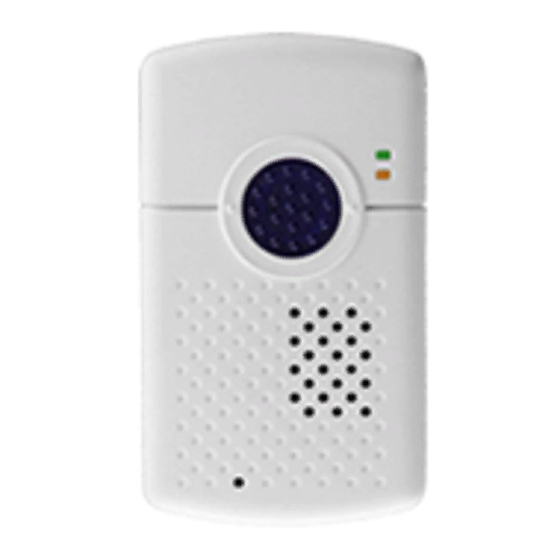
Page 6: System Overview
Mobile Lite operating normally Top LED (Red) 1 Flash every 3 seconds Mobile Lite low on battery When Mobile Lite is charging, the Red LED will not indicate the battery status. 3. Bottom LED (Amber) 1 Flash every 3 seconds Cellular Network fault 4. -
Page 7: Power Supply
To Charge Mobile Lite, please refer to 3.2. Charging Mobile Lite. When Mobile Lite is low on battery, the Top LED will flash Red every 3 seconds and Mobile Lite will make Low Battery report. If battery is not changed after making Low Battery report, Mobile Lite will ... -
Page 8: Getting Started - Setting Up Mobile Lite
SIM Card and USB Protective Cover. Step 2. Hold Mobile Lite with its front side facing you. Insert a micro SIM card into the SIM card slot with the chip side of the SIM card facing you as shown in the picture below. -
Page 9: Hardware Installation
Step 3. Insert the programming/charging end of the USB cable into the AC Adapter and plug the adapter into a power socket. 3.3. Hardware Installation To use PC Programming Tool for programming Mobile Lite, follow the hardware installation steps below: Step 1. Loosen the Protective Cover Fixing Screws using a Philips screwdriver and remove the SIM Card and USB Protective Cover. - Page 10 Cable into a computer USB port as shown in the picture below: < > < > If programming cable is not provided, please contact your supplier. DO NOT attempt to connect Mobile Lite to computer with a regular Micro-USB cable. Programming Regular Micro-USB Micro-USB Cable Cable...
-
Page 11: Software Installation
3.4. Software Installation 3.4.1. Installing USB Driver Mobile Lite can be programmed via USB port connection of a computer using the PC Programming Tool software (using the Programming Cable). If the computer cannot recognize the USB connection, please try installing the USB driver as instructed below. -
Page 12: Programming Mobile Lite
4. Programming Mobile Lite Mobile Lite can be programmed by sending SMS commands to the device or using a PC Programming Tool. 4.1. PC Programming Tool (Installers Only) For system setting programming with PC Programming Tool software via USB port, follow instruction below. - Page 13 To start configuring Mobile Lite settings, click on “Open”. A Read configuration success message will pop up, click “OK” to proceed: The current Mobile Lite setting will be displayed. Click on different tabs to see and edit Mobile Lite functions.
-
Page 14: Profile
“Read”. Default When “Default” is selected, the PC Programming Tool will display default configurations of Mobile Lite, you can use this profile to return Mobile Lite to its default setting. New Profile To create a new profile, click on “New Profile”. A pop-up window will prompt... - Page 15 Mobile Lite. Apply profile If you wish to apply all the configuration of a profile into Mobile Lite, go to each individual page and click on all the “Write” buttons to make sure all settings are programmed into Mobile Lite.
-
Page 16: Sms Program
Access Code: 1111 (default) 4.1.3. APN The APN setting must be completed for Mobile Lite to report events via cellular network. Click “APN” to set APN Name, APN User and APN Password and click “Write” to confirm. APN Name: The name of an access point for GPRS. Please ask your SIM ... -
Page 17: Report Setting
4.1.4. Report Setting The “Report” tab allows the user to configure report settings. Mobile Lite reports over 3 media: IP (Mobile Network), Speech channel, and SMS message. 5 Report Indexes are available for setting: 4 programmable settings are available per Report Index: 1. - Page 18 The message contains event information and a Google Map link for location. If the recipient’s receiver device supports map function, he/she can click on the link to locate Mobile Lite. Event Filter This parameter determines which events are reported to the selected Report Destination.
- Page 19 For example: Mobile Lite being low on battery is a “status” event. If report index 3 and 5 are set as “status” and index 4 as “all” in event filters, this status event will be reported to destinations 3, 4, and 5.
- Page 20 If all reporting in a group failed, Mobile Lite will retry reporting. Mobile Lite will try reporting within the same group for up to three times, (or until one of the reports is successful). If three times of trying within the same group failed, Mobile Lite will regard reporting to this Group unsuccessful.
- Page 21 Mobile Lite has exit GeoFence Area Carrier enters GeoFence area Mobile Lite has entered GeoFence Area When help is sent by pressing the Mobile Lite’s Button, in which according to CID event code, the user will receive SMS text format as follows:...
- Page 22 Last Know Loc. 1 Min Ago Mobile Lite Medical Help maps.google.com/maps?q=12.12312,121.123123 Last Know Loc. 1 Hour Ago <For Example>: - Mobile Lite Medical Help maps.google.com/maps?q=12.12312,121.123123: (Display Mobile Lite exact location where help is sent through GPS signal). - Mobile Lite Medical Help maps.google.com/maps?q=12.12312,121.123123 By:WiFi (Display Mobile Lite exact location where help is sent through WiFi positioning).
-
Page 23: Geo-Fence
When GeoFencing is enabled, Mobile Lite will check its location every 2 minutes. If the user leaves the GeoFence area and is detected while Mobile Lite is checking its location, it will automatically report to the report destinations. - Page 24 from the entered value. However, the actual position is affected very slightly. Radius: Enter the radius of the operational area with respect to the center of the operational area (200 to 10,000 meters). Click on “Write” to submit the settings. To identify the latitude and longitude of a particular location, follow the steps below to identify a coordinate using Google Map: Step 1: Open internet browser and access Google Map.
- Page 25 Longitude 1-4: Enter the location longitude of 1-4 vertices of the operational area (-180 to 180). Mobile Lite will connect the coordinates consecutively (from 1 > 2 > 3 > 4) and draw up a GeoFence area (see Example below). Do not cross any coordinate connections (to prevent GeoFence area error).
-
Page 27: Setting
The Guard Time will begin to count down when the Active Button on Mobile Lite is pressed. If a false alarm is triggered, it can be canceled during guard time by pressing and holding the Active Button for 5 seconds. - Page 28 This function is only used when a fall is detected, if the Active Button on Mobile Lite or the Active Button of the learnt-in Fall Sensor is pressed to activate alarm, normal guard time is used instead. Speech Report Ack: ...
- Page 29 You can select the length of the interval between auto check-in reports. When the Mobile Lite makes the auto check-in report to CMS, its location info will also be updated and sent with the report. There will be no auto check-in report if you select “Disable.”...
- Page 30 DTMF keys to change communication types (please refer to 6.5. Alarm Activation for more details). Speaker Volume Level Adjust the speaker volume of Mobile Lite from a scale of 1-5, where 1 = minimum speaker volume 5 = maximum speaker volume (default) Answering Incoming Calls: ...
- Page 31 If Wi-Fi data cannot be obtained, Mobile Lite will check GPS location instead. When Mobile Lite is activated to send alarm report, it will begin to check last position while acquiring new Location. If new location cannot be acquired by the time Guard Time ends, Mobile Lite will send report with last location.
- Page 32 0-60 minutes. When set as 0, Mobile Lite will not update or report GPS location, continuous GPS Report function is disabled For example, if Report Period is selected as “1 hour” and Report Interval set as “3 minutes”, Mobile Lite will keep checking and reporting GPS location every 3 minutes during the 1 hour-period after Geofence Alarm.
-
Page 33: Device
Depends on the supplier, a Sensor ID of the device may be labeled (usually on the back of the device). Users can use the “Add Sensor” function to include sensors into the Mobile Lite. Click on the “Add Sensor” button: ... -
Page 34: Miscellaneous
GSM signal strength. Scream Duration Select a duration and click on the Scream button. Mobile Lite will emit a series of long beeps for the duration. A location information will also be sent to the reporting destination(s). -
Page 35: Firmware
Step 4. Click on “OK” and the programming tool will read the settings of Mobile Lite again. < > < > During updating process, please DO NOT disconnect Mobile Lite from the computer nor clicking on the “Close” button of the programming tool. -
Page 36: Sms Remote Programming
Step 6. Enter the Access Code (default is 1111). Step 7. Enter a comma (,). Step 8. Enter the parameter(s). Step 9. The composition of the command is completed. You can send the command to Mobile Lite now. < > <... -
Page 37: Local Rf Device Management
5. Local RF Device Management Mobile Lite can learn up to 20 RF devices which can be used to activate Mobile Lite to make emergency report. < > < > Only Fall Sensor, Panic Button, Wrist Transmitter and Pendant Transmitter, and Pull Cord Unit can be learned into Mobile Lite. -
Page 38: Operation
Enter (9) to hang up. You can also put the handset back to the base cradle to end the call. Press Mobile Lite’s Active Button for 5 seconds to hang up or press the learnt-in RF device (WTR, Fall Sensor or PB) button once to hang up. -
Page 39: Current Operation Condition
6.2. Current Operation Condition Mobile Lite uses its LED to remind the user of its Current Operation Condition. LED indicators: Case B Behavior Indication Green LED (Top LED) Mobile Lite is being charged. 1 flash every 5 seconds Mobile Lite operating... -
Page 40: Geofencing
Mobile Lite location updates during two-way communication will be reported through last successful IP channel. If Mobile Lite is under low battery and makes a second low battery report to the CMS, the location function will be turned off. -
Page 41: Alarm Activation
6.5. Alarm Activation When an alarm is activated by pressing the Active Button of Mobile Lite or the learnt-in RF device (WTR, Fall Sensor or PB), or pulling the cord of PCU, Mobile Lite will emit a voice prompt “Emergency Call was pressed”... - Page 42 When Mobile Lite is reporting, it will emit confirmation beeps (1 beep every second). For Speech Reporting, if the call recipient picks up the call, Mobile Lite will stop beeping. It will start emitting confirmation beeps again when reporting is resumed (e.g.
-
Page 43: Alarm Report Procedure
Mobile Lite alarm and location reporting sequence is determined by Use Last Position setting. Use Last Position Disabled When Mobile Lite button is pressed and alarm is activated, it will begin to acquire new Location (through Wi-Fi and GPS positioning) and count down Guard Time. - Page 44 If Wi-Fi data cannot be obtained, Mobile Lite will check GPS location instead. When Mobile Lite button is pressed and alarm is activated, it will begin to check last position while acquiring new Location and count down Guard Time.
- Page 45 When new position is acquired, Mobile Lite makes follow up report (CID 645) immediately with Location coordinates. If new position is acquired under two-way communication following a successful IP report, Mobile Lite makes report (CID 100/101/120) via the successful IP channel with location coordinates.
-
Page 46: Callback Mode
Mobile Lite will enter callback mode only after all groups have been reported to and at least one report was successful. When a caller calls back within the period, Mobile Lite will auto answer the call after 2 beeps, and depending on the setting of “Callback Check Access Code”, Mobile Lite will check the Access Code or not before it... -
Page 47: Speech Reporting Method
Put the handset back to the base cradle to end the call. Press and hold the Active Button of Mobile Lite for 5 seconds, or press the Active Button of RF device (WTR, Fall Sensor or PB) once to end the call. -
Page 48: Report Sequence
Reporting within a Group: If there are multiple Report Indexes programmed within a Group: Mobile Lite will report according to the numeric order (e.g. 1 > 2 > 3, etc.) of the Report Index in a Group. Report will stop when one report is successful and Mobile Lite will regard reporting to this Group successful. - Page 49 If reporting to Group 3 is successful, Mobile Lite will terminate reporting. If reporting to Group 3 is unsuccessful (going through all the Report Indexes within the group for 3 times), Mobile Lite will also terminate reporting. When reporting to the first group failed (going through all the Report Indexes within the group for 3 times), Mobile Lite will start reporting to the next group.
-
Page 50: Sleep Mode
After the active button is pressed for 5 seconds to enter Sleep Mode, Mobile Lite will emit a voice prompt “Power Off” as an indication of it entering Sleep Mode, and Cellular module will be powered down in 30 seconds. -
Page 51: Usage Recommendation For Fall Detection
Fall Sensor can be effectively triggered. Please do not place the Mobile Lite in your bag, or hide it inside coat pocket, which may lead to difficult trigger or non-detection. -
Page 52: Voice Prompts
Mobile Lite will play voice prompts according to different conditions. Voice prompts can be turned on/off using SMS remote programming. Below is a quick reference chart of all the voice prompts of Mobile Lite and the conditions under which they are played. -
Page 53: Appendix
Default Make Unit SCREAM SCREAM:PROG,1111,60 Scream To set the length of Mobile Lite’s beeping period (5-60 seconds) to help the search for Mobile Lite when the device is lost This command will also request for location information. Locating via LOC:PROG,1111,1 To locate Mobile Lite user via SMS Parameter: 0 = No reply to sender’s mobile number... - Page 54 30 = 30 minutes, 60 = 60 minutes To set the BTNEV BTNEV:PROG,1111,100 CID event To set the CID event code sent when Mobile Lite’s red help button is code for the pressed. red help 100 = medical event...
- Page 55 Parameter: 0 = Off hook, 1 = Any DTMF Setting Remote FWUG FWUG:PROG,1111,59.124.230.221,53033,/img/123.bin,042d Firmware Upgrade Mobile Lite firmware by downloading firmware file from Upgrade server remotely. Parameter 1: Server IP Address (Max 44 characters) Parameter 2: Server Port Number Parameter 3: File path(max 31 characters)
-
Page 56: Contact Id Communications Protocol And Format
Parameter 3: Session ID (maximum length: 16 digits) 7.2. Contact ID Communications Protocol and Format Mobile Lite can communicate with the CMS receiver using the Contact ID protocol. The CMS can receive the event codes using SMS or IP reporting methods. - Page 57 Q = Event qualifier, which gives specific event information: 1 = New Event or Opening 3 = New Restore or Closing 6 = Previously reported condition still present (Status report) XYZ = Event code (3 Hex digits 0-9, B-F) GG = Group or Partition number (2 Hex digits 0-9, B-F). Use 00 to indicate that no specific group or partition information applies.
- Page 58 Event Codes: 100 – Mobile Lite Emergency (emergency) When the Active Button of Mobile Lite is pressed (“Help Event” set as 100). Location info will be sent with event 100. 101 – Personal Emergency (emergency) ...
-
Page 59: Sia Digital Communication Standard
602 – Auto Check-In Report (status) When Mobile Lite makes an auto check-in report to the CMS. The Mobile Lite location info will be updated and sent with the auto check-in report to CMS. 645 – Locate Position Follow Up After Alarm (emergency) ... - Page 60 1101 00 200 = CID data (QXYZ GG CCC) [X...] and [Y...] are location data. [X...] includes the longitude coordinate represented as E (for East) or W (for West) _ degrees. The degree count is always a positive value. [Y...] includes the latitude coordinate represented as N (for North) or S (for South) _ degrees.
Need help?
Do you have a question about the Mobile Lite and is the answer not in the manual?
Questions and answers