AVer M70W Instruction Manual
Hide thumbs
Also See for M70W:
- Setup manual (9 pages) ,
- Instruction manual (120 pages) ,
- Instruction manual (62 pages)
Table of Contents
Advertisement
Quick Links
Advertisement
Table of Contents

Related Manuals for AVer M70W


Summary of Contents for AVer M70W
- Page 1 M70W Instruction Manual ...
-
Page 3: Table Of Contents
Content Package Contents ....................1 Optional Accessories ....................1 Overview ......................... 2 Compound Key ....................... 2 Remote Controller ....................3 LED Indicator ......................4 Device Connection ....................5 Power Connection and Charging ..............5 USB Connection ..................... 6 HDMI Connection ................... 7 P2P connection via Wi-Fi Dongle ................ -
Page 5: Package Contents
Package Contents The items below are included with this product. If any item is missing, contact the dealer from whom you purchased this product. Power Adaptor M70W unit Remote controller USB Cable Power cord* AAA Batteries Quick Guide Wi-Fi Dongle *The power cord will vary depending on the standard power outlet of the country where it is sold. -
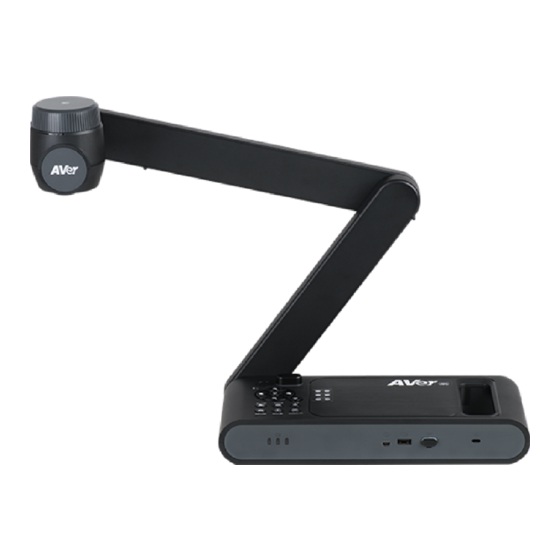
Page 6: Overview
Overview 14 15 1. Camera head 2. LED lighting 3. Arm 4. IR sensor 5. Control panel 6. Handle 7. Built-in MIC 8. Battery Indicator 9. USB mini port 10. USB port 11. Wi-Fi dongle 12. -
Page 7: Remote Controller
- Auto detects the best resolution(4K, 720P, 1080P) - 1024x768 (If HDMI device support) - 4K 60Hz (If HDMI device support) Lock the exposure to stop M70W (15) AE LOCK attempting to find optimal exposure. Turn the overhead light on/off. -
Page 8: Led Indicator
LED Indicator Name Status indicator Solid green: Power on Power No light: Power off Solid red: Standby mode* *Standby mode is supported when power plugged in. Solid green(x3): Battery is full(100% ~ 60%) Battery Solid green(x2): Battery is 60% ~ 30% Solid green(x1): Battery is 30% ~ 5% Solid red (x1): Battery is 5% ~ 0% Flashing red (x1): Battery is out of power... -
Page 9: Device Connection
Device Connection Power Connection and Charging Plug in power adapter and turn on M70W. [Note] Please full charge the camera for the first time use. When the camera is power on, the camera is in “Standby” mode. In standby mode, it can be charging with the USB connection between other devices;... -
Page 10: Usb Connection
Press Wi-Fi button to disable Wi-Fi mode. Connect M70W to laptop/PC with USB port. Connect USB pen drive to USB port to save the recording file. -
Page 11: Hdmi Connection
HDMI Connection Connect M70W to HDMI display with HDMI output port. Connect M70W to laptop/PC with HDMI input port. -
Page 12: P2P Connection Via Wi-Fi Dongle
P2P connection via Wi-Fi Dongle Plug-in the WiFi dongle to PC/laptop and Install AVerTouch application. AVerTouch Wi-Fi Dongle Laptop Open AVerTouch application, click to connect the camera. ... - Page 13 Entering the Camera Name and Passcode, click Done to continue. Click Done button to connect camera. [Note] It takes about 60 seconds to complete connection. ...
-
Page 14: Wi-Fi Connection
The software will auto detect the camera on your network. Select the camera that you want to connect with it. The camera name will be “AVer ‘model name’ - WiFi dongle Mac address”. The Mac address will be different from the device. ... - Page 15 Select the to make a connection with the camera. Select to switch to camera live screen.
-
Page 16: Miracast Connection
Miracast Connection Press to enter selection menu. [Note] Use , and button to move between the selections and press button to confirm the selection. A commercial Miracast Dongle (Wireless Adapter) is required for the display device. ... -
Page 17: Using The Camera
Using the Camera Object Position The icon on top of camera head can help user to place objects in a positive direction. The direction adjust wheel can turn 90° to change the icon in 2 positions (refer to figure). Shooting Area When camera position is 470mm high, the shooting area will be A3 size. -
Page 18: Storage The Camera
Storage the Camera Mounting the Camera on a Flat Surface [Note] M4 screw x4, depth is 5mm. 75.00... -
Page 19: Specification
Specification Sensor 1/3.2 CMOS Pixel Count 13 megapixels Frame Rate 60 fps (max.) Image mode Normal / High Frame / High Quality/ Microscope/Infinity/Marco Effect Rotate / Freeze HDMI Output 4K; 1080p 60Hz; 720p 60Hz Focusing Auto / Manual/ Area (SW) Shooting Area 480mm x345mm @ 470 mm Zooming... - Page 20 WARNING To reduce the risk of fire or electric shock, do not expose this appliance to rain or moisture. Warranty will be void if any unauthorized modifications are done to the product. Do not drop the camera or subject it to physical shock. Use the correct power supply voltage to avoid the damaging camera.
- Page 21 In no event will AVer be liable for direct, indirect, special, incidental, or consequential damages arising out of the use or inability to use this product or documentation, even if advised of the possibility of such damages.
- Page 22 More Help For FAQs, technical support, software and instruction manual download, please visit: https://www.averusa.com/education/support/ Contact Information AVer Information Inc. www.averusa.com 668 Mission Ct. Fremont, CA 94539, USA Toll-free: 1(877)528-7824 Local: 1(408)263-3828 Support.usa@aver.com...
- Page 24 P/N: 300APW30-EGF...
Need help?
Do you have a question about the M70W and is the answer not in the manual?
Questions and answers