Table of Contents
Advertisement
Advertisement
Table of Contents

Subscribe to Our Youtube Channel
Related Manuals for JVC RA-D58B


Summary of Contents for JVC RA-D58B
- Page 1 Instruction Manual Internet Bluetooth ® Radio RA-D58B...
-
Page 3: Table Of Contents
Contents Safety Warnings ........................5 Unpacking ..........................7 Product Overview ........................8 Front View ...............................8 Rear View.................................8 Connections ..........................9 Using the AUX Connection........................9 Using Earphones ............................9 Charging from the USB Charging Port ....................10 Connecting to Internet ......................11 Wired network ............................11 Wireless network ............................12 Initial Setup ........................13 Turning the Radio On for the First Time ....................13 Connecting To The Internet For The First Time ..............14... - Page 4 DAB Operation ........................28 DAB Full Scan .............................. 28 Manually Tuning In DAB Radio Stations ................... 28 Secondary Services ..........................29 Station List ..............................29 DRC Setting ..............................29 Station Order .............................. 29 Saving Preset Stations ..........................29 Recalling a Preset Station ........................30 DAB Display Modes ...........................31 FM Operation ........................32 Auto Scan ..............................
-
Page 5: Safety Warnings
Safety Warnings • Read all the instructions carefully before Ventilation using the unit and keep them for future • To prevent the risk of electric shock or reference. fire hazard due to overheating, ensure • Retain the manual. If you pass the unit that curtains and other materials do not onto a third party make sure to include this obstruct the ventilation vents. - Page 6 Supervision To prevent the • Children should be supervised to ensure that they do not play with the unit. spread of fire, keep • Never let anyone especially children push candles or other anything into the holes, slots or any other openings in the case - this could result in a open flames away fatal electric shock.
-
Page 7: Unpacking
Thank you for purchasing your new product. We recommend that you spend some time reading this instruction manual in order that you fully understand all the operational features it offers. You will also find some hints and tips to help you resolve any issues. Read all the safety instructions carefully before use and keep this instruction manual for future reference. -
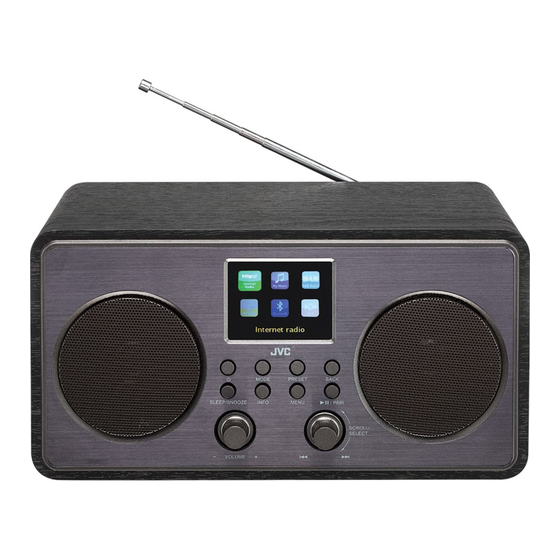
Page 8: Product Overview
Product Overview Front View MODE PRESET BACK SLEEP/SNOOZE INFO MENU / PAIR SCROLL/ SELECT VOLUME 5 6 7 8 9 10 11 12 1. Display 7. INFO Button 2. Speaker 8. MENU Button Standby Button 9. PRESET Button 4. SLEEP/SNOOZE Button SCROLL/SELECT Dial 5. -
Page 9: Connections
Connections Using the AUX Connection Connect the AUX IN socket at the rear of the unit to the line output sockets on the auxiliary equipment using a 3.5 mm to 3.5 mm stereo audio cable (not included), as illustrated. Rear of the Unit Auxiliary Equipment NETWORK... -
Page 10: Charging From The Usb Charging Port
Charging from the USB Charging Port The USB 5V 1A socket is designed only for charging mobile devices (e.g. MP3 player, mobile phone, etc.). It supplies 5V DC at a charging current of up to 1000 mA (1 A). Use a USB cable (not included) to connect mobile device to the USB 5V 1A socket of the unit and the mobile device will start charging. -
Page 11: Connecting To Internet
Connecting to Internet This radio can be connected to a local area network (LAN) via the network port at the rear of the unit. Wired network Connect the NETWORK socket on the unit to the corresponding port on your Router using a commercially available LAN or Ethernet cable (CAT5 or better with RJ45 connector). -
Page 12: Wireless Network
Wireless network In the example configuration for a wireless connection below, the unit would be able to access content from your computer connected to the same wireless network. The network configuration and connection method may vary depending on the equipment in use and the network environment. -
Page 13: Initial Setup
Initial Setup Turning the Radio On for the First Time Connecting to the Mains Supply • Connecting the unit to any other power source may damage the unit. Unwind the mains adapter cable to its full length. Connect the end of the unit and then connect the mains adapter to the mains socket. -
Page 14: Connecting To The Internet For The First Time
Connecting To The Internet For The First Time 1. When your radio is connected to power the splash screen (welcome message and then the unset time clock) will appear. 2. Press the Standby button to switch on the unit, and the display will show the “Privacy policy”... -
Page 15: Connecting Using The Wps Button On Your Router
The Daylight saving screen will now appear, here you can Daylight saving choose if the set daylight saving ON or OFF. SCROLL/SELECT dial to select ON or OFF. 8. Turn the Daylight savings SCROLL/SELECT dial to confirm. Then press the OFF* 9. -
Page 16: Connecting Using Your Wireless Network Password
10. Press the WPS button on your router. Check your routers WPS setup instruction manual if you are unsure which button is the Push WPS button WPS button. at the other end Press SELECT to continue Best connection speed as close as possible Press the WPS Maximum distance 5 m... -
Page 17: Basic Operating
Basic Operation Switching ON/OFF button on the unit to switch the unit between the On and Standby mode. Press Remove the mains plug from the mains socket if you want to switch the unit off completely. Selecting Modes Press MODE button on the unit, and then turn the SCROLL/SELECT dial to switch between Internet radio, Music player, DAB radio, FM radio, Bluetooth Audio and AUX in mode. -
Page 18: System Settings
System Settings Equaliser The unit support a variety of equalizers and sound effects. 1. Press MENU button, and then turn the SCROLL/SELECT dial to select System settings. Press the SCROLL/SELECT dial to confirm. 2. Turn the SCROLL/SELECT dial to select Equaliser. Press the SCROLL/ SELECT to confirm. -
Page 19: Setting The Time And Date
Setting the Time and Date 1. Press MENU button, and then turn the SCROLL/SELECT dial to select System settings. Press the SCROLL/SELECT dial to confirm. SCROLL/SELECT dial to select Time/Date. Press the SCROLL/ 2. Turn the SELECT dial to confirm. SCROLL/SELECT dial to select options, and then press the 3. -
Page 20: Factory
3. Turn the dial to confirm. 4. The display will show the “JVC” logo, and then the unit will switch into Standby mode after factory reset is done. After the system reset, all the tuned stations, preset stations will be erased. -
Page 21: Info
Info 1. Press MENU button, and then turn the SCROLL/SELECT dial to select System settings. Press the SCROLL/SELECT to confirm. SCROLL/SELECT dial to select Info. Press the SCROLL/ 2. Turn the SELECT dial to confirm. 3. The Software version, Radio ID and Friendly name will show on the display. Privacy policy Privacy policy To see the Privacy policy page, press MENU to go to System... -
Page 22: Alarms
Alarms Ensure the time and date is set before you can activate the alarm function. Setting the Alarm Your radio has two alarms (Alarm 1 and Alarm 2). 1. Press MENU button, and then turn the SCROLL/SELECT dial to select Main menu. -
Page 23: Internet Radio Operation
Internet Radio Operation To listen to internet radio your radio must be connected to the internet. Try to position your radio as close as possible to your router to get the best connection speeds. Finding Local Radio Stations 1. Press MODE button, and then turn the SCROLL/ Internet radio SELECT dial to select Internet Radio. -
Page 24: Finding Radio Stations From Around The World
Finding Radio Stations From Around the World You can search for radio station from a particular country in the Internet radio world. All you need to do is select the area in the world (e.g. Last listened Europe) then select the country (e.g. Portugal). You will then be Station list >... -
Page 25: Searching For A Radio Station By Name
Searching for a Radio Station by Name If you know the name of the radio station you can type the station name into the search and find it that way. For example if you want to listen to BBC RADIO 1 simply just type in the station name. -
Page 26: Saving Preset Stations
Saving Preset Stations You can store up to 10 of your favourite stations to the memory. Save to Preset This will enable you to access your favourite stations quickly and 1. [Not set] 2. [Not set] easily. 3. [Not set] To store a preset, you must first be listening to the station that 4. -
Page 27: Finding Podcasts
Finding Podcasts You can search for podcasts from a particular country in the world, by genre or you can search for a particular podcast it you know its title. Internet radio 1. In Internet radio mode, turn the SCROLL/SELECT Last listened dial to select Station list. -
Page 28: Dab Operation
DAB Operation The first time you use DAB make sure the aerial is fully extended before selecting DAB mode, because your radio will automatically scan for DAB radio stations. If the aerial is not fully extended your radio will not tune in properly. During the scan the display will show Scanning …... -
Page 29: Secondary Services
Secondary Services You may see a symbol after the name of the station, this indicates that there are secondary services available to that station. These secondary services contain extra services that are related to the primary station. e.g. a sports station may want to add extra commentaries. -
Page 30: Recalling A Preset Station
Recalling a Preset Station Once you have saved a station, you can recall a preset station by Recall from Preset 1. Rock Radio 1 pressing the preset button. 2. BBC Radio 2 1. Press the PRESET button on the unit to display the Recall 3. -
Page 31: Dab Display Modes
DAB Display Modes Every time you press INFO on the unit, the display will cycle through the following display modes. DLS (Dynamic Label Segment) Dynamic label segment is a scrolling message that the broadcaster may include with their transmissions. The message usually includes information, such as program details etc. -
Page 32: Fm Operation
FM Operation Press the MODE button, and then turn the SCROLL/SELECT dial to select FM mode. Press the SCROLL/SELECT dial to confirm. -Or- Press MENU button and then turn the SCROLL/SELECT dial to select Main menu, SCROLL/SELECT dial to confirm. Turn the SCROLL/ and then press the SELECT dial to select FM, and then press the... -
Page 33: Audio Setting
Audio Setting If you find that the station you are listening is not clear, you can select to listen to it in Mono this can often clear up some of the Scan setting static. Audio setting System settings 1. Press MENU to display the FM menu. Main menu SCROLL/SELECT dial to select Audio 2. -
Page 34: Fm Display Modes
FM Display Modes Every time you press INFO on the unit, the display will cycle through the following display modes, if available. Radio Text The broadcaster can include a message that displays information about the current programme. Radio Text Programme Type This describes the “Style”... -
Page 35: Bluetooth® Operation
Bluetooth logo will start to flash in the display. This shows that the radio is in pairing mode. 2. Activate your Bluetooth® device and select the search mode. “RA-D58B” will appear on your Bluetooth® device list. 3. Select “RA-D58B” and enter “0000” for the password if necessary. Once selected the Bluetooth logo on the screen will stop flashing. -
Page 36: Music Player Operation
Music Player Operation The built-in Music player allows you to play unprotected audio files stored on a networked computer. To play music from the computer, you must setup a shared file or media library on the computer. Press the MODE button, and then turn the SCROLL/SELECT dial to select Music Player mode. -
Page 37: Clearing My Playlist
Clearing My Playlist 1. Press MENU, and then turn the Clear My playlist Music player SCROLL/SELECT dial to USB playback select Clear My playlist. Press My playlist > Remove all from my playlist? SCROLL/SELECT Repeat play: O > dial to confirm. Shu e play: O Clear My playlist SCROLL/... -
Page 38: Usb Operation
USB Operation USB playback When a USB device is connected to the unit, the display shows “USB disk attached – Open folder?”, turn the SCROLL/ USB disk attached - Open folder SELECT dial to select YES. Press the SCROLL/SELECT dial to confirm. In Music player mode, turn the SCROLL/SELECT •... -
Page 39: Hints And Tips
Hints and Tips If a problem does occur, it may often be due to something very minor. The following table contains various tips. If you require additional assistance For UK, please call our UK Call Centre on 0344 561 1234. •... - Page 40 Bluetooth Problem Solution I cannot find “RA-D58B” • Ensure the Bluetooth function is activated on your on my Bluetooth device. Bluetooth device. • Re-pair the unit with your Bluetooth device. Can’t hear the music • You may need to increase the volume on the radio and Bluetooth device.
-
Page 41: Product Fiche And Specifications
Product Fiche and Specifications Brand Model RA-D58B Mains Adapter Mains Adapter Model DYS612-060200W-3 Mains Adapter Manufacturer Dongguan Dongsong Electronic Co., Ltd. System Section Power Supply 100 - 240 V ~ 50/60 Hz, 0.4 A Power Consumption 12 W Speaker Output Power 2 ×... -
Page 42: Useful Information And Licences
Useful Information and Licences For general information about appliances, and handy hints and tips check out Kit Guides at teamknowhow.com or call UK: 0344 561 1234 Ireland: 1890 818 575 Visit Partmaster.co.uk today for the easiest way to buy electrical spares and accessories. - Page 44 3rd Floor Office Suite Omni Park SC, Santry, Dublin 9, Republic of Ireland The product is distributed and warranted exclusive by DSG Retail Ltd. “JVC” is the trademark of JVC KENWOOD Corporation, used by DSG Retail Ltd. under license. (IB-RA-D58B-190703V2)
Need help?
Do you have a question about the RA-D58B and is the answer not in the manual?
Questions and answers