Table of Contents
Advertisement
Advertisement
Table of Contents

Related Manuals for JVC RA-D77M


Summary of Contents for JVC RA-D77M
- Page 1 Instruction Manual Wooden Wireless DAB Radio RA-D77M...
-
Page 3: Table Of Contents
Contents Safety Warnings ........................5 Unpacking ..........................7 Product Overview ........................8 Front View ...............................8 Rear View.................................8 Top View ................................9 Connections ........................10 Using the AUX Connection........................10 Using Earphones ............................10 Turning the Radio On for the First ..................11 Basic Operating ........................12 Switching ON/OFF .............................12 Selecting Modes ............................12 Adjusting the Volume ..........................12 Automatically Setting the Clock ......................12... - Page 4 Hints and Tips ........................27 Product Fiche and Specifications ..................28 Useful Information and Licences ..................29...
-
Page 5: Safety Warnings
Safety Warnings • Read all the instructions carefully before Ventilation using the unit and keep them for future • To prevent the risk of electric shock or reference. fire hazard due to overheating, ensure • Retain the manual. If you pass the unit that curtains and other materials do not onto a third party make sure to include this obstruct the ventilation vents. - Page 6 Supervision To prevent the • Children should be supervised to ensure that they do not play with the unit. spread of fire, keep • Never let anyone especially children push candles or other anything into the holes, slots or any other openings in the case - this could result in a open flames away fatal electric shock.
-
Page 7: Unpacking
Thank you for purchasing your new product. We recommend that you spend some time reading this instruction manual in order that you fully understand all the operational features it offers. You will also find some hints and tips to help you resolve any issues. Read all the safety instructions carefully before use and keep this instruction manual for future reference. -
Page 8: Product Overview
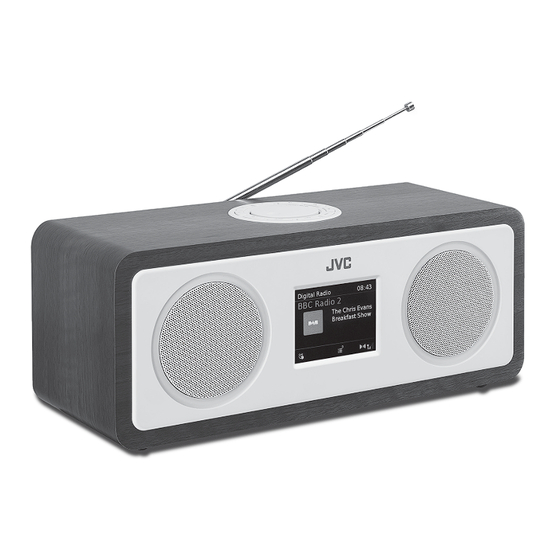
Product Overview Front View 1. Speaker 2. TFT Display Rear View UPDATE PORT 2 3 4 1. DAB / FM Aerial Socket 3. AUX IN Socket 4. DC IN 12V Socket 5. UPDATE PORT Socket... -
Page 9: Top View
Top View 3 4 5 STANDBY Button 6. Preset 1/2/3 Button Switch the unit ON or into • Press and hold to directly save STANDBY mode. preset station 1, 2 or 3. • Press to directly recall preset 2. MODE Button station 1, 2 or 3. -
Page 10: Connections
Connections Using the AUX Connection Connect the AUX IN socket at the rear of the unit to the line output sockets on the auxiliary equipment using a 3.5 mm to 3.5 mm stereo audio cable (not included), as illustrated. Rear of the Unit Auxiliary Equipment UPDATE PORT... -
Page 11: Turning The Radio On For The First
Turning the Radio On for the First Time 1. Fully extend the aerial before plugging the unit into the mains. 2. Connecting the unit to any other power source may damage the unit. Unwind the mains adapter cable to its full length. Connect the end of the cable to the DC IN 12V Socket at the rear of the unit and then connect the mains adapter to the mains socket. -
Page 12: Basic Operating
Basic Operation Switching ON/OFF STANDBY on the unit to switch the unit between the ON and STANDBY modes. Press Remove the mains plug from the mains socket if you want to switch the unit off completely. Selecting Modes Press MODE button on the unit repeatedly to switch between DAB radio, FM radio, Bluetooth and Auxiliary Input mode. -
Page 13: System Settings
System Settings Setting a Sleep Timer You can set a sleep timer so if you are listening to your radio and fall asleep, it will automatically switch off at the preset time. The sleep timer can be activated for up to a maximum of 90 minutes. -
Page 14: Equaliser
5. Press MENU button to exit alarm setting. icon will show on the display. 6. To temporarily switch off alarm, press VOLUME/SELECT dial to activate Snooze function when alarm sounds. Press VOLUME/SELECT dial repeatedly to set snooze period time of 5, 10, 15 or 30 minutes in turn. The set snooze time will show on the display and unit will go to standby. -
Page 15: Setting The Time And Date
Setting the Time and Date 1. Press MENU button, and then turn the VOLUME/SELECT dial or press button to select System settings. Press the VOLUME/SELECT dial to confirm. 2. Turn the VOLUME/SELECT dial or press button to select Time/Date. Press the VOLUME/SELECT dial to confirm. -
Page 16: Factory Reset
Factory Reset If you want to delete all your stations and settings, you can return your radio back to the default setting by running a Factory Reset. 1. Press MENU button, and then turn the VOLUME/SELECT dial or press button to select System settings. -
Page 17: Dab Operation
DAB Operation The first time you use DAB make sure the aerial is fully extended before selecting DAB mode, because your radio will automatically scan for DAB radio stations. If the aerial is not fully extended your radio will not tune in properly. -
Page 18: Dab Full Scan
DAB Full Scan The Full Scan will search for the entire DAB Band III channels. After the scan has finished, the first alphanumerically found station will be automatically selected. Full scan will not replace the DAB stations in memory. If you want to remove all the previous scanned stations, Factory Reset is required. -
Page 19: Drc Setting
DRC Setting You can set the DRC (Dynamic Range Compression) to High, Low or Off. This will reduce the volume of loud sounds and increase the volume of quiet sounds. 1. In the menu select DRC. 2. Turn the VOLUME/SELECT dial to select HIGH / LOW / OFF, and then press VOLUME/ SELECT to confirm. -
Page 20: Dab Display Modes
DAB Display Modes Every time you press INFO on the unit, the display will cycle through the following display modes. The information is displayed on the lower segment of the display. DLS (Dynamic Label Segment) Dynamic label segment is a scrolling message that the broadcaster may include with their transmissions. -
Page 21: Fm Operation
FM Operation Press MODE button repeatedly to select FM mode. -Or- Press MODE button and then turn the VOLUME/SELECT dial to select the FM mode. Press VOLUME/SELECT dial to confirm. Auto Scan While listening to an FM station, press and hold button to perform auto scan. -
Page 22: Audio Setting
Audio Setting If you find that the station you are listening is not clear, you can select to listen to it in MONO this can often clear up some of the static. 1. In FM mode, press MENU to display the FM menu. Audio Setting 10:45 2. -
Page 23: Saving Preset Stations
Saving Preset Stations You can store up to 10 of your favourite stations to the memory. This will enable you to access your favourite stations quickly and easily. Presets 1 -3 To store a preset, you must first be listening to the station 10:45 that you would like to save. -
Page 24: Fm Display Modes
FM Display Modes Every time you press INFO on the unit, the display will cycle through the following display modes. The information is displayed on the lower segment of the display. Radio Text The broadcaster can include a message that displays Radio Text information about the current programme. -
Page 25: Bluetooth® Operation
1. Select Bluetooth mode. 2. Activate Bluetooth on your device i.e. mobile phone and look for your radios mode number in the Bluetooth list (RA-D77M). Once the Bluetooth device is connected with the unit, the display will show Bluetooth Connected. -
Page 26: Aux In Operation
AUX IN Operation 1. Before connecting to the mains socket, use the 3.5mm audio stereo cable (not included) to connect to your external audio device through the AUX IN socket at the rear of the unit. • When connecting the external audio device, refer to the owner’s manual of the external device, as well as this manual. - Page 27 Problem Solution I cannot find • Ensure that the unit is switched on. “RA-D77M” on my • Ensure that the Bluetooth® function is activated on your Bluetooth® device. Bluetooth® device. • The unit has a Bluetooth® function that can receive a signal within 10 metres.
- Page 28 Product Fiche and Specifications Brand Model RA-D77M Mains Adapter Mains Adapter Model GPE024W-120200-3 Mains Adapter Manufacturer Golden Profit Electronics Ltd System Section Power Supply 100 - 240 V ~ 50/60 Hz Power Consumption 24 W Speaker Output Power 5 W RMS × 2 Working Environment - Temperature 0 ~ 35 °C...
- Page 29 Useful Information and Licences For general information about this appliance and handy hints and tips, please visit www.knowhow.com/knowledgebank or call UK: 0344 561 1234 Ireland: 1890 818 575. Visit Partmaster.co.uk today for the easiest way to buy electrical spares and accessories. With over 1 million spares and accessories available we can deliver direct to your door the very next day.
- Page 32 For Help and Support Call UK: 0344 561 1234 Ireland: 1890 818 575 The product is distributed and warranted exclusive by DSG Retail Ltd. “JVC” is the trademark of JVC KENWOOD Corporation, used by DSG Retail Ltd. under license. (IB-RA-D77M-170608V2)
Need help?
Do you have a question about the RA-D77M and is the answer not in the manual?
Questions and answers
White screen on the JVC DAB RA-D77m