
Related Manuals for IAC INDUSTRIES Workmaster Storage Cabinet Series


Summary of Contents for IAC INDUSTRIES Workmaster Storage Cabinet Series
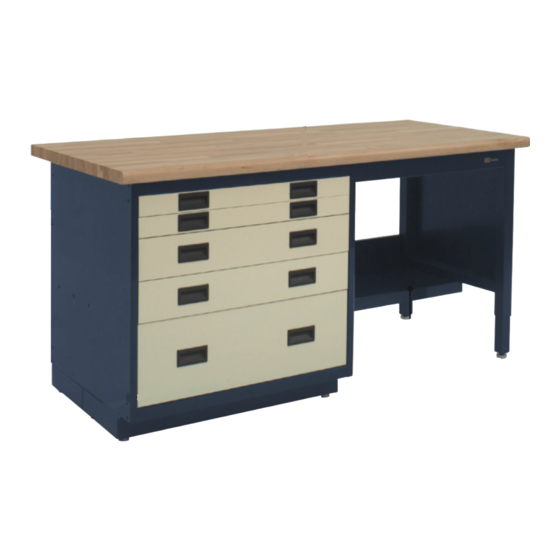
- Page 1 INDUSTRIES Workmaster Storage Cabinet Series IAC INDUSTRIES 3831 S BULLARD AVE., GOODYEAR, AZ 85338 Phone (714) 990-8997 Fax (714) 990-0557 www.iacindustries.com WSC SERIES Assembly Instructions REV. (042318P65)
-
Page 2: Table Of Contents
ESD Grounding ATTENTION NOTES: IAC Industries takes great care in the packing of it’s products, however damage can occur during shipment. Check all packages and parts for any signs of damage. If damage is evident STOP and contact the carrier that delivered your order. -
Page 3: Wsc Worksurface Cabinet/Storage Mounting
WSC Worksurface Cabinet/Storage Mounting: Item Description WSC Cabinet WSC Cabinet Base WSC Cabinet Shelf (optional) HARDWARE KIT #HWR144 Screw, #14AB X .625 PPH SMS Black 10 Screw, #14AB X 1.00 PPH SMS Black 1/4 Flat Washer Floor Glide 5/16-18 Cap Plug .500 Dia Black Step 1: Attach the cabinet base item 2 of each WSC cabinet item 1 by first turning the WSC cabinet upside down and aligning the holes on the WSC cabinet with the holes on the base as shown. - Page 4 When installing more than one WSC cabinet it is recommended that the WSC cabinets not be installed in the upside down position with the worksurface face down due to the weight of more than one WSC cabinet. Note: If a WSC Leg Assembly was purchase see pages 7 and 8 before installing WSC cabinets.
-
Page 5: Wsc Worksurface Support Beam Assembly
WSC Worksurface Support Beam Assembly: 1055111 (1-cab) 1055112 (2-cab) Item Description Support Beam Front Support Beam Rear HARDWARE KIT #HWR148 (1 Cabinet 96”) Beam Connector Plate Hex Head Bolt 5/16-18 1/4 Flat Washer Screw, #14 X 1.00 PPH SMS Black HARDWARE KIT #HWR159 (2 Cabinet 96”) 1/4 Flat Washer Screw, #14 X 1.00 PPH SMS Black... - Page 6 Step 1: (Both HWR Kits) Align the WSC cabinet(s) with the pilot holes on the worksurface and install it using #14AB X 1.00 screws items B and 1/4 flat washers items C from Hardware Kit HWR 144 leaving them loose. Step 2: (Both HWR Kits) Align and install the support beams to the WSC Cabinet(s) using #14AB X 1.00 screws items D...
-
Page 7: Wsc Leg Assembly
WSC Leg Assembly: 1055101 Item Description Adj. Pedestal Weldment Leg Extender HARDWARE KIT #HWR145 1/4-20x.75 Hex Head Bolt 5/16-18x.75 Hex Head Bolt Screw, #14 X 1.00 PPH SMS Black 1/4 Flat Washer Beam Connector Plate Floor Glide 5/16-18 Adj. Pedestal Gusset Rt Adj. - Page 8 Step 4: Turn the pedestal assembly over and slide the leg extenders item 2 into the pedestal tube making sure the plastic insert in the end of the leg extender is exposed. Align the threads of the leg extender with the holes in the pedestal tube and select the desired height of the bench. Thread the 1/4-20 x .75 hex head bolts item A with the 1/4 flat washers item D into the threaded holes in the leg extender and tighten.
-
Page 9: Wsc Lower Metal Shelf Cabinet To Pedestal Assembly
WSC Lower Metal Shelf Cabinet to Pedestal Assembly: Item Description Lower Metal Shelf 1 Suspended Cab HARDWARE KIT HWR146 Bracket, Cab Footrest LMS Screw, #14AB x .625 PPH SMS Black 1/4 Flat Washer Bolt 1/4-20 x 1.00 Hex Head Black Nut, Unistrut 1/4-20 Nut, 1/4-20 Hex Keps Black Weld Stud 1/4-20 X .75 Right Angle... - Page 10 Step 3: Place the lower metal shelf between the pedestal leg assembly and the cabinet and rest one end on the pedestal cross channel. Lower the opposite end of the lower metal shelf so that the slots at that end can be aligned with the hardware installed in the cabinet footrest LMS bracket. Lift the lower metal shelf into place and adjust the hardware into the slots and hand tighten so that the shelf will hang on the hardware.
-
Page 11: Wsc Lower Metal Shelf Cabinet To Cabinet Assembly
WSC Lower Metal Shelf Cabinet to Cabinet Assembly: Item Description Lower Metal Shelf 2 Cabinets HARDWARE KIT HWR147 Bracket, Cab Footrest LMS Screw, #14AB X .625 PPH SMS Black 4 1/4 Flat Washer Nut, 1/4-20 Hex Keps Black Stud Weld 1/4-20 X .75 Right Angle Step 1: Install the weld studs item E, 1/4 flat washers item C, and 1/4-20 hex keps nuts item D into the cabinet footrest LMS brackets as shown below on the right. -
Page 12: Wsc Shelf
WSC Cabinet Bottom Shelf WSC Cabinet Shelf HARDWARE KIT HWR121 Step 1: Install the cabinet shelf by using four K-V bracket clips and pressing and attaching them to the side cabinet walls slots as shown below. Make sure all four of the K-V bracket clips are at the same height. -
Page 13: Esd Grounding
ESD Grounding HWR014 ESD Hardware Kit Note: do not use power tools for installation of ground cords. Step 1: For ESD worksurfaces to dissipate static electricity they require the connection of a ground cord to an earth ground. IAC install grounding studs on each rear corner of all ESD worksurfaces. Thread the 1/4-20 coupler nut onto one of these ground studs and tighten it being careful not to over tighten.
Need help?
Do you have a question about the Workmaster Storage Cabinet Series and is the answer not in the manual?
Questions and answers