
Related Manuals for IAC INDUSTRIES 950 HAND CRANK ADJ. HI


Summary of Contents for IAC INDUSTRIES 950 HAND CRANK ADJ. HI
- Page 1 INDUSTRIES 950 Hand Crank Adjustable Bench IAC INDUSTRIES 3831 S BULLARD AVE., GOODYEAR, AZ 85338 Phone (714) 990-8997 Fax (714) 990-0557 www.iacindustries.com 950 HAND CRANK ADJ. HI Assembly Instructions REV. (042318P65)
-
Page 2: Attention Notes
If you believe there are parts missing from your order please contact IAC Industries customer service at 800-989-1422. WARNING: ALL PARTICLE BOARD USED IN IAC INDUSTRIES PRODUCTS ARE SOURCED ONLY FROM VENDORS THAT ARE CARB ATCM PHASE 2 AND TSCA TITLE VI COMPLIANT WITH VALID CERTIFICATES Drilling, Sawing, Sanding or Machining Wood products can expose you to wood dust, a substance known to the state of California to cause cancer. - Page 3 Step 1: With Accessories installed, crank the hand crank clockwise and between mid-point to highest point check to see if the top moves back and forth when the work surface is pushed (there will be some play, but it should be minimum) Step 2: If top is stable, your top will not need any adjustments made.
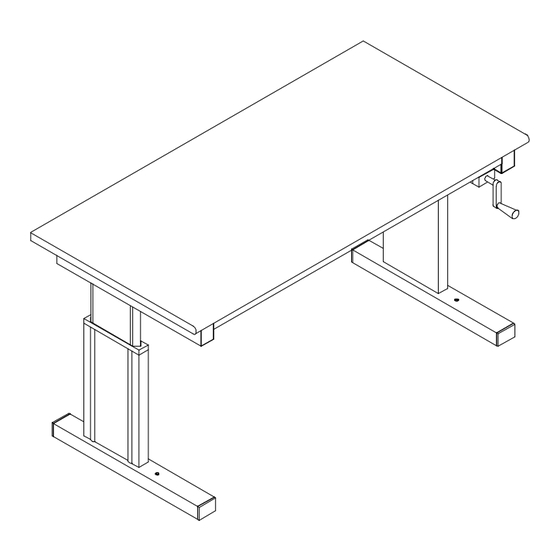
- Page 4 950 Bench Assembly Drawing (Figure 1)
-
Page 5: Item Description
Parts List: 950 Hand Crank Adjustable Bench (Ref. Figure 1) Item Description Qty. Item Description Qty. Worksurface Screw, 10-32x 3.00L PPH 950 Leg Sub-Assy-Rt. & Lt. Screw, 10-32x 1.00L PPH Front Support Beam 1.5H Well Nut 10-32 Neoprene Std. Support Beam 3” Flat washer # 10 ZINC 950 Modesty Panel Screw #6x1/2 PPH/SMS... - Page 6 While the bench is upside-down raise the leg assemblies to their highest point by turning the hand crank clockwise. Secure hand crank pump hydraulic lines to underside of worksurface using cable mounts (items L), cable ties (items M) and #6x1/2 Phillips Screws (items K) being sure not to kink or damage the lines in anyway.
-
Page 7: Grounding Cautions
ESD GROUNDING: HWR-014 ESD Hardware Kit ESD refers to the OPTIONAL static dissipative laminate used on the bench. The laminate has a conductive under layer that comes in contact with the factory installed grounding bolts in the worksurface. The ESD grounding kit, including the 10 ft. grounding wire must be attached and the bench must be properly grounded to your facility earth ground. - Page 8 Grounding Cautions (Continued) ………….. 5.) DON’T use power tools to install the nuts for the grounding kit. HAND TIGHTEN ONLY. If you attempt to 'spin' the ground bolt, the serrated teeth under the head of the bolt might strip the thin conductive layer.
Need help?
Do you have a question about the 950 HAND CRANK ADJ. HI and is the answer not in the manual?
Questions and answers