Table of Contents
Advertisement
Quick Links
Advertisement
Table of Contents

Summary of Contents for NXP Semiconductors i.MX 6SLL
- Page 1 Quick Start Guide i.MX 6SLL Evaluation Kit...
- Page 2 Quick Start Guide ABOUT THE i.MX 6SLL EVALUATION KIT The following features are available with the EVK based on i.MX 6SLL applications processor: i.MX 6SLL applications processor with a EPDC expansion port (unpopulated) 1 GHz ARM Cortex -A9 core ®...
-
Page 3: Getting Started
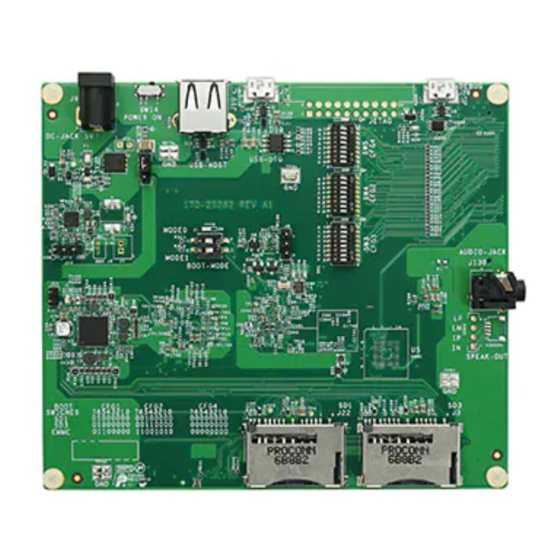
GETTING STARTED The i.MX 6SLL EVK includes the following items: Board: MCIMX6SLL-EVK Cables: USB AM TO MICRO USB 5P 1.0M Power supply: 100/240 V input, 5 V, 4 A output Documentation: Quick Start Guide (this document) - Page 4 Quick Start Guide GET TO KNOW THE i.MX 6SLL EVK Power Booth Device Debug Switch Host Switches 5V Power Jack Boot Mode Switch Audio Jack SPK Out PMIC EMMC Figure 1: Front side of i.MX 6SLL EVK (top)
- Page 5 6SLL applications processor JTAG LPDDR3 ON/OFF RESET Bluetooth Figure 2: Back side of i.MX 6SLL EVK (bottom)
-
Page 6: Setting Up The Board
Quick Start Guide SETTING UP THE BOARD Note: The PC needs a driver to enable Insert SD a virtual COM port through the PC USB Card port. Insert the supplied SD card into the SD1 Visit ftdichip.com/drivers/vcp.htm to card slot. download the correct driver. - Page 7 www.nxp.com BOOT PROCESS FOR LINUX IMAGE Boot Process Change S1 to enter internal boot When the boot process is complete, mode (BOOT_MODE [1:0] = 10), and the Linux operating system (Yocto then switch SW3, SW4, SW5 to boot Project) will be displayed on the LCD from the SD1 card, as shown in Table1 screen.
- Page 8 Quick Start Guide BOOT OPTIONS AND SWITCH CONFIGURATION Table 1 shows the switch configuration of boot mode for i.MX 6SLL EVK. Internal boot is chosen as default. Table 2 shows the switch configuration of boot device for i.MX 6SLL EVK.
- Page 9 www.nxp.com JUMPER, PUSH BUTTONS AND SWITCHES CONFIGURATION Reference Shunt Installation Function Use cable to pins 1 and 2 to connect an external 1–2 charger 2–3 Shunt 2–3 to experiment with USB charging OpenD No charger 1–2 5 V rail supplied by PMIC (600 mA limited) 2–3 5 V rail supplied from wall adapter 1–2...
-
Page 10: Tips And Precautions
Quick Start Guide TIPS AND PRECAUTIONS The i.MX 6SLL includes an overvoltage protection circuit that will disconnect the power supply from the system by opening transistor Q1 in case the supply voltage exceeds 5.5 V. The user must take into account this is the maximum voltage that can be plugged into J6. - Page 11 www.nxp.com...
-
Page 12: Warranty
SUPPORT Get Started Visit the i.MX community at Download installation www.imxcommunity.org. software and documentation WARRANTY under “Getting Started” at www.nxp.com/iMX6SLLEVK. Visit www.nxp.com/warranty for complete warranty information. www.nxp.com/iMX6SLLEVK NXP and the NXP logo are trademarks of NXP B.V. All other product or service names are the property of their respective owners.


Need help?
Do you have a question about the i.MX 6SLL and is the answer not in the manual?
Questions and answers