Table of Contents
Advertisement
Quick Links
Foreword
This manual was written to assist engine technicians and service personnel with the repair and maintenance
procedures for Briggs & Stratton® engines. It assumes that persons using this manual have been properly
trained in and are familiar with the servicing procedures for these products, including the proper use of
required tools and safety equipment and the application of appropriate safety practices. Persons untrained
or unfamiliar with these procedures or products should not attempt to perform such work.
Proper maintenance and repair is important to safe, reliable operation of all engines and engine-driven
systems. The troubleshooting, testing, maintenance, and repair procedures described in this manual are
appropriate for the Briggs & Stratton engines described herein. Alternative methods or procedures may pose
risk to personal safety and the safety and/or reliability of the engine and are not endorsed or recommended
by Briggs & Stratton.
All information, illustrations, and specifications contained in this manual were based on the data available
at the time of publication. Briggs & Stratton Corporation reserves the right to change, alter, or otherwise
improve the product or the product manuals at any time without prior notice.
Briggs & Stratton offers two complementary publications to enhance understanding of engine technology,
maintenance, and repair. (Neither publication, however, is a substitution for a recognized training program
for engine technicians.)
• For consumers, Small Engine and Equipment Maintenance Guide (p/n CE8155) provides a comprehensive
overview of how small air-cooled engines work, basic troubleshooting, and step-by-step maintenance
procedures.
• For engine technicians and consumers alike, an in-depth study of engine theory and operation can be
found in the textbook Small Engines (p/n CE8020).
Both publications can be purchased at BRIGGSandSTRATTON.COM or through a local Briggs & Stratton
Authorized Service Dealer.
Copyright © 2015 Briggs & Stratton Corporation.
All rights reserved.
No part of this manual may be reproduced or transmitted in any form or by any means, electronic or
mechanical, including photocopying or recording by any information storage and retrieval system, without
prior written permission from Briggs & Stratton Corporation.
Advertisement
Chapters
Table of Contents

Related Manuals for Briggs & Stratton 083100


Summary of Contents for Briggs & Stratton 083100
- Page 1 Foreword This manual was written to assist engine technicians and service personnel with the repair and maintenance procedures for Briggs & Stratton® engines. It assumes that persons using this manual have been properly trained in and are familiar with the servicing procedures for these products, including the proper use of required tools and safety equipment and the application of appropriate safety practices.
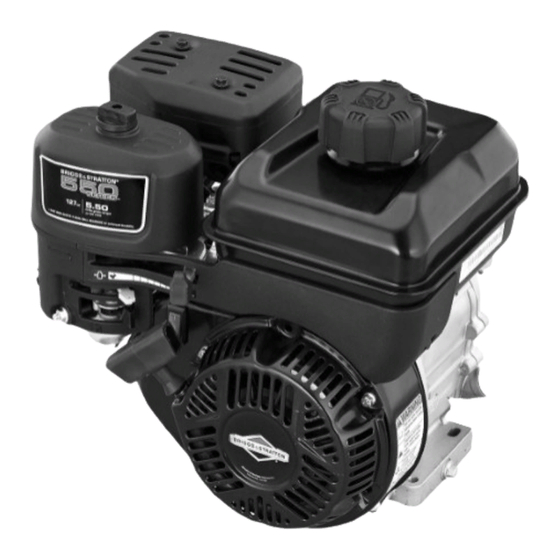
- Page 2 This engine repair manual includes the following engine model: • MODEL 083100...
- Page 3 SECTION 1 – GENERAL INFORMATION SECTION 2 – SAFETY, MAINTENANCE AND ADJUSTMENTS SECTION 3 – TROUBLESHOOTING SECTION 4 – FUEL SYSTEM AND CARBURETION SECTION 5 – CONTROLS AND GOVERNOR SYSTEM SECTION 6 – LUBRICATION SYSTEM SECTION 7 – CYLINDER HEAD AND VALVES SECTION 8 –...
- Page 5 SECTION 1 – GENERAL INFORMATION GENERAL INFORMATION - - - - - - - - - - - - - - - - - - - - - - - - - - - - - - - - - - - - - - - - - - - - - - - - - - - - - - - - - - - - - - - - - 4 Engine Identification - - - - - - - - - - - - - - - - - - - - - - - - - - - - - - - - - - - - - - - - - - - - - - - - - - - - - - - - - - - - - - - - - - - 4 Acronyms, Abbreviations and Meanings - - - - - - - - - - - - - - - - - - - - - - - - - - - - - - - - - - - - - - - - - - - - - - - - - - - - - 4 Order of Engine Assembly and Disassembly - - - - - - - - - - - - - - - - - - - - - - - - - - - - - - - - - - - - - - - - - - - - - - - - - - 4...
- Page 6 GENERAL INFORMATION Order of Disassembly Section Section Procedure Engine Identification Number Engine identification is located as shown (A). Control panel trim Remove Control Bracket Governor control bracket Remove Control Bracket Air cleaner base Remove Control Bracket Carburetor Remove Carburetor Disassemble carburetor Disassemble Carburetor Fuel tank Remove Fuel Tank...
- Page 7 Order of Assembly Section Section Procedure Number Adjust valve clearance Adjust Valve Clearance Rocker cover / breather Install Breather Cylinder shield Install Cylinder Head Flywheel Install Flywheel Armature Install Flywheel Adjust armature air gap Adjust Armature Air Gap Blower housing Adjust Armature Air Gap Rewind starter Install Rewind Starter...
- Page 8 BRIGGSandSTRATTON.COM...
-
Page 9: Table Of Contents
SECTION 2 – SAFETY, MAINTENANCE AND ADJUSTMENTS SAFETY INFORMATION - - - - - - - - - - - - - - - - - - - - - - - - - - - - - - - - - - - - - - - - - - - - - - - - - - - - - - - - - - - - - - - - - - - 8 Safety Alert Symbol and Signal Words - - - - - - - - - - - - - - - - - - - - - - - - - - - - - - - - - - - - - - - - - - - - - - - - - - - - - - 8 Hazard Symbols and Meanings - - - - - - - - - - - - - - - - - - - - - - - - - - - - - - - - - - - - - - - - - - - - - - - - - - - - - - - - - - - 8 General Safety Messages - - - - - - - - - - - - - - - - - - - - - - - - - - - - - - - - - - - - - - - - - - - - - - - - - - - - - - - - - - - - - - - 8... -
Page 10: Safety Information
SAFETY INFORMATION This repair manual contains safety information that is Symbol Meaning Symbol Meaning designed to: Kickback hazard Thrown object hazard - wear eye protection • Make you aware of hazards associated with engines. Amputation hazard - • Inform you of the risk of injury associated with those entanglement hazards. - Page 11 • Do not operate this product inside any building, carport, porch, mobile equipment, marine applications, or WARNING enclosure. Briggs & Stratton Engines are not designed for and are • Do not tip engine or equipment at angle which causes not to be used to power: fun-karts; go-karts; children's, fuel to spill.
- Page 12 • Keep hands and feet away from rotating parts. WARNING POISONOUS GAS HAZARD. Engine exhaust contains WARNING carbon monoxide, a poisonous gas that could kill you in Running engines produce heat. Engine parts, especially minutes. You CANNOT see it, smell it, or taste it. Even if mufflers, become extremely hot which could cause severe you do not smell exhaust fumes, you could still be exposed thermal burns or catching fire to combustible debris, such...
- Page 13 • Repairs should only be made with factory approved parts. WARNING • Repair work should be done by a qualified technician. Charging batteries produce hydrogen gas which could cause explosion resulting in death or serious injury. • Flexible supply lines should be checked regularly to make sure they are in good condition.
-
Page 14: Engine Maintenance
ENGINE MAINTENANCE Maintenance Schedule High Altitude At altitudes over 5,000 feet (1524 meters), a minimum 85 First 5 Hours octane / 85 AKI (89 RON) gasoline is acceptable. • Change oil For carbureted engines, high altitude adjustment is required Every 8 Hours or Daily to remain emissions compliant. -
Page 15: In-Line Fuel Filter
In-Tank Fuel Filter 1. Drain fuel tank by running engine until fuel tank is empty. 2. Disconnect the spark plug wire from the spark plug (A). 3. Remove the air filter cover and air filter (B) as instructed in Change Air Filter found in this section. 4. -
Page 16: Change Oil
• Allow muffler, engine cylinder and fins to cool before In-Line Fuel Filter touching. 1. Drain fuel tank by running engine until fuel tank is empty. CAUTION 2. Disconnect the spark plug wire from the spark plug. Avoid prolonged or repeated skin contact with used motor oil. -
Page 17: Change Air Filter
WARNING Fuel and its vapors are extremely flammable and explosive which could cause burns, fire or explosion resulting in death or serious injury. • Never start or run the engine with the air cleaner assembly or the air filter removed. NOTICE Do not use pressurized air or solvents to clean the filter. -
Page 18: Service Spark Plug
5. Install spark plug by hand and tighten finger tight. Then torque to the value listed in Section 14 - Engine Specifications. 6. Connect the spark plug wire. Clean Air Cooling System Service Spark Plug WARNING NOTICE Spark plugs have different thread lengths and heat ranges. -
Page 19: Clean Combustion Chamber
and clean the air cooling system as recommended in the Maintenance Schedule. Clean Combustion Chamber Remove combustion chamber deposits every 500 hours or whenever the cylinder head is removed. With the piston at Top Dead Center (TDC), scrape deposits from top of piston and upper bore with a plastic scraper. Remove the loosened deposits from around the top ring land area using compressed air or a shop vacuum and a soft bristle brush. -
Page 20: Engine Adjustments
ENGINE ADJUSTMENTS 11. Tighten screw (K) to secure Armature. Adjust Armature Air Gap 12. Turn flywheel so magnet is aligned with armature legs (G). 1. Disconnect spark plug wire from spark plug. Secure spark plug wire away from spark plug. 2. -
Page 21: Carburetor
17. Move fuel line (E) to allow installation of blower housing. Install blower housing onto engine using four screws (F). Torque screws to the value listed in Section 14 - Engine Specifications . 18. Install fuel line (E) onto carburetor and secure using clamp. -
Page 22: Adjust Remote Throttle Control
Governor A complete governor system adjustment includes a static governor adjustment, engine warm-up, idle and/or governed idle speed adjustment, and top no-load speed adjustment. Be sure to complete all steps. Perform Static Governor Adjustment 1. Drain fuel tank by running engine until fuel tank is empty. -
Page 23: Adjust Idle Speed
Adjust Idle Speed Adjust the idle speed as instructed in Carburetor, Adjust Idle Speed found in this section. Combustion Chamber Remove combustion chamber deposits every 500 hours or Adjust Top No-Load Speed whenever the cylinder head is removed. 1. Find the Top No-Load Speed for your engine. With the piston at Top Dead Center (TDC), scrape deposits from top of piston and upper bore with a plastic scraper. - Page 24 1. Remove spark plug wire and spark plug. 2. Remove the four rocker cover screws and remove the rocker cover. 3. Turn crankshaft clockwise (J) (flywheel end) until piston (H) is at top dead center on the compression stroke. This prevents the compression release from holding the valves open.
- Page 25 SECTION 3 – TROUBLESHOOTING SYSTEMIC CHECK - - - - - - - - - - - - - - - - - - - - - - - - - - - - - - - - - - - - - - - - - - - - - - - - - - - - - - - - - - - - - - - - - - - - - - 24 Check Ignition - - - - - - - - - - - - - - - - - - - - - - - - - - - - - - - - - - - - - - - - - - - - - - - - - - - - - - - - - - - - - - - - - - - - - - - 24 Check Carburetion - - - - - - - - - - - - - - - - - - - - - - - - - - - - - - - - - - - - - - - - - - - - - - - - - - - - - - - - - - - - - - - - - - - - 25 Check Compression - - - - - - - - - - - - - - - - - - - - - - - - - - - - - - - - - - - - - - - - - - - - - - - - - - - - - - - - - - - - - - - - - - - 25...
-
Page 26: Systemic Check
SYSTEMIC CHECK Most complaints concerning engine operation can be 1. Ignition classified as one or a combination of the following: 2. Carburetion 3. Compression • Will not start • Hard starting This check-up can usually be completed in a matter of minutes and is the quickest and most reliable method of •... -
Page 27: Check Carburetion
• Leaking carburetor or intake manifold gaskets • Gummy or dirty carburetor, fuel filter, fuel lines or fuel tank • Float needle valve stuck closed • Inoperative fuel pump (if equipped) • Inoperative fuel shut-off solenoid (if equipped) A simple check to determine if the fuel is getting to the combustion chamber through the carburetor is to remove the spark plug and pour a small quantity of gasoline through the spark plug hole. -
Page 28: Electrical Systems
ELECTRICAL SYSTEMS Equipment Used for Testing NOTE: Not all testing equipment shown is used on every engine model. Digital Multimeter A digital multimeter is recommended for all electrical testing of Briggs & Stratton® engines. The meter can be used to read volts, ohms, amperes, and to test diodes. - Page 29 2. Disconnect module wire from sensor wire as shown. Use Digital Multimeter #19602 to check resistance. 3. Rotate selector to (Ohms) position. 4. Insert RED test lead into the V Ω receptacle in the meter. 5. Insert BLACK test lead into COM receptacle. 6.
- Page 30 BRIGGSandSTRATTON.COM...
- Page 31 SECTION 4 – FUEL SYSTEM AND CARBURETION FUEL TANK - - - - - - - - - - - - - - - - - - - - - - - - - - - - - - - - - - - - - - - - - - - - - - - - - - - - - - - - - - - - - - - - - - - - - - - - - - - 30 Remove Fuel Tank - - - - - - - - - - - - - - - - - - - - - - - - - - - - - - - - - - - - - - - - - - - - - - - - - - - - - - - - - - - - - - - - - - - 31 Inspect Fuel Tank - - - - - - - - - - - - - - - - - - - - - - - - - - - - - - - - - - - - - - - - - - - - - - - - - - - - - - - - - - - - - - - - - - - - 31 Install Fuel Tank - - - - - - - - - - - - - - - - - - - - - - - - - - - - - - - - - - - - - - - - - - - - - - - - - - - - - - - - - - - - - - - - - - - - - 31...
- Page 32 FUEL TANK BRIGGSandSTRATTON.COM...
- Page 33 Remove Fuel Tank WARNING Fuel and its vapors are extremely flammable and 1. Drain fuel tank (B) by running engine until fuel tank is explosive. empty. Fire or explosion can cause severe burns or death. 2. Disconnect spark plug wire from spark plug (N). Secure spark plug wire away from spark plug.
- Page 34 2. Install fuel line (E) with clamp (F) onto in-tank fuel filter 4. Install the air filter (K) and air cleaner cover (J). For (D) or fuel tank fitting (in-line fuel filter applications). detailed instructions and air cleaner variations, refer to Change Air Filter found in Section 2.
- Page 35 CARBURETOR...
- Page 36 2. Inspect choke shaft, choke valve, throttle shaft, and Carburetor and Carburetor Overhaul Kit throttle valve for evidence of wear or damage. Replace parts as necessary. Consult the Illustrated Parts List for the correct carburetor 3. Using Carb/Choke Cleaner p/n 100041, p/n 100042 or and carburetor overhaul kit for your engine.
- Page 37 1. If not already Installed, slide gasket (AB) and carburetor spacer (AA) onto studs. NOTE: Make sure gasket is properly orientated on carburetor. An improperly orientated gasket will cause poor engine performance. Refer to illustration at the beginning of the carburetor section. 2.
- Page 38 BRIGGSandSTRATTON.COM...
- Page 39 SECTION 5 – CONTROLS AND GOVERNOR SYSTEM CONTROL BRACKET - - - - - - - - - - - - - - - - - - - - - - - - - - - - - - - - - - - - - - - - - - - - - - - - - - - - - - - - - - - - - - - - - - - - 38 Remove Control Bracket - - - - - - - - - - - - - - - - - - - - - - - - - - - - - - - - - - - - - - - - - - - - - - - - - - - - - - - - - - - - - - - 39 Install Control Bracket - - - - - - - - - - - - - - - - - - - - - - - - - - - - - - - - - - - - - - - - - - - - - - - - - - - - - - - - - - - - - - - - - 39 GOVERNOR SYSTEM - - - - - - - - - - - - - - - - - - - - - - - - - - - - - - - - - - - - - - - - - - - - - - - - - - - - - - - - - - - - - - - - - - - - 39...
-
Page 40: Control Bracket
CONTROL BRACKET BRIGGSandSTRATTON.COM... -
Page 41: Remove Control Bracket
NOTE: If the opposite end of the governor spring (G) was Remove Control Bracket removed from the engine, connect it to the marked hole that it was removed from. 1. Disconnect spark plug wire from spark plug (A). Secure spark plug wire away from spark plug. 2. -
Page 42: Governor System
GOVERNOR SYSTEM BRIGGSandSTRATTON.COM... -
Page 43: Top No-Load Speed
Be sure to note orientation of linkages and springs (A) 3. Check governor cup (E) for cracks or breaks; replace before removing. if necessary. 4. Check governor gear (D) for chipped or damaged teeth. NOTE: If the governor gear assembly is damaged, the Top No-Load Speed engine must be replaced. - Page 44 BRIGGSandSTRATTON.COM...
- Page 45 SECTION 6 – LUBRICATION SYSTEM BREATHER AND LUBRICATION SYSTEM - - - - - - - - - - - - - - - - - - - - - - - - - - - - - - - - - - - - - - - - - - - - - - - - - - - - - 44 Breathers - - - - - - - - - - - - - - - - - - - - - - - - - - - - - - - - - - - - - - - - - - - - - - - - - - - - - - - - - - - - - - - - - - - - - - - - - - 45 Service Breather - - - - - - - - - - - - - - - - - - - - - - - - - - - - - - - - - - - - - - - - - - - - - - - - - - - - - - - - - - - - - - - - - - 45 Lubrication System - - - - - - - - - - - - - - - - - - - - - - - - - - - - - - - - - - - - - - - - - - - - - - - - - - - - - - - - - - - - - - - - - - - 45...
- Page 46 BREATHER AND LUBRICATION SYSTEM BRIGGSandSTRATTON.COM...
- Page 47 3. If air flow is restricted under vacuum at the breather Breathers hose, or has no resistance when blowing on the breather hose, replace the rocker cover. Briggs & Stratton engines utilize a breather valve (C) to control and maintain cylinder vacuum. The breather valve is a fiber disc or reed which closes on the piston up stroke Install Breather and opens on the piston down stroke.
- Page 48 OIL GARD SYSTEM BRIGGSandSTRATTON.COM...
- Page 49 Oil Gard System The Oil Gard System consists of: • Oil Sensor (P) (located inside cylinder) • Oil Sensor Module (Q) • Mounting Bracket (R) If the oil level is low, the Oil Gard sensor will close. The engine cannot be restarted until sufficient oil is added. Identification Run Sense will stop a running engine if the oil level runs below the ADD level on the dipstick.
- Page 50 BRIGGSandSTRATTON.COM...
- Page 51 SECTION 7 – CYLINDER HEAD AND VALVES CYLINDER HEAD AND VALVES - - - - - - - - - - - - - - - - - - - - - - - - - - - - - - - - - - - - - - - - - - - - - - - - - - - - - - - - - - - - 50 Remove Cylinder Head - - - - - - - - - - - - - - - - - - - - - - - - - - - - - - - - - - - - - - - - - - - - - - - - - - - - - - - - - - - - - - - - 51 Disassemble Cylinder Head - - - - - - - - - - - - - - - - - - - - - - - - - - - - - - - - - - - - - - - - - - - - - - - - - - - - - - - - - - - - - 51 Inspect Cylinder Head - - - - - - - - - - - - - - - - - - - - - - - - - - - - - - - - - - - - - - - - - - - - - - - - - - - - - - - - - - - - - - - - - 51...
-
Page 52: Cylinder Head And Valves
CYLINDER HEAD AND VALVES BRIGGSandSTRATTON.COM... -
Page 53: Remove Cylinder Head
NOTE: Refer to the following illustrations and the exploded Remove Cylinder Head view at the beginning of this section. 1. Remove four screws (H) from rocker cover (J), then remove cover and gasket (K). 2. Remove two screws (AA) and (AC) from cylinder head shield (AB). -
Page 54: Assemble Cylinder Head
2. If head passes visual inspection, check valve guides for wear. If valve guides meet or exceed the reject dimension shown in Section 14 - Engine Specifications , replace the cylinder head. 3. Inspect valves for wear or damage. If slight wear is found, lap the valve and seat as instructed in the following steps. -
Page 55: Install Cylinder Head
2. Lightly coat valve stems with lubricant, then insert until there is zero clearance between the valve stems valves (Q) into cylinder head (G). and rocker arms. 7. Rotate crankshaft at least twice to ensure proper NOTE: Do Not get lubricant on valve face, valve seat, or movement of the push rods and rocker arms. - Page 56 BRIGGSandSTRATTON.COM...
- Page 57 SECTION 8 – PISTON, RINGS AND CONNECTING ROD PISTON, RINGS AND CONNECTING ROD - - - - - - - - - - - - - - - - - - - - - - - - - - - - - - - - - - - - - - - - - - - - - - - - - - - - - 56 Remove Piston and Connecting Rod - - - - - - - - - - - - - - - - - - - - - - - - - - - - - - - - - - - - - - - - - - - - - - - - - - - - - - - 57 Disassemble Piston and Connecting Rod - - - - - - - - - - - - - - - - - - - - - - - - - - - - - - - - - - - - - - - - - - - - - - - - - - - - 57 Inspect Piston and Pin - - - - - - - - - - - - - - - - - - - - - - - - - - - - - - - - - - - - - - - - - - - - - - - - - - - - - - - - - - - - - - - - - 57...
-
Page 58: Piston, Rings And Connecting Rod
PISTON, RINGS AND CONNECTING ROD BRIGGSandSTRATTON.COM... -
Page 59: Remove Piston And Connecting Rod
Remove Piston and Connecting Rod 1. Carefully remove any carbon or ridge at top of cylinder bore to prevent ring breakage. 4. Remove the bottom oil control ring (M) by hand as follows: • Grasp one end of the upper steel rail and wind the rail from the oil ring groove into the center ring 2. -
Page 60: Check Ring End Gap
Inspect Piston and Pin 1. Inspect piston (K) for scoring, galling, or other damage. Replace piston if necessary. 2. Using a dial caliper or plug gauge, measure the pin bore diameter. Compare with reject dimensions listed in Section 14 - Engine Specifications . If pin bore exceeds reject dimensions, replace the piston. -
Page 61: Install Piston And Connecting Rod
Assemble Piston and Connecting Rod 1. Install a piston pin retainer (Q) into one groove in piston bore (K). 2. Oil the piston pin bore (K), connecting rod pin bore (J), and the pin (R). Insert rod into piston, then slip pin through piston and rod bores until it seats against the retainer. - Page 62 not to damage crankpin journal or connecting rod bearing. 5. Cap should snap into position when assembled correctly. Install rod screws (G). 6. Tighten screw closest to piston first, then screw farthest from piston second. Torque screws to values listed in Section 14 - Engine Specifications .
- Page 63 SECTION 9 – CRANKSHAFT, CAMSHAFT AND FLYWHEEL FLYWHEEL - - - - - - - - - - - - - - - - - - - - - - - - - - - - - - - - - - - - - - - - - - - - - - - - - - - - - - - - - - - - - - - - - - - - - - - - - - - 62 Remove Flywheel - - - - - - - - - - - - - - - - - - - - - - - - - - - - - - - - - - - - - - - - - - - - - - - - - - - - - - - - - - - - - - - - - - - - 63 Inspect Flywheel - - - - - - - - - - - - - - - - - - - - - - - - - - - - - - - - - - - - - - - - - - - - - - - - - - - - - - - - - - - - - - - - - - - - - 63 Install Flywheel - - - - - - - - - - - - - - - - - - - - - - - - - - - - - - - - - - - - - - - - - - - - - - - - - - - - - - - - - - - - - - - - - - - - - - 63...
-
Page 64: Flywheel
FLYWHEEL BRIGGSandSTRATTON.COM... -
Page 65: Remove Flywheel
Inspect flywheel (E) for cracks, burrs on taper or keyway Remove Flywheel and distortion of keyway. 1. Remove blower housing (J) as instructed in Adjust Inspect taper on crankshaft (D) for burrs, rust or other Armature Air Gap found in Section 2. damage. -
Page 66: Crankshaft And Camshaft
CRANKSHAFT AND CAMSHAFT BRIGGSandSTRATTON.COM... -
Page 67: Remove Crankshaft And Camshaft
2. Using a micrometer, measure the journal diameters. Remove Crankshaft and Camshaft Compare results to values listed in Section 14 - Engine Specifications . If wear exceeds the reject dimensions, 1. Remove spark plug wire and spark plug. replace the camshaft. 2. -
Page 68: Check And Adjust Crankshaft End Play
12. Install spark plug and spark plug wire. 13. Adjust governor system as instructed in Governor found in Section 2. Check and Adjust Crankshaft End Play When crankcase cover (D) is installed with a standard gasket (C), end play should match values listed in Section 14 - Engine Specifications . - Page 69 SECTION 10 – CYLINDER AND CRANKCASE COVER CYLINDER AND CRANKCASE COVER - - - - - - - - - - - - - - - - - - - - - - - - - - - - - - - - - - - - - - - - - - - - - - - - - - - - - - - 68 Cylinder - - - - - - - - - - - - - - - - - - - - - - - - - - - - - - - - - - - - - - - - - - - - - - - - - - - - - - - - - - - - - - - - - - - - - - - - - - - 69 Inspect and Measure Cylinder - - - - - - - - - - - - - - - - - - - - - - - - - - - - - - - - - - - - - - - - - - - - - - - - - - - - - - - - - 69 Recondition Cylinder Bore - - - - - - - - - - - - - - - - - - - - - - - - - - - - - - - - - - - - - - - - - - - - - - - - - - - - - - - - - - - 69...
-
Page 70: Cylinder And Crankcase Cover
CYLINDER AND CRANKCASE COVER BRIGGSandSTRATTON.COM... -
Page 71: Cylinder
Cylinder Inspect and Measure Cylinder 1. Using a plastic scraper, remove all traces of head gasket and cover gasket material. • Visually check cylinder for cracks, stripped threads, and bore damage. Bore damage, if not severe, may be corrected by reconditioning or resizing. •... -
Page 72: Resize Cylinder Bore
3. Rinse cylinder thoroughly with hot running water. 4. Repeat washing and rinsing until all traces of honing grit are gone. NOTE: Honing grit is highly abrasive and will cause rapid wear to all of the internal components of the engine. When cylinder and cylinder housing has been thoroughly cleaned, use a clean white rag to wipe the cylinder bore and internal cylinder housing surfaces. -
Page 73: Install Mag Bearing
4. Press driver tool until bearing is seated in bore. 5. Install new oil seal (J) until flush with cylinder housing. 2. Place a bearing driver tool on the MAG bearing (G). Press driver tool until bearing is extracted. Crankcase Cover Inspect and Measure Cover Install MAG Bearing 1. -
Page 74: Remove Pto Bearing
Install PTO Bearing 1. Remove burrs and imperfections from PTO bearing NOTE: DO NOT reuse ball bearing. The bearing races are bore in cover (H). Clean and lightly lubricate all PTO usually damaged during removal. bearing bore surfaces in cover. NOTE: Standard and reject sizes for the PTO bearing are 2. - Page 76 BRIGGSandSTRATTON.COM...
- Page 77 SECTION 11 – GEAR REDUCTION UNIT GEAR REDUCTION UNIT - - - - - - - - - - - - - - - - - - - - - - - - - - - - - - - - - - - - - - - - - - - - - - - - - - - - - - - - - - - - - - - - - 76 Disassemble Gear Reduction Unit - - - - - - - - - - - - - - - - - - - - - - - - - - - - - - - - - - - - - - - - - - - - - - - - - - - - - - - - - 77 Inspect Gear Reduction Parts - - - - - - - - - - - - - - - - - - - - - - - - - - - - - - - - - - - - - - - - - - - - - - - - - - - - - - - - - - - - 77 Assemble Gear Reduction Unit - - - - - - - - - - - - - - - - - - - - - - - - - - - - - - - - - - - - - - - - - - - - - - - - - - - - - - - - - - - 77...
- Page 78 GEAR REDUCTION UNIT BRIGGSandSTRATTON.COM...
- Page 79 Disassemble Gear Reduction Unit Inspect Gear Reduction Parts 1. Note orientation of gear reduction assembly on engine. 1. Inspect seals for cracks, tears or hardening. Replace Place an oil collection pan beneath the assembly. seals if necessary. 2. Remove oil vent plug (C) and set aside. 2.
- Page 80 4. Install new gasket on outside of gear case. The two screws installed in Step 3 will hold gasket in place. 5. Slide gear reduction case over crankshaft. Hand tighten the two screws installed in Step 3. 6. Install and hand tighten two screws (K) into bottom mounting holes of gear reduction case.
- Page 82 BRIGGSandSTRATTON.COM...
- Page 83 SECTION 12 – STARTER REWIND STARTER - - - - - - - - - - - - - - - - - - - - - - - - - - - - - - - - - - - - - - - - - - - - - - - - - - - - - - - - - - - - - - - - - - - - - - 82 Remove Rewind Starter - - - - - - - - - - - - - - - - - - - - - - - - - - - - - - - - - - - - - - - - - - - - - - - - - - - - - - - - - - - - - - - - 83 Replace Rewind Starter Rope - - - - - - - - - - - - - - - - - - - - - - - - - - - - - - - - - - - - - - - - - - - - - - - - - - - - - - - - - - - - 83 Disassemble Rewind Starter - - - - - - - - - - - - - - - - - - - - - - - - - - - - - - - - - - - - - - - - - - - - - - - - - - - - - - - - - - - - - 84...
-
Page 84: Rewind Starter
REWIND STARTER BRIGGSandSTRATTON.COM... -
Page 85: Remove Rewind Starter
Remove Rewind Starter 1. Remove screws (K) and then remove rewind starter assembly (B through M) from blower housing (A). Replace Rewind Starter Rope NOTE: Consult the Illustrated Parts List or Section 14 - Engine Specifications for the correct diameter and length of rope. -
Page 86: Disassemble Rewind Starter
9. Insert the other end of rope into handle (M) and tie a knot (S) to secure it. Fit knot into opening of handle. 10. Hold rope (L) firmly while removing screwdriver (Q). Then slowly allow rope to rewind itself on pulley. 3. -
Page 87: Reassemble Rewind Starter
6. Inspect the friction spring for damage. Replace spring if worn. 7. Inspect the rope for broken or frayed areas. Replace rope if necessary. Reassemble Rewind Starter 1. Install pulley and spring assembly (G and H) into starter housing (J). Rotate pulley counterclockwise until slight resistance is felt, which indicates that the spring hook (T) has engaged in the anchor tab (U). -
Page 88: Install Rewind Starter
10. Insert the other end of rope into handle (M) and tie a knot (S) to secure it. Fit knot into opening of handle. 11. Hold rope (L) firmly while removing screwdriver (Q). Then slowly allow rope to rewind itself on pulley. Install Rewind Starter 1. - Page 89 SECTION 13 – EXHAUST SYSTEM EXHAUST SYSTEM - - - - - - - - - - - - - - - - - - - - - - - - - - - - - - - - - - - - - - - - - - - - - - - - - - - - - - - - - - - - - - - - - - - - - 88 Exhaust System Warnings - - - - - - - - - - - - - - - - - - - - - - - - - - - - - - - - - - - - - - - - - - - - - - - - - - - - - - - - - - - - - - 89 OEM Statement - - - - - - - - - - - - - - - - - - - - - - - - - - - - - - - - - - - - - - - - - - - - - - - - - - - - - - - - - - - - - - - - - - - - - - 89 Inspect Exhaust System - - - - - - - - - - - - - - - - - - - - - - - - - - - - - - - - - - - - - - - - - - - - - - - - - - - - - - - - - - - - - - - - 89...
- Page 90 EXHAUST SYSTEM BRIGGSandSTRATTON.COM...
- Page 91 Exhaust System Warnings Muffler Deflector Remove Muffler Deflector WARNING 1. Prior to removing the muffler deflector, note its Running engines produce heat. Engine parts, especially orientation for reinstallation. mufflers, become extremely hot. NOTE: Orientation of muffler deflector should match the Severe thermal burns can occur on contact.
- Page 92 1. Clean spark arrester and muffler adapter. 2. Check spark arrester and muffler adapter for holes, cracks or breakage. 3. Replace any damaged parts with new original equipment parts. Never reinstall broken or damaged components. Install Spark Arrester 1. Install muffler adapter (F) and spark arrester (E) using two screws (D).
- Page 93 SECTION 14 – ENGINE SPECIFICATIONS SPECIFICATIONS - - - - - - - - - - - - - - - - - - - - - - - - - - - - - - - - - - - - - - - - - - - - - - - - - - - - - - - - - - - - - - - - - - - - - - - 92...
- Page 94 SPECIFICATIONS ENGINE SPECIFICATIONS Armature Air Gap 0.008 - 0.016 in (0,2 - 0,4 mm) Bore 2.44 in (62,00 mm) Compression Ratio 8.5:1 Crankshaft End Play 0.002 - 0.013 in (0,05 - 0,33 mm) Displacement 7.75 ci (127 cc) Fuel Tank Capacity 2.1 qt (2,0 L) Ignition Timing 19°...
- Page 95 REJECT DIMENSIONS STANDARD SIZE REJECT SIZE CYLINDER Camshaft Bearing 0.552 in (14,02 mm) 0.554 in (14,07 mm) Bore Out-Of-Round 0.000 in (0,00 mm) 0.002 in (0,05 mm) CYLINDER HEAD Intake Valve Seat Angle 45 degrees Valve Seat Width 0.047 - 0.063 in (1,19 - 1,60 mm) Reject if out of range shown at left.
- Page 96 BRIGGSandSTRATTON.COM...
Need help?
Do you have a question about the 083100 and is the answer not in the manual?
Questions and answers