Advertisement
Quick Links
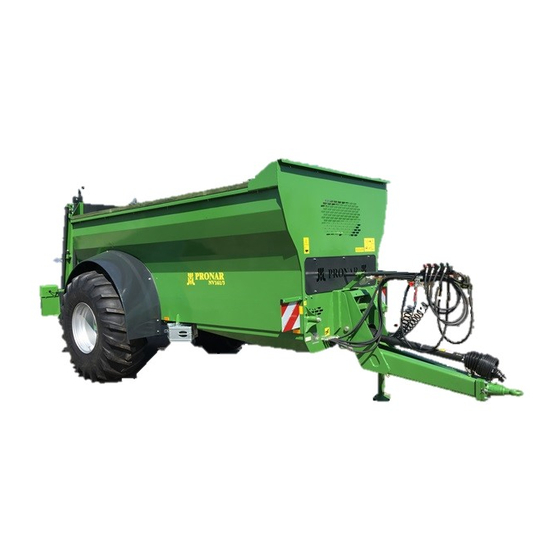
PRONAR NV161/1, PRONAR NV161/2
PRONAR NV161/3, PRONAR NV161/4
TRANSLATION OF THE ORIGINAL COPY OF THE MANUAL
EDITION 2C-10-2020
PRONAR Sp. z o.o.
17-210 NAREW, UL. MICKIEWICZA 101A, PODLASKIE PROVINCE
phone:
fax:
OPERATOR'S MANUAL
MANURE SPREADER
PRONAR NV161/5
+48 085 681 63 29
+48 085 681 63 81
+48 085 681 63 83
PUBLICATION NO. 523N-00000000-UM
+48 085 681 64 29
+48 085 681 63 82
+48 085 682 71 10
www.pronar.pl
Advertisement

Subscribe to Our Youtube Channel
Related Manuals for PRONAR NV161/1


Summary of Contents for PRONAR NV161/1
- Page 1 +48 085 681 63 82 fax: +48 085 681 63 83 +48 085 682 71 10 www.pronar.pl OPERATOR'S MANUAL MANURE SPREADER PRONAR NV161/1, PRONAR NV161/2 PRONAR NV161/3, PRONAR NV161/4 PRONAR NV161/5 TRANSLATION OF THE ORIGINAL COPY OF THE MANUAL EDITION 2C-10-2020 PUBLICATION NO. 523N-00000000-UM...
- Page 3 The machine is designed to meet obligatory standards, documents and legal regulations currently in force. The Operator's Manual describes the basic safety rules and operation of Pronar NV161/1, NV161/2, NV161/3, NV161/4 and NV161/5 manure spreader. If the information stated in the Operator's Manual needs clarification then the user should refer for assistance to the sale point where the machine was purchased or to the Manufacturer.
- Page 4 SYMBOLS APPEARING IN THIS OPERATOR'S MANUAL Information, descriptions of danger and precautions and also recommendations and prohibitions associated with user safety instructions are marked: and also preceded by the word "DANGER”. Failure to observe the instructions may endanger the machine operator's or other person's health or life. Particularly important information and instructions, the observance of which is essential, are distinguished in the text by the sign: and also preceded by the word "ATTENTION".
- Page 5 DIRECTIONS USED IN THIS OPERATOR'S MANUAL Left side – side to the left hand of the operator facing in the direction of machine's forward travel. Right side – side to the right hand of the operator facing in the direction of machine's forward travel.
- Page 9 CONTENTS 1 BASIC INFORMATION IDENTIFICATION 1.1.1 AXLE IDENTIFICATION 1.1.2 LIST OF FACTORY NUMBERS INTENDED USE EQUIPMENT TERMS & CONDITIONS OF WARRANTY TRANSPORT 1.11 1.5.1 TRANSPORT ON VEHICLE 1.11 1.5.2 INDEPENDENT TRANSPORT BY THE USER 1.12 ENVIRONMENTAL HAZARDS 1.13 WITHDRAWAL FROM USE 1.14 2 SAFETY ADVICE BASIC SAFETY RULES...
- Page 10 3 DESIGN AND OPERATION TECHNICAL SPECIFICATION MANURE SPREADER DESIGN 3.2.1 GENERAL DESIGN 3.2.2 FEEDING MECHANISM 3.2.3 HYDRAULIC SYSTEM OF FEEDING MECHANISM 3.2.4 DRIVE TRANSMISSION 3.2.5 TWO-BEATER VERTICAL SPREADER UNIT 3.11 3.2.6 TAILGATE OPENING HYDRAULIC SYSTEM 3.12 3.2.7 HYDRAULIC SYSTEM OF THE SLIDE GATE 3.13 3.2.8 MAIN BRAKE 3.14...
- Page 11 5 MAINTENANCE PRELIMINARY INFORMATION MAINTENANCE OF BRAKES AND AXLES 5.2.1 PRELIMINARY INFORMATION 5.2.2 INITIAL INSPECTION OF AXLE BRAKES 5.2.3 CHECKING BRAKE SHOE LININGS FOR WEAR 5.2.4 CHECKING WHEEL AXLE BEARINGS FOR SLACKNESS 5.2.5 ADJUSTMENT OF SLACKNESS OF WHEEL AXLE BEARINGS 5.2.6 MOUNTING AND DISMOUNTING WHEEL, INSPECTION OF WHEEL NUT TIGHTENING 5.2.7 CHECKING AIR PRESSURE IN TYRES, EVALUATING...
- Page 12 MANURE SPREADER CLEANING 5.37 PREPARATION FOR END OF SEASON 5.39 5.10 PREPARATION FOR THE BEGINNING OF A NEW FIELDWORK SEASON 5.40 5.11 STORAGE 5.41 5.12 MAINTENANCE OF ELECTRICAL SYSTEM AND WARNING ELEMENTS 5.42 5.12.1 PRELIMINARY INFORMATION 5.42 5.12.2 CHANGING BULBS 5.43 5.13 TIGHTENING TORQUE FOR NUT AND BOLT CONNECTIONS...
- Page 13 SECTION BASIC INFORMATION...
- Page 14 Pronar NV161/1 │ NV161/2 │ NV161/3│ NV161/4 │ NV161/5 SECTION 1 1.1 IDENTIFICATION FIGURE 1.1 Manure spreader identification (1) data plate – version standard, (2) data plate – version EU, (3) data plate CE– version EU, (4) serial number The manure spreader is marked with the data plate (1) – version standard, or (2) and (3) - version EU and the factory number (4) located on a gold painted rectangle.
- Page 15 Pronar NV161/1 │ NV161/2 │ NV161/3│ NV161/4 │ NV161/5 SECTION 1 When buying the manure spreader check that the factory numbers on the machine agree with the number written in the WARRANTY BOOK, in the sales documents and in the OPERATOR'S MANUAL.
- Page 16 Pronar NV161/1 │ NV161/2 │ NV161/3│ NV161/4 │ NV161/5 SECTION 1 TABLE 1.3 Markings on data plate CE - version EU ITEM MARKING General description and purpose Seventeen digit serial number (VIN) Type Year of manufacture Model 1.1.1 AXLE IDENTIFICATION The factory number of the axle shaft and its type are stamped onto the data plate (2) secured to the axle shaft beam (1) –...
- Page 17 AXLE FACTORY NUMBER AND TYPE 1.2 INTENDED USE Pronar single axle manure spreader is designed for uniform spreading of all kinds of manure, peat and compost. The manure spreader must not be used in any way other than that described above. Using it as intended also involves all actions connected with the safe and proper operation and maintenance.
- Page 18 Pronar NV161/1 │ NV161/2 │ NV161/3│ NV161/4 │ NV161/5 SECTION 1 • for transporting machines and equipment with high centre of gravity deteriorating manure spreader stability, • for transporting construction materials, single objects or any materials and substances outside the scope of intended use of the manure spreader.
- Page 19 Pronar NV161/1 │ NV161/2 │ NV161/3│ NV161/4 │ NV161/5 SECTION 1 • are familiar with the contents of this publication and with the contents of the Operator's Manual of the agricultural tractor, • have been trained in manure spreader operation and work safety, •...
- Page 20 Pronar NV161/1 │ NV161/2 │ NV161/3│ NV161/4 │ NV161/5 SECTION 1 CONTENTS UNIT REQUIREMENTS Other requirements PTO RPM NV161/1, NV161/2 NV161/3, NV161/4, NV161/5 1,000 The required minimum power NV161/1 hp / /kW 70 / 51.5 NV161/2 hp / /kW 80 / 58.8...
- Page 21 7 G7N 121 CE 008 R09 1.4 TERMS & CONDITIONS OF WARRANTY PRONAR Sp. z o.o. Narew guarantees the reliable operation of the machine when it is used according to its intended purpose as described in the OPERATOR'S MANUAL. The repair...
- Page 22 Pronar NV161/1 │ NV161/2 │ NV161/3│ NV161/4 │ NV161/5 SECTION 1 The warranty does not cover those parts and sub-assemblies of the machine which are subject to wear in normal usage conditions, regardless of the warranty period. Consumables include the following parts/sub-assemblies: •...
- Page 23 Pronar NV161/1 │ NV161/2 │ NV161/3│ NV161/4 │ NV161/5 SECTION 1 The user is obliged to report immediately on noticing any wear in the paint coating or traces of corrosion, and to have the faults rectified whether they are covered by the warranty or not.
- Page 24 Pronar NV161/1 │ NV161/2 │ NV161/3│ NV161/4 │ NV161/5 SECTION 1 and stays etc.) and the force necessary for their tensioning depend on such factors as the manure spreader weight, the carrying vehicle design, speed of travel and other conditions.
- Page 25 Pronar NV161/1 │ NV161/2 │ NV161/3│ NV161/4 │ NV161/5 SECTION 1 1.6 ENVIRONMENTAL HAZARDS A hydraulic oil leak constitutes a direct threat to the natural environment owing to its limited biodegradability. Because of the low solubility of oil in water, it is not highly toxic to living organisms.
- Page 26 Pronar NV161/1 │ NV161/2 │ NV161/3│ NV161/4 │ NV161/5 SECTION 1 1.7 WITHDRAWAL FROM USE In the event of decision by the user to withdraw the machine from use, comply with the regulations in force in the given country concerning withdrawal from use and recycling of machines withdrawn from use.
- Page 27 SECTION SAFETY ADVICE...
- Page 28 Pronar NV161/1 │ NV161/2 │ NV161/3│ NV161/4 │ NV161/5 SECTION 2 2.1 BASIC SAFETY RULES 2.1.1 USE OF MANURE SPREADER • Before using the machine, the user must carefully read this Operator's Manual and the Operator's Manual of the PTO shaft. During use all the recommendations laid down in this Operator's Manual should be observed.
- Page 29 Pronar NV161/1 │ NV161/2 │ NV161/3│ NV161/4 │ NV161/5 SECTION 2 2.1.2 HITCHING AND UNHITCHING THE MANURE SPREADER, LOADING THE LOAD BOX • The manure spreader should be hitched to and transported with only such an agricultural tractor which fulfils all the requirements of the Manufacturer (minimum tractor power demand, required tractor hitch etc.) –...
- Page 30 Pronar NV161/1 │ NV161/2 │ NV161/3│ NV161/4 │ NV161/5 SECTION 2 • Loading of manure spreader may only take place when the machine is positioned on level and hard surface and connected to tractor. Tractor and manure spreader must be placed to drive forwards.
- Page 31 Pronar NV161/1 │ NV161/2 │ NV161/3│ NV161/4 │ NV161/5 SECTION 2 • Chocks (1) should be placed only under one wheel (one in front of the wheel, the other behind the wheel - figure(2.1)). • Before driving off make certain that the manure spreader is correctly hitched to the tractor.
- Page 32 Pronar NV161/1 │ NV161/2 │ NV161/3│ NV161/4 │ NV161/5 SECTION 2 • Place the slow-moving vehicle warning sign in the rear section of the machine – figure (2.2). The slow-moving vehicle warning sign (1) should be placed in the special attachment point (2).
- Page 33 Pronar NV161/1 │ NV161/2 │ NV161/3│ NV161/4 │ NV161/5 SECTION 2 • When connecting the hydraulic conduits to the tractor, make sure that the hydraulic system of the tractor and manure spreader is not under pressure. If necessary, reduce residual pressure in the system.
- Page 34 Pronar NV161/1 │ NV161/2 │ NV161/3│ NV161/4 │ NV161/5 SECTION 2 • Protect the PTO shaft shields against turning with the aid of small chains, which should be secured to a fixed structural element of the manure spreader. • After connecting shaft ensure that it is correctly and safely connected to the tractor and to the manure spreader.
- Page 35 Pronar NV161/1 │ NV161/2 │ NV161/3│ NV161/4 │ NV161/5 SECTION 2 2.1.6 MACHINE OPERATION • Staying in the material spreading area is forbidden due to danger which may be caused by stones, pieces of wood etc. contained in the material.
- Page 36 Pronar NV161/1 │ NV161/2 │ NV161/3│ NV161/4 │ NV161/5 SECTION 2 immediately cleaned and disinfected. In the event of more serious injuries, seek a doctor's advice. • Regularly check the condition of the bolt and nut connections. • Should it be necessary to change individual parts, use only original parts. Non- adherence to these requirements may put the user and other people's health and life at risk, and also damage the manure spreader and invalidate the warranty.
- Page 37 2.2 DESCRIPTION OF RESIDUAL RISK Pronar Sp. z o. o. in Narew has made every effort to eliminate the risk of accidents. There is, however, a certain residual risk, which could lead to an accident, and this is connected mainly with the actions described below: •...
- Page 38 Safety decals can be purchased from the Manufacturer of the manure spreader or your PRONAR dealer. New assemblies, changed during repair, must be labelled once again with the appropriate safety signs. During cleaning do not use solvents which may damage the coating of information label stickers and do not subject them to strong water jets.
- Page 39 Pronar NV161/1 │ NV161/2 │ NV161/3│ NV161/4 │ NV161/5 SECTION 2 TABLE 2.1 Information and warning decals ITEM SAFETY SYMBOL DESCRIPTION Machine symbol. 523N-00000004 Machine symbol. 523N-00000005 Machine symbol. 539N-00000001 Machine symbol. 535N-00000001 Machine symbol. 544N-00000001 Caution! Before starting work, carefully read the Operator's Manual.
- Page 40 Pronar NV161/1 │ NV161/2 │ NV161/3│ NV161/4 │ NV161/5 SECTION 2 ITEM SAFETY SYMBOL DESCRIPTION Danger of inadvertent starting or rolling of the machine. Before beginning servicing or repairs, turn off engine and remove key from ignition 70RPN-00.00.00.05 Grease according to the recommendations in the Operator's Manual .
- Page 41 Pronar NV161/1 │ NV161/2 │ NV161/3│ NV161/4 │ NV161/5 SECTION 2 ITEM SAFETY SYMBOL DESCRIPTION Caution! Do not stand on the chain conveyor if the tractor engine is running and PTO shaft is engaged 70RPN-00.00.00.08 Caution! Danger of crushing. Keep a safe distance from the rotating spreading discs.
- Page 42 Pronar NV161/1 │ NV161/2 │ NV161/3│ NV161/4 │ NV161/5 SECTION 2 ITEM SAFETY SYMBOL DESCRIPTION Beware of thrown out objects. Thrown out objects endanger the whole body. Keep a safe distance from the spreader unit, minimum 40 metres. 153RPN-00.00.00.10 Before climbing on the ladder in order to...
- Page 43 Pronar NV161/1 │ NV161/2 │ NV161/3│ NV161/4 │ NV161/5 SECTION 2 ITEM SAFETY SYMBOL DESCRIPTION Wait until all machine components hale completely Stoppel before touching them. 535N-00000008 - not shown in figure, the decal is placed close to the hydraulic plugs Numbers in the item column correspond to labels in figure (2.3).
- Page 44 Pronar NV161/1 │ NV161/2 │ NV161/3│ NV161/4 │ NV161/5 SECTION 2 FIGURE 2.3 Locations of information and warning decals 2.18...
- Page 45 SECTION DESIGN AND OPERATION...
- Page 46 Pronar NV161/1 │ NV161/2 │ NV161/3│ NV161/4 │ NV161/5 SECTION 3 3.1 TECHNICAL SPECIFICATION TABLE 3.1 Technical specification of manure spreader NV161/1, NV161/2, NV161/3 CONTENTS UNIT NV161/1 NV161/2 NV161/3 Manure Spreader dimensions Total length 7,250 7,250 7,330 Total width 2,540...
- Page 47 Pronar NV161/1 │ NV161/2 │ NV161/3│ NV161/4 │ NV161/5 SECTION 3 TABLE 3.2 Technical specification of manure spreader NV161/4, NV161/5 CONTENTS UNIT NV161/4 NV161/5 Manure Spreader dimensions Total length 7,900 8,580 Total width 3,090 2,950 Total height 2,270 2,800 Wheel track...
- Page 48 Pronar NV161/1 │ NV161/2 │ NV161/3│ NV161/4 │ NV161/5 SECTION 3 3.2 MANURE SPREADER DESIGN 3.2.1 GENERAL DESIGN FIGURE 3.1 Manure spreader design (1) load box (2) suspension system, (3) lower drawbar, (4) upper drawbar, (5) drawbar eye Ø50, (6) fixed drawbar eye Ø40, (7) support, (8) ladder, (9) two-beater vertical spreader unit,...
- Page 49 3.2.2 FEEDING MECHANISM The feeding mechanism in NV161/1 and NV161/2 and NV161/3 manure spreaders consists of transfer unit (1), tensioning unit (2) and drive unit (3) – figure (3.2) . The feeding mechanism in NV161/4 and NV161/5 manure spreaders consists of two transfer units (3), two tensioning units (2) and a drive unit (3) –...
- Page 50 Pronar NV161/1 │ NV161/2 │ NV161/3│ NV161/4 │ NV161/5 SECTION 3 The chain tension is adjusted with tensioning bolts (8). The principle of conveyor speed adjustment is described in section 4.5.1 – figure (4.2), whereas the method of adjusting the tension of floor conveyor chains is described in section 5.7.
- Page 51 Pronar NV161/1 │ NV161/2 │ NV161/3│ NV161/4 │ NV161/5 SECTION 3 FIGURE 3.3 Feeding mechanism NV161/4, NV161/5 (1) transfer unit, (2) tensioning unit, (3) drive unit, (4) chain, (5) scraping strip, (6) hydraulic motor, (7) reduction gear, (8) tensioning bolt...
- Page 52 Pronar NV161/1 │ NV161/2 │ NV161/3│ NV161/4 │ NV161/5 SECTION 3 3.2.3 HYDRAULIC SYSTEM OF FEEDING MECHANISM FIGURE 3.4 Design and diagram of hydraulic system of feeding mechanism (1) flow rate regulator, (2) hydraulic motor, (3) reduction gear, (4) supply conduit, (5) return...
- Page 53 Pronar NV161/1 │ NV161/2 │ NV161/3│ NV161/4 │ NV161/5 SECTION 3 Design and diagram of hydraulic system of feeding mechanism is shown in figure (3.4). This system is used for controlling the floor conveyor. The hydraulic system is supplied from the tractor's external hydraulic system through hydraulic conduits (4) and (5).
- Page 54 Pronar NV161/1 │ NV161/2 │ NV161/3│ NV161/4 │ NV161/5 SECTION 3 FIGURE 3.5 Drive transmission (1) PTO shaft with shear bolt clutch, (2) power transmission shaft, (3) PTO shaft with unidirectional overload clutch, (4) spreader unit, (5), (6), (7) shaft shield Drive transmission system is protected against damage by means of shear bolt clutch installed in PTO shaft (1) and with unidirectional overload clutch located on shaft (3).
- Page 55 Pronar NV161/1 │ NV161/2 │ NV161/3│ NV161/4 │ NV161/5 SECTION 3 3.2.5 TWO-BEATER VERTICAL SPREADER UNIT FIGURE 3.6 Two-beater vertical spreader unit (1) side wall, (2) wormshaft, (3) spreading disk, (4) gear The two-beater vertical spreader unit is used for disintegrating and spreading manure supplied by the floor conveyor.
- Page 56 Pronar NV161/1 │ NV161/2 │ NV161/3│ NV161/4 │ NV161/5 SECTION 3 3.2.6 TAILGATE OPENING HYDRAULIC SYSTEM The tailgate hydraulic system is used for opening, closing and setting the manure spreader's tailgates in a required position. The hydraulic system is supplied with oil from the tractor external hydraulic system.
- Page 57 Otherwise, hydraulic cylinders and/or tailgates may be damaged. 3.2.7 HYDRAULIC SYSTEM OF THE SLIDE GATE Pronar manure spreader can be equipped with a load box slide gate. The slide gate is mounted in front of the spreader unit and it ensures safe transport of disintegrated materials (e.g.
- Page 58 Pronar NV161/1 │ NV161/2 │ NV161/3│ NV161/4 │ NV161/5 SECTION 3 FIGURE 3.8 Design and diagram of the slide gate's hydraulic system (1) slide gate, (2) hydraulic cylinder, (3) flow divider, (4) return conduit, (5) supply conduit, (Z) supply, (P) return 3.2.8 MAIN BRAKE...
- Page 59 Pronar NV161/1 │ NV161/2 │ NV161/3│ NV161/4 │ NV161/5 SECTION 3 FIGURE 3.9 Single conduit pneumatic system (1) air tank, (2) control valve, (3) braking force regulator, (4) pneumatic cylinder, (5) conduit connection, (6) air filter, (7) air tank control connector, (8) pneumatic cylinder control connector, (9) drain valve 3.15...
- Page 60 Pronar NV161/1 │ NV161/2 │ NV161/3│ NV161/4 │ NV161/5 SECTION 3 FIGURE 3.10 Double conduit pneumatic system (1) air tank, (2) control valve, (3) braking force regulator, (4) pneumatic cylinder, (5) conduit connector (red), (6) conduit connector (yellow), (7) air filter, (8) air tank control connector, (9) pneumatic cylinder control connector, (10) drain valve 3.16...
- Page 61 Pronar NV161/1 │ NV161/2 │ NV161/3│ NV161/4 │ NV161/5 SECTION 3 FIGURE 3.11 Design and diagram of hydraulic braking system (1) hydraulic cylinder, (2) hydraulic quick-coupler, (3) information decal The main brake is activated from the tractor driver's cab by depressing the brake pedal. The function of the control valve (2) used in the pneumatic systems - figure (3.9), (3.10), is to...
- Page 62 Pronar NV161/1 │ NV161/2 │ NV161/3│ NV161/4 │ NV161/5 SECTION 3 Three-step brake force regulator - figure (3.12), applied in pneumatic systems adjusts braking force depending on setting. Switching to a suitable working mode is done manually by machine operator using the lever (4) prior to moving off. Three working positions are available: A - "no load”, B - "half load”...
- Page 63 Pronar NV161/1 │ NV161/2 │ NV161/3│ NV161/4 │ NV161/5 SECTION 3 3.2.9 PARKING BRAKE FIGURE 3.13 Parking brake (1) expander lever, (2) brake crank mechanism, (3) steel cable L=3 200 mm, (4) cable roller The parking brake is used for immobilising manure spreader while standing motionless.
- Page 64 Pronar NV161/1 │ NV161/2 │ NV161/3│ NV161/4 │ NV161/5 SECTION 3 3.2.10 LIGHTING SYSTEM The manure spreader electrical system is designed for supply of 12 V DC. Connection of the manure spreader electrical system with the tractor should be made through an appropriate connection lead that is part of the machine's standard equipment.
- Page 65 Pronar NV161/1 │ NV161/2 │ NV161/3│ NV161/4 │ NV161/5 SECTION 3 TABLE 3.4 List of electrical component markings SYMBOL NAME Rear right lamp assembly Rear left lamp assembly Seven-pin socket Licence plate light TABLE 3.5 GT socket connection markings MARKING...
- Page 66 Pronar NV161/1 │ NV161/2 │ NV161/3│ NV161/4 │ NV161/5 SECTION 3 FIGURE 3.15 Arrangement of electrical system components (1) rear left lamp (2) rear right lamp, (3) licence plate light, (4) connection socket, (5) warning board, (6) attachment point, (7) white reflector...
- Page 67 SECTION CORRECT...
- Page 68 Pronar NV161/1 │ NV161/2 │ NV161/3│ NV161/4 │ NV161/5 SECTION 4 4.1 PREPARING FOR WORK BEFORE FIRST USE 4.1.1 CHECKING THE MANURE SPREADER AFTER DELIVERY The manure spreader is supplied to the user completely assembled and does not require additional mounting operations of machine sub-assemblies. The manufacturer guarantees that the manure spreader is fully operational and has been checked according to quality control procedures and is ready for use.
- Page 69 Pronar NV161/1 │ NV161/2 │ NV161/3│ NV161/4 │ NV161/5 SECTION 4 check technical condition of the manure spreader lights and indicators, check technical condition of PTO shafts and their shields as well as completeness of these elements, check technical condition of hydraulic and pneumatic conduits, check that there are no hydraulic oil leaks.
- Page 70 Pronar NV161/1 │ NV161/2 │ NV161/3│ NV161/4 │ NV161/5 SECTION 4 ATTENTION Pipe profiles of the PTO shaft must overlap at least at 1/2 of the length in normal working conditions and at least at 1/3 of the length in all working conditions.
- Page 71 Pronar NV161/1 │ NV161/2 │ NV161/3│ NV161/4 │ NV161/5 SECTION 4 Using the appropriate selective control valve lever in the tractor cab, start the chain conveyor. Set the conveyor speed by turning the knob of the flow regulator installed on the outrigger in the front section of the manure spreader from position „0”...
- Page 72 Pronar NV161/1 │ NV161/2 │ NV161/3│ NV161/4 │ NV161/5 SECTION 4 • other suspected faults immediately cut off oil supply, disconnect tractor PTO drive and identify a fault. If a fault cannot be rectified or the repair could void the warranty, please contact the retailer or directly the manufacturer for additional clarifications or to perform the repair.
- Page 73 Pronar NV161/1 │ NV161/2 │ NV161/3│ NV161/4 │ NV161/5 SECTION 4 lubricate elements according guidelines presented section „LUBRICATION OF MANURE SPREADER” in compliance with lubrication schedule, check the floor conveyor tension and adjust if necessary – see section 5.7 „CHECKING AND ADJUSTMENT OF TENSION OF FLOOR CONVEYOR CHAINS”.
- Page 74 Pronar NV161/1 │ NV161/2 │ NV161/3│ NV161/4 │ NV161/5 SECTION 4 ATTENTION Prior to attaching the manure spreader, check the technical condition of the manure spreader's and tractor's hitch system and connection elements of the hydraulic, electrical and pneumatic systems.
- Page 75 Pronar NV161/1 │ NV161/2 │ NV161/3│ NV161/4 │ NV161/5 SECTION 4 FIGURE 4.1 Hitching to tractor (1) parking stand, (2) pneumatic conduits, (3) PTO shaft for connecting with tractor, (4) conduit outrigger, (5) connector bracket Connect pneumatic system conduits (2) (applies to double conduit pneumatic system) - figure (4.1).
- Page 76 Pronar NV161/1 │ NV161/2 │ NV161/3│ NV161/4 │ NV161/5 SECTION 4 Connect hydraulic conduits (marked black) of the floor conveyor movement system to the tractor. Conveyor connection conduits are marked with decals in the form of arrows indicating the direction of hydraulic oil flow.
- Page 77 Pronar NV161/1 │ NV161/2 │ NV161/3│ NV161/4 │ NV161/5 SECTION 4 Immobilise tractor and manure spreader with parking brake. Place chocks under manure spreader wheel. Wheel chocks must be so placed that one is in front of the wheel and the second is behind the wheel - see section 2.
- Page 78 Pronar NV161/1 │ NV161/2 │ NV161/3│ NV161/4 │ NV161/5 SECTION 4 ATTENTION Exercise caution when disconnecting the manure spreader from the tractor. Ensure good visibility. Unless it is necessary, do not go between tractor and manure spreader. The manure spreader disconnected from the tractor must be immobilised with the parking brake.
- Page 79 Pronar NV161/1 │ NV161/2 │ NV161/3│ NV161/4 │ NV161/5 SECTION 4 TABLE 4.1 Guideline weights by volume of selected loads WEIGHT BY VOLUME TYPE OF MATERIAL KG / M Organic fertilisers: Old manure 700 - 800 Mature manure 800 - 900...
- Page 80 Pronar NV161/1 │ NV161/2 │ NV161/3│ NV161/4 │ NV161/5 SECTION 4 • Conveyor speed is reduced by turning the regulator knob towards ”0” setting. • Conveyor speed is increased by turning the regulator knob towards „10” setting. When the manure spreader travel speed is high and the conveyor speed is low, a small spreading dose is obtained.
- Page 81 Pronar NV161/1 │ NV161/2 │ NV161/3│ NV161/4 │ NV161/5 SECTION 4 To ensure precise manure spreading also along the field boundaries, the rear shields of the manure spreader can be set in such a manner as to reduce the spreading width on one or both sides of the manure spreader.
- Page 82 Pronar NV161/1 │ NV161/2 │ NV161/3│ NV161/4 │ NV161/5 SECTION 4 In order to obtain uniform spreading in the beginning of operation, increase PTO rotation maximally to the recommended speed and engage the chain conveyor when the manure spreader is still motionless. Spread manure while the manure spreader is motionless until a sufficient amount of manure is delivered to the spreader unit wormshafts.
- Page 83 Pronar NV161/1 │ NV161/2 │ NV161/3│ NV161/4 │ NV161/5 SECTION 4 4.7 PROPER USE AND MAINTENANCE OF TYRES • When working with tyres, the manure spreader should be secured against rolling by placing chocks under the wheels. Wheels can be taken off only when the manure spreader is not loaded.
- Page 84 Pronar NV161/1 │ NV161/2 │ NV161/3│ NV161/4 │ NV161/5 SECTION 4 4.18...
- Page 85 SECTION MAINTENANCE...
- Page 86 Pronar NV161/1 │ NV161/2 │ NV161/3│ NV161/4 │ NV161/5 SECTION 5 5.1 PRELIMINARY INFORMATION When using the manure spreader, regular inspections of its technical condition are essential and the performance of maintenance procedures, which keep the machine in good technical condition.
- Page 87 Pronar NV161/1 │ NV161/2 │ NV161/3│ NV161/4 │ NV161/5 SECTION 5 • changing brake linings, repairing brake, may be performed by specialist workshops. DANGER Do NOT use the manure spreader when braking system is unreliable. 5.2.2 INITIAL INSPECTION OF AXLE BRAKES After purchasing manure spreader, the user is responsible for general checking of brake system of manure spreader axle.
- Page 88 Pronar NV161/1 │ NV161/2 │ NV161/3│ NV161/4 │ NV161/5 SECTION 5 5.2.3 CHECKING BRAKE SHOE LININGS FOR WEAR Manure spreader brake shoes should be replaced when the brake lining thickness is less then the minimum specified by the manufacturer. Minimum thickness of brake shoe linings is 5 mm.
- Page 89 Pronar NV161/1 │ NV161/2 │ NV161/3│ NV161/4 │ NV161/5 SECTION 5 5.2.4 CHECKING WHEEL AXLE BEARINGS FOR SLACKNESS FIGURE 5.2 Lifting jack support point (1) wheel axle Preparation procedures Hitch manure spreader to tractor, immobilise tractor with parking brake. Park tractor and manure spreader on hard level ground.
- Page 90 Pronar NV161/1 │ NV161/2 │ NV161/3│ NV161/4 │ NV161/5 SECTION 5 Checking wheel axle bearings for slackness Turning the wheel slowly in both directions check that movement is smooth and that the wheel rotates without excessive resistance. Turn the wheel so that it rotates very quickly, check that the bearing does not make any unusual sounds.
- Page 91 Pronar NV161/1 │ NV161/2 │ NV161/3│ NV161/4 │ NV161/5 SECTION 5 DANGER Before commencing work, the user must read the user manual for lifting jack and adhere to the manufacturer's instructions. The lifting jack must be stably supported on the ground and so must the axle.
- Page 92 Pronar NV161/1 │ NV161/2 │ NV161/3│ NV161/4 │ NV161/5 SECTION 5 FIGURE 5.3 Adjustment of axle bearings (1) hub cover, (2) castellated nut, (3) cotter pin The wheel should turn smoothly without stiffness or detectable resistance not originating from abrasion of brake shoes in brake drum. Adjustment of bearing slackness may only be conducted when the manure spreader is hitched to a tractor and the load box is empty.
- Page 93 Pronar NV161/1 │ NV161/2 │ NV161/3│ NV161/4 │ NV161/5 SECTION 5 Loosen wheel nuts according to sequence given in figure (5.4). Place a lifting jack and raise the manure spreader to a sufficient height so that the wheel to be replaced does not touch the ground.
- Page 94 Pronar NV161/1 │ NV161/2 │ NV161/3│ NV161/4 │ NV161/5 SECTION 5 FIGURE 5.4 Sequence of tightening nuts, axles with 10 M22x1.5 pins (1) - (10) sequence of nut tightening 5.2.7 CHECKING AIR PRESSURE IN TYRES, EVALUATING TECHNICAL CONDITION OF TYRES AND STEEL WHEELS Air pressure in tyres should be checked each time after changing a spare wheel and at least once a month.
- Page 95 Pronar NV161/1 │ NV161/2 │ NV161/3│ NV161/4 │ NV161/5 SECTION 5 Wheels should be inspected with regard to distortion, breaking of material, breaking of welds, corrosion, especially in the area of welds and contact with tyre. Proper technical condition and appropriate maintenance of wheels significantly extend the life of these components and ensure appropriate level of safety for manure spreader users.
- Page 96 Pronar NV161/1 │ NV161/2 │ NV161/3│ NV161/4 │ NV161/5 SECTION 5 Check technical condition of brakes: • Before the period of intensive use. • Every 6 months. • After repair of braking system. • In case of uneven wheel braking.
- Page 97 Pronar NV161/1 │ NV161/2 │ NV161/3│ NV161/4 │ NV161/5 SECTION 5 The inspection of the brake operation involves measuring the extension length of each brake cylinder piston while braking at parking. If the brake cylinder piston stroke exceeds the maximum value (45 mm), the braking system should be adjusted.
- Page 98 Pronar NV161/1 │ NV161/2 │ NV161/3│ NV161/4 │ NV161/5 SECTION 5 FIGURE 5.6 Principle of brake system adjustment (1) brake cylinder piston, (2) brake cylinder membrane, (3) expander arm, (4) adjustment bolt, (5) cylinder fork, (6) position of fork pin, (7) brake cylinder bracket, (A) mark on the brake...
- Page 99 Pronar NV161/1 │ NV161/2 │ NV161/3│ NV161/4 │ NV161/5 SECTION 5 During adjustment, membrane (2) must rest on the rear wall of the brake cylinder – compare figure (5.6). Install the brake cylinder fork pin and washers and secure the pin with cotter pins.
- Page 100 Pronar NV161/1 │ NV161/2 │ NV161/3│ NV161/4 │ NV161/5 SECTION 5 Adjustment of parking brake cable tension Connect the manure spreader to tractor. Park manure spreader and tractor on level surface. Place securing chocks under one wheel of manure spreader.
- Page 101 Pronar NV161/1 │ NV161/2 │ NV161/3│ NV161/4 │ NV161/5 SECTION 5 FIGURE 5.7 Adjustment of parking brake cable tension (1) brake crank mechanism, (2) steel cable, (3) cable roller, (4) shackle, (5) U-shaped clamp, (6) clamp nuts Installation of steel cable ATTENTION Clamp jaws must be placed on the load bearing side of cable - see Figure (5.8).
- Page 102 Pronar NV161/1 │ NV161/2 │ NV161/3│ NV161/4 │ NV161/5 SECTION 5 The first clamp should be placed directly on the thimble. FIGURE 5.8 Installation of steel cable clamps (1) steel cable, (2) clamp jaw, (3) thimble, (4) nut, (5) heat shrink tubing 5.3 PNEUMATIC SYSTEM MAINTENANCE...
- Page 103 Pronar NV161/1 │ NV161/2 │ NV161/3│ NV161/4 │ NV161/5 SECTION 5 • cleaning and maintaining pneumatic conduit connections, • replacement of pneumatic conduit. 5.3.2 CHECKING AIR TIGHTNESS AND VISUAL INSPECTION OF PNEUMATIC SYSTEM Checking air tightness of pneumatic system Connect the manure spreader to tractor.
- Page 104 Pronar NV161/1 │ NV161/2 │ NV161/3│ NV161/4 │ NV161/5 SECTION 5 Checking tightness of pneumatic system: • after travelling the first 1,000 km, • each time after making repairs or changing system components, • annually. Visual inspection of the system During tightness inspection attention should additionally be given to technical condition and degree of cleanness of the system components.
- Page 105 Pronar NV161/1 │ NV161/2 │ NV161/3│ NV161/4 │ NV161/5 SECTION 5 FIGURE 5.9 Air filter (1) securing slide lock, (2) air filter cover Required maintenance activities: Reduce pressure in supply conduit. Reduction of pressure in conduit may be achieved by pressing the head of the pneumatic connection until resistance is felt.
- Page 106 Pronar NV161/1 │ NV161/2 │ NV161/3│ NV161/4 │ NV161/5 SECTION 5 5.3.4 DRAINING WATER FROM AIR TANK FIGURE 5.10 Draining water from air tank (1) air tank, (2) drain valve Draining water from air tank: • every seven days of use.
- Page 107 Pronar NV161/1 │ NV161/2 │ NV161/3│ NV161/4 │ NV161/5 SECTION 5 Released valve stem should automatically close and stop flow of air from the tank. If the valve stem resists returning to its position, then the whole drain valve must be unscrewed and cleaned or replaced (if it is damaged) - see section 5.3.5.
- Page 108 Pronar NV161/1 │ NV161/2 │ NV161/3│ NV161/4 │ NV161/5 SECTION 5 In the event of damage to cover or seal, change these elements for new reliable elements. Contact of pneumatic connector seals with oils, grease, petrol etc. may cause damage and accelerate ageing process.
- Page 109 Pronar NV161/1 │ NV161/2 │ NV161/3│ NV161/4 │ NV161/5 SECTION 5 FIGURE 5.11 Installation of pneumatic conduit (1) pneumatic conduit, (2) connecting nut (3) clamping ring, (4) reinforcing sleeve 5.4 HYDRAULIC SYSTEM OPERATION ATTENTION Manure spreader with a leaking hydraulic system must NOT be used.
- Page 110 Pronar NV161/1 │ NV161/2 │ NV161/3│ NV161/4 │ NV161/5 SECTION 5 permitted. In a new manure spreader, the hydraulic system is filled with L HL32 Lotos hydraulic oil. The manure spreader's hydraulic system should be completely tight sealed. Checking tightness of the hydraulic system involves connecting the machine with the tractor and activating the floor conveyor several times.
- Page 111 Pronar NV161/1 │ NV161/2 │ NV161/3│ NV161/4 │ NV161/5 SECTION 5 the respiratory tract. A hazard only occurs when oil is strongly atomised (oil vapour), or in the case of fire during which toxic compounds may be released. Oil fires should be quenched with the use of carbon dioxide, foam or extinguisher steam.
- Page 112 Pronar NV161/1 │ NV161/2 │ NV161/3│ NV161/4 │ NV161/5 SECTION 5 DANGER When checking oil level and changing oil, use appropriate personal protection equipment i.e. protective clothing, safety shoes, gloves, safety goggles. Avoid contact of skin with oil. FIGURE 5.12...
- Page 113 Pronar NV161/1 │ NV161/2 │ NV161/3│ NV161/4 │ NV161/5 SECTION 5 WARNING Do not overfill. Too much oil may result in overheating of the gears. In case of leakage inspect the sealing and check the oil level. Operating the gears with low oil level or without oil may result in permanent damage of their components.
- Page 114 Pronar NV161/1 │ NV161/2 │ NV161/3│ NV161/4 │ NV161/5 SECTION 5 Remove two hydraulic hoses (4) from the hydraulic drive valve (5) or remove the valve (6). Remove the screws (7) securing the gear to the hopper. Disassemble or rotate the gear. When disassembling, remove the retaining ring from the shaft (8).
- Page 115 Pronar NV161/1 │ NV161/2 │ NV161/3│ NV161/4 │ NV161/5 SECTION 5 TABLE 5.3 Lubrication schedule NUMBER OF ITEM LUBRICATION POINT LUBRICATION POINTS Hub bearings Drawbar eye Axle expander shaft sleeves Parking brake mechanism Brake expander arm Drive shaft bearings Surface of multi-splined shaft...
- Page 116 Pronar NV161/1 │ NV161/2 │ NV161/3│ NV161/4 │ NV161/5 SECTION 5 Parts that should be lubricated with machine oil should be wiped with dry clean cloth and then a small quantity of oil should be applied to surfaces (using oil can or brush). Wipe off excess oil.
- Page 117 Pronar NV161/1 │ NV161/2 │ NV161/3│ NV161/4 │ NV161/5 SECTION 5 FIGURE 5.13 Lubrication points on the manure spreader 5.33...
- Page 118 Pronar NV161/1 │ NV161/2 │ NV161/3│ NV161/4 │ NV161/5 SECTION 5 FIGURE 5.14 Lubrication points on the manure spreader 5.34...
- Page 119 Pronar NV161/1 │ NV161/2 │ NV161/3│ NV161/4 │ NV161/5 SECTION 5 FIGURE 5.15 Lubrication points on the manure spreader 5.35...
- Page 120 Pronar NV161/1 │ NV161/2 │ NV161/3│ NV161/4 │ NV161/5 SECTION 5 5.7 CHECKING AND ADJUSTMENT OF TENSION OF FLOOR CONVEYOR CHAINS Tension of floor conveyor chains must be checked daily, in particular, at the beginning of the conveyor's working period.
- Page 121 Pronar NV161/1 │ NV161/2 │ NV161/3│ NV161/4 │ NV161/5 SECTION 5 ATTENTION All conveyor chains must be equally tensioned. Excessive looseness of conveyor chain may lead to serious damage to the manure spreader and pose a direct threat to the machine operators or other persons.
- Page 122 Pronar NV161/1 │ NV161/2 │ NV161/3│ NV161/4 │ NV161/5 SECTION 5 Do not apply organic solvents, preparations of unknown origin or other substances, which may cause damage to lacquered, rubber or plastic surfaces. In the event of doubt it is recommended to make a test on an unseen surface area.
- Page 123 Pronar NV161/1 │ NV161/2 │ NV161/3│ NV161/4 │ NV161/5 SECTION 5 Cleaning and drying of the manure spreader must take place at temperatures above 0°C. In winter, freezing water may cause damage to paint coating or machine elements. 5.9 PREPARATION FOR END OF SEASON After finishing fieldwork the manure spreader must be properly prepared for winter storage.
- Page 124 Pronar NV161/1 │ NV161/2 │ NV161/3│ NV161/4 │ NV161/5 SECTION 5 5.10 PREPARATION FOR THE BEGINNING OF A NEW FIELDWORK SEASON Check technical condition of bearings, shields, chains. Check spreader unit blades and replace them if necessary. Check technical condition of the electrical system; Check whether lights work correctly.
- Page 125 Pronar NV161/1 │ NV161/2 │ NV161/3│ NV161/4 │ NV161/5 SECTION 5 5.11 STORAGE After finishing work, the manure spreader should be thoroughly cleaned and washed. In the event of damage to the lacquer coating clean those places from rust and dirt, degrease and then paint with paint maintaining uniform colour and even thickness of protective coating.
- Page 126 Pronar NV161/1 │ NV161/2 │ NV161/3│ NV161/4 │ NV161/5 SECTION 5 5.12 MAINTENANCE OF ELECTRICAL SYSTEM AND WARNING ELEMENTS 5.12.1 PRELIMINARY INFORMATION Work connected with the repair, change or regeneration of electrical system components should be entrusted to specialist establishments, having the appropriate technology and qualifications for this type of work.
- Page 127 Pronar NV161/1 │ NV161/2 │ NV161/3│ NV161/4 │ NV161/5 SECTION 5 Before driving off, make certain that all lamps and reflective lights are clean. 5.12.2 CHANGING BULBS Compatible bulbs are shown in table (5.6). All light lenses are secured by screws and it is not necessary to dismantle whole lamp or manure spreader subassemblies.
- Page 128 Pronar NV161/1 │ NV161/2 │ NV161/3│ NV161/4 │ NV161/5 SECTION 5 TABLE 5.6 Tightening torque for nut and bolt connections 10.9 THREAD METRIC MD [Nm] 1,050 1,150 1,650 1,050 1,450 2,100 – resistance class according to DIN ISO 898 standard, (M ) –...
- Page 129 Pronar NV161/1 │ NV161/2 │ NV161/3│ NV161/4 │ NV161/5 SECTION 5 5.14 TROUBLESHOOTING TABLE 5.7 Faults and means of remedying them FAULT CAUSE REMEDY Excessive lengthening of Check tension of chains conveyor chains. Improperly Conveyor knocking and adjust according to adjusted tension of conveyor section 5.7.
- Page 130 Pronar NV161/1 │ NV161/2 │ NV161/3│ NV161/4 │ NV161/5 SECTION 5 FAULT CAUSE REMEDY Incorrectly adjusted main Regulate setting of brake. expander arms Excessive heating of axle Incorrectly adjusted parking Adjust tension of parking hubs brake. brake cables. Worn brake linings.
- Page 131 NOTES …………………………………………………………………………………………………………… …………………………………………………………………………………………………………… …………………………………………………………………………………………………………… …………………………………………………………………………………………………………… …………………………………………………………………………………………………………… …………………………………………………………………………………………………………… …………………………………………………………………………………………………………… …………………………………………………………………………………………………………… …………………………………………………………………………………………………………… …………………………………………………………………………………………………………… …………………………………………………………………………………………………………… …………………………………………………………………………………………………………… …………………………………………………………………………………………………………… …………………………………………………………………………………………………………… …………………………………………………………………………………………………………… …………………………………………………………………………………………………………… …………………………………………………………………………………………………………… …………………………………………………………………………………………………………… …………………………………………………………………………………………………………… …………………………………………………………………………………………………………… …………………………………………………………………………………………………………… …………………………………………………………………………………………………………… …………………………………………………………………………………………………………… …………………………………………………………………………………………………………… …………………………………………………………………………………………………………… ……………………………………………………………………………………………………………...
Need help?
Do you have a question about the NV161/1 and is the answer not in the manual?
Questions and answers