Advertisement
PVA or equivalent glue will be required to stick sections together.
Sand paper can be used to gently clean any joints.
A sharp modelling knife will be required to remove sections from the sprue. Please use knives with due
care and remember to cut away from yourself at all times.
During the construction of this model, you may find it convenient to use pegs / elastic bands to hold
pieces in place while you allow glue to dry.
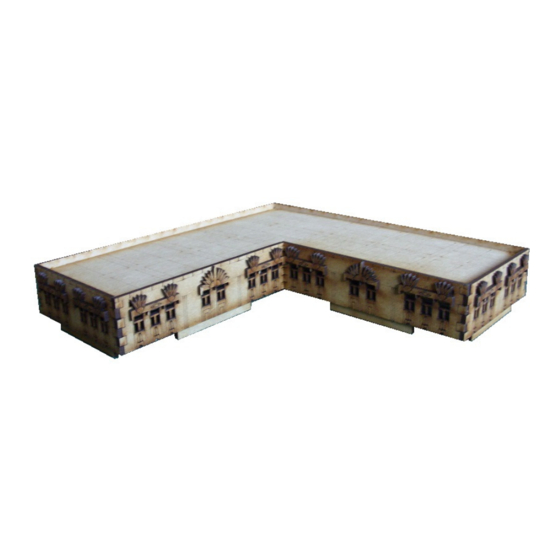
Foyer (B10-MW-110)
Start by removing the sections shown above (left)
from the sprue (one set per doorway section).
There are enough parts to create all three
doorway sections.
Glue them together as shown in the image on the
right.
At the same time, glue a triangular bracer to the
back of long side 'A' at each end. Leave this to
dry.
Note there is an 'L-shape corner bracer between
parts 'D' and 'E'.
10mm 5x5 'L-Shape' Foyer
B10-MW-110
Please read these instructions fully before starting construction.
Glue each doorway to the back of the long sides (A
and B) and short side 'D', using the lugs/holes
provided.
Run clockwise around the building, adding each piece
(and where relevant a corner brace). Start with Long
side 'A'. Then add side 'B', end 'C', side 'D', side 'E' and
finally end 'F'.
Finally glue the decorative columns into position.
Advertisement
Table of Contents

Subscribe to Our Youtube Channel
Related Manuals for BLOTZ B10-MW-110


Summary of Contents for BLOTZ B10-MW-110
- Page 1 During the construction of this model, you may find it convenient to use pegs / elastic bands to hold pieces in place while you allow glue to dry. Foyer (B10-MW-110) Start by removing the sections shown above (left) Glue each doorway to the back of the long sides (A from the sprue (one set per doorway section).
- Page 2 10mm 5x5 ‘L-Shape’ Middle B10-MW-156 Please read these instructions fully before starting construction. PVA or equivalent glue will be required to stick sections together. Sand paper can be used to gently clean any joints. A sharp modelling knife will be required to remove sections from the sprue. Please use knives with due care and remember to cut away from yourself at all times.
- Page 3 10mm 5x5 ‘L-Shape’ Roof B10-MW-206 Please read these instructions fully before starting construction. PVA or equivalent glue will be required to stick sections together. Sand paper can be used to gently clean any joints. A sharp modelling knife will be required to remove sections from the sprue. Please use knives with due care and remember to cut away from yourself at all times.
Need help?
Do you have a question about the B10-MW-110 and is the answer not in the manual?
Questions and answers