
Related Manuals for Nexans Berk-Tek PowerGIG-OAC


Summary of Contents for Nexans Berk-Tek PowerGIG-OAC
- Page 1 PowerGIG‐OAC PowerGIG‐MobileApp User Guide PowerGIG‐MobileApp User Guide Page 1 of 27 BSP0415.A 33816 www.berktek.us ...
-
Page 2: Table Of Contents
PowerGIG‐OAC PowerGIG‐MobileApp User Guide Table of Contents 1. Introduction ................................ 4 Related Manuals .............................. 4 For More Information ............................ 4 2. Installation and Operation ............................ 5 System Requirements ............................ 5 Software Components ............................ 5 Automatic Operation ............................. 5 Quick Instructions .............................. 5 How to Obtain and Install .......................... 5 Configure ................................ 8 Transfer ................................. 9 Read NFC Tag ................................. 9 Troubleshoot ............................... 10 Switch Configuration ............................ 11 3. PowerGIG‐MobileApp ............................ 12 Detailed Instructions with Sample Screen Shots ... - Page 3 PowerGIG‐OAC PowerGIG‐MobileApp User Guide Warranty ................................ 23 7. Glossary of Terms ............................... 24 8. Record of Revisions ............................ 26 Page 3 of 27 BSP0415.A 33816 www.berktek.us ...
-
Page 4: Introduction
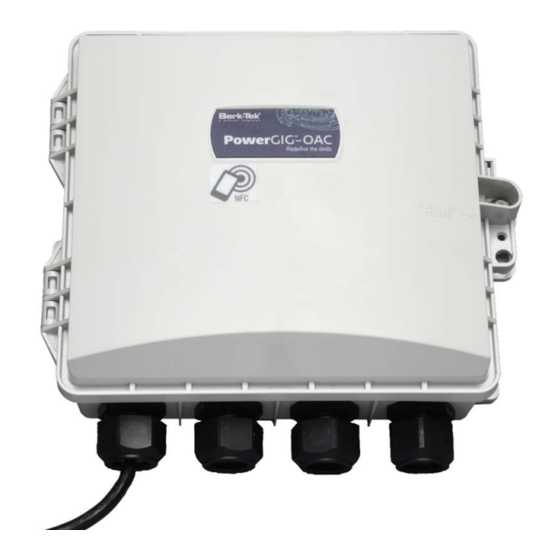
PowerGIG‐OAC PowerGIG‐MobileApp User Guide 1. Introduction The Berk‐Tek PowerGIG‐OAC Switch is a Layer 2 managed switch with (4) 10/100/1000BASE‐T PoE++ (IEEE 802.3bt) ports and (1) combination 10/100/1000BASE‐T RJ45 or 100/1000BASE‐X SFP uplink port (additional optional port available), that is ideal for use in security and surveillance, PoE lighting, digital signage, and many other applications. The switch is equipped with Near Field Communication (NFC) to allow simple and repeatable switch configuration with a user‐friendly app on a mobile device prior to connecting or powering up the switch. The switch allows Bluetooth Low Energy (BLE) remote access to alarm information or to read or change equipment settings without requiring physical access using inconvenient ladders or scissor lift rental. The switch also has integrated management software for setup, monitoring, and control of connected devices. The PowerGIG‐MobileApp provides a mobile interface through NFC and BLE connections, which allows for switch configuration, performing remote diagnosis, and troubleshooting for the switch from a smart phone or tablet, without having to climb a ladder or scissor lift to connect to the switch. The integrated NFC saves time and labor expense by allowing laborers of any skill level to easily configure the switch prior to powering up and to repeat the configuration across multiple switches. The integrated BLE Antenna allows remote access to the switch for troubleshooting and changing settings, reducing time and hassles related to console cables and ladders or scissor lifts. Related Manuals The following manuals are available on the PowerGIG‐OAC product page, located at https://www.berktek.us/powergig. PowerGIG‐OAC Quick Start Guide PowerGIG‐OAC Installation Guide PowerGIG‐OCA Operation Guide PowerGIG‐MobileApp User Guide (this manual) PowerGIG‐PMK Pole Mount Bracket Kit Installation Guide PowerGIG‐FMK Fiber Management Kit Installation Guide PowerGIG‐DIO Digital Input/Output Module Installation Guide PowerGIG‐CPM Combo Port Module Install Guide Release Notes (version specific) For More Information ... -
Page 5: Installation And Operation
PowerGIG‐OAC PowerGIG‐MobileApp User Guide 2. Installation and Operation System Requirements NOTE: Antivirus and password protection are recommended with BLE operations. Tablet: any Android OS with BLE and NFC capability Smart Phone: any Android OS with BLE and NFC capability Browser: current version of most popular web browsers NOTE: Some third‐party apps can prevent BLE operations from successfully working. Software Components The PowerGIG‐OAC interfaces with the following software elements: Web UI on a desktop or laptop computer Command Line Interface (CLI) Smart phone or tablet via NFC Smart phone or tablet via BLE Automatic Operation The PowerGIG‐OAC switch performs these operations automatically: Shut down the switch if an over temperature condition is detected. If the temperature within the enclosure exceeds 70°C the switch will power off automatically. Shut off power to a port in case of a port being over powered. If the Powered Device (PD) power exceeds the power available, ports will shut down according to priority settings (see the poe priority command in the PowerGIG‐OAC Operation Guide). Load NFC configuration at boot up. An option exists to disable this feature. See the PowerGIG‐OAC Operation Guide. Update PoE firmware at boot up. This can also be done via CLI and Web UI. The switch will only update PSE firmware automatically if it can correctly determine the current running version. Otherwise, the message ... - Page 6 PowerGIG‐OAC PowerGIG‐MobileApp User Guide NOTE: The PowerGIG‐MobileApp is tied to a particular version of firmware. For example, for firmware version 2.1.0.3.20200128, PowerGIG‐MobileApp version 2.1.0 or later should be used. 4. Download and save the PowerGIG‐MobileApp and firmware. NOTE: You must agree to the End User License Agreement to use this software. 5. Unzip the file; if needed, transfer the apk file (e.g. BerkTek‐Release‐2.1.0.apk) to a location on your mobile device. 6. When you select the installation APK, it will ask you if you want to install it. Select Install. The message “Installing…” displays momentarily. When the install is complete the message “App installed.” displays. NOTE: You may need to adjust security settings to allow this 3 party app to be installed on your device. 7. Open the app. a. After the install, a prompt displays the options Done and Open. Click Open. b. From the apps list, select the program PowerGIG‐MobileApp with the BT logo shown below. The main home page appears below: Page 6 of 27 BSP0415.A 33816 www.berktek.us ...
- Page 7 PowerGIG‐OAC PowerGIG‐MobileApp User Guide 8. From the main home page there are two options: INITIALIZE is used with NFC to pre‐configure the switch prior to installation. TROUBLESHOOT is used with BLE to access the switch to check or change configuration or reboot the switch after installation without having to physically access the switch with a cable. The use of these two buttons are briefly detailed starting on page 8. The ideal use case is for the switch to be pre‐configured through NFC (via the PowerGIG‐MobileApp) prior to installation or bootup. The switch is then installed in an out‐of‐reach location (e.g. high on a pole or wall). The switch is powered up and the configuration is set in the switch. At this point, the NFC is no longer used for configuration changes (i.e. no one should have to climb the pole to get close enough to make changes—and no unauthorized person should be able to make changes either). All future changes can be made remotely through the Web UI or at the site (from the ground) through BLE using the PowerGIG‐MobileApp. Page 7 of 27 BSP0415.A 33816 www.berktek.us ...
-
Page 8: Configure
PowerGIG‐OAC PowerGIG‐MobileApp User Guide Configure These steps are used to create a configuration file for the PowerGIG‐OAC switch: 1. Open the PowerGIG‐MobileApp program. 2. From the main home screen (previous page), select INITIALIZE. 3. Select the CONFIGURE tab at the top menu bar, in the middle. 4. At the DHCP Enable checkbox, check to use a DHCP server for automatic IP address assignment or leave unchecked to manually enter IP addresses. 5. Set IP Address: You can select Individual to configure a single switch or Range to configure multiple switches using multiple IP addresses. 6. Enter a Subnet Mask and a Gateway IP address for the switch(es) (required). 7. Enter the management VLAN (Mgmt VLAN) value; default is 1. 8. Enter the Vlan Port Number; default is 1. 9. Uncheck BLE enabled to disable BLE access. WARNING: This will disable access to the switch from the PowerGIG‐MobileApp via BLE after the configuration is installed. This cannot be reversed from the Mobile App and can only be done through the Web UI). 10. The Add User Credentials fields are optional: a. Enter a Username b. Enter a Password 11. In the Set User information fields: a. Enter System Location b. -
Page 9: Transfer
PowerGIG‐OAC PowerGIG‐MobileApp User Guide Transfer These steps are used to transfer a configuration file onto the switch: NOTE: The switch does not need to be powered or connected to the network to perform these steps. 1. Lift the lid of the packaging box that the switch shipped in. 2. Ensure NFC is on within your device’s settings. 3. Open the PowerGIG‐MobileApp program. 4. On the main home screen, select INITIALIZE. 5. Select the Transfer tab at the top (selected by default). The available configuration files are displayed in the box in the left side box on the screen. 6. Select the appropriate file; the name of the file will be highlighted when selected and the config details are displayed in the right side box on the screen. 7. Press the TAP AND GO button. 8. Hold the smart phone or tablet so the NFC reader is directly over the NFC target on the front cover of the switch. NOTE: The device must be within about 1.5 in (4 cm) of the switch. 9. You will hear a “chime” and see a message “Config transferred successfully” when the configuration has been transferred. If you hear a low tone and see a message “Failed to write, please reposition your device and try again”, the configuration has not been transferred. Re‐select TAP AND GO button and reposition the device, being sure to align the NFC reader area of the device directly over the NFC target on the switch cover. 10. The EXPORT button allows you to export the config file to make edits or changes using a different device. NOTE: This is a future enhancement and there is currently no capability to import files. 11. You may delete a file after the config file has been successfully transferred or is no longer needed. Ensure the file name is highlighted and press DELETE FILE. WARNING: This action cannot be undone and deleted files will be lost. ... -
Page 10: Troubleshoot
PowerGIG‐OAC PowerGIG‐MobileApp User Guide intended for use prior to powering up the switch. After installation and power‐up, changes should be made via the Web UI. Troubleshoot This feature lets you connect with and troubleshoot the switch via the BLE interface. If you have multiple PoE++ switches in the vicinity you may need the specific BLE MAC Address from the switch in order to pair the App with the correct switch. This can be found via the Web UI at the following the path Switch > Security > Management > BLE. NOTE: You must use the PowerGIG‐MobileApp for Bluetooth pairing; do not use the Android Bluetooth pairing function. NOTE: The PowerGIG‐MobileApp will not allow you to disable BLE when the device is paired. 1. Ensure Bluetooth is on within your device’s settings. 2. Open the PowerGIG‐MobileApp program. 3. On the main home screen, select TROUBLESHOOT. 4. Pairing ‐ The App should automatically start searching for eligible BLE‐enabled devices to pair with. If it does not, select the RETRY SCAN button to initiate the search. You can limit the displayed devices to only PoE++ switches by checking the PoE++ box above the Pairing box (checked by default). If left unchecked, all available BLE devices in the area will be displayed. 5. A list of available BLE devices displays under Pairing in the upper left corner. Locate the one with the BLE MAC Address for the switch you are trying to troubleshoot. Once the devices have successfully paired, the BLE MAC Address of the switch will be highlighted. 6. Enter the Username that you selected when configuring the switch. Page 10 of 27 BSP0415.A ... -
Page 11: Switch Configuration
PowerGIG‐OAC PowerGIG‐MobileApp User Guide 7. Enter the Password that you selected when configuring the switch. 8. Select LOGIN to log into the switch 9. Switch Commands ‐ you can perform several simple actions with the touch of a button: a. Set IP Address b. Reboot Device c. Turn PoE Power On/Off for a specific port 10. Alternatively, you can type CLI Commands in the large box at the bottom of the screen. NOTE: If the box indicates “Please do the pairing”, the BLE pairing step must be done before you can enter any CLI commands (proceed from step 4 above). Some common CLI commands included for your reference in the PowerGIG‐OAC Operation Guide. For detailed instructions, including sample screen shots, see pages 12‐21. Switch Configuration Switch configuration can also be via: Console Port (Serial) (RS‐232 RJ‐45) (out‐of‐band) Command Line Interface (CLI) Web UI via Ethernet (in‐band) NFC (PowerGIG‐MobileApp) See the PowerGIG‐OAC Operation Guide for commands in each mode. NOTE: There are BLE commands in Exec mode and Config mode. NOTE: BLE must be enabled to use BLE with the PowerGIG‐MobileApp. The switch ships with BLE enabled, but it can also be enabled via the CLI or the Web UI. NOTE: The switch has a BLE session timeout; after a minute of inactivity, the CLI session will be logged out and ... -
Page 12: Powergig-Mobileapp
PowerGIG‐OAC PowerGIG‐MobileApp User Guide 3. PowerGIG‐MobileApp Detailed Instructions with Sample Screen Shots The PowerGIG‐MobileApp interfaces with NFC and BLE to configure and monitor the switch using an Android‐ based smart phone or tablet. The PowerGIG‐MobileApp startup page is shown below: Button Descriptions INITIALIZE: Click to use Near Field Communication (NFC) to pre‐configure the switch before installation. TROUBLESHOOT: Click to use Blue Low Energy (BLE) to access the switch to check change the configuration or reboot the switch after installation without having to physically access the switch with a cable. NFC Interface The NFC interface allows easy setup and access. NFC replaces DIP switches and allows a simple configuration process that requires very little training for installers. It also simplifies installation in situations where more than one switch is being installed, since a range of IP addresses can be designated to configure multiple switches at one time. Antivirus and password protection are recommended for NFC operation. The NFC module is NFC Forum Type 2 Tag Compliant and ISO/IEC 14443A Compliant. NFC Configuration The CONFIGURE tab is used to create a configuration. Select the INITIALIZE button from the main home page, then select CONFIGURE. The pictures shown below are for creating an individual IP address, a range of IP addresses, or DHCP‐assigned IP addresses. Page 12 of 27 BSP0415.A 33816 www.berktek.us ... - Page 13 PowerGIG‐OAC PowerGIG‐MobileApp User Guide Individual IP Address IP Address Range DHCP Enabled Parameter Descriptions DHCP Enabled: Check the box to allow a configured and running DHCP server to automatically assign IP addresses. Uncheck the box to manually assign IP addresses. By default, the box is unchecked. Set IP Address o IP Address: Check the Individual or Range radio button and enter the individual IP address or the range of IP addresses. The default is 192.168.1.10. o Subnet Mask: Enter the subnet mask. The default is 255.255.255.0. o Gateway: Enter the IP address of the gateway. The default is 192.168.1.1. BLE enabled: Check the box to enable the ability to configure the switch via BLE. Configuration will still be allowed via the Web UI or via the CLI commands over a connected console cable. By default, the box is checked. Add User Credentials o Username: Enter the username that you wish to use to access the switch via the PowerGIG‐ MobileApp, Web UI, or CLI. o Password: Enter the password that you wish to use to access the switch via the PowerGIG‐ MobileApp, Web UI, or CLI. Set User information o System Location: Enter text to identify the location of the switch. ...
-
Page 14: Nfc Transfer
PowerGIG‐OAC PowerGIG‐MobileApp User Guide Button Descriptions CREATE FILE: Click to save the configuration file to transfer into the switch(es). ←: Click to go back to the main home page. Error: If the message “Incorrect IP address” displays, check the parameter descriptions above and re‐try the operation. NFC Transfer The TRANSFER tab is used to transmit the saved configuration(s) information into the switch(es). Select the INITIALIZE button from the main home page; this tab will automatically be selected. The transfer screen options are shown below. File Selected TAP AND GO Selected File Transferred NOTE: the switch does not need to be powered, connected, or even removed from the box to do this. Simply lift the switch box lid and follow the steps. Button Descriptions TAP AND GO: Click to transfer the highlighted/selected configuration into a switch. Hold the smartphone or tablet so the NFC reader is directly over the NFC target on the switch front cover. The device must be within about 1.5 in (4 cm) of the switch. You will hear a “chime” when the configuration file has been transferred and the App will display the message “The configuration has been successfully transferred.” Page 14 of 27 BSP0415.A ... -
Page 15: Read Nfc Tag
PowerGIG‐OAC PowerGIG‐MobileApp User Guide If you hear a low tone, the configuration has not been transferred. This is usually because of improper positioning of the device. The App will display a message asking you to reposition the device and try again. Select TAP AND GO and reposition the device, being sure to align the NFC reader area of the device directly over the NFC target on the switch cover. DELETE FILE: Click to delete the highlighted/selected configuration file after it has been transferred and is no longer needed. EXPORT: Click to export the highlighted/selected configuration file to make edits and changes using a different device. NOTE: While you can export (via send), there is currently no capability to import files. ←: Click to go back to the main home page. Read NFC Tag The READ NFC TAG tab is used to check the configuration that has already been transferred to the switch. When the READ NFC TAG tab is selected, the device will automatically begin scanning for NFC transmitters. Hold the smartphone or tablet so the NFC reader is positioned directly over the NFC tag on the switch that you want to check. When successfully read, you will hear a chime and the configuration information will be displayed on the NFC READ NFC TAG Results page, as shown below. If the NFC tag was detected but not read, the information below will be displayed. Page 15 of 27 BSP0415.A 33816 www.berktek.us ... -
Page 16: Ble Interface
PowerGIG‐OAC PowerGIG‐MobileApp User Guide Read NFC Tag Start Screen Read NFC Tag Success Read NFC Tag Error Scanning for tags Detected tag Detected tag – Error reading data on tag. Please try again. Parameter descriptions Detected Tag: Indicates the tag was detected. The next box displays the information from the device. ip: Displays the detected IP address. sysname: Displays the detected system name. syscontact: Displays the detected system contact. location: Displays the detected system location. username: Displays the detected user name. password: Displays the detected system password. serial: Displays the device serial number. mac: Displays the device MAC address. filename: Displays the name of the file. ... - Page 17 PowerGIG‐OAC PowerGIG‐MobileApp User Guide To use Bluetooth features in an app, you must allow Location permission in your device’s Settings menu or when the phone requests it. NOTE: The PowerGIG‐MobileApp will not allow you to disable the BLE when the device is paired. The BLE Pairing page is shown below. Nothing Found Nearby Device Found Paired With Device Parameter Descriptions Pairing: The PowerGIG‐MobileApp should automatically start searching for eligible BLE devices to pair with. If it does not, select the RETRY SCAN button to initiate the search. Username: After selecting the device to pair with, enter the Username that you selected for the specific switch configuration. Password: Enter the Password that you selected for the specific switch configuration, then click the LOGIN button. Button Descriptions POE++: Check the box to limit the set of available devices displayed to only the available PoE++ devices. RETRY SCAN: Click to refresh the list of potential devices for Pairing. The button will change to DISCONNECT after the PowerGIG‐MobileApp is paired with a device. LOGIN: Click after entering Username and Password to access the switch. NOTE: You can log in via the command section found at the bottom. ...
- Page 18 PowerGIG‐OAC PowerGIG‐MobileApp User Guide STOP SCAN: Click to cancel searching for eligible BLE devices. The button will change to RETRY SCAN for future pairing attempts. SET IP ADDRESS: Click to change the IP address. REBOOT DEVICE: Click to reboot the paired device. POE POWER ON: Enter a port number then click this button to turn PoE power for the port on. POE POWER OFF: Enter the port number then click this button to turn PoE power for the port off. DISCONNECT: Click to cancel the pairing and disconnect from the current device. Message Descriptions Please do the pairing means the PowerGIG‐MobileApp is not currently paired with a switch. Scanning for devices… means the PowerGIG‐MobileApp is attempting to pair with a switch. A list of available devices will display in the Pairing box on the BLE Pairing Prompt page as shown below. Nearby Device Found Paired With Device Locate the device with the BLE Mac address of the switch you want to troubleshoot. Check if the devices have successfully paired; the switch BLE MAC address will be highlighted in the BLE Pairing section of the page as shown above. Several common CLI commands have been set up as simple button commands. Alternatively, you can type other CLI commands directly in the large box at the bottom of the screen. You must first log in using Username and Password. The BLE login page is shown below for a switch that is paired, already logged in, and prompting for an action. ...
-
Page 19: Switch Cli Commands
PowerGIG‐OAC PowerGIG‐MobileApp User Guide Parameter Descriptions qwerty keyboard: Keyboard keys for entering CLI commands. See the PowerGIG‐OAC Operation Guide. It will use the default keyboard, which will show when clicking into a text box. PowerGIG‐OAC login: The default Username and Password are admin. We recommend changing the login per your organization’s security policy. Message Descriptions Login incorrect displays if not logged in or incorrect login information is entered. Type command here… displays to prompt for CLI command entry. When you click the DISCONNECT button, the BLE Disconnected message displays as shown below. When the message Disconnected from <mac address> displays, click the OK button to continue. Switch CLI Commands The CLI Command prompt is shown below. See the PowerGIG‐OAC Operation Guide for the full set of available CLI commands. Page 19 of 27 BSP0415.A 33816 www.berktek.us ... -
Page 20: Update Existing Application
PowerGIG‐OAC PowerGIG‐MobileApp User Guide Ready for CLI commands Show Version command Example: show version command Berk‐Tek PowerGIG‐OAC # Type command here... show version 2.1.0.3 20200128 Active Rev: 2.0.4.6 20190809 Backup Rev: PowerGIG‐OAC Device name: Hardware Revision: 1.2.0 Bootloader Revision: ... -
Page 21: Additional Information
PowerGIG‐OAC PowerGIG‐MobileApp User Guide 5. Additional Information Q & A Q1: What is the PowerGIG‐MobileApp used for? A1: The PowerGIG‐MobileApp interfaces with the NFC and BLE features to allow switch configuration, remote diagnosis, and troubleshooting without having to climb a ladder or scissor lift to connect to the switch. Q2: How can you configure the switch without it being powered up? A2: When the NFC‐enabled device (smartphone or tablet) and the NFC “tag” or antenna on the switch are in close proximity, a magnetic field is formed and the power from that magnetic field uses modulation to transfer data. The NFC antenna/tag contains a nonvolatile EEPROM which retains the data transferred from the smartphone or tablet even after it moves out of proximity, and the configuration is transferred into the switch’s memory once the switch is fully powered up. Q3: What does the BLE feature do? A3: The Bluetooth Low Energy feature allows remote access to the switch without having to physically connect with a cable, so monitoring and troubleshooting and changes can be made prior to leaving the job site or after ladders or scissor lifts have been removed. The maximum range is approximately 328 feet (100 meters); local environmental factors (such as trees, building materials, etc.) can limit this distance. Q4: Are the BLE and NFC features safe and secure enough for my network? A4: NFC is considered very secure and is frequently used for contactless payments (e.g. Apple Pay). A secure channel is established and uses encryption for sending sensitive information. However, we always recommend users have antivirus software and passwords on their devices in case they are lost or stolen. Page 21 of 27 BSP0415.A 33816 www.berktek.us ... -
Page 22: Troubleshooting
PowerGIG‐OAC PowerGIG‐MobileApp User Guide BLE uses Advanced Encryption Standard (AES), 128/256, SHA‐1, SHA‐2 (SHA‐224 and SHA‐256) and ECC (Elliptic Curve Cryptography) encryption. It uses an authenticated encryption algorithm designed to provide both authentication and confidentiality. AES was adopted by the US Government in 2002 and is used worldwide. Troubleshooting Use the NFC section of the PowerGIG‐MobileApp to configure before or during installation. Use the BLE section of the PowerGIG‐MobileApp to troubleshoot after installation. See the PowerGIG‐OAC Installation Guide for PoE Modes, Compliance, Standards and Troubleshooting, and other related topics. 1. Check the Release Notes for any known issues. 2. Verify your port configuration. See the PowerGIG‐OAC Installation Guide. 3. Verify the “Console Port Setup” in the PowerGIG‐OAC Installation Guide. 4. Verify the CLI command syntax, parameters, and mode; see the PowerGIG‐OAC Operation Guide. 5. Verify the Web UI operation; see the specific Web UI module in the PowerGIG‐OAC Operation Guide. 6. Re‐try the attempted operation from another interface (e.g. try Web UI). 7. Monitor and document LED conditions; see the PowerGIG‐OAC Operation Guide. 8. Verify the switch’s firmware is the latest version and upgrade if available. 9. If the issue is a suspected PoE issue, see the PowerGIG‐OAC Operation Guide. 10. Make sure any related hardware (Camera, WAP, SFP, Injector, etc.) is connected and operating correctly. See the related device manuals and troubleshooting guides. 11. Check and update your Android version. 12. See “NFC Troubleshooting” on page 22 if an NFC issue. 13. See “Bluetooth Troubleshooting” on page 23 if a Bluetooth issue. 14. -
Page 23: Bluetooth Troubleshooting
PowerGIG‐OAC PowerGIG‐MobileApp User Guide Bluetooth Troubleshooting NOTE: Use the PowerGIG‐MobileApp for Bluetooth pairing; do not use the Android Bluetooth pairing function. The Mobile App will not allow you to disable the BLE when the device is paired. Verify that your device has Bluetooth capabilities. If you cannot connect your Android device after verifying Bluetooth, please follow these steps: 1. Check that BLE is enabled on the switch. Using the Web UI, go to Security > Management > BLE. If BLE Broadcast is Disabled, change to Enabled, click Apply, and save the configuration. Try pairing with the PowerGIG‐MobileApp again; if it does not work, continue on with the remaining steps. 2. On your Android device, go to the settings and make sure that Bluetooth is on, per your device’s manual. If you can't turn on Bluetooth or you see a spinning gear, restart your device. Then try to pair and connect it again. 3. Make sure that the switch and Android device are within approximately 328 feet (100 meters) or less to each other; try to get as close as physically possible. 4. When using the BLE feature on the Switch Manager Mobile App: If your configured switch does not appear in the list of Pairing Devices, select Retry Scan. Once paired, the switch configuration should remain highlighted in green until you Disconnect. If you lose pairing, try closing out of the Switch Manager Mobile App, go back into the PowerGIG‐MobileApp and pair again. 5. Check and update your Android version. 6. Contact your mobile device manufacturer’s technical support if you still have any of these issues: You can’t turn on Bluetooth or the setting is grayed out. You can’t connect any Bluetooth accessories with your device. The accessory manufacturer confirmed that your accessory is working correctly. 7. Contact Berk‐Tek’s TEK Support for issues with the PowerGIG‐MobileApp or the switch. WARNING: Some third‐party apps can prevent the BLE interface from working properly, despite following all of the steps above. ... - Page 24 PowerGIG‐OAC PowerGIG‐MobileApp User Guide 7. Glossary of Terms NOTE: The mention or definition of a term here does not imply that the switch supports that particular feature. 802.11b standard has a maximum raw data rate of 11 Mbit/s and uses the same media access method defined in the original standard. 802.11b products appeared on the market in early 2000, since 802.11b is a direct extension of the modulation technique defined in the original standard. The dramatic increase in throughput of 802.11b (compared to the original standard) along with simultaneous substantial price reductions led to the rapid acceptance of 802.11b as the definitive wireless LAN technology. Devices using 802.11b experience interference from other products operating in the 2.4 GHz band. Devices operating in the 2.4 GHz range include microwave ovens, Bluetooth devices, baby monitors, cordless telephones, and some amateur radio equipment. 802.11g modulation standard was ratified in June 2003. This works in the 2.4 GHz band (like 802.11b) but uses the same OFDM based transmission scheme as 802.11a. It operates at a maximum physical layer bit rate of 54 Mbit/s exclusive of forward error correction codes, or about 22 Mbit/s average throughput. 802.11g hardware is fully backward compatible with 802.11b hardware, and therefore is encumbered with legacy issues that reduce throughput by ~21% when compared to 802.11a. 802.11n is an amendment that improves upon the previous 802.11 standards by adding multiple‐input multiple‐ output antennas (MIMO). 802.11n operates on both the 2.4 GHz and the 5 GHz bands. Support for 5 GHz bands is optional. Its net data rate ranges from 54 Mbit/s to 600 Mbit/s. The IEEE has approved the amendment, and it was published in October 2009. Prior to the final ratification, enterprises were already migrating to 802.11n networks based on the Wi‐Fi Alliance’s certification of products conforming to a 2007 draft of the 802.11n proposal. APK File and “Sideloading”: The .apk (Android Package) is a package file format used by the Android OS for distributing and installing mobile apps. APK files are a type of archive file, specifically in zip format packages, based on the JAR file format, with .apk as the filename extension. APK files can have any name needed, as long as the file name ends in the file extension ".apk". APK files can be installed on Android‐powered devices just like installing software on a PC. When you download and install an Android application, you are installing an APK file on to your device. You can also install an APK file directly to a device (i.e. not via download from the network) from a desktop computer, using a communication program (e.g. adb) or from within a file manager app in a process known as "sideloading". Installing APK files downloaded outside the Google Play is disabled by default. You can install unknown APK files by enabling "Unknown sources" from "Accounts and Security" in Settings. With Android apps, "sideloading" usually means installing an application package in APK format onto an Android device. Such packages are usually downloaded from websites other than Google play, usually with a computer. Sideloading apps is only ...
- Page 25 PowerGIG‐OAC PowerGIG‐MobileApp User Guide AirDroid is a free and fast app that helps you manage your Android devices from a web browser, all over the air. AirDroid lets you take complete control of your Android device from a web browser on a PC. AirDroid is a secure comprehensive free download app. Bluetooth Low Energy (BLE): Bluetooth® Low Energy (LE) enables short‐burst wireless connections and uses multiple network topologies. The Bluetooth LE broadcast topology supports localized information sharing and is well suited for beacon solutions, such point‐of‐interest (POI) information and item‐finding and way‐finding services. Bluetooth Low Energy (Bluetooth LE, BLE, formerly marketed as “Bluetooth Smart” is a wireless personal area network technology designed and marketed by the Bluetooth Special Interest Group (Bluetooth SIG) aimed at novel applications in the healthcare, fitness, beacons, security, and home entertainment industries. Compared to Classic Bluetooth, Bluetooth Low Energy is intended to provide considerably reduced power consumption and cost while maintaining a similar communication range. BLE broadcasting can be disabled via the CLI or the Web UI. Mobile OS support: iOS, Android, Windows Phone, BlackBerry, MacOS, Linux, Windows 8, and Windows 10 natively support BLE. Endspan: PSE type located at the end of the twisted‐pair channel. For example, a switch. IEEE 802.3bt: Trade names of PoE++, 4P PoE. Types 1, 2, 3, and 4. Max speed of 10GBASE‐T. Power on 4 out of 4 pairs, up to 960 mA / pair (480 mA / wire); PSE: Max of 99.9 W, PD: Max of 71 W. Near Field Communication (NFC) is a form of contactless communication between devices like smartphones or tablets. Contactless communication allows a user to wave the smartphone over a NFC compatible device to send information without needing to touch the devices together or go through multiple steps setting up a connection. NFC technology lets smartphones and other enabled devices communicate with other devices with a NFC tag. NearFieldCommunication.org is devoted to educating individuals, small businesses, and large companies alike on the merits of near field communication. NFC establishes a secure channel and uses encryption for sending sensitive information. Recommend users have antivirus software and passwords on their devices in case they are lost or stolen. NFC state can be disabled via the CLI or the Web UI. For more information about the official standards and regulations surrounding near field communication, check out the NFC Forum. NFC Data Exchange Format (NDEF): is a light‐weight binary format, used to encapsulate typed data. It is specified by the NFC Forum, for transmission and storage with NFC, however it is transport agnostic. NDEF defines messages and records. An NDEF Record contains typed data, such as MIME‐type media, a URI, or a custom application payload. An NDEF Message is a container for one or more NDEF Records. Powered Device (PD): A device that receives power from a PSE over the twisted‐pair copper cabling channel ...
- Page 26 PowerGIG‐OAC PowerGIG‐MobileApp User Guide 8. Record of Revisions Rev. Date Description A 01/28/2020 Initial release of PowerGIG‐MobileApp at v 2.1.0. Trademark notice: All trademarks and registered trademarks are the property of their respective owners. All other products or service names used in this publication are for identification purposes only and may be trademarks or registered trademarks of their respective companies. All other trademarks or registered trademarks mentioned herein are the property of their respective holders. Copyright restrictions: © 2020 Berk‐Tek LLC. All rights reserved. No part of this work may be reproduced or used in any form or by any means (graphic, electronic, or mechanical) without written permission from Berk‐Tek LLC. Page 26 of 27 BSP0415.A 33816 www.berktek.us ...
- Page 27 PowerGIG‐OAC PowerGIG‐MobileApp User Guide About Berk‐Tek, A Nexans Company Berk‐Tek is a premier manufacturer of more than 100 different network infrastructure solutions. For more than 50 years, Berk‐Tek has led the industry in the development of high‐performance and enhanced fiber optic and copper cables designed to transport high‐speed data, voice and power transmissions. Berk‐Tek’s world‐class research and development teams are dedicated to developing innovative structured cabling solutions that are critically important to managing the demands of today’s emerging technologies. Berk‐Tek has manufacturing facilities in New Holland, PA and Fuquay‐Varina, NC. For more information, visit www.berktek.us. About Nexans Nexans brings energy to life through an extensive range of advanced cabling systems, solutions and innovative services. For over 120 years, Nexans has been providing customers with cutting‐edge cabling infrastructure for power and data transmission. Today, beyond cables, the Group advises customers and designs solutions and services that maximize performance and efficiency of their projects in four main business areas: Building & Territories (including utilities, e‐mobility), High Voltage & Projects (covering offshore wind farms, submarine interconnections, land high voltage), Telecom & Data (covering data transmission, telecom networks, hyperscale data centers, LAN), and Industry & Solutions (including renewables, transportation, Oil & Gas, automation, and others). Corporate Social Responsibility is a guiding principle of Nexans’ business activities and internal practices. In 2013 Nexans became the first cable provider to create a Foundation supporting sustainable initiatives bringing access to energy to disadvantaged communities worldwide. The Group’s commitment to developing ethical, sustainable and high‐quality cables also drives its active involvement within leading industry associations, including Europacable, the NEMA, ICF or CIGRE to mention a few. Nexans employs nearly 27,000 people with industrial footprint in 34 countries and commercial activities worldwide. In 2018, the Group generated 6.5 billion euros in sales. Nexans is listed on Euronext Paris, compartment A. Berk‐Tek LLC 132 White Oak Road New Holland, PA 17557 U.S.A. toll free: 1‐800‐BERK‐TEK (1‐800‐237‐5835) | +1‐717‐354‐6200 | fax: 717‐354‐7944 berktek.support@nexans.com PowerGIG‐MobileApp User Guide Page 27 of 27 BSP0415.A ...
Need help?
Do you have a question about the Berk-Tek PowerGIG-OAC and is the answer not in the manual?
Questions and answers