
Related Manuals for Home Depot Home Decorators Conner


Summary of Contents for Home Depot Home Decorators Conner
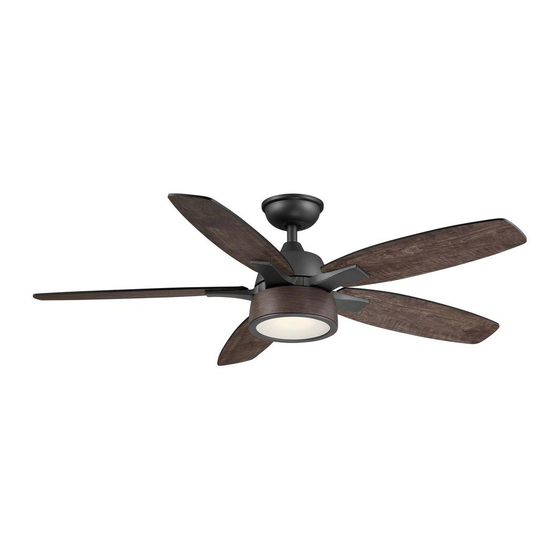
- Page 1 129 825 YG614-NI Model: 120 V~ 60 Hz 80 W Read and follow all the instructions before using this product. Conner Ceiling Fan Owner’s Manual Conner Ventilador de Techo de 1,32 Manual del Propietario...
- Page 2 ongratulations on your A large selection of light fixtures purchase of a Home and light kits is also available. Ask Decorators Collection your dealer about other ceiling fan, Your new fan will be a accessories that will allow you to beautiful addition to your home, further customize your fan.
- Page 3 Consumo de energía por unidad de tiempo en operación (Energy Consumption): 75.63 Wh Importador/Importer: SERVICIOS HOME DEPOT, S. DE R.L. DE C.V. Ricardo Margain 605, Santa Engracia, San Pedro Garza García, Nuevo León, C.P. 66267 Tel./Phone: 01 800 004 6633 Lea y siga todas las instrucciones de seguridad y operación antes de usar...
-
Page 4: Table Of Contents
52” Conner Thank you for purchasing our ceiling fan. This product has been manufactured with the highest standards of safety and quality. Ceiling Fan by HDC Date Purchased Table of Contents Store Purchased Safety Rules ....1 129-825 Unpacking Your Fan . -
Page 5: Safety Rules
Safety Rules - Read and Save These Instructions To reduce the risk of electric shock, insure electricity has been turned off After making electrical connections, spliced conductors should be turned at the circuit breaker or fuse box before beginning. upward and pushed carefully up into outlet box. The wires should be spread apart with the grounded conductor and the equipment-grounding All wiring must be in accordance with the National Electrical Code conductor on one side of the outlet box and ungrounded conductor on the... -
Page 6: Unpacking Your Fan
Unpacking Your Fan Unpack your fan and check the contents. You should have the following items: Set of blades (5) Mounting plate Electrical Hardware (3 Plastic Wire Nuts) Canopy assembly 14 watt LED Light kit Ball/downrod assembly Light kit cover Coupling cover Receiver with 6 wire nuts Fan motor assembly... -
Page 7: Installing Your Fan
MAY NOT BE ACCEPTABLE FOR FAN SUPPORT but no ceiling joist, you may need an installation AND MAY NEED TO BE REPLACED. CONSULT A Figure 2 hanger bar as shown in Figure 4 (available at any QUALIFIED ELECTRICIAN IF IN DOUBT. Home Depot store). - Page 8 3 pieces from the downrod and assemble them Figure 5 onto longer downrod before proceeding step 4. (The longer downrod is Figure 7 available at any Home Depot store)
- Page 9 Installing Fan to NOM Listed the Electrical Box Cross pin Ground Lead Outlet Box Set Screw Hanger Ball Downrod WARNING Pin in Locked Mounting TO REDUCE THE RISK OF FIRE, ELECTRIC Motor Wires Positioon SHOCK OTHER PERSONAL INJURY. Screws (Supplied MOUNT FAN ONLY TO AN OUTLET BOX OR Ceiling Canopy with Outlet Box)
- Page 10 Making the Electrical bulbs, use a ballpoint pen or small screwdriver After checking the switches, insert the receiver to set the switch to O to disable the dimming into the mounting bracket with the flat side of Connections function. If using dimmable bulbs, set the the receiver facing the ceiling.
- Page 11 NOTE (Figure 13) Motor to receiver electrical SUPPLY CIRCUIT connections: Connect the black wire from the FAN MUST BE INSTALLED AT A MAXIMUM fan to black wire marked "TO MOTOR L". DISTANCE FEET FROM TRANSMITTING UNIT FOR PROPER SIGNAL Connect the white wire from the fan to the Ground TRANSMISSION BETWEEN...
- Page 12 Finishing the Fan Outlet Box Installation Screws Ceiling Mounting Slide canopy up to the ceiling as shown in Figure Bracket 14. Make sure you place the wires safely into the Canopy outlet box. Secure the canopy to the mounting bracket with the four screws with your fan. Slide the canopy ring over the canopy and turn the Canopy canopy ring clockwise until the canopy ring are...
- Page 13 Attaching the Fan Blades To install the blade to the blade arm: Blade Key-slot Holes Hold the blade with hands close to the blade arm, align the key-slot holes with the blade arm posts and press the blade down firmly. Ensure the key-slot holes are properly seated on the blade arm posts.
- Page 14 Attaching the Blade Assembly WARNING THE FAN MOTOR ASSEMBLY IS SHIPPED WITH MOTOR SUPPORT PLATE TO PREVENT MOVEMENT DURING TRANSPORTATION. REMOVE THE MOTOR SUPPORT PLATE FROM THE FAN MOTOR ASSEMBLY AND DISCARD PRIOR TO ATTACHING THE BLADE ARMS. WARNING Motor TO REDUCE THE RISK OF PERSONAL INJURY, DO NOT BEND THE Assembly BLADE ARMS WHILE INSTALLING, BALANCING THE BLADES, OR...
- Page 15 Blade Balancing Installing the Mounting If deviation is greater than 1/8”, please call Customer Service (01-800-004-6633) to order Plate complimentary replacements of your brackets. All blades are grouped by weight during assembly. The following procedure should correct most fan Remove 1 of the 3 screws from the mounting wobble.
-
Page 16: Installing The Light Kit
Installing the Light Kit CAUTION BEFORE STARTING INSTALLATION, DISCON- NECT THE POWER BY TURNING OFF THE CIRCUIT BREAKER OR REMOVING THE FUSE AT FUSE BOX. TURNING POWER OFF USING THE FAN SWITCH IS NOT SUFFICIENT TO PREVENT ELECTRIC SHOCK. Remove the 1 of 3 screws from the posts of the mounting plate and keep it for future use. -
Page 17: Operating Your Transmitter
Operating Your Transmitter - Press and release the button to turn the - While the fan is on press 1 time - turns fan on or off. on a 2 hour run timer. - While the fan is on press 2 times - turns - Press and release 1 time - turns the fan on on a 4 hour run timer. - Page 18 Speed settings for warm or cool weather depend on factors such as the room size, ceiling height, number of fans, etc. The reverse switch is located on the top of motor housing. Slide the switch to the left for warm weather operation.
-
Page 19: Care Of Your Fan
Care of Your Fan Troubleshooting PROBLEM SOLUTION Here are some suggestions to help you maintain your fan. The fan will not start. Check main and branch circuit fuses or breakers. Because of the fan's natural movement, some Check line wire connections to the fan and switch wire connections in connections may become loose. -
Page 20: Specifications
134.13 These are approximate measures. They do not include Amps and Wattage used by the light kit. Importer: SERVICIOS HOME DEPOT, S. DE R.L. DE C.V. The appliance is not to be used by persons (including Ricardo Margain 605, Santa Engracia, San Pedro Garza García, children) with reduced physical, sensory or metal capabili- Nuevo León, C.P.
Need help?
Do you have a question about the Home Decorators Conner and is the answer not in the manual?
Questions and answers