Table of Contents
Advertisement
Available languages
Available languages
Quick Links
Item #1000 020 187, 458 301, 458 611, 458 633
Model #99966, 99963, 99961, 99962
UL Model #52-WWDIV
USE AND CARE GUIDE
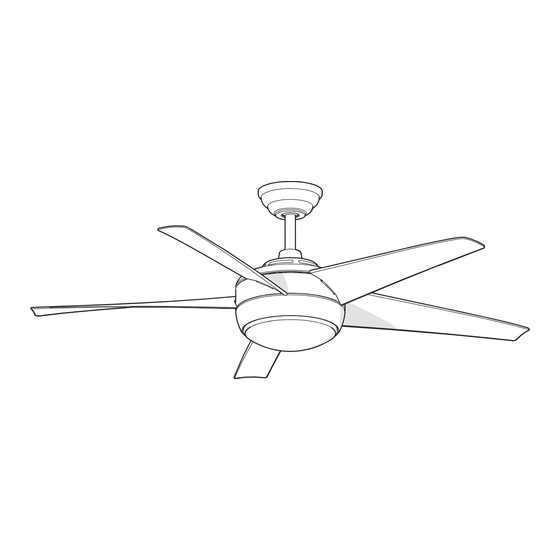
WINDWARD IV 52-INCH CEILING FAN
Questions, problems, missing parts? Before returning to the store,
call Home Decorators Collection Customer Service
8 a.m. - 6 p.m., EST, Monday-Friday.
1-800-986-3460
HOMEDEPOT.COM/HOMEDECORATORS
THANK YOU
We appreciate the trust and confidence you have placed in Home Decorators Collection through the purchase of this ceiling fan. We strive
to continually create quality products designed to enhance your home. Visit us online to see our full line of products available for your home
improvement needs. Thank you for choosing Home Decorators Collection!
Advertisement
Chapters
Table of Contents

Subscribe to Our Youtube Channel
Related Manuals for Home Depot WINDWARD IV 99966


Summary of Contents for Home Depot WINDWARD IV 99966
- Page 1 Item #1000 020 187, 458 301, 458 611, 458 633 Model #99966, 99963, 99961, 99962 UL Model #52-WWDIV USE AND CARE GUIDE WINDWARD IV 52-INCH CEILING FAN Questions, problems, missing parts? Before returning to the store, call Home Decorators Collection Customer Service 8 a.m.
-
Page 2: Table Of Contents
Table of Contents Table of Contents ..............2 Assembly ................7 Safety Information ............... 2 Operation ................15 Warranty ................3 Care and Cleaning ............. 16 Pre-Installation ..............3 Troubleshooting ..............16 Installation ................6 Safety Information READ AND SAVE THESE INSTRUCTIONS. WARNING: To reduce the risk of personal injury, do not bend the blade brackets (also referred to as To reduce the risk of electric shock, ensure the electricity has... -
Page 3: Warranty
Warranty The supplier warrants the fan motor to be free from defects in workmanship and material present at time of shipment from the factory for a lifetime after the date of purchase by the original purchaser. The supplier also warrants that all other fan parts, excluding any glass or acrylic blades, to be free from defects in workmanship and material at the time of shipment from the factory for a period of two years after the date of purchase by the original purchaser. -
Page 4: Hardware Included
Pre-Installation (continued) HARDWARE INCLUDED NOTE: Hardware not shown to actual size. Part Description Quantity Blade attachment screws Wire connecting nut Rubber Gasket... -
Page 5: Package Contents
Pre-Installation (continued) PACKAGE CONTENTS Part Description Quantity Part Description Quantity Slide-on mounting bracket Decorative motor collar cover (inside canopy) Blade Ball/downrod assembly Glass bowl Canopy with canopy ring attached CFL Bulb, 13-watts maximum Fan-motor assembly Receiver Light kit fitter assembly Remote (batteries included) IMPORTANT: This product and/or components are governed by one or more of the following U.S. -
Page 6: Installation
To hang your fan where there is an existing fixture but no ceiling joist, you may need an installation hanger bar as shown above (available at any Home Depot store). Outlet Box Outlet Box Provide Strong... - Page 7 Assembly - Standard Ceiling Mount Preparing for mounting Routing the wires □ □ Remove the canopy ring (FF) from the canopy (C) by turning Route the wires exiting the top of the fan motor (D) into the ring counter-clockwise until it unlocks. the decorative motor collar cover (F) and through the □...
- Page 8 Assembly - Close-To-Ceiling Mount Close-to-Ceiling Mounting Routing the wires □ □ Remove the canopy ring (FF) from the canopy (C) by turning the Remove three of the six screws and lock washers (every other ring counter-clockwise until it unlocks. one) securing the motor collar (M) to the top of the fan motor □...
-
Page 9: Assembly
Assembly - Hanging the Fan (continued) Installing the receiver Setting the remote control codes WARNING: To reduce the risk of fire or electric shock, NOTE: The frequencies on your receiver and hand unit have remember to disconnect power. The electrical wiring must been preset at the factory. -
Page 10: Electrician
Assembly - Hanging the Fan (continued) Wiring the receiver to the household wiring WARNING: To avoid possible electrical shock, turn the electricity off at the main fuse box before wiring. If you feel you do not have enough electrical wiring knowledge or experience, contact a licensed electrician. - Page 11 Assembly - Hanging the Fan (continued) Making the electrical connection WARNING: Each wire not supplied with this fan is designed to accept up to one 12-gauge house wire and two wires from the fan. If you have larger than 12-gauge house wiring or more Outlet box than one house wire to connect to the fan wiring, consult an in the ceiling...
- Page 12 Assembly - Hanging the Fan (continued) Mounting the fan Wrapping the extra wire WARNING: When using the standard ball/downrod mounting, the NOTE: Follow this step ONLY if you did not cut the extra length off tab in the ring at the bottom of the mounting bracket must rest in from the wires coming from the ceiling fan to the receiver.
-
Page 13: Attaching The Fan Blades
Assembly - Hanging the Fan (continued) Close-to-Ceiling mounting Attaching the fan blades WARNING: The locking slots of the celling canopy are provided only □ Attach a blade (G) to the fan motor housing (D) by first as an aid to mounting. Do not leave the fan assembly unattended until all four canopy screws are engaged and firmly tightened. - Page 14 Assembly - Installing the Light Kit Attaching the light kit Installing the Light bulbs CAUTION: To reduce the risk of electric shock, disconnect WARNING: Do not overtighten when installing the glass shade the electrical supply circuit to the fan before installing the into the light kit assembly.
-
Page 15: Operation
Operation CAUTION: This device complies with part 15 of the FCC rules. Changes or modifications not expressly approved by the manufacturer could void your authority to operate this equipment. Remote Control - Your fan is equipped with a remote control to operate the speed and lights of your new ceiling fan. -
Page 16: Care And Cleaning
Care and Cleaning WARNING: Make sure the power is off before cleaning your fan. □ Because of the fan’s natural movement, some connections may become loose. Check the support connections, brackets, and blade attachments twice a year. Make sure they are secure. It is not necessary to remove the fan from the ceiling. □... - Page 17 This device complies with Part 15 of the FCC Rules. Operation is subject to the following two conditions: (1) This device may not cause harmful interference, and (2) this device must accept any interference received, including interference that may cause undesired operation. Questions, problems, missing parts? Before returning to the store, call Home Depot Customer Service 8 a.m. - 6 p.m., EST, Monday-Friday 1-800-986-3460 HOMEDEPOT.COM/HOMEDECORATORS...
- Page 18 Artículo Núm. #1000 020 187, 458 301, 458 611, 458 633 Modelo Núm. #99966, 99963, 99961, 99962 Modelo Núm.52-WWDIV Aprobado por UL GUÍA DE USO Y MANTENIMIENTO WINDWARD IV - VENTILADOR DE TECHO DE 52” (1,32 m) ¿Preguntas, problemas o piezas faltantes? Antes de regresar a la tienda, llama al Servicio al Home Decorators Collection Customer Service de Lunes a Viernes entre 8 a.m.
- Page 19 Tabla de Contenido Tabla de Contenido ............. 2 Ensamblado ................. 7 Información de Seguridad ..........2 Funcionamiento ..............15 Garantía ................3 Mantenimiento y Limpieza ..........16 Pre-Instalación ..............3 Solución de problemas ............ 16 Instalación ................6 Información de Seguridad LEE LAS INSTRUCCIONES Y GUÁRDALAS.
-
Page 20: Garantía
Garantía El proveedor garantiza de por vida, a partir de la fecha en que el comprador original lo adquiere, que el motor del ventilador no presenta defectos de fabricación ni de material al momento en que es enviado desde la fábrica. El proveedor también garantiza por un período de dos años, a partir de la fecha de compra por el comprador original, que todas las demás piezas del ventilador, sin incluir ninguna aspa de vidrio o acrílico, no presentarán ningún defecto de fabricación o de material desde el momento de su salida de la fábrica. - Page 21 Pre-Instalación (continuación) HERRAJES INCLUIDOS NOTA: No se muestra el tamaño real de los herrajes. Pieza Descripción Cantidad Tornillo de montaje de aspas Tuerca para conectar cable Junta de goma...
-
Page 22: Contenido Del Paquete
Pre-Instalación (continuación) CONTENIDO DEL PAQUETE Pieza Descripción Cantidad Pieza Descripción Cantidad Soporte deslizante de montaje Cubierta decorativa del collarín del (dentro de la cubierta) motor Ensamblado de tubo bajante/bola Aspa Cubierta con aro incorporado Tazón de vidrio Ensamblaje del motor del ventilador Focos de 13W Ensamblaje del soporte del juego de Receptor... -
Page 23: Instalación
Las ilustraciones a continuación muestran tres formas muestra arriba (disponible en cualquier tienda de The Home Depot). diferentes de montar la caja eléctrica. Caja Eléctrica... - Page 24 Ensamblaje - Montaje Estándar en Techo Preparar el montaje Disposición de los cables □ □ Retira el aro de cubierta (FF) de la cubierta (C), girándolo en Inserta los cables que salen por la parte superior del sentido contrario a las manecillas del reloj hasta soltarlo. motor del ventilador (D) en la cubierta decorativa del □...
-
Page 25: Ensamblado
Ensamblaje — Montaje “Cerca del Techo” Montaje Cerca del Techo Pasar los cables □ □ Retira el aro de cubierta (FF) de la cubierta (C), girándolo en Retira tres de los seis tornillos y arandelas de seguridad sentido contrario a las manecillas del reloj hasta soltarlo. (alternados) que sujetan el collarín del motor (M) a la parte □... - Page 26 Ensamblaje — Colgar el Ventilador (continuación) Cómo configurar los códigos del Instalar el Receptor control remoto ADVERTENCIA: Para reducir el riesgo de incendio o de NOTA: Las frecuencias del receptor y de la unidad de mano han descarga eléctrica, recuerda desconectar la electricidad. sido preconfiguradas en la fábrica.
- Page 27 Ensamblaje - Cómo colgar el ventilador (continuación) Como conectar los cables del receptor a los cables del hogar ADVERTENCIA: Para evitar una posible descarga eléctrica, desconecta la electricidad de la caja de fusibles principal antes de realizar el cableado. Si crees que no tienes suficiente conocimiento o experiencia sobre cableado eléctrico, contacta a un electricista certificado.
- Page 28 Ensamblaje — Colgar el Ventilador (continuación) Cómo conectar los cables del ventilador a los del receptor Caja eléctrica en el techo (LL) ADVERTENCIA: Cada cable no suministrado con este ventilador está diseñado para aceptar un máximo de un solo circuito eléctrico doméstico de calibre 12 y dos cables del ventilador.
- Page 29 Ensamblaje - Cómo colgar el ventilador (continuación) Cómo montar el ventilador Cómo enroscar el cable sobrante ADVERTENCIA: Cuando uses el montaje de tubo bajante y bola estándar, la pestaña en el aro en la parte inferior de la placa NOTA: Sigue estos pasos SOLAMENTE si no cortaste el cable de montaje debe encajar en la ranura de la bola de soporte.
- Page 30 Ensamblaje — Colgar el Ventilador (continuación) Cómo montar las aspas del Montaje Cerca del Techo ventilador □ ADVERTENCIA: Las ranuras de cierre de la cubierta del techo sólo Coloca el aspa (G) en la carcasa del motor del ventilador (D) sirven de ayuda durante el montaje.
- Page 31 Ensamblaje - Cómo Instalar el Juego de Luces Cómo instalar el juego de luces Cómo instalar los focos PRECAUCIÓN: Para disminuir el riesgo de descarga ADVERTENCIA: No apretar demasiado al instalar la pantalla eléctrica, desconecta el circuito de energía del ventilador de vidrio en el ensamblado del juego de luces.
-
Page 32: Funcionamiento
Funcionamiento PRECAUCIÓN: Este dispositivo cumple con la parte 15 de las regulaciones de la FCC. Los cambios o modificaciones no expresamente aprobados por el fabricante podrían anular el derecho del usuario para operar este equipo. Control Remoto - Tu ventilador está equipado con un control remoto que controla la velocidad, la dirección y las luces de tu nuevo ventilador de techo. -
Page 33: Mantenimiento Y Limpieza
Mantenimiento y Limpieza ADVERTENCIA: Asegúrate de que la corriente esté apagada antes de limpiar el ventilador. □ Debido al movimiento natural del ventilador, algunas conexiones pueden aflojarse. Revisa las conexiones de soporte, soportes y ac- cesorios de aspas dos veces al año. Verifica que estén seguros. No es necesario desmontar el ventilador del techo. □... - Page 34 Este equipo ha sido probado y se determinó que cumple con los límites establecidos para un dispositivo digital Clase B, de acuerdo con la Parte 15 de las Normas de la FCC. Estos límites fueron establecidos para ofrecer protección razonable contra la interferencia dañina durante uso residencial. Este equipo genera, usa y puede irradiar energía de radiofrecuencia y, si no se instala y usa de acuerdo con las instrucciones, puede causar interferencia dañina a comunicaciones radiales.
Need help?
Do you have a question about the WINDWARD IV 99966 and is the answer not in the manual?
Questions and answers
what button do I press to turn off without it keep coming back on I press the top button to turn off but the **** comes on later
To turn off the Home Depot WINDWARD IV 99966 ceiling fan without it turning back on automatically, ensure that any timer functions or automatic temperature settings are disabled. Press the power button on the remote control to turn off the fan. If the fan turns back on, check if the automatic temperature control or Comfort Breeze™ mode is activated and disable them as needed.
This answer is automatically generated