Microtek ScanMaker 1000XL Start Here Manual
Hide thumbs
Also See for ScanMaker 1000XL:
- User manual (37 pages) ,
- Brochure & specs (2 pages) ,
- Reference manual (151 pages)
Advertisement
Quick Links
Start Here
Installing your Microtek ScanMaker 1000XL
Step 1:
Unpack your scanner package and check
for major components.
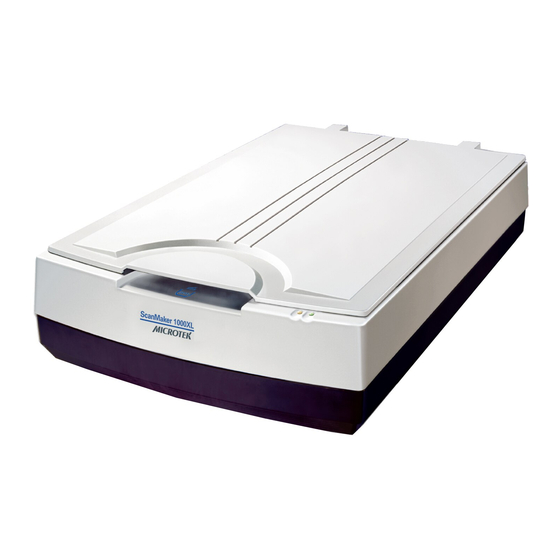
1. ScanMaker 1000XL
12. 4"x5" Film Template (2)
13. Film Alignment Ruler
2. FireWire cable
14. Transparency Target
3. USB cable
4. Power cord
5. Software CDs
6. Reflective Target
7. TMA 1000XL
8. Black Plate (for scanning reflectives)
9. 35mm Slide Template (3)
10. 35mm Filmstrip Template (3)
11. 120 Film Template withBlack Plate (3)
Step 2:
Important: Do not remove the yellow stickers from your scanner
until you are told to do so. You must install software before
connecting your scanner.
Always close any open programs, and
turn off Anti-virus utilities before installing software.
PC:
A.
Place the Adobe CD-ROM into the CD-ROM
drive, and install the software. Skip this step if
you have a newer version of Photoshop
Elements already installed on your computer.
B.
Place the Microtek software CD-ROM into the
CD-ROM drive, and follow the on-screen
instructions to install the driver and software.
NOTE: If the Microtek Software Installer screen does not
come up automatically, double-click the following in
succession: "My Computer"; the CD-ROM icon; then
cdsetup.exe to start the installer program.
C.
Insert the IT8 Calibration Data CD for the
Microtek Scanner ICC Profiler (MSP) program
into your CD-ROM drive, and follow the on-
screen instructions for installation.
D.
Restart your computer at the end of all software
installation.
Copyright © 2009
Microtek International, Inc.
I49-004383 A, March 2009
Unpack Contents
1
2
Install Software
http://www.microtek.com
5
4
3
6
MAC:
A.
Place the Adobe CD-ROM into the CD-ROM
drive, and install the software. Skip this step if
you have a newer version of Photoshop
Elements already installed on your computer.
B.
Place the Microtek software CD-ROM into the
CD-ROM drive, and take note of the following:
For OS X, double-click the ScanWizard Pro
installer icon to install ScanWizard Pro first.
Next, double-click the MSP installer icon to
install the Microtek Scanner ICC Profiler (MSP)
program. Finally, insert the IT8 Calibration Data
CD, and double-click the IT8 installer icon to
complete MSP installation.
C.
Install the remaining software components, then
restart your computer at the end of all software
installation.
NOTE: After rebooting your Macintosh, the Microtek software will
attempt to locate your scanner on the system. Since this is your
first install and you have not yet connected the scanner, simply
ignore the message that appears and proceed to the next step.
1
For TMA 1000XL only
7
8
10
9
12
11
13
14
Advertisement

Related Manuals for Microtek ScanMaker 1000XL


Summary of Contents for Microtek ScanMaker 1000XL
- Page 1 Next, double-click the MSP installer icon to instructions to install the driver and software. install the Microtek Scanner ICC Profiler (MSP) NOTE: If the Microtek Software Installer screen does not program. Finally, insert the IT8 Calibration Data come up automatically, double-click the following in CD, and double-click the IT8 installer icon to succession: “My Computer”;...
- Page 2 1.1 ports, connect the cable to the Hi-Speed USB port. Use the USB 1.1 port only if your computer does not have Hi-Speed USB. For details on how to connect using the alternate FireWire connection, refer to the ScanMaker 1000XL User Guide.
- Page 3 This section is for users only with purchased TMA 1000XL Using the TMA 1000XL NOTE: If you purchased a standard ScanMaker 1000XL without the TMA 1000XL, see only the section below on positioning reflective materials without the TMA 1000XL. I. Installing the TMA 1000XL Make sure that the scanner power is turned off.
- Page 4 Use the individual film templates included with the TMA 1000XL package. Make sure the templates are oriented correctly on the scanner glass surface, with the Microtek logo on the templates facing up. Keep the calibration strip on the glass surface clear and free of obstruction at all times.
- Page 5 (Keep clear and unobstructed) Film Alignment Ruler B. Positioning Reflectives To scan reflective originals such as photos, you can use the ScanMaker 1000XL with or without the TMA 1000XL. • If you purchased your ScanMaker 1000XL with the TMA, you will need to use the Black Plate included with your TMA 1000XL package to shield unwanted light.
- Page 6 If prompted to set up Color Matching, click OK for now to accept the settings. You can always change the settings at a later time. For more details, see the ScanMaker 1000XL User Guide. In the Preview window of ScanWizard Pro, choose Reflective from the Scan Material menu.
- Page 7 Scanning Damaged Photos (using DIGITAL ICE) If using the scanner without TMA: Follow steps 1 to 7 of the procedures detailed in Scanning Non- Damaged Photos (the column to the left). If the TMA 1000XL is installed: Put the Black Plate on top of the photo to cover it, with the side that reads “This side up”...
- Page 8 For more details, refer to a PDF document called “ScanWizard Pro Reference Manual” in your Microtek software CD-ROM and see the Addendum to ScanWizard Pro section. Follow steps 4 to 7 of the procedures detailed in “Scanning Non-Damaged Photos” (the first column in this section).
- Page 9 Calibration The Microtek Scanner ICC Profiler (MSP) program included with your ScanMaker 1000XL is used to calibrate your scanner to achieve consistent and accurate color. Two industry-standard Kodak IT8 color targets are included for calibration: a Reflective 5”x7” target to calibrate the scanner for scanning photos;...
- Page 10 Finally, select and click the title of the manual you wish to view. Missing Items If your package is missing items, please call Microtek Customer Service Department. Copyright © 2009 Microtek. Microtek, ScanMaker, ArtixScan, ScanWizard and ColoRescue are trademarks or registered trademarks of Microtek International, Inc.
Need help?
Do you have a question about the ScanMaker 1000XL and is the answer not in the manual?
Questions and answers